:People Counting
Contents
- 1 People Counting
- 2 Instructions
- 2.1 Description
- 2.2 Video Instructions
- 2.3 Step by Step Instructions
- 2.4 Description
- 2.5 Prerequisites
- 2.6 Video Instructions
- 2.7 Step By Step Instructions
- 2.8 Description
- 2.9 Prerequisites
- 2.10 Installation Requirements
- 2.11 Video Instructions
- 2.12 Step by Step Instructions
- 2.13 Description
- 2.14 Prerequisites
- 2.15 Video Instructions
- 2.16 Step By Step Instructions
- 2.17 Description
- 2.18 Prerequisites
- 2.19 Video Instructions
- 2.20 Step by Step Instructions for SmartPSS
- 2.21 SmartPSS Setup
People Counting
Description
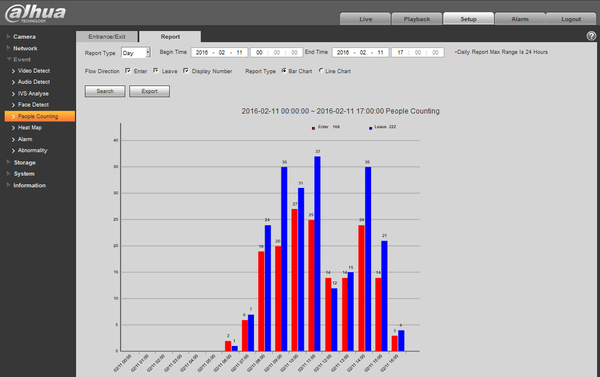
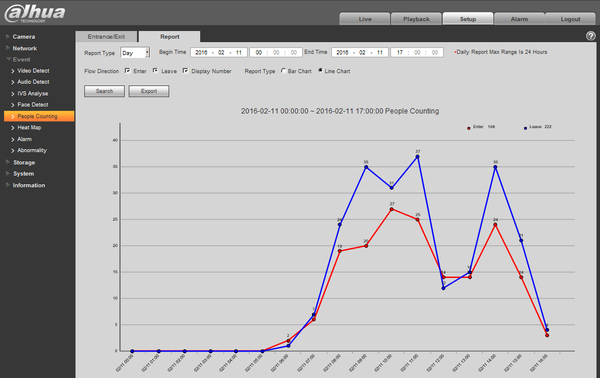
It is to make statistics of enter and leave people in the specific area of the image, and finally it comes out the statistics data, providing kinds of data reports such as day report, month report and year report. There are two ways to present: line chart and bar chart, providing data exporting function.
Note: People counting supports max half year data, it will operate auto overwrite according to hour when surpassing one year.
Prerequisites
- Internet Explorer
- IP Address of Device
- IVS capable devices
- Current Firmware
Installation Requirements
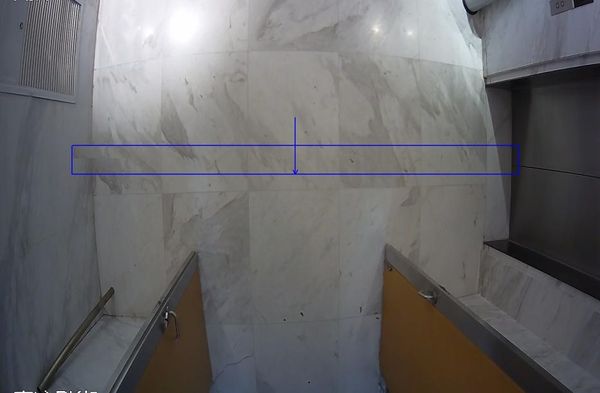
The reason this example works better is that the scene is not as complicated as a horizontal shot. This provides a stable and clear background to differentiate object detection (shown as a green box around the targets) from a static object. If the background is a complicated scene, like a horizontal camera shot outdoors, then the camera loses the efficiency of detecting a moving object. This results in the People Counting IVS rule (seen as a blue box) not reliably triggering. The camera should be mounted at least 9 feet above the target if using a 3.6mm lens. Using a camera with a varifocal lens can help create a better scene if mounting options are limited. Adjusting the image settings: contrast, B&W, and gamma can aid in getting better detection, but will reduce image quality. To assess issues with IVS compatibility between the camera and NVR, please update both devices to the most current firmware and factory reset the NVR, and use the hard reset button to reset the camera.
Height Requirements
1. Vari-focal (H > 2.8 meters): vari-focal device is recommended to make people counting statistics
2. Fixed focal (only for reference):
| Resolution | f(mm) | H(m) |
| 2MP | 2.8 | 2.8 |
| 2MP | 3.6 | 3 |
Coverage Width Requirements
It is recommended that the width of exit and entrance should be within 3 meters, it is advised to install several cameras to make people counting statistics for the entrance whose width is more than 3 meters.
Ceiling Installation Requirements
The device is installed right above the entrance and exit, it forms 90°vertically between lens angle and horizontal. It needs to adjust focal length for vari-focal device:
| Resolution | Shoulder width |
| 1280*960 | Approx. 280px |
| 1920*1080 | Approx.420px |
| 2048*1536 | Approx. 448px |
| 2560*1440 | Approx. 560px |
Instructions
Description
It is to make statistics of enter and leave people in the specific area of the image, and finally it comes out the statistics data, providing kinds of data reports such as day report, month report and year report. There are two ways to present: line chart and bar chart, providing data exporting function.
Note: People counting supports max half year data, it will operate auto overwrite according to hour when surpassing one year.
Video Instructions
Step by Step Instructions
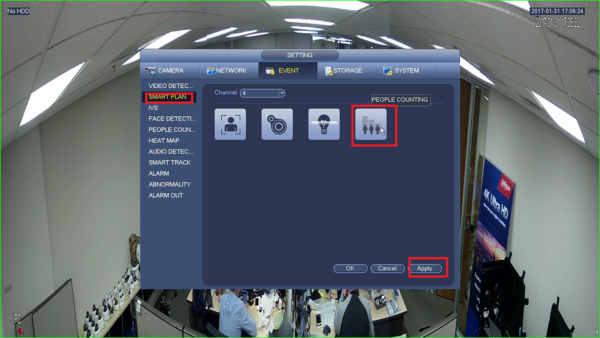
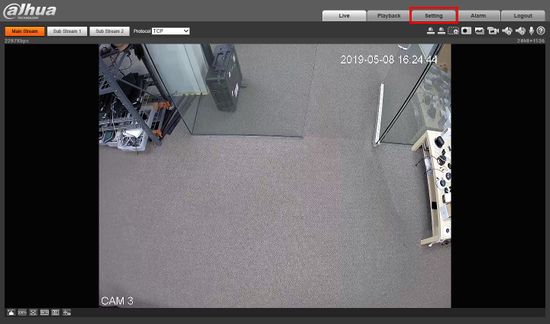
1. Go to Events.
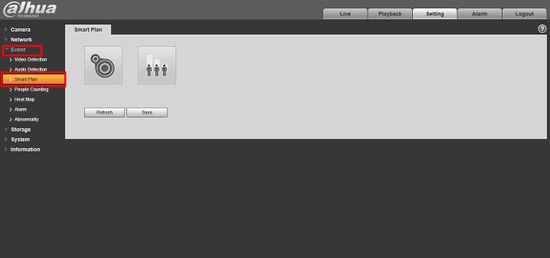
2. Under Smart plan, select people counting and click apply.
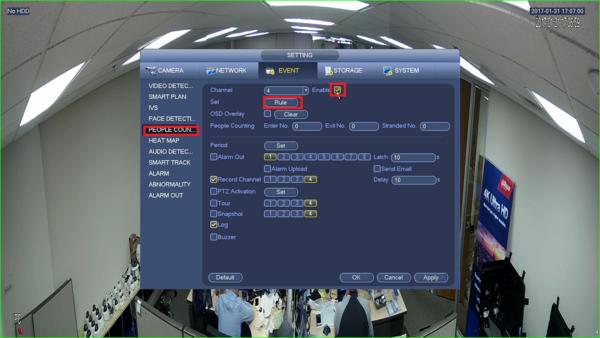
3. Under People counting, select enable then select Rules.
4. Click on number stat, draw rules, and then click ok.
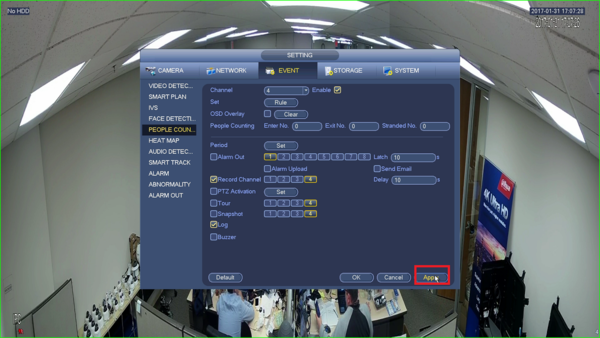
5. Click apply.
Description
This guide will show how to set up the People Counting feature in the SystemUI with NewUI
Prerequisites
- Dahua device with People Counting feature
Video Instructions
Step By Step Instructions
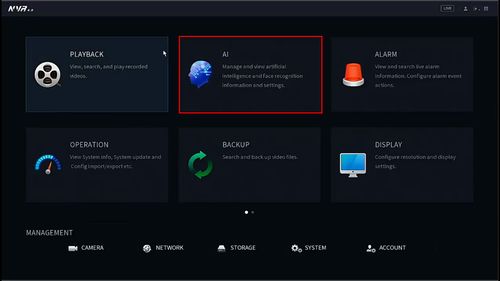
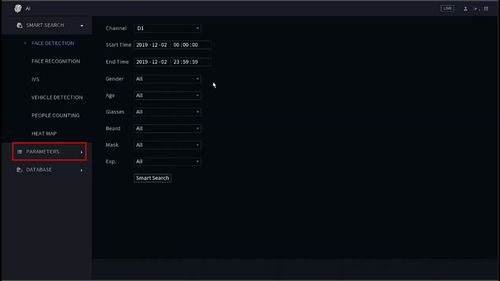
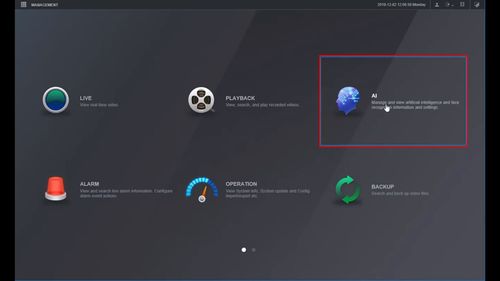
1. From the Main Menu
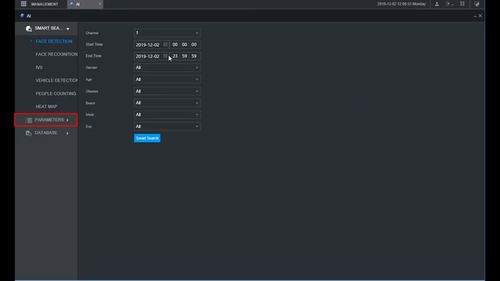
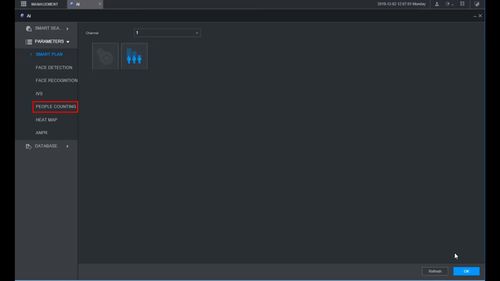
Click AI
2. Click Parameters
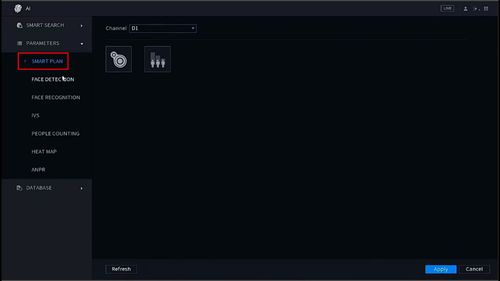
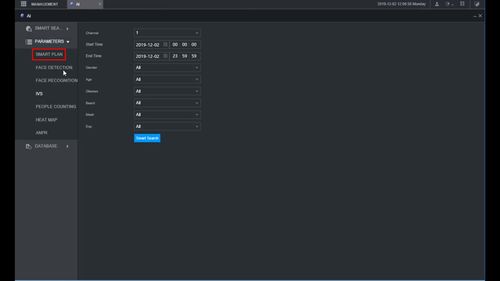
3. Click Smart Plan
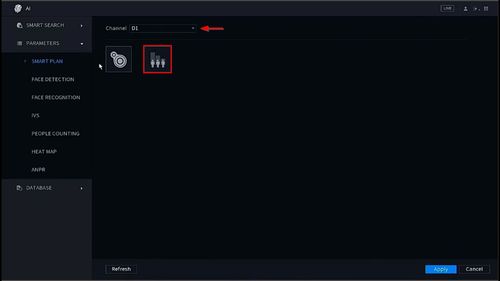
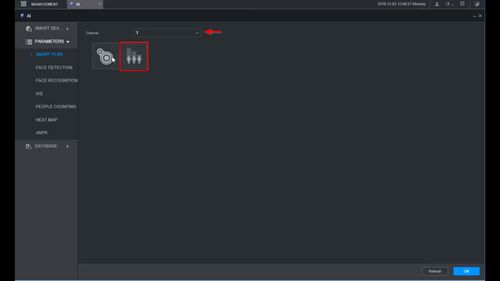
4. Use the dropdown box to select the Channel
Click the People Counting symbol to enable the Smart Plan
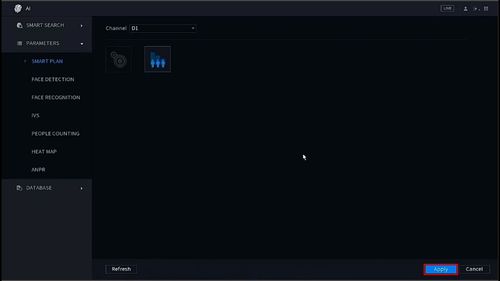
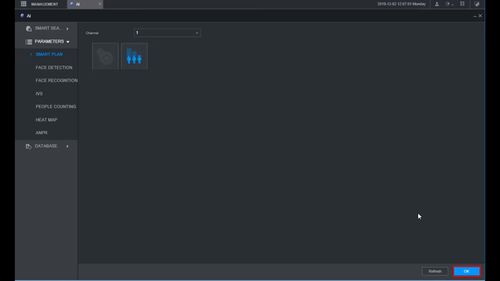
5. Click Apply to save
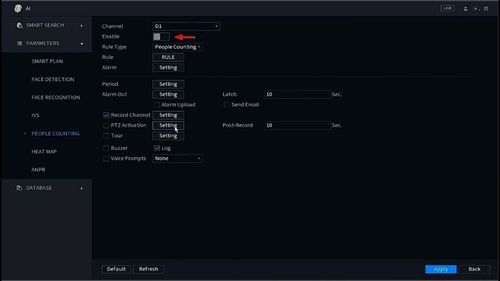
6. Click People Counting
7. Click to Enable the feature
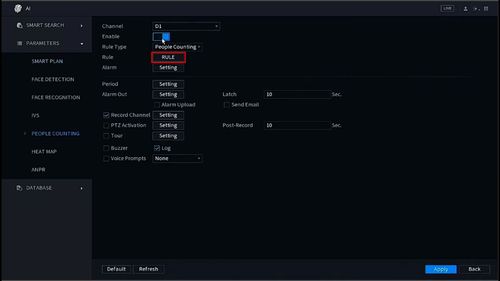
8. Click the Rule button to set the parameters for the People Counting
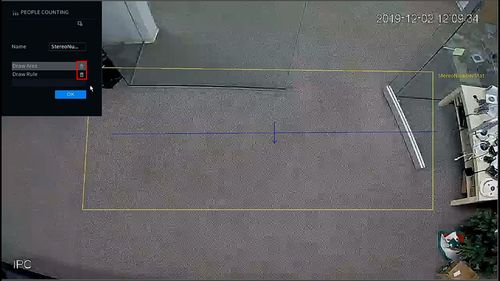
9. Click the Trash icon to clear the default Area/Rule
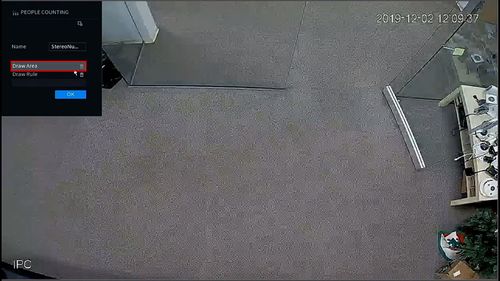
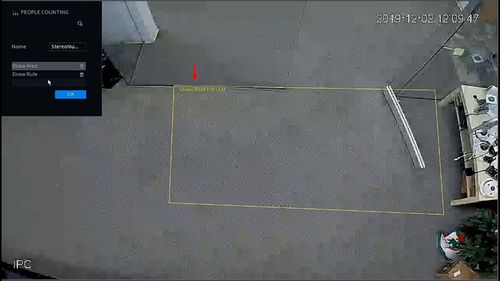
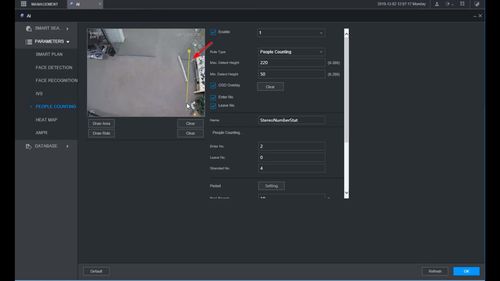
10. To begin drawing the detection area
Click Draw Area
11. Left click inside the window to begin drawing the detection area
Right click to complete the area and finish drawing
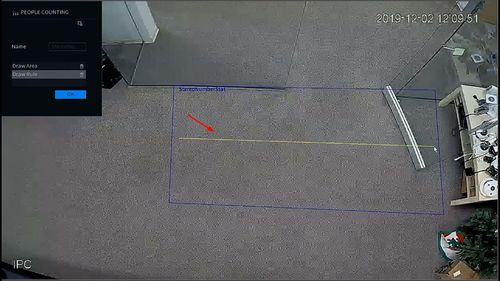
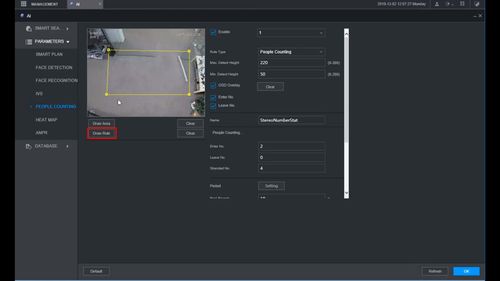
12. To begin drawing the detection rule (trigger line for people counting)
Click Draw Rule
13. Left click inside the window to draw the Rule. Right click to finish drawing. This line will be the trigger for counting people that cross it.
- The arrow defines the direction of people entering the scene (Enter)
- To create a downward facing arrow, create the Rule by starting on the left hand side then drag the mouse to the right
- To create an upward facing arrow, create the Rule line by starting on the right hand side then drag the mouse to the left
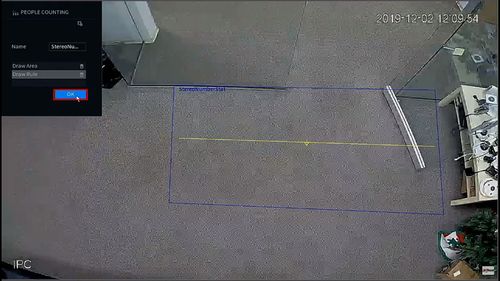
14. Click OK to save
15. Click Apply to save

Description
It is to make statistics of enter and leave people in the specific area of the image, and finally it comes out the statistics data, providing kinds of data reports such as day report, month report and year report. There are two ways to present: line chart and bar chart, providing data exporting function.
Note: People counting supports max half year data, it will operate auto overwrite according to hour when surpassing one year.
Prerequisites
- Internet Explorer
- IP Address of Device
- IVS capable devices
- Current Firmware
Installation Requirements
The reason this example works better is that the scene is not as complicated as a horizontal shot. This provides a stable and clear background to differentiate object detection (shown as a green box around the targets) from a static object. If the background is a complicated scene, like a horizontal camera shot outdoors, then the camera loses the efficiency of detecting a moving object. This results in the People Counting IVS rule (seen as a blue box) not reliably triggering. The camera should be mounted at least 9 feet above the target if using a 3.6mm lens. Using a camera with a varifocal lens can help create a better scene if mounting options are limited. Adjusting the image settings: contrast, B&W, and gamma can aid in getting better detection, but will reduce image quality. To assess issues with IVS compatibility between the camera and NVR, please update both devices to the most current firmware and factory reset the NVR, and use the hard reset button to reset the camera.
Height Requirements
1. Vari-focal (H > 2.8 meters): vari-focal device is recommended to make people counting statistics
2. Fixed focal (only for reference):
| Resolution | f(mm) | H(m) |
| 2MP | 2.8 | 2.8 |
| 2MP | 3.6 | 3 |
Coverage Width Requirements
It is recommended that the width of exit and entrance should be within 3 meters, it is advised to install several cameras to make people counting statistics for the entrance whose width is more than 3 meters.
Ceiling Installation Requirements
The device is installed right above the entrance and exit, it forms 90°vertically between lens angle and horizontal. It needs to adjust focal length for vari-focal device:
| Resolution | Shoulder width |
| 1280*960 | Approx. 280px |
| 1920*1080 | Approx.420px |
| 2048*1536 | Approx. 448px |
| 2560*1440 | Approx. 560px |
Video Instructions
Step by Step Instructions
1.Log into device using the Web Service.
2.Select Setting
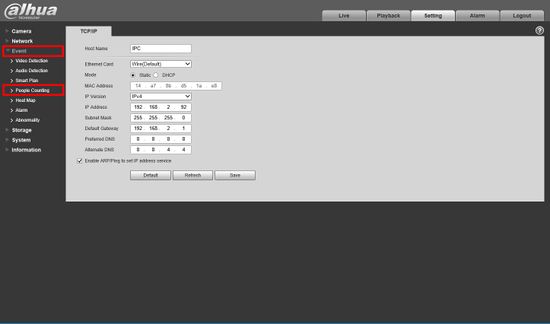
3. Click Event > Smart Plan
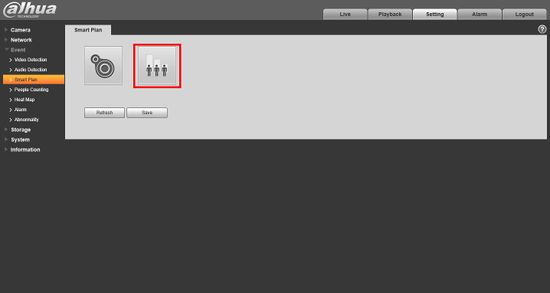
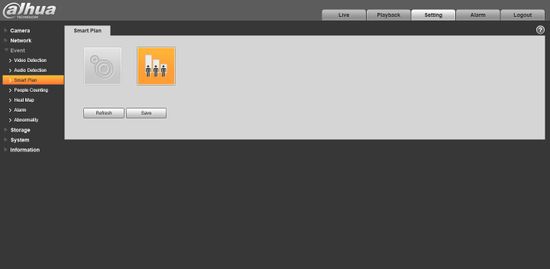
4. Click the People Counting icon, it will highlight in color when select
5. Click Save
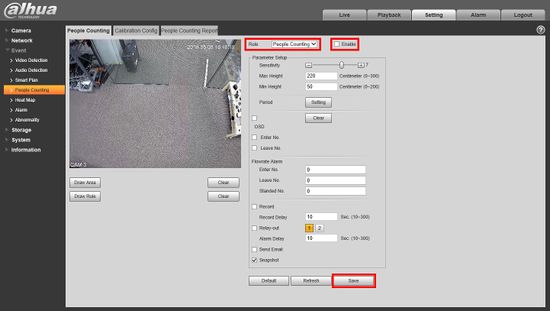
6. Click Event > People Counting
7. The People Counting menu will appear. Start by switching the dropdown box to People Counting, checking the box to Enable, then click Save
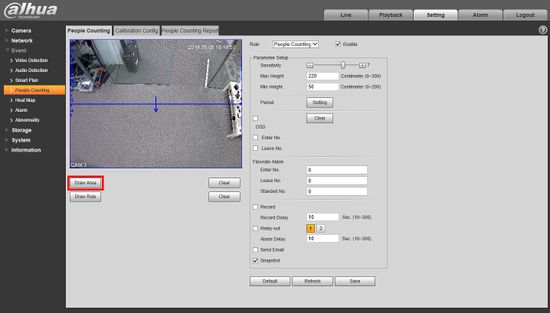
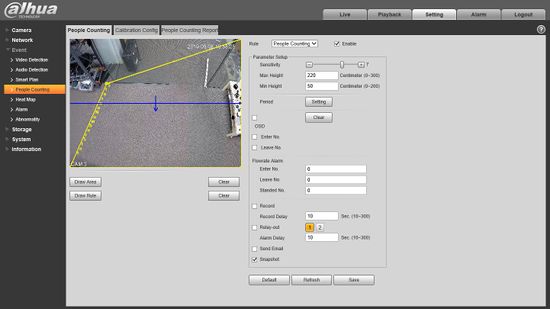
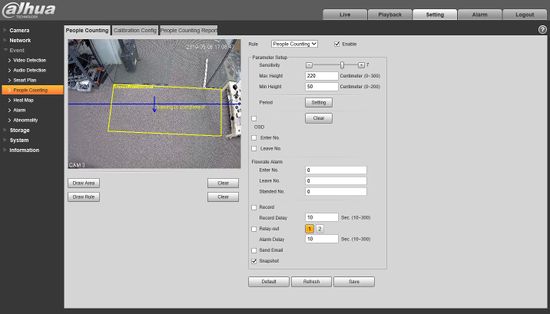
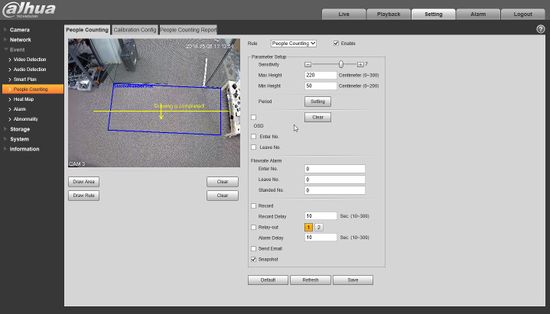
8. The default People Counting Area and Rule will appear. Click Draw Area to edit the focus area for People Counting
9. The Area box will highlight yellow when it is editable. Start by clicking one of the corners of the default box and drag it the desired position.
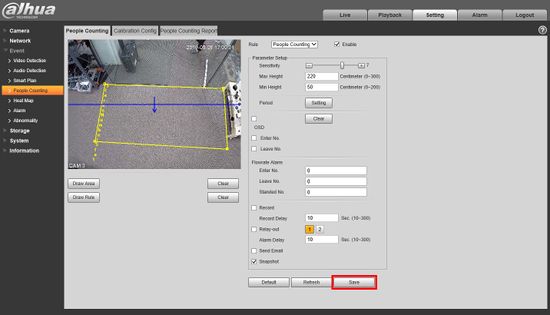
10. Continue with the remaining corners of the box until the desired focus area is created. Click Save
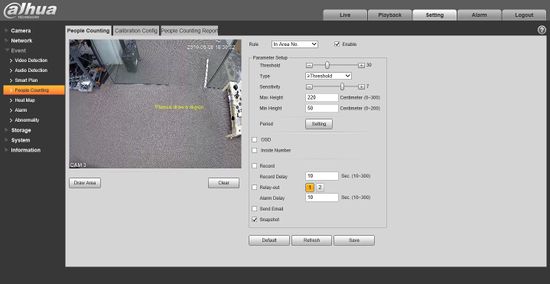
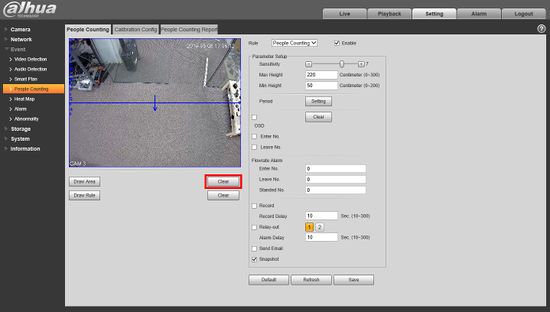
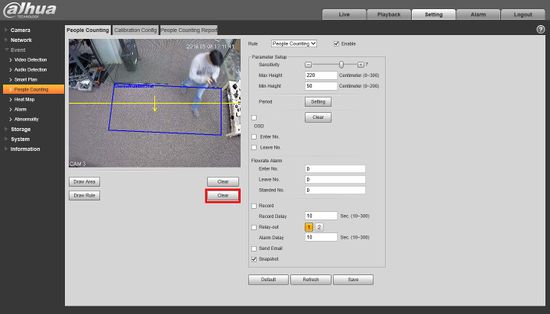
11. You can draw a custom area by Clicking 'Clear' then clicking inside the video frame to draw the object.
Click Save to save the custom area
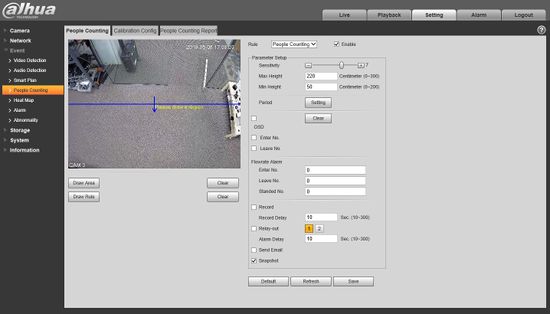
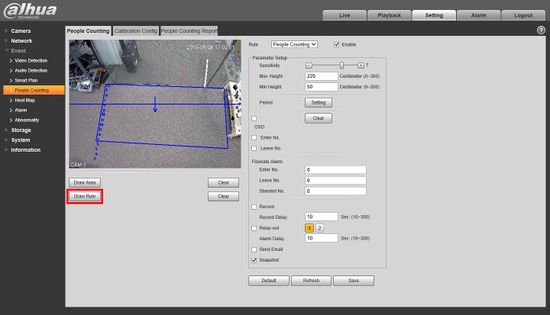
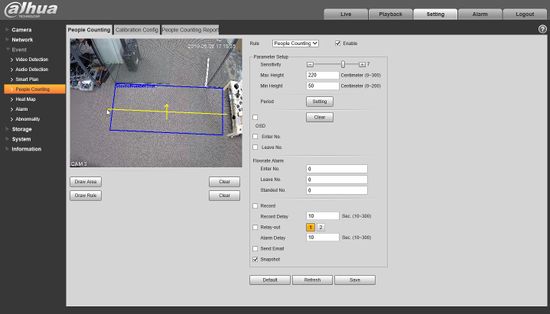
12. The arrow shows the area and the direction the People Counting rule will follow. To create a custom rule start by clicking Draw Rule
13. Similar to the Area, you can click to drag the default line or click Clear to draw a custom Rule line. This line will be the trigger for counting people that cross it.
14. Click inside the video frame to draw the Rule line. The arrow defines the direction of people entering the scene
To create a downward facing arrow, create the Rule by starting on the left hand side then drag the mouse to the right
To create an upward facing arrow, create the Rule line by starting on the right hand side then drag the mouse to the left
Click Save once the Rule line has been created.
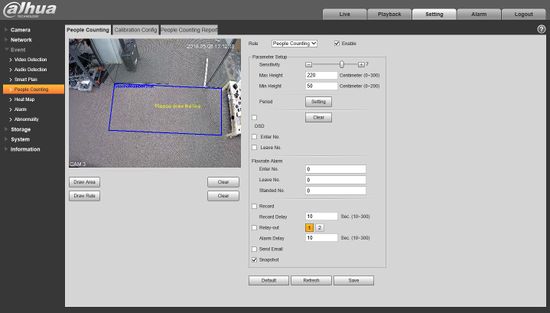
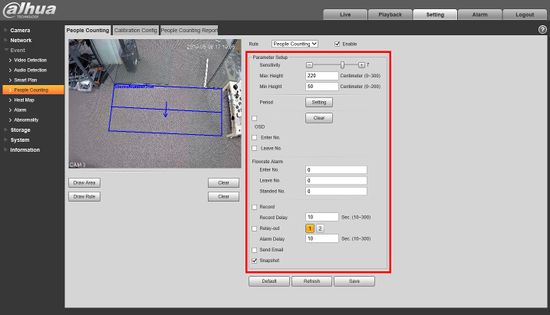
15. Once the Area / Rule have been defined for the People Counting, the parameters of the rule can be configured:
- Sensitivity
- Max Height
- Min Height
- Period
- OSD - On Screen Display - click to enable an On Screen Display of the active People Counting rule - Enter Number and Leave Number can be enabled.
- Flowrate Alarm
- Record
- Relay-out
- Send email
- Snapshot
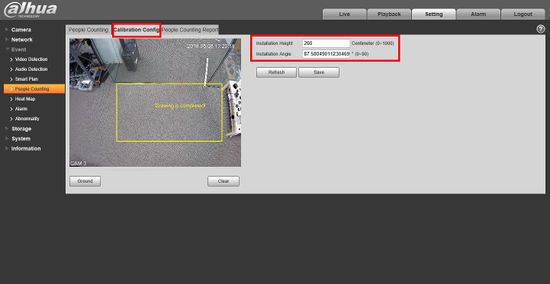
16. Click Calibration Config to adjust installation height and and angle settings for the camera.
Line Chart
Bar Chart
Operation Steps:
- Enter report interface, select report type, such as day report, month report and year report.
- Select the time of statistics report.
- Select people counting direction of statistics and ways to present of the report including bar chart or line chart.
- Click Search button to view the report presentation.
- Click export to save report as CSV format or picture format.
Description
This guide will show how to set up the People Counting feature in the WebUI with NewUI
Prerequisites
- Dahua device with People Counting feature
Video Instructions
Step By Step Instructions
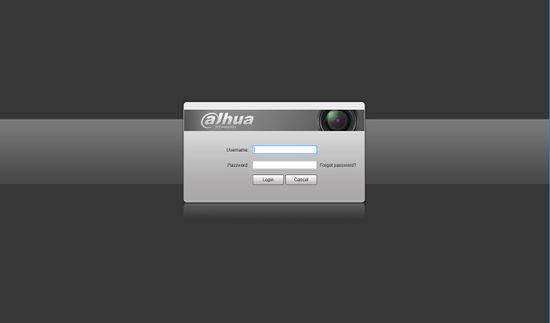
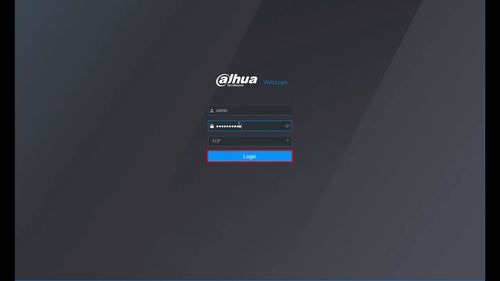
1. Enter the IP of the device in a browser
Enter username and password
Click Login
2. Click AI
3. Click Parameters
4. Click Smart Plan
5. Use the dropdown box to select the Channel
Click the People Counting symbol to enable the Smart Plan
6. Click OK to save
7. Click People Counting
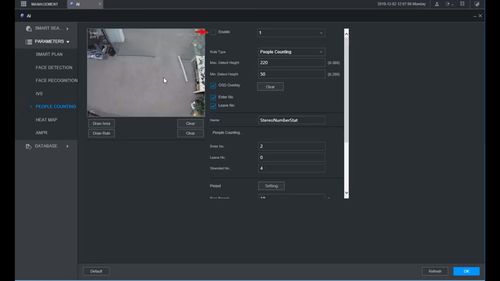
8. Check the box to enable People Counting
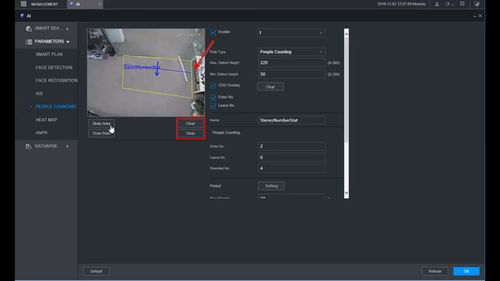
9. The default rule will appear in the window
Click the Clear buttons to remove the default Area and Rule
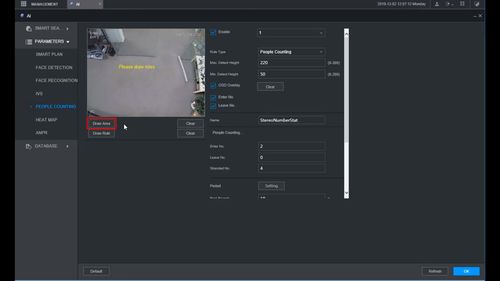
10. Click Draw Area to create the detection area
11. Left click inside the window to begin drawing the detection area
Right click to complete the area and finish drawing
12. Click Draw Rule
13. Left click inside the window to draw the Rule. This line will be the trigger for counting people that cross it.
- The arrow defines the direction of people entering the scene (Enter)
- To create a downward facing arrow, create the Rule by starting on the left hand side then drag the mouse to the right
- To create an upward facing arrow, create the Rule line by starting on the right hand side then drag the mouse to the left
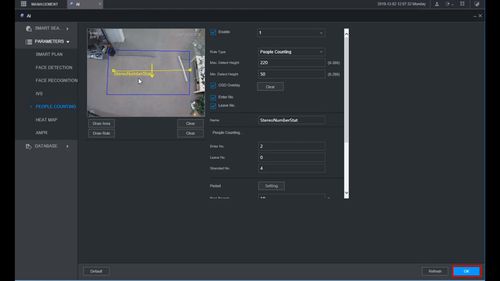
14. Click OK to save all settings
Description
It is to make statistics of enter and leave people in the specific area of the image, and finally it comes out the statistics data, providing kinds of data reports such as day report, month report and year report. There are two ways to present: line chart and bar chart, providing data exporting function.
Note: People counting supports max half year data, it will operate auto overwrite according to hour when surpassing one year.
Prerequisites
- SmartPSS 2.0
- IVS capable device
- Upgraded devices to latest firmware
Video Instructions
Step by Step Instructions for SmartPSS
1. Login into SmartPSS and select Live.
2. Select People Counting capable device and rigct click to show IVS Channel Config.
3. Select People Counting -> Select Next.
4. Select Lens Direction. For this tutorial we are using vertical -> click on down arrow which will bring up Rules Details.
5. Draw a rule
6. Select Config. Here you can change the enter direction, enter number exit number and remaining number.
7. Select Arming Schedule to set schedule.
8. Select Aalarm to set type of alarm -> select save.
9. Apply and save to save settings.
10. Go back to the main menu and select People Counting.
11. Select Device -> Select Search
12. Here you can see the generated report.
600px
Line Chart
Bar Chart
Operation Steps:
- Enter report interface, select report type, such as day report, month report and year report.
- Select the time of statistics report.
- Select people counting direction of statistics and ways to present of the report including bar chart or line chart.
- Click Search button to view the report presentation.
- Click export to save report as CSV format or picture format.
SmartPSS Setup
Prerequisites
- SmartPSS 2.0
- IVS capable device
- Upgraded devices to latest firmware
