Template:IVS Tripwire WebUI New
Description
This article will cover how to configure an IVS Tripwire Alarm on a Dahua recorder with the New WebUI
Prerequisites
- An IP Camera with IVS, with the New WebUI; or an IP camera with IVS added to an NVR, with the New WebUI; or an HDCVI Camera that is connected to a HDCVI DVR, with the New WebUI, that has IVS
- A computer on the same network as the camera or recorder
Video Instructions
Step By Step Instructions
1. Navigate in a web browser to the IP address of the camera or recorder and log into the device
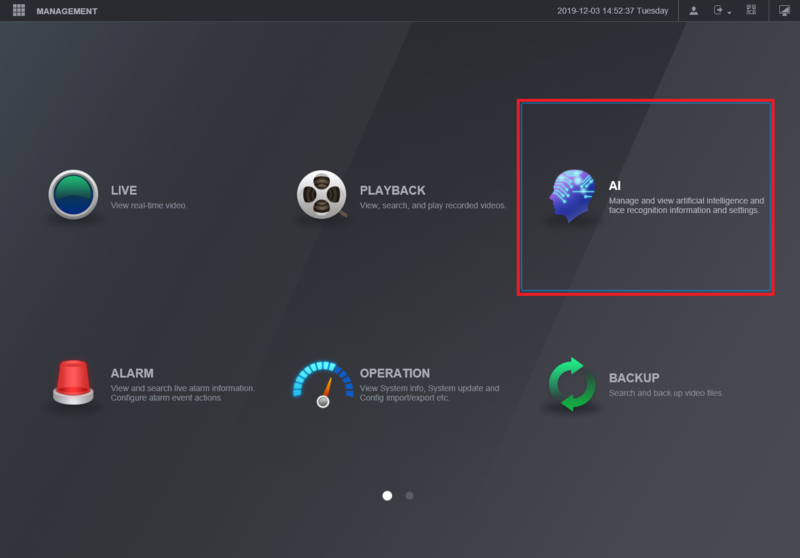
2. From the Main Menu select "AI"
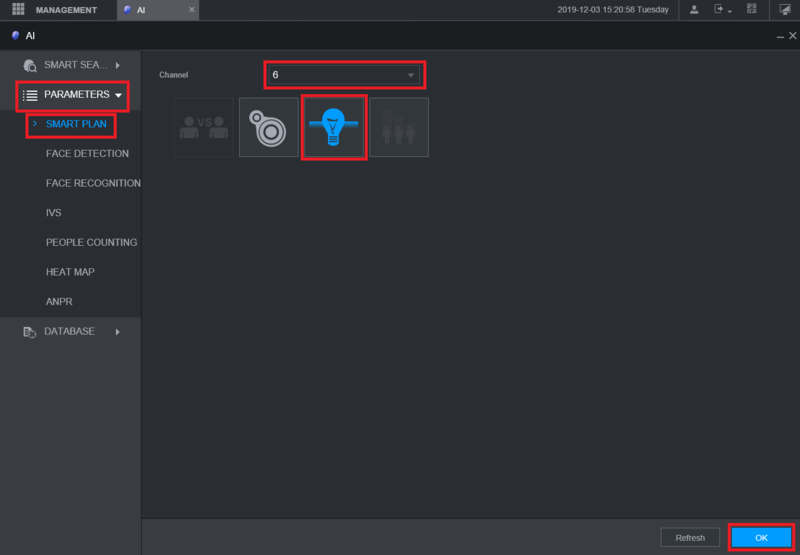
3. Select "Parameters" on the left.
Then select "Smart Plan".
Select the camera channel at the top.
Select and highlight "IVS" (You may need to de-select any other options).
Select "OK"
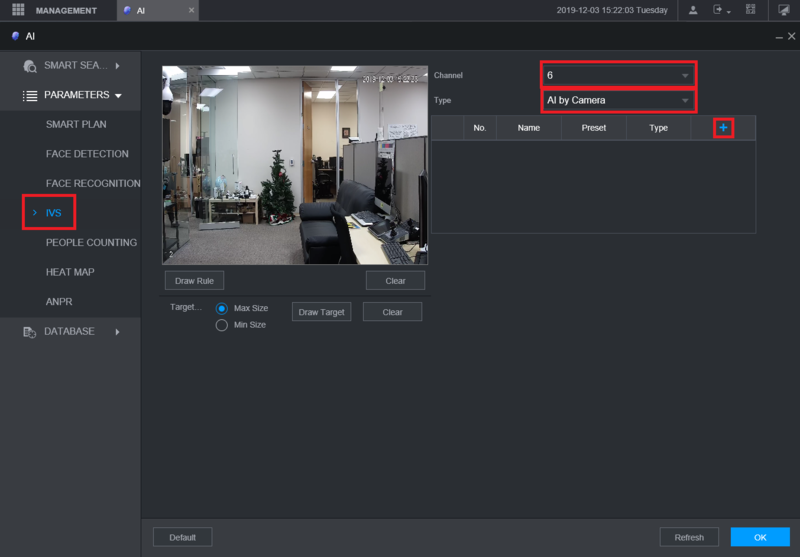
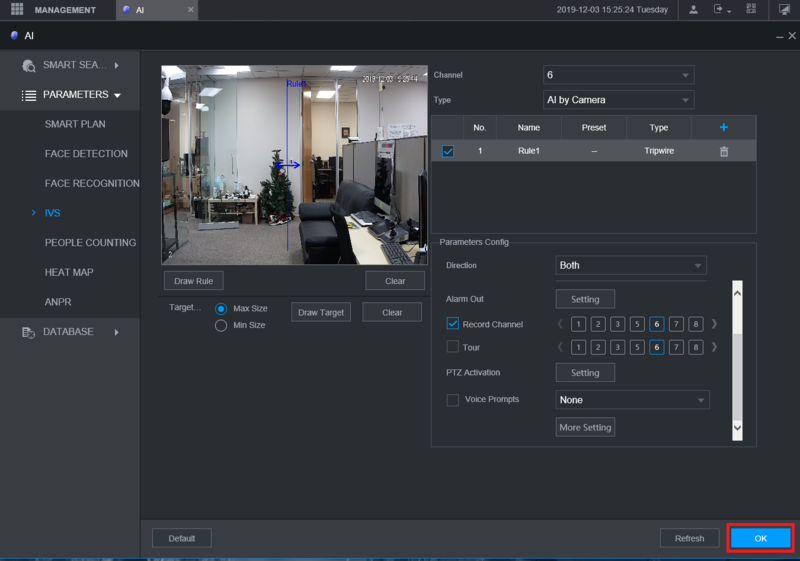
4. Select "IVS" on the left.
Then choose the channel number at the top right and if the IVS will be done by the camera or by the recorder, by selecting either "AI by Camera" or "AI by Device" below the channel number.
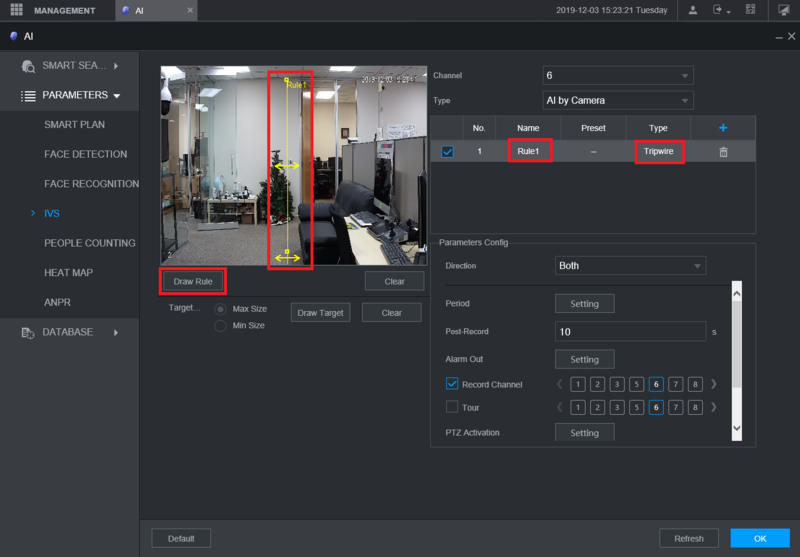
Select the Plus button on the right to create a new IVS alarm rule
5. Double-click on the option under "Type" for the new rule you created and set it to "Tripwire".
Give this rule a name by double-clicking the text box under "Name" and typing in a name.
Select the "Draw Rule" button on the left.
Left click anywhere on the camera view to start the tripwire line.
Left click anywhere else on the camera view to complete the segment of the line. Continue moving your mouse and left clicking to continue making multiple segments of the tripwire line.
When done drawing the line segments, right click to finish the line.
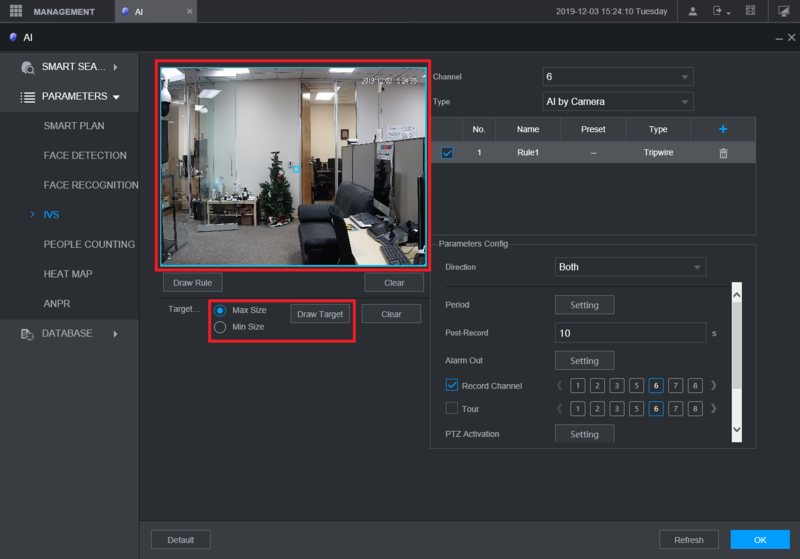
6. Select "Draw Target".
Then select "Max Size" and adjust the size of the box on the camera view to the relative maximum size for a target that can trigger the tripwire.
Select "Min Size" and adjust the size of the box on the camera view to the relative minimum size for a target that can trigger the tripwire
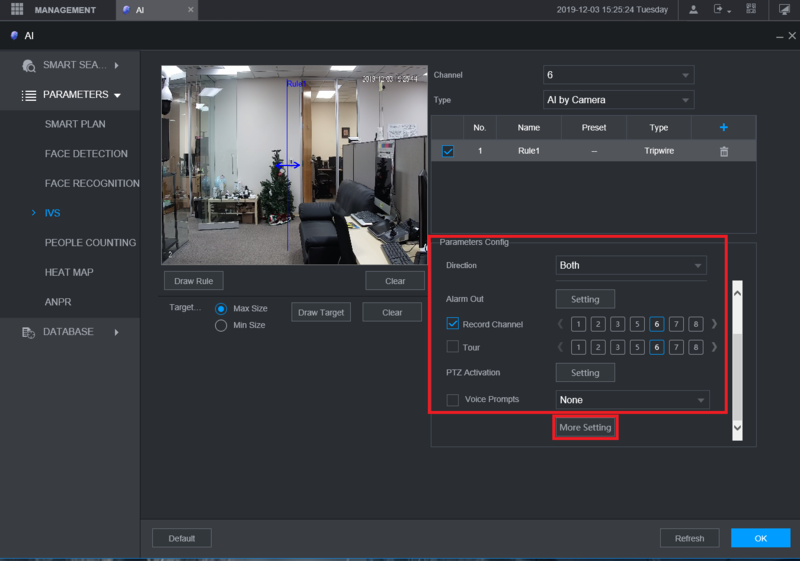
7. Select the drop-down menu next to "Direction" to choose if the IVS alarm is triggered in both directions ("Both") or just one direction ("A To B" or "B To A").
Adjust the settings below "Direction" to configure what happens when the tripwire alarm is triggered:
Period - Sets the time and days of the week this alarm can be triggered
Post-Record - Sets the amount of seconds that are recorded after the alarm event is done being triggered, if "Record Channel" is enabled
Alarm Out - Sets alarm outputs that will be activate when this alarm is triggered
Record Channel - Sets which channels are recorded when the alarm is triggered
Tour - Enables a tour when the alarm is triggered
PTZ Activation - Sets the behavior of a PTZ camera connected to the same recorder when the alarm is triggered
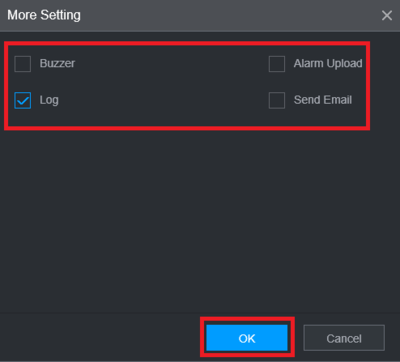
Select "More Settings for the following options:
Buzzer - Makes the recorder emit an audible beeping noise when the alarm is triggered
Log - Records the event information in the system log when the alarm is triggerd
Send Email - Sends an email, via the settings set in the Email section of the Network settings on the recorder, when the alarm is triggered
Select "OK" to save the settings
8. Select "OK" to save the Tripwire IVS alarm settings
