Template:PTZ Scan SystemUI NewGUI
Description
This article will cover how to setup the PTZ Scan function via the System UI with the New GUI
Prerequisites
- Dahua PTZ
- Dahua Recorder with the New GUI, connected to a TV or Monitor
Video Instructions
Step by Step Instructions
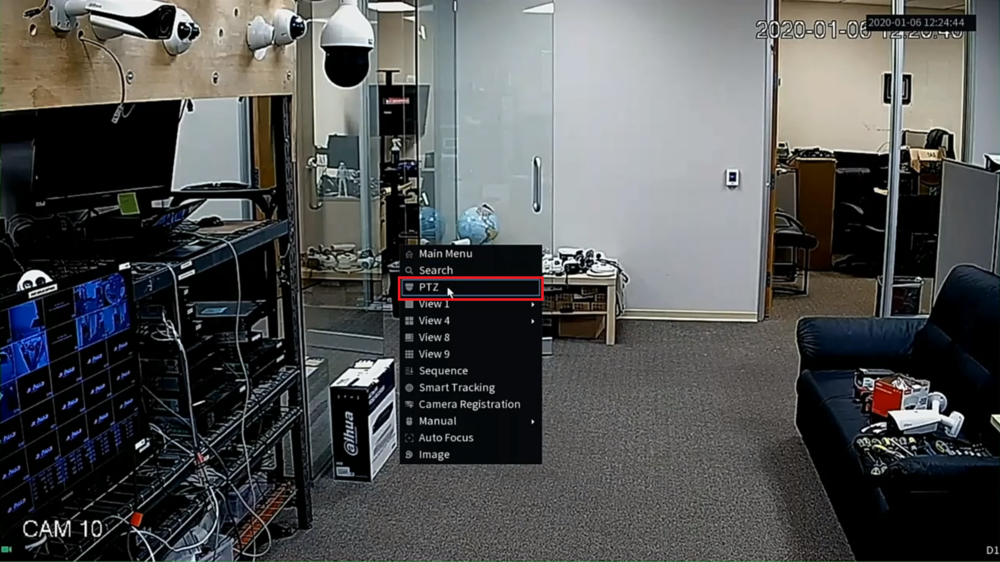
1. Select the PTZ camera's channel live view on the main screen of the recorder. (A green box should appear around the live view of that camera)
Right-click and select "PTZ" from the drop-down menu
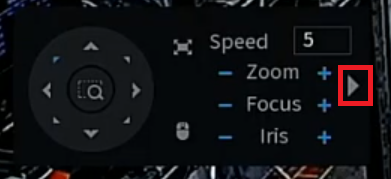
2. Click the arrow pointing right on the right-hand side of the PTZ control window
3. Click the gear icon on the bottom right
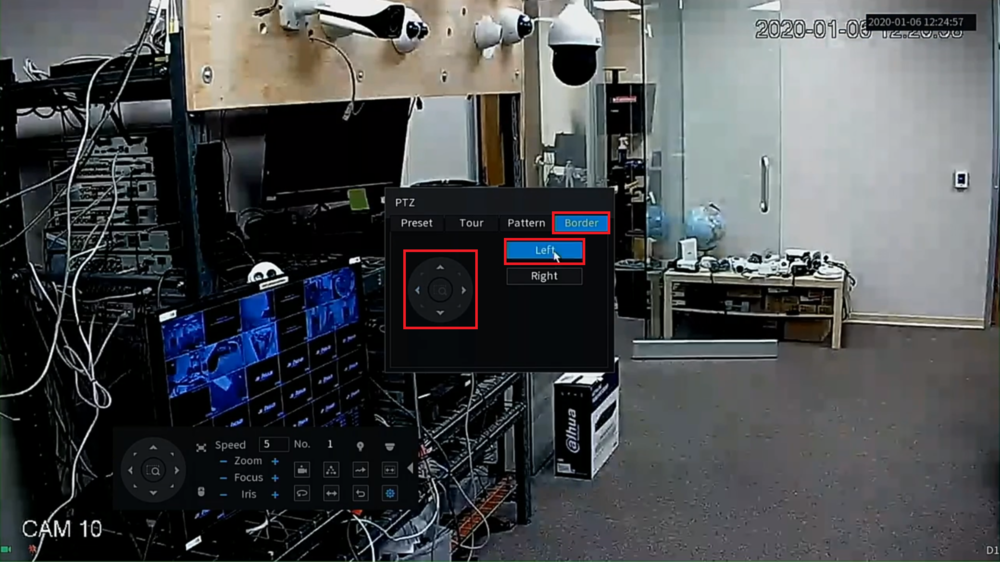
4. Select "Border" at the top.
Then use the arrow controls on the left to move the PTZ camera to aim at where you want the left-most location of the scan to be.
Then select the "Left" button to set that postion as the left edge of the scan
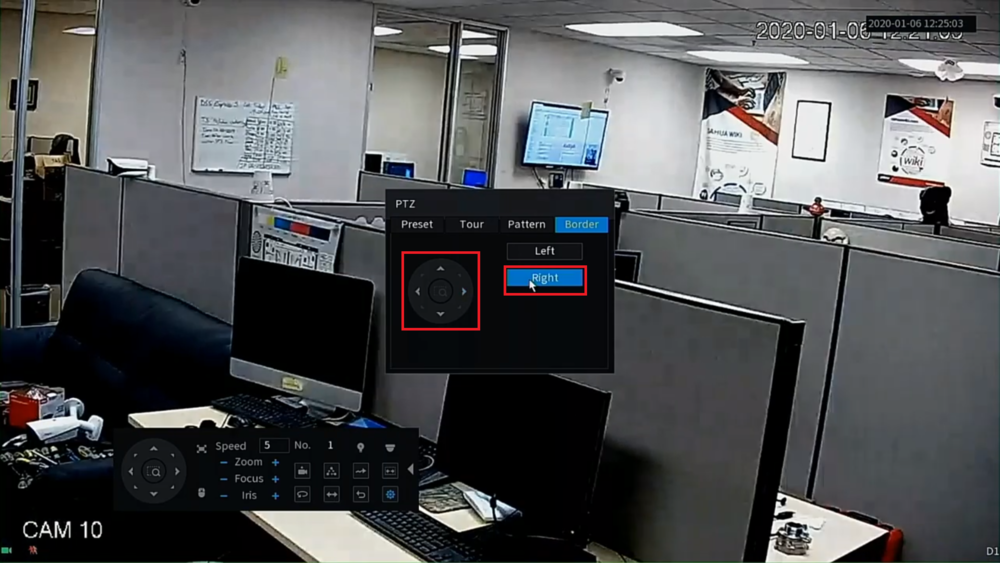
5. Then use the arrow controls on the left to move the PTZ camera to aim at where you want the right-most location of the scan to be.
Then select the "Right" button to set that postion as the right edge of the scan
6. Right-click anywhere to close that menu and go back to the original PTZ control menu.
Select the Autoscan button, which looks like two arrows pointing left and right, at the right-hand side to initiate the scan function.
The camera should start scanning between the two postions you set above.
To end the scan click on same button again that you selected to begin the scan


