Template:Motion Record WebUI Old
Video Instructions
Step by Step Instructions
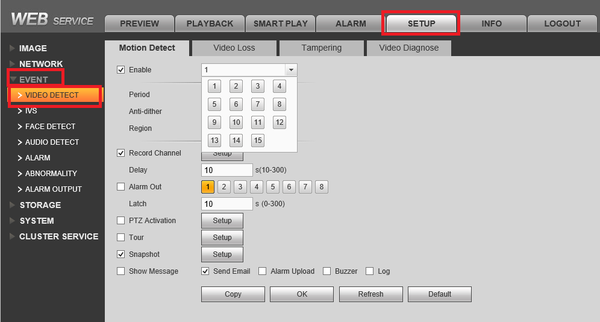
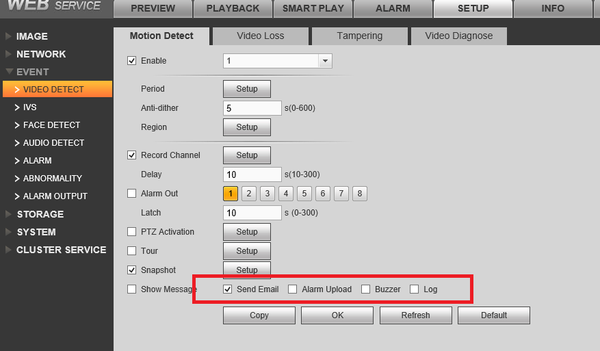
1. Set up tab → event → video detect.
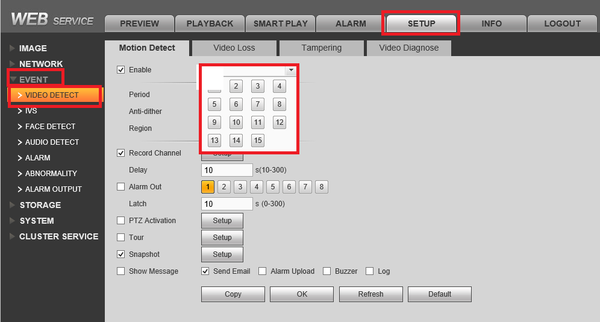
2. Check enable → Choose which cameras you want motion detect set for. You may copy motion settings from one channel to another or from one channel to all by selecting the "Copy" button on the lower left.
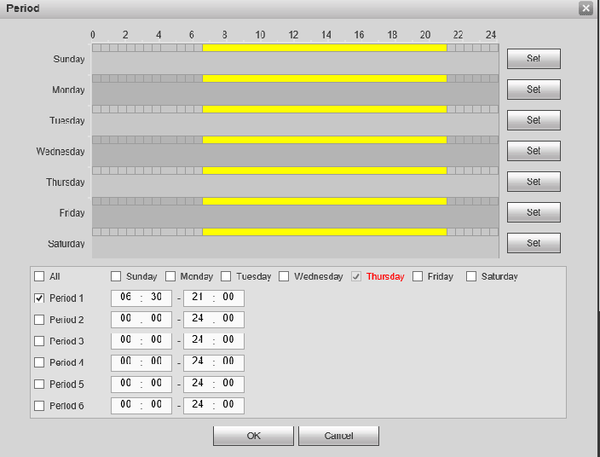
3. Set Period. You can choose what days and times you want motion detect set.
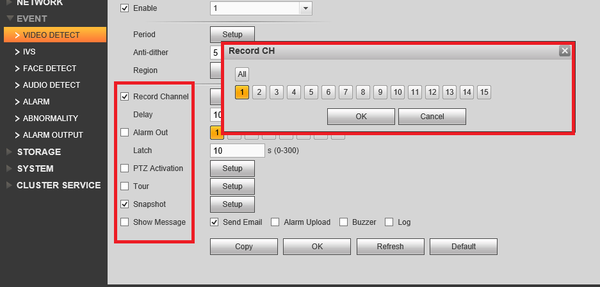
4. Choose which functions you want motion to do when a motion event occurs such as snap shot and record channel. The set up is the same for record channel, snapshot and tour. You may choose which cameras record , snapshot , tour and PTZ activation when a motion event occurs. All or more than one camera maybe selected.
5. Select notification when a motion event occurs. Remember to click "OK" to save settings.
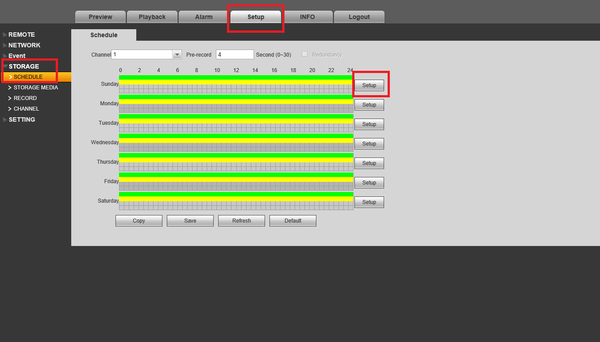
6. Select Setup Tab → Storage → Schedule → Click on Setup button
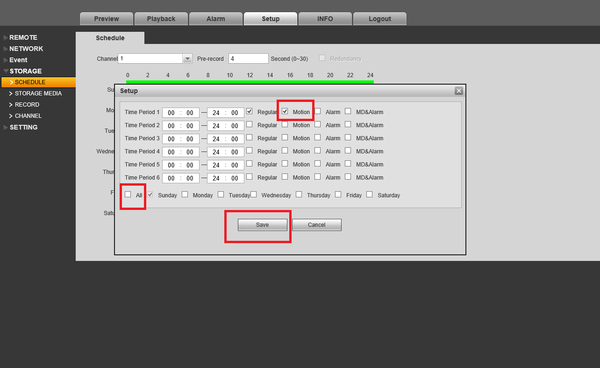
7. Check off Motion, Default time period is 0:00 to 24:00 hours. → Select "All" for recording motion everyday. → Click on "Save" to save schedule settings.
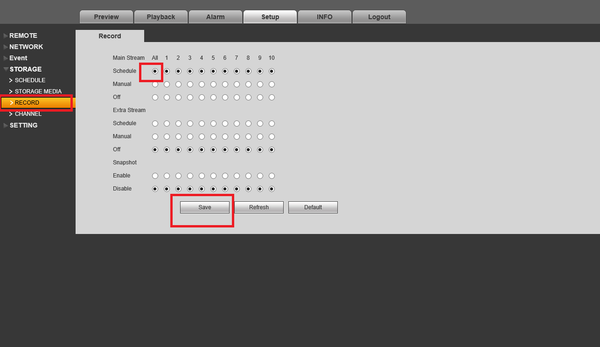
8. Select Record → Select "All" for motion detection to record everyday. You may choose which cameras on which streams record motion. Click on "Save" → to save settings.
