Playback/Basic
Contents
- 1 Playback-Basic
- 1.1 Description
- 1.2 Prerequisites
- 1.3 Instructions
- 1.4 Prerequisites
- 1.5 Video Instructions
- 1.6 Step by Step Instructions
- 1.7 Prerequisites
- 1.8 Video Instructions
- 1.9 Step by Step Instructions
- 1.10 Prerequisites
- 1.11 Video Instructions
- 1.12 Step by Step Instructions
- 1.13 Prerequisites
- 1.14 Video Instructions
- 1.15 Step by Step Instructions
- 1.16 Prerequisites
- 1.17 Video Instructions
- 1.18 Step by Step Instructions
- 1.19 Prerequisites
- 1.20 Video Instructions
- 1.21 Step by Step Instructions
- 1.22 Prerequisites
- 1.23 Video Instructions
- 1.24 Step by Step Instructions
- 1.25 NOTICE
- 1.26 Prerequisites
- 1.27 Video Instructions
- 1.28 Step by Step Instructions
Playback-Basic
Description
Prerequisites
Instructions
Prerequisites
- Dahua Recorder: NVR, DVR, or XVR
- HDD installed
Video Instructions
Step by Step Instructions
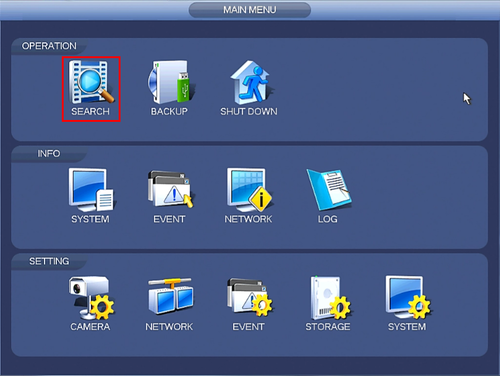
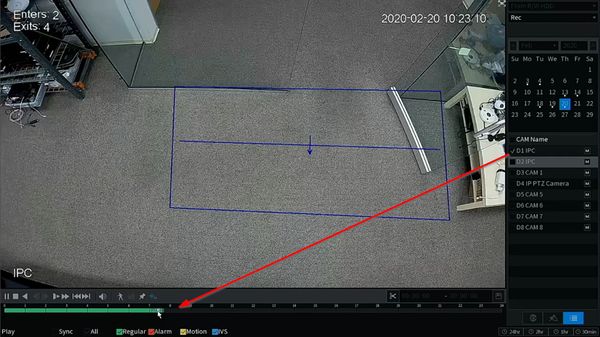
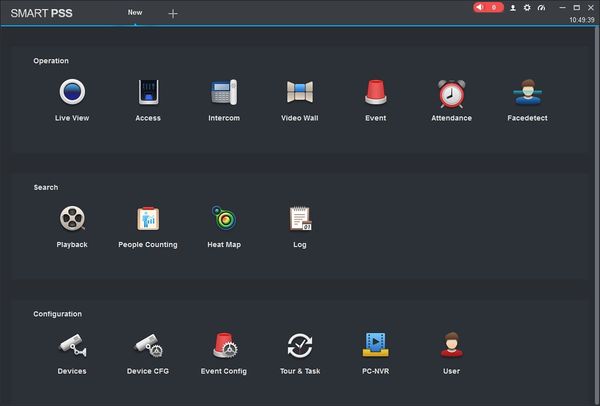
1. From the Main Menu click, "Search"
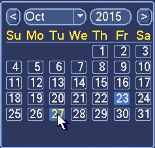
2. On the right hand side, there will be a calendar. Click on the day that you wish to play back video.
- Days that are shaded a lighter color blue have recordings.
- Days that are dark blue do not have recordings.
3. Double click on the graph below to begin playing back video.
Prerequisites
- Dahua recorder with recorded video
Video Instructions
Step by Step Instructions
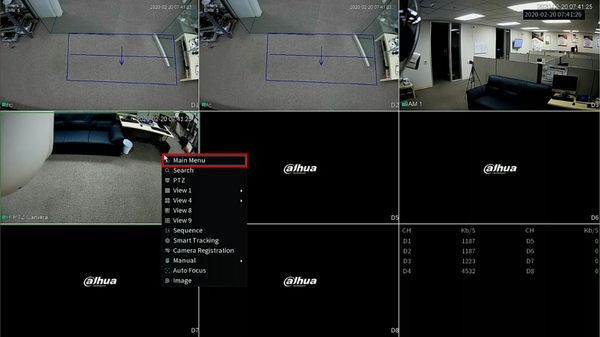
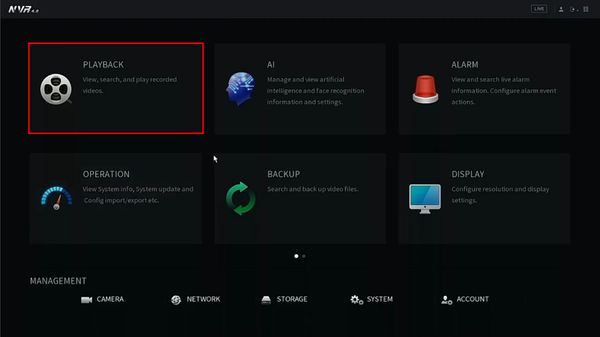
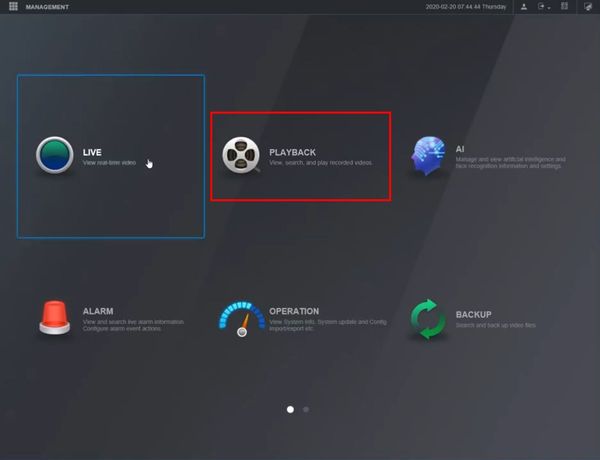
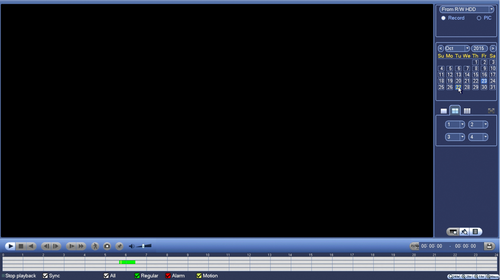
1. From Live View, right click select Main Menu
2. Click Playback
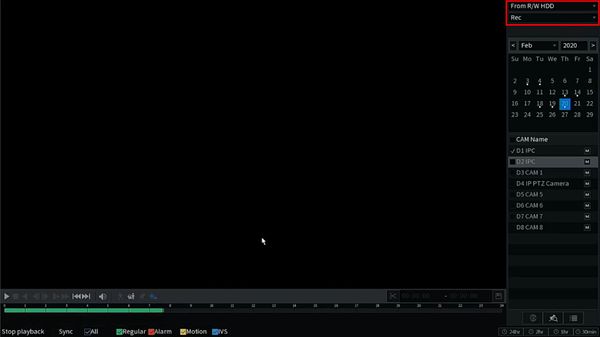
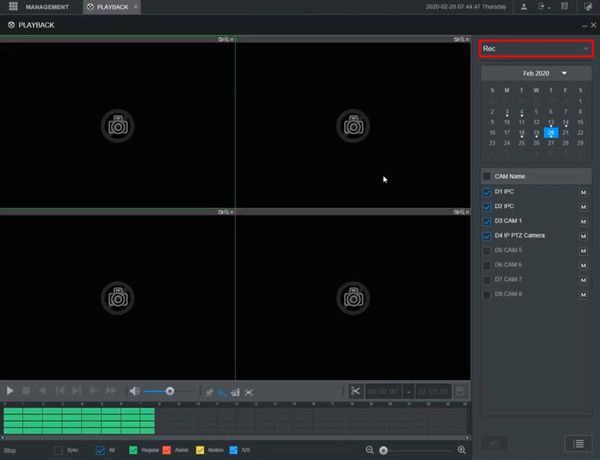
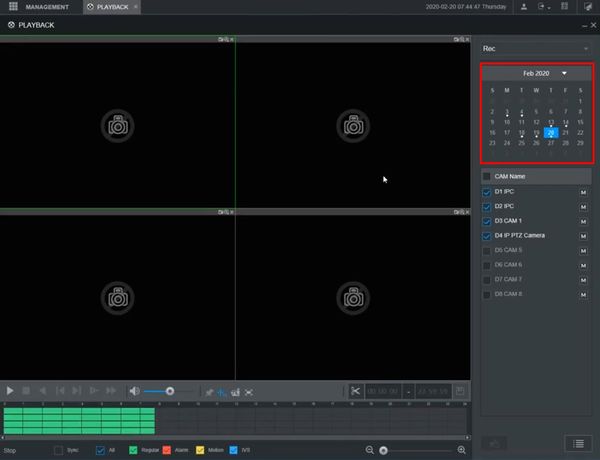
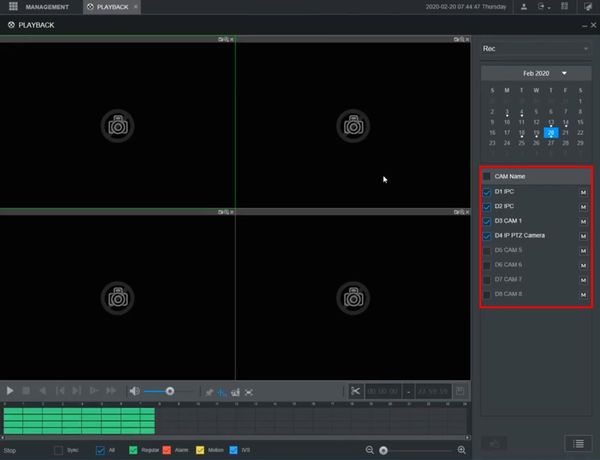
3. The Playback interface will appear
Use the interface on the right side of the screen to set parameters for the Playback search
Use the dropdown box to select the source for playback
- From R/W HDD (internal hard drive) , From I/O Device
- File type: Rec, Pic, Slice
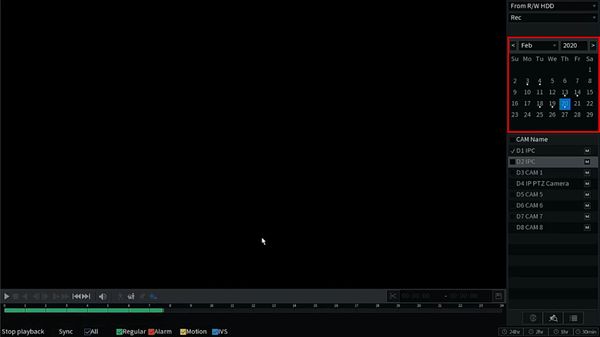
Use the calendar to select the date
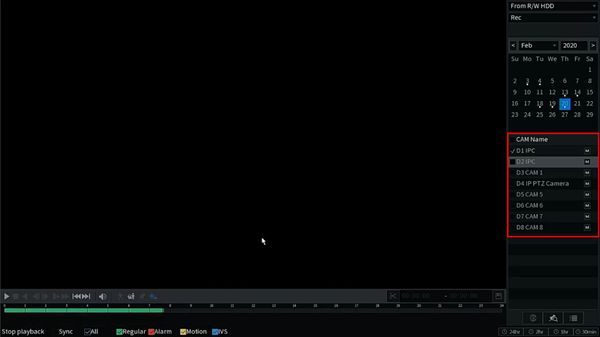
Select which cameras/channels for playback using the checkbox next to each camera/channel
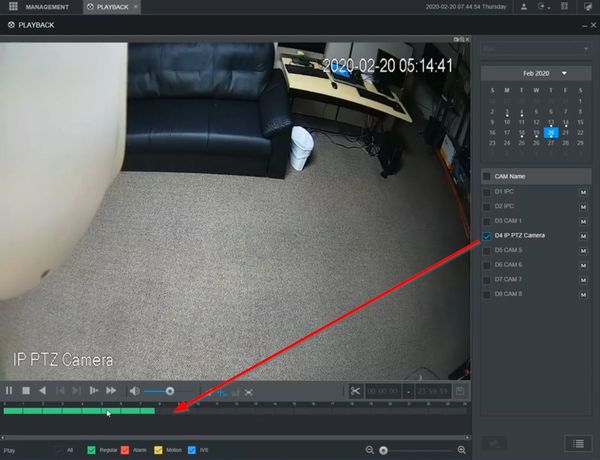
Checking the camera/channel will load the footage into the timeline below the video frame
4. Click anywhere inside the timeline to navigate
Use the on screen playback controls to control the playback
Prerequisites
- Dahua recorder with recorded video footage
- Dahua recorder with network connection
- Computer with network connection
Video Instructions
Step by Step Instructions
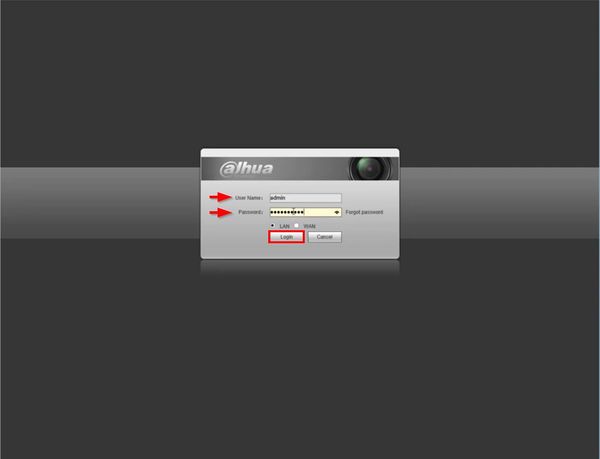
1. Enter the IP of the device into a browser
At the Web Login
Enter the Username and Password
Click Login
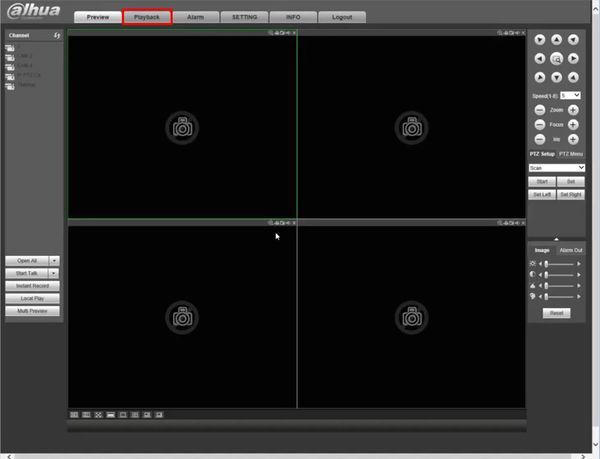
2. Click Playback
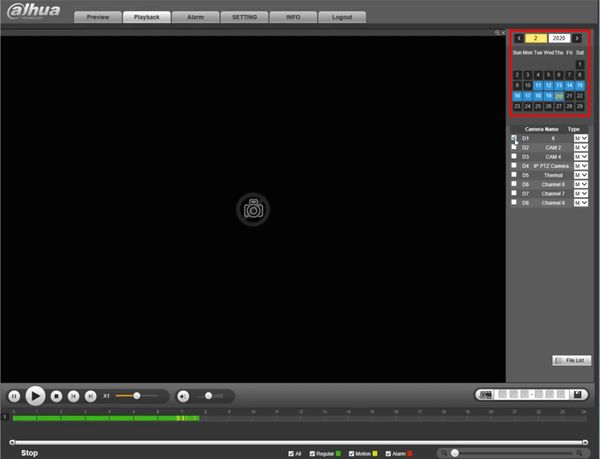
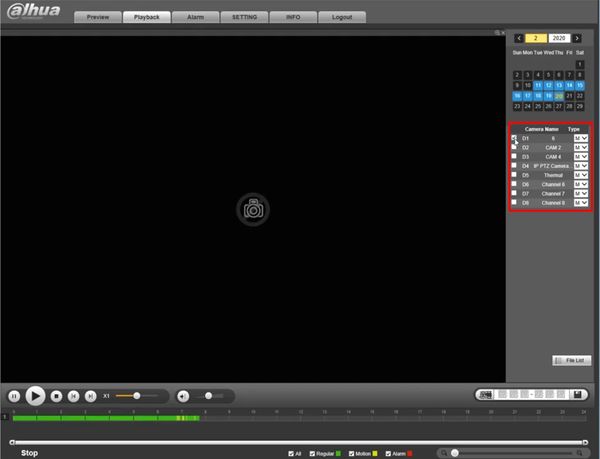
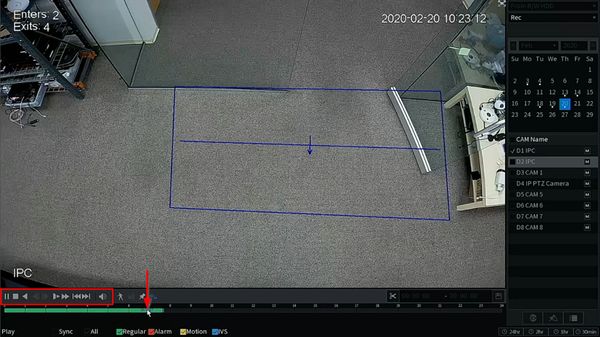
3. The Playback interface will appear
Use the interface on the right side of the screen to set parameters for the Playback search
Use the calendar to select the date
Select which cameras/channels for playback using the checkbox next to each camera/channel
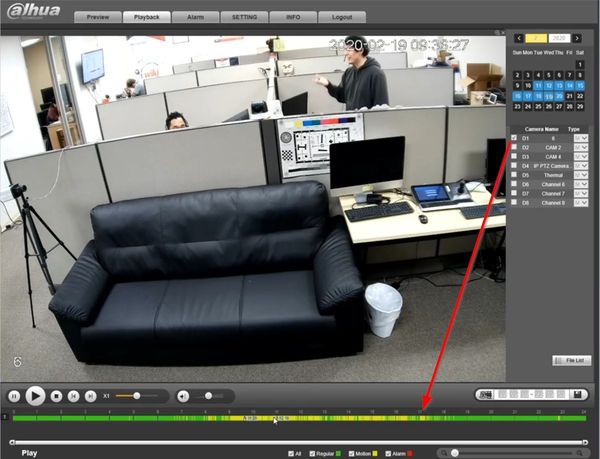
Checking the camera/channel will load the footage into the timeline below the video frame
4. Click anywhere inside the timeline to navigate
Use the on screen playback controls to control the playback
Prerequisites
- Dahua recorder with recorded video footage
- Dahua recorder with network connection
- Computer with network connection
Video Instructions
Step by Step Instructions
1. Enter the IP of the device into a browser
At the Web Login
Enter the Username and Password
Click Login
2. Click Playback
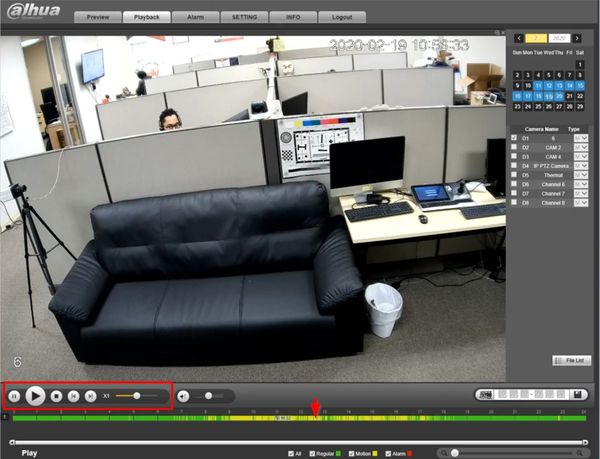
3. The Playback interface will appear
Use the interface on the right side of the screen to set parameters for the Playback search
Use the dropdown box to select the filetype: Rec, Pic, Slice
Use the calendar to select the date
Select which cameras/channels for playback using the checkbox next to each camera/channel
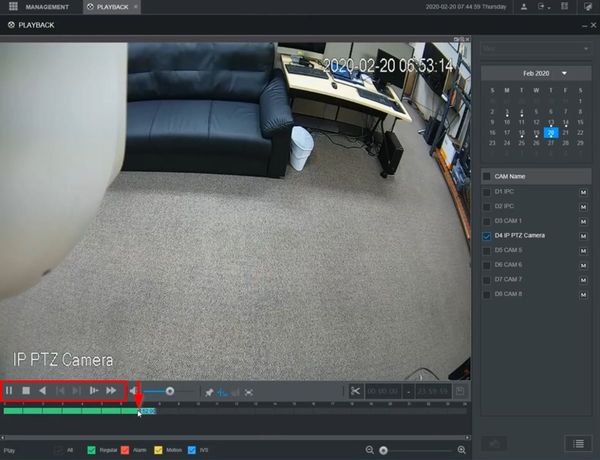
Checking the camera/channel will load the footage into the timeline below the video frame
4. Click anywhere inside the timeline to navigate
Use the on screen playback controls to control the playback
Prerequisites
- SmartPSS
- Device added to SmartPSS SmartPSS/Add Device via IP SmartPSS/Add Device P2P
Video Instructions
Step by Step Instructions
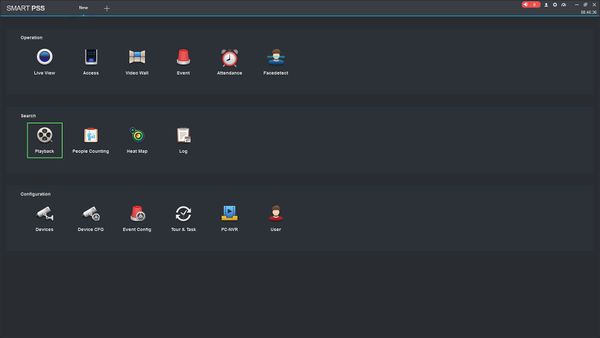
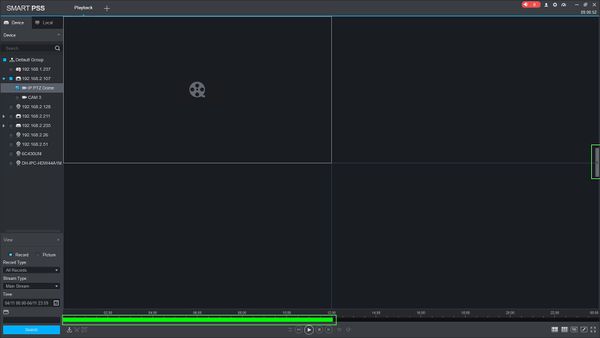
1. Launch SmartPSS.
2. Click Playback
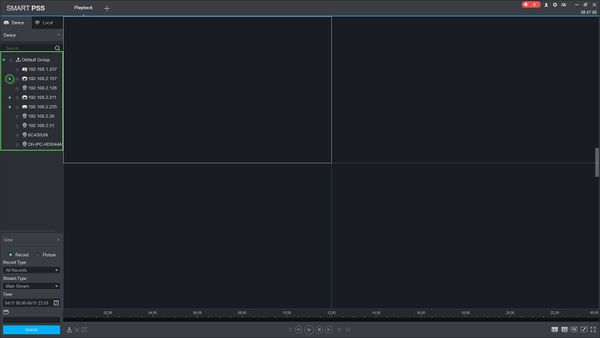
3. The device tree on the left will show all devices added to SmartPSS.
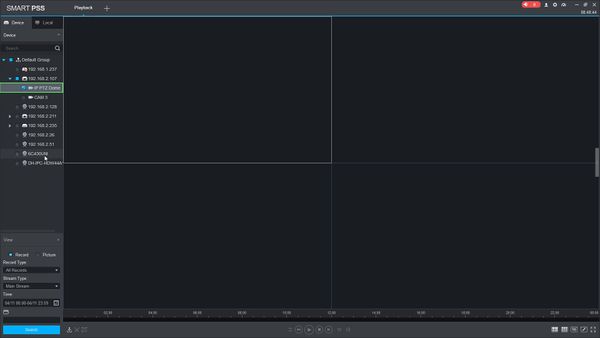
For devices with multiple channels/streams, Click the ![]() icon to expand the tree to see all channels.
icon to expand the tree to see all channels.
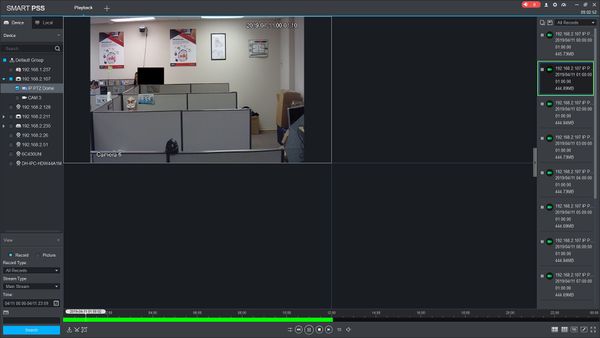
5. Use the checkbox next to each channel you wish to search for.
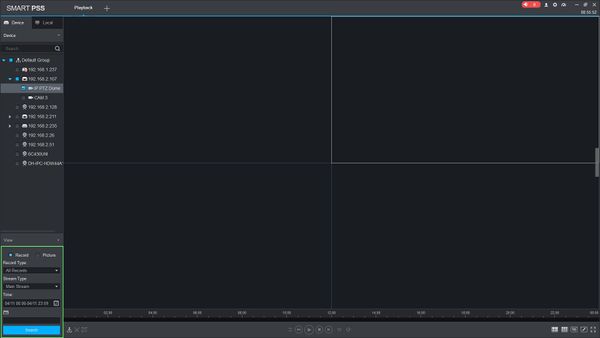
6.You can configure the parameters of the search using the drop down boxes on the left side of the screen:
- Record Type - choose the type of recording records to search for, including Events
- Stream Type - Main Stream, Sub Stream
- Time - Click the Time window to enter the time frame to search for - Please note this value cannot exceed a 24 hour period
Click 'Search' to begin a search based on the parameters.
7. The search results will appear in the timeline below the center window. Click the floating bar on the right side of the screen to open the Record Tray
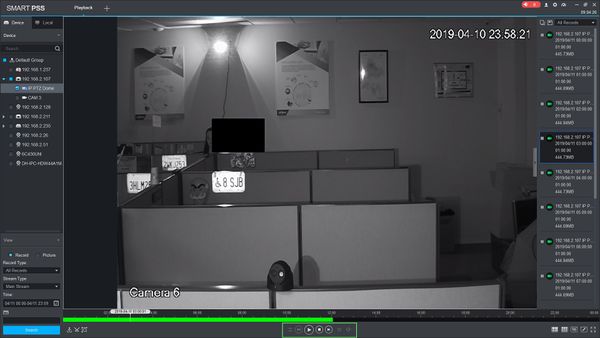
8. Double click an entry in the list to begin playback
9. Use the controls below the video pane to control playback
There are options for forward and reverse playback, playback speed, and to enable audioPrerequisites
Video Instructions
Step by Step Instructions
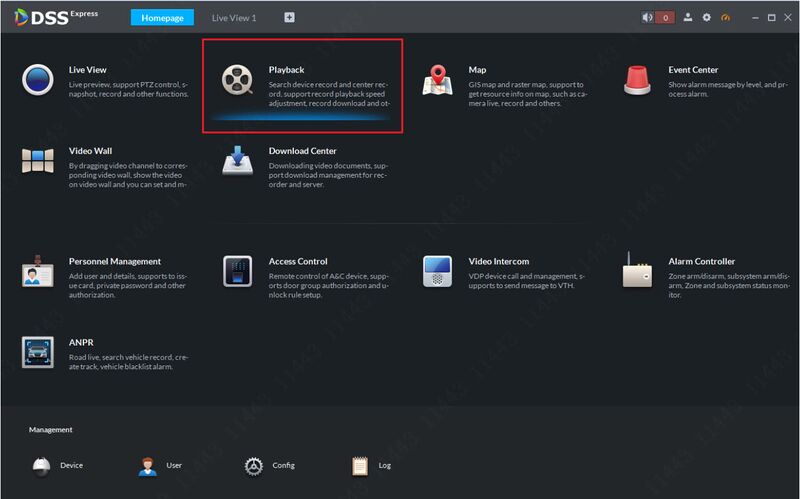
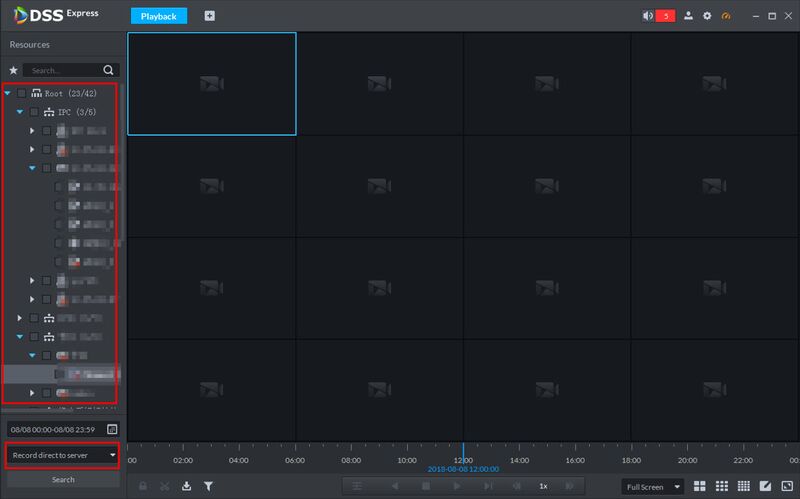
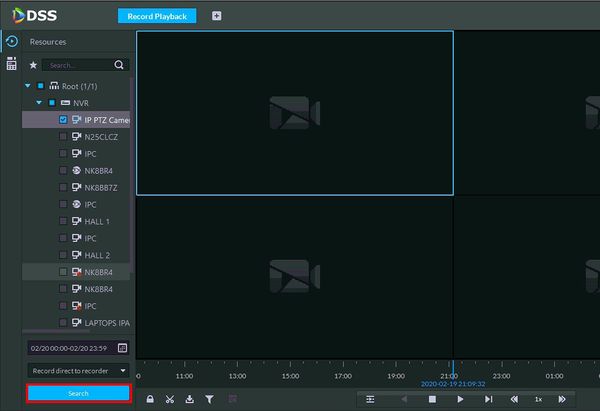
1. On DSS Express Client main menu, click on Playback
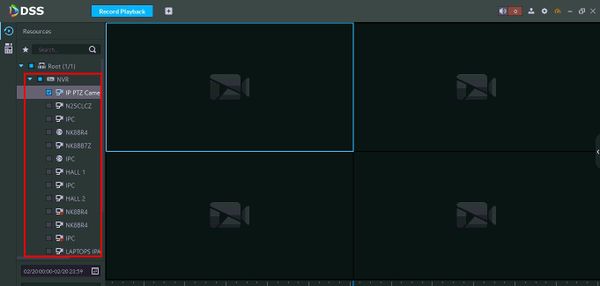
2. You will see the camera tree on the left pane. Select the camera you like to search, and then choose where you want the pull the recording from.
Note: Record direct to Recorder means you like to pull the video recording that saved in the recorder internal HDD. Record direct to server means the video recording is saved in Storage Server.
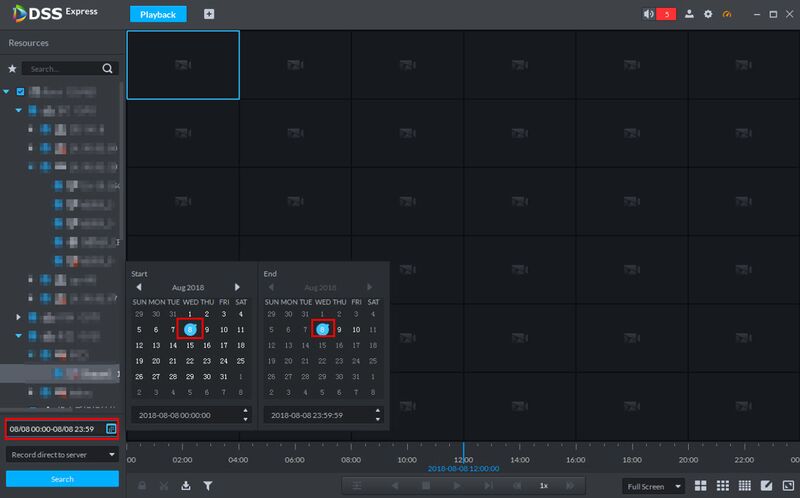
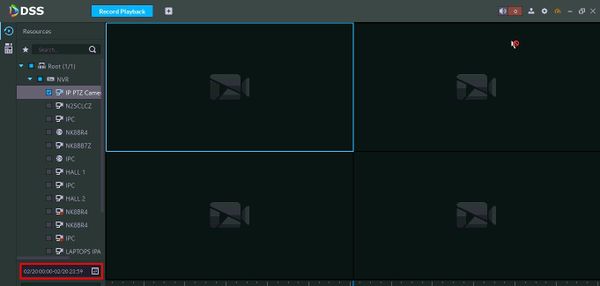
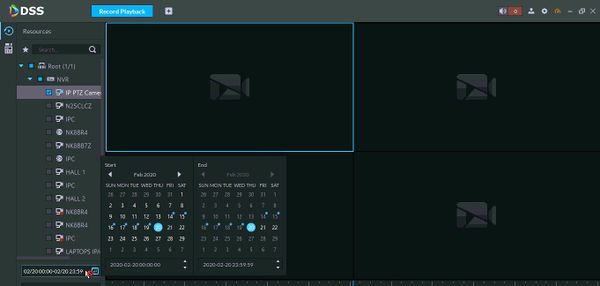
3. Select the date and time to search.
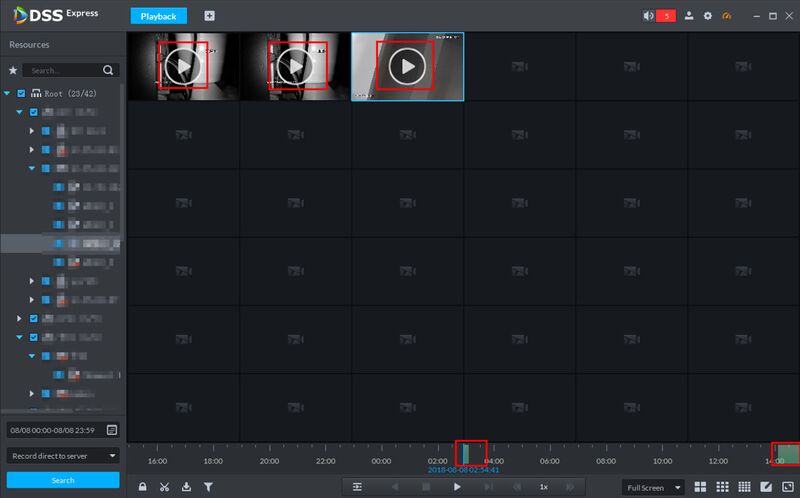
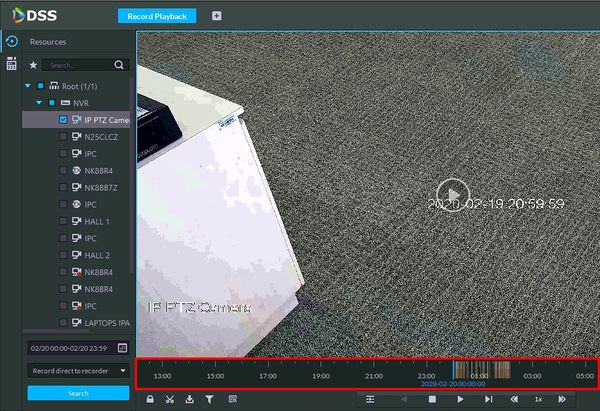
4. The record video result will now showing on the camera preview. Double click time with record on time axis to playback record by time (you can scroll to zoom in time axis). Click play button on window to start play from the earliest time.
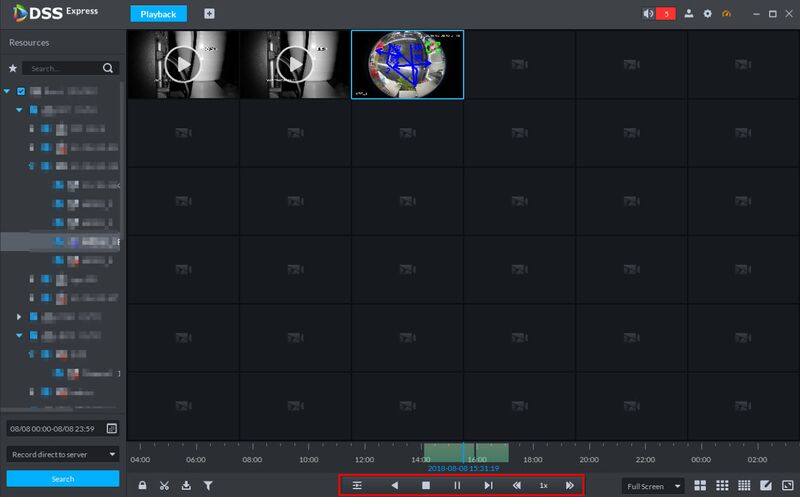
5. During playback, you can control the video using button on the bottom of preview screen.
Download Playback
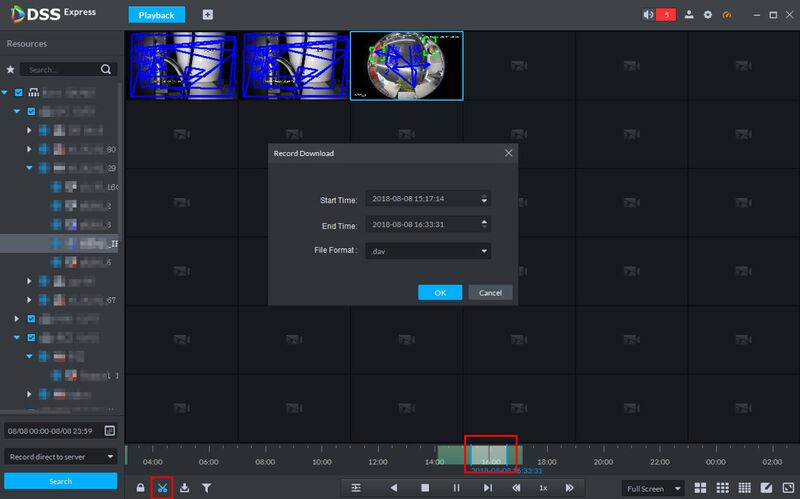
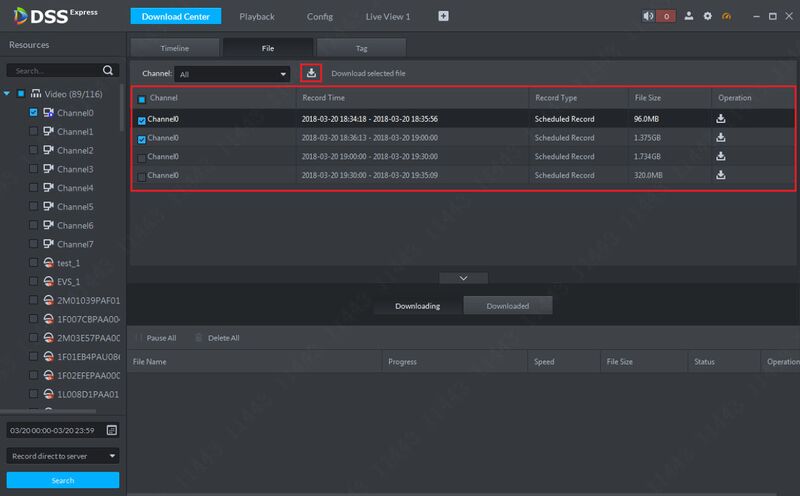
Option 1: using cut button 1. Follow previous section, in playback page, click cut button, and select start and end time on time axis to download record. Note: Record download supports several different format, such as: dav, avi, mp4, flv and asf.
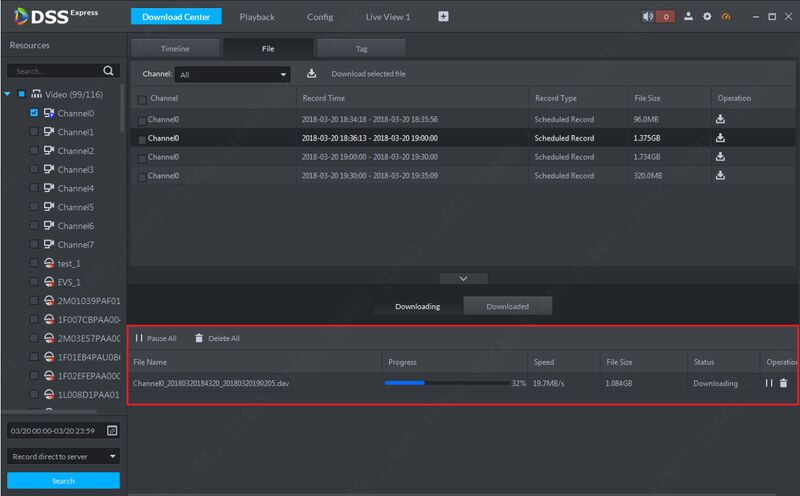
2. Click download and go to download center. During the downloading process, you can pause or delete the download task using the available button.
Option 2: using download button
Click download button to enter download center, you can download record by record list and tag.
Prerequisites
- DSS-S2 Server installed
- DSS-S2 Client installed
- Dahua device with recorded video added to DSS-S2 server
Video Instructions
Coming Soon
Step by Step Instructions
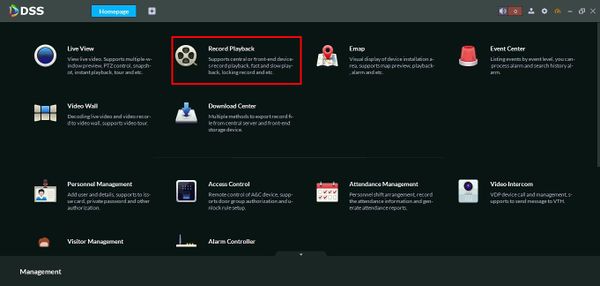
1. On the Main Menu of DSS Client
Click Record Playback
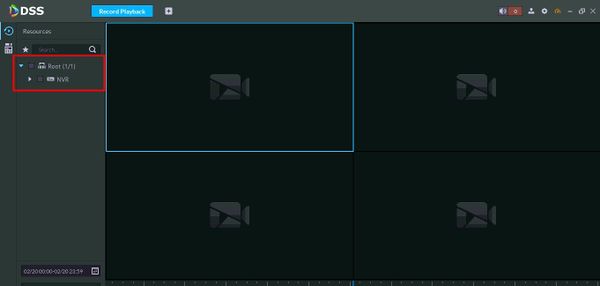
2. You will see the camera tree on the left pane. Select the camera you like to search, and then choose where you want the pull the recording from.
Note: Record direct to Recorder means you like to pull the video recording that saved in the recorder internal HDD. Record direct to server means the video recording is saved in Storage Server.
3. Select the date and time to search.
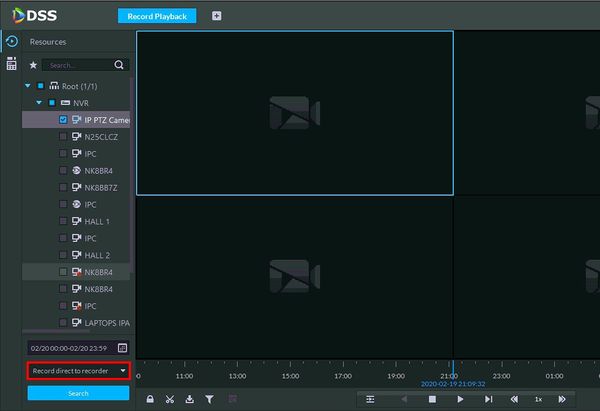
4. Use the dropdown box to choose where you want the pull the recording from.
Note: Record direct to Recorder means you like to pull the video recording that saved in the recorder internal HDD. Record direct to server means the video recording is saved in Storage Server.
5. Click Search to begin the search
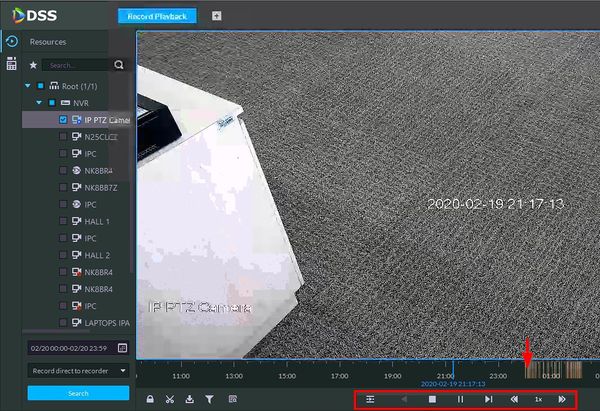
6. The search results will load into the timeline below the video frame
7. Click anywhere inside the timeline to navigate
Use the on screen playback controls to control the playback
![]() Mobile:iDMSS Plus & gDMSS Plus
Mobile:iDMSS Plus & gDMSS Plus
NOTICE
Notice of Discontinuation of iDMSS and gDMSS
Prerequisites
- Requires iOS 7.0 or later. Compatible with iPhone, iPad, and iPod touch
- Requires Android 3.0 and up
Video Instructions
Step by Step Instructions
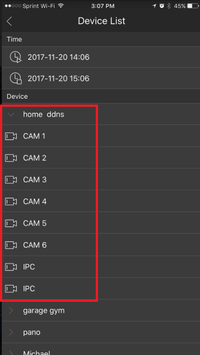
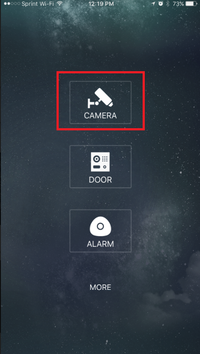
1. From the home screen select "Camera"
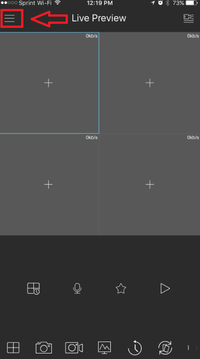
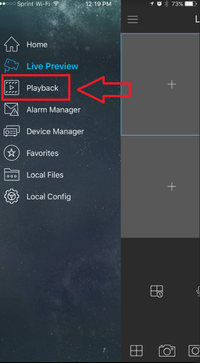
2. Select the Menu Icon -> Select playback.
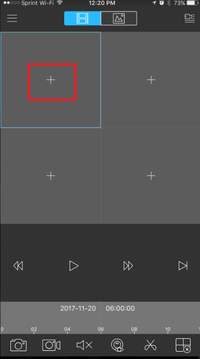
3. Select the + Icon to for a device to playback.
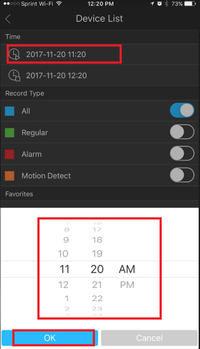
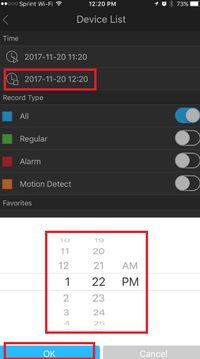
4. Choose a beginning date and time -> end date and time.
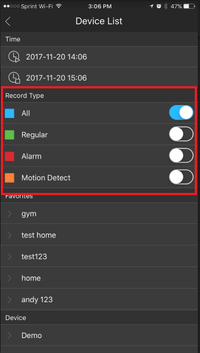
5. Toggle on to choose record type. ( All, Regular, Alarm, and Motion Detect)
6. Select a device from the list to playback.
