SmartPSS/How to Install SmartPSS on Non Admin Account
Contents
How to Install SmartPSS in Windows with a Non-Administrator Account
Description
This guide aims to explain the process of installing SmartPSS with a non-administrator Windows account
NOTE: If none of the below methods are successful, the software will not run without an admin account on that computer
Prerequisites
- A Windows Computer
- The SmartPSS Installer: Download Here
- A new Windows User Account that has been logged into at least once
Step by Step Instructions
Installing SmartPSS for a Non-Administrator Account
1. First step is to install SmartPSS using an admin account in Windows. After SmartPSS was installed under the admin, you can then logged out of the admin, and log into a “standard user” account that will be using SmartPSS without admin credentials. All the steps below were done using the “standard user” account, but the first time you run the shortcut, you will need to know the admin credentials.
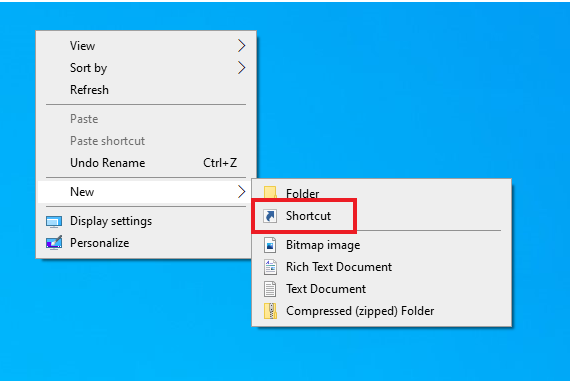
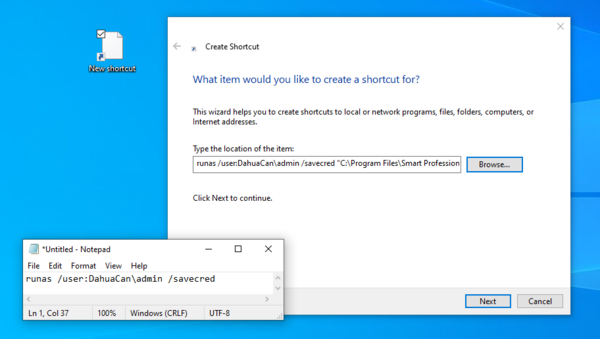
2. First, we need to make a manual shortcut for SmartPSS so we can add our syntax. Right click on the desktop, choose new and then choose shortcut.
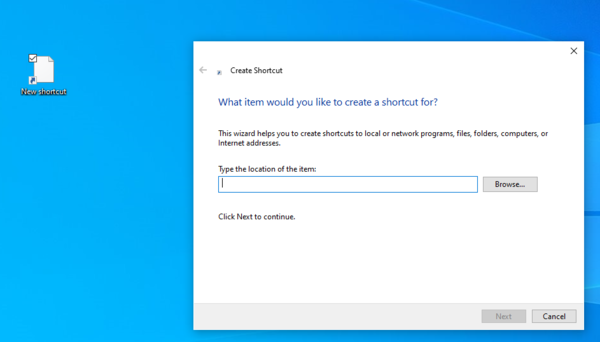
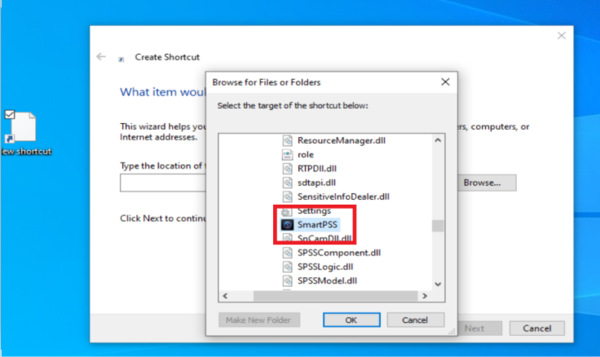
3. You will get a screen that asks you to choose the file location. Click on the browse button and then navigate to the SmartPSS.exe. The default location is C:\Program Files\Smart Professional Surveillance System\SmartPSS\SmartPSS.exe. Once you locate the file, click ok.
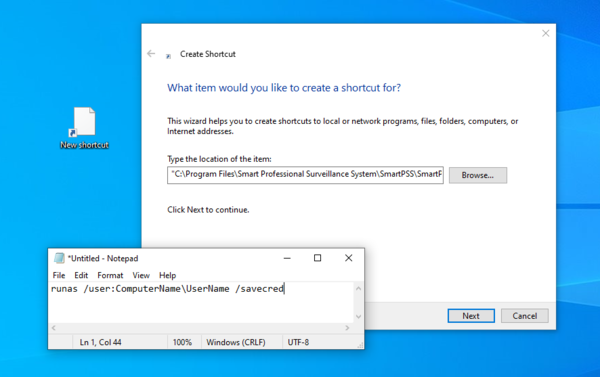
4. Once you navigate to the file and click ok, it will add the location in the location bar.
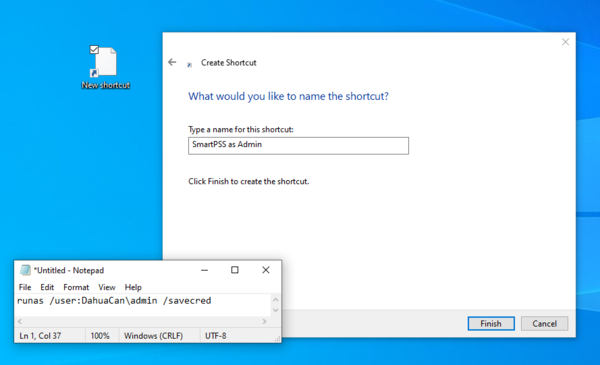
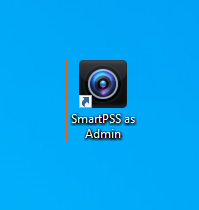
5. Now you want to take the example syntax and modify it to match your computer name and username. As an example our computer name is DahuaCan and our admin account username is admin. So in the next screenshot you can see we modified the syntax to include our computer name and username. Now you want to add that syntax to the beginning of the location. After you fill that in like the screenshot below and click next, give your Shortcut a name. I called ours SmartPSS as Admin.
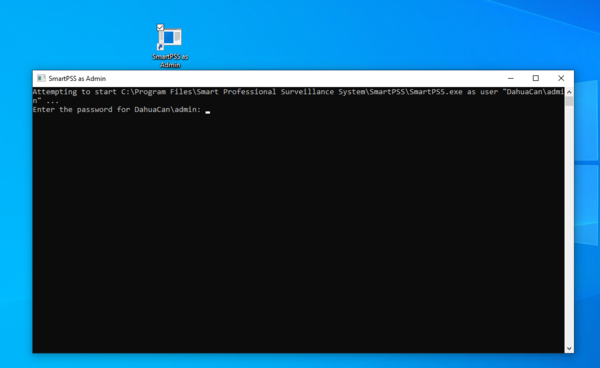
6. Now you want to double click on the new SmartPSS shortcut, and you will get a command line pop up. All you need to do is type in the password for the main Admin account. Of note, when you type in the password the line does not move and there is no indication that you are typing anything into the command prompt, this is normal. Make sure to type it in carefully and then click enter.
7. After you click Enter, it should then run SmartPSS using those admin credentials. Those credentials are now saved, so even if you close SmartPSS, even if you log out of the user account or reboot the computer, you can just click on the shortcut on the desktop and it will always use the credentials you already provided it. Your shortcut should now be good to go for that user. If you want to know how to change the shortcut icon, you can continue onto the following steps.
Steps to modify the shortcut icon
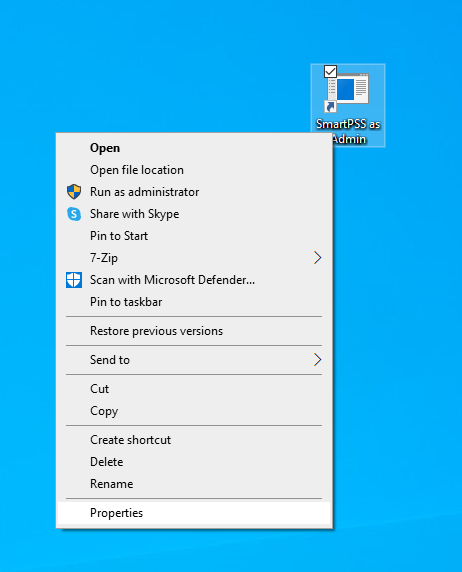
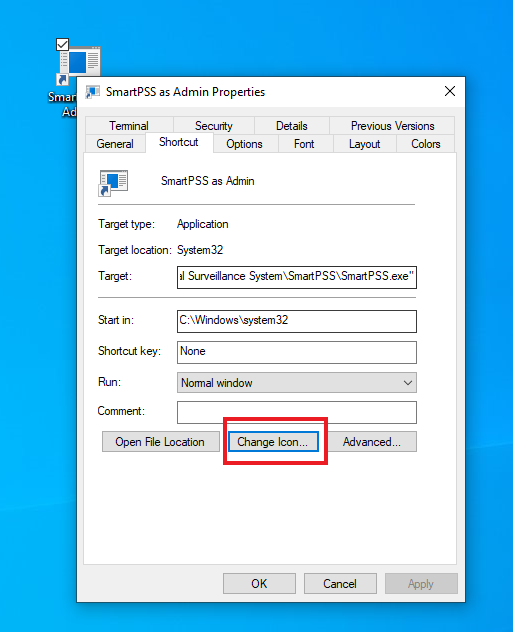
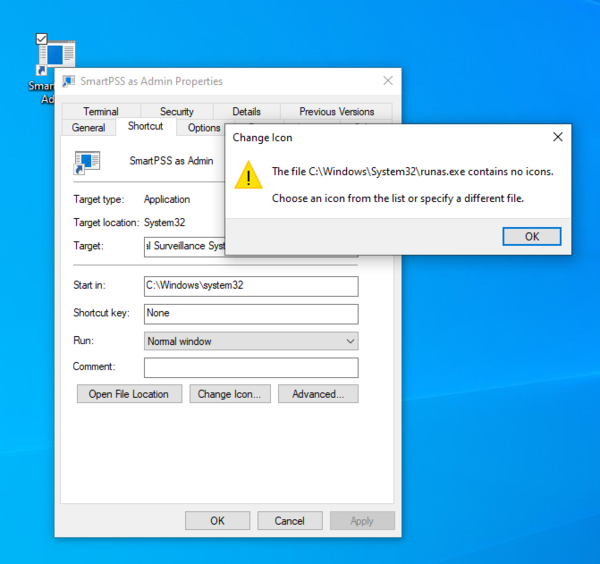
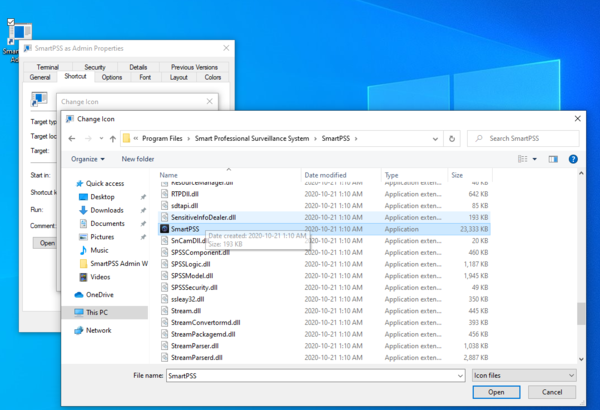
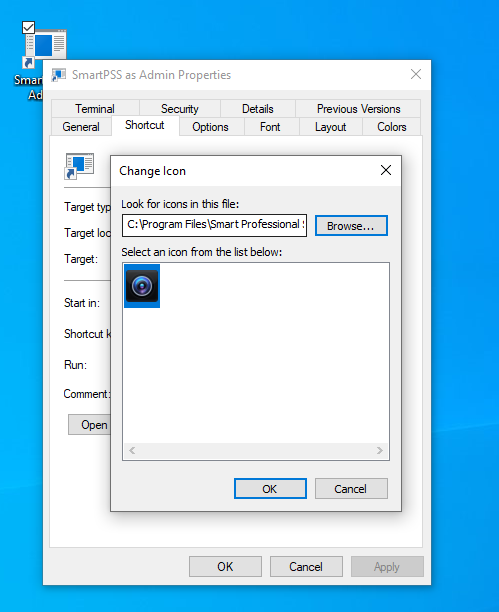
8. Right click the shortcut, then choose change icon like in the screenshots below. It may give you an error about no icons being available. Just click ok. Now navigate your way to the SmartPSS folder again, choose the SmartPSS executable. Now on the next screen it will give you the SmartPSS icon. Choose it and click ok. Now your shortcut will have the proper icon.
