New GUI/Instructions/Motion Record
Contents
New GUI - Motion Detection Recording Setup
Description
This article will go over Motion Detection Recording setup in detail on the recorder's new GUI
Prerequisites
- Dahua Recorder with new GUI
- Dahua Camera
Video Instructions
Step by Step Instructions
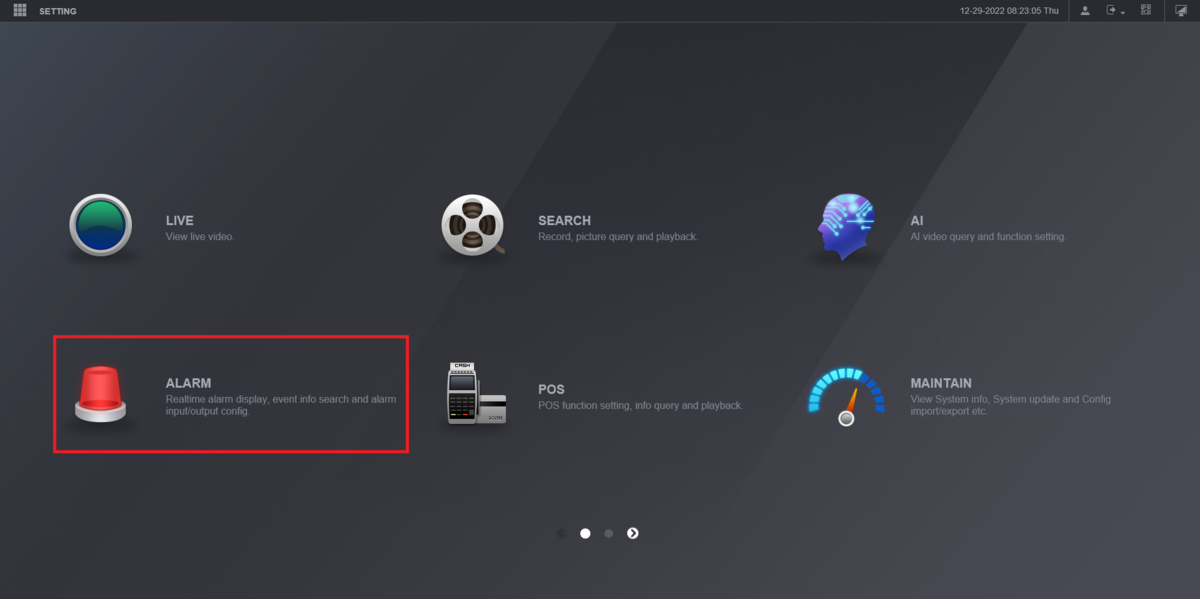
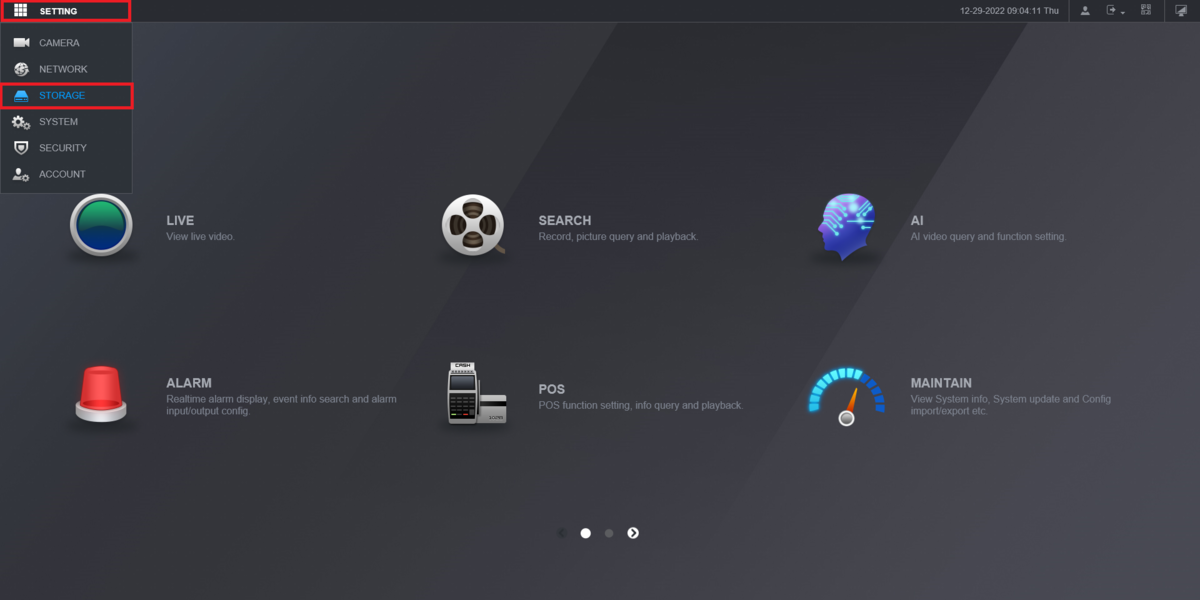
1. On the main menu select Alarm
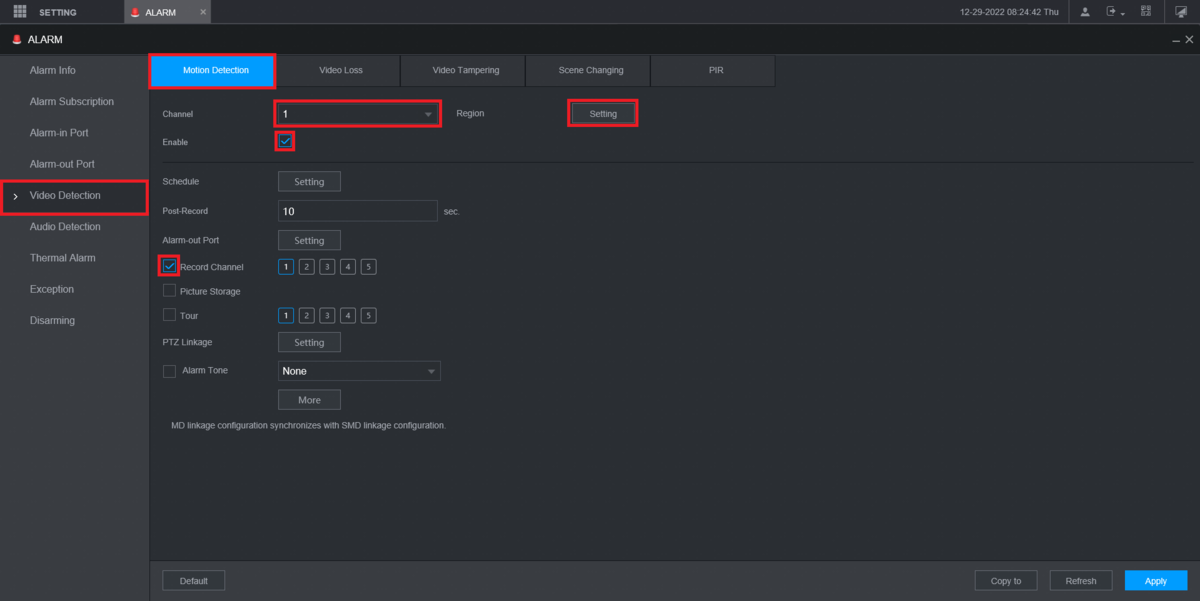
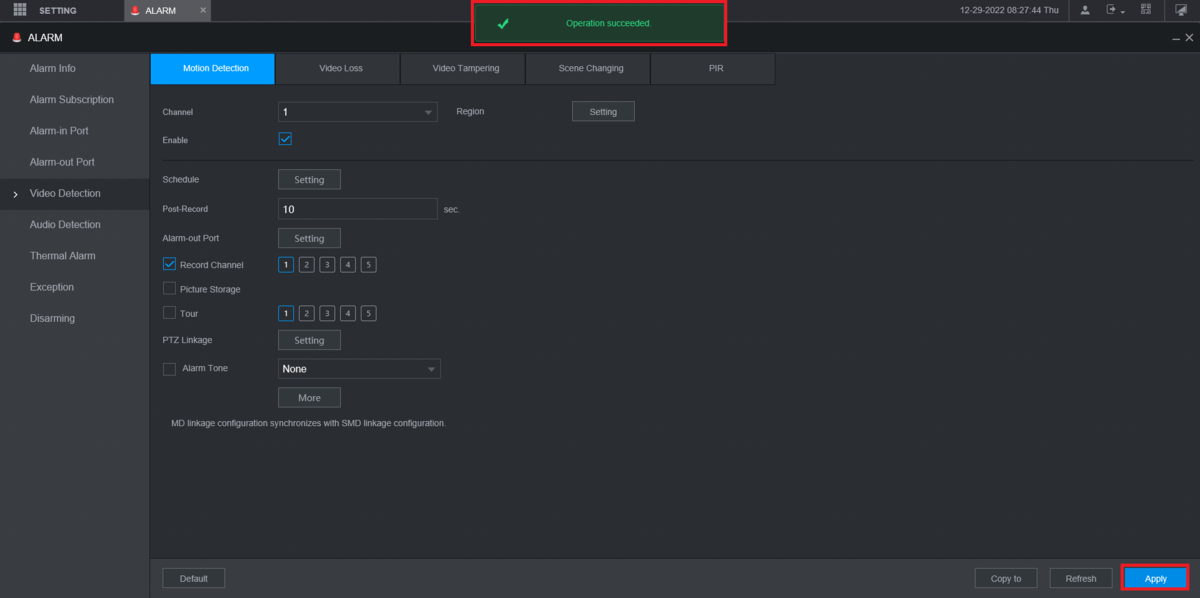
2. Select Video Detection on the left.
Then select the Motion Detection tab at the top.
Choose the channel from the drop-down next to Channel.
Check the box next to Enable.
Check the box next to Record Channel.
Click on Setting next to Region
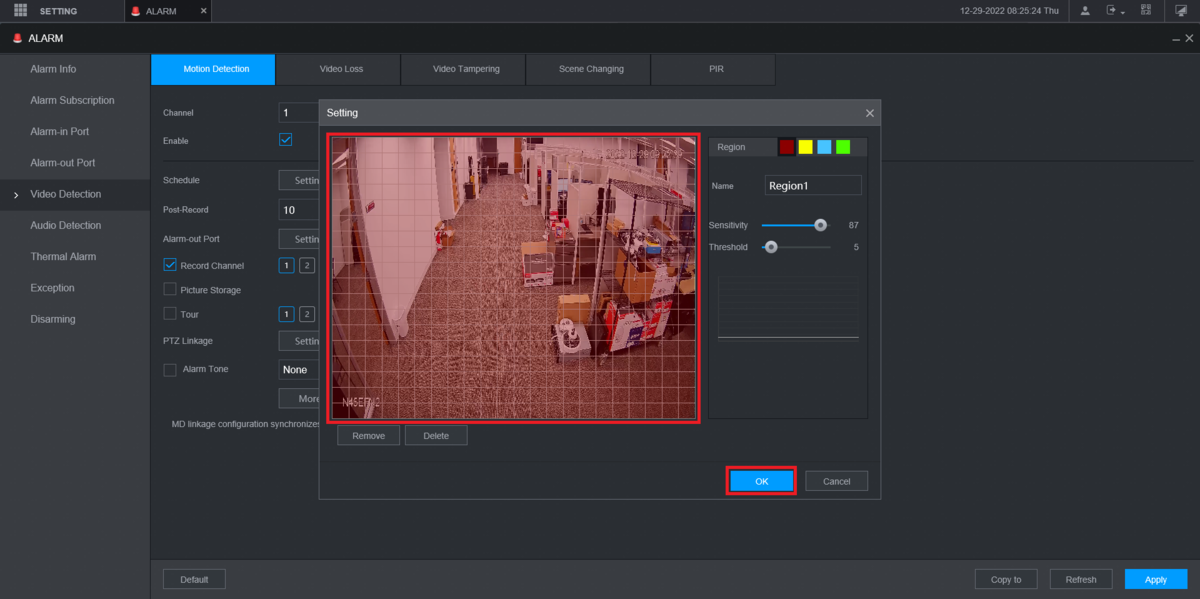
3. Highlight the areas in red where you want to track motion.
Then click OK at the bottom
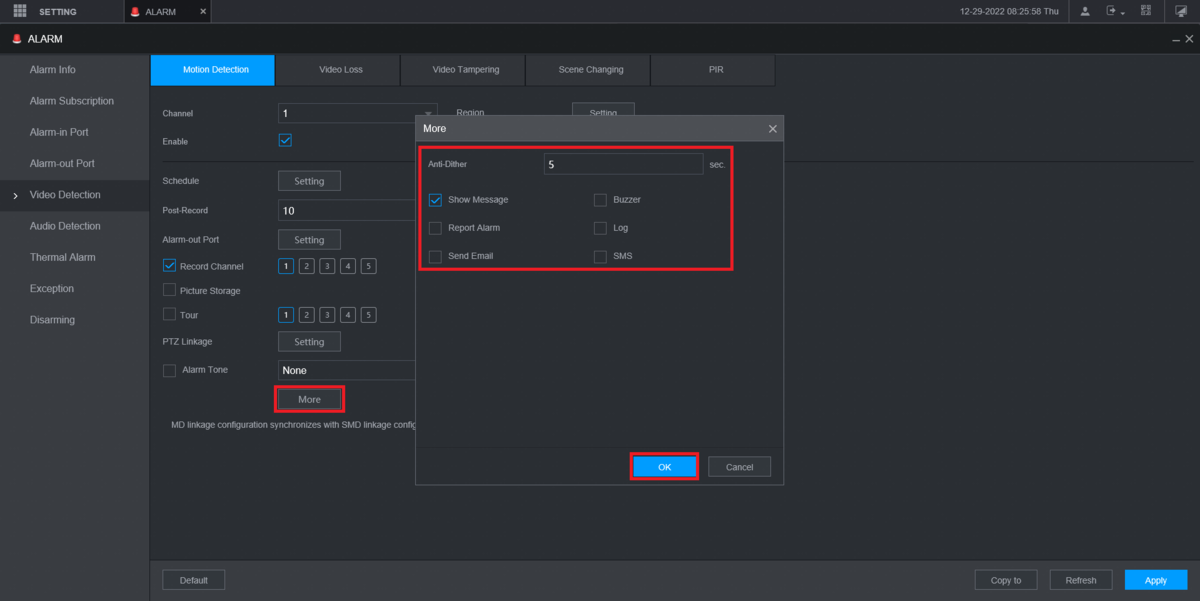
4. Select More at the bottom
Check the boxes next to any of the other options you want to activate when motion is detected.
Click on OK
5. Click on Apply at the bottom.
You will see "Operation Succeeded" at the top when your changes have been saved
6. Click on the Setting drop-down at the top and select Storage
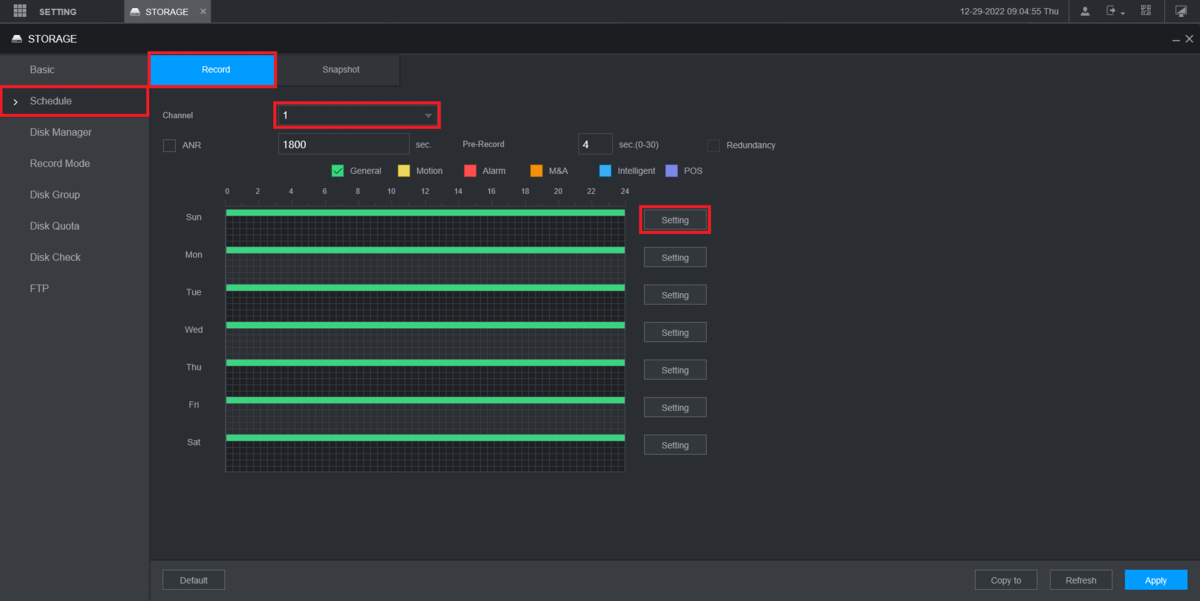
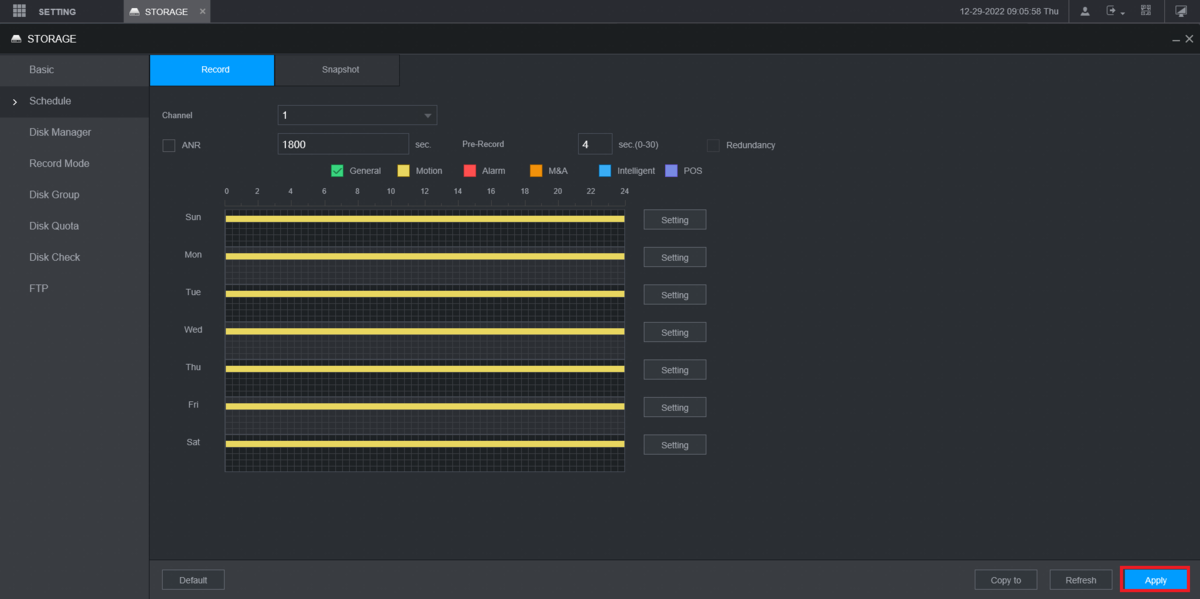
7. Select Schedule on the left.
Then select the Record tab at the top.
Choose the channel from the drop-down next to Channel.
Click on the Setting button next to any day of the week.
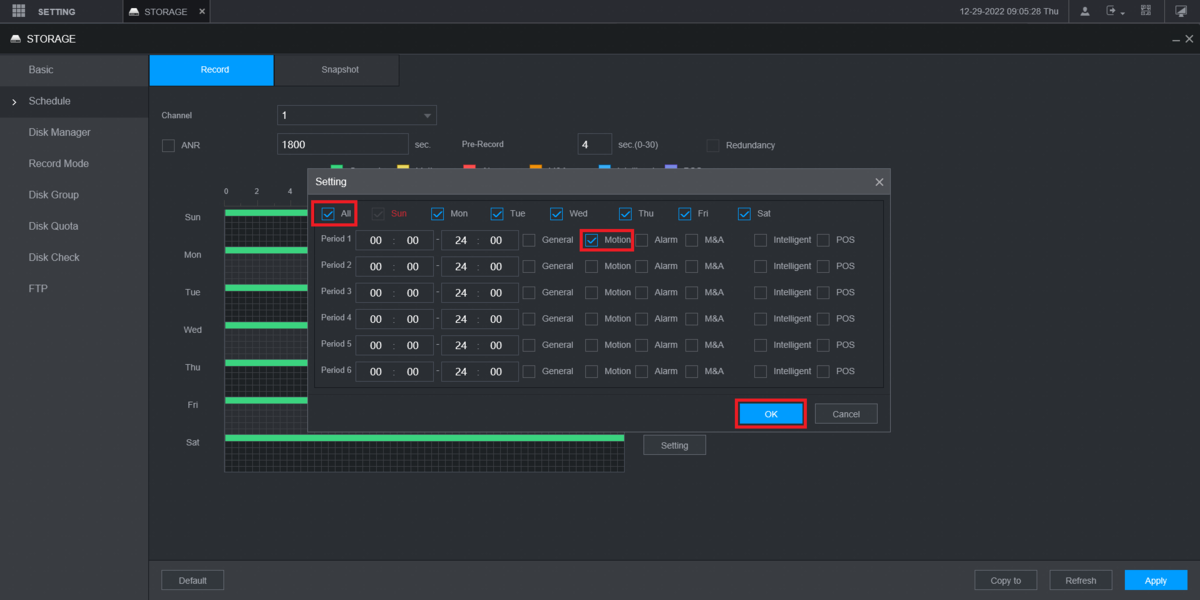
8. Check the All box to enable all days of the week.
Check the Motion box for "Period 1".
Click OK at the bottom.
9. Click on Apply at the bottom to save the settings
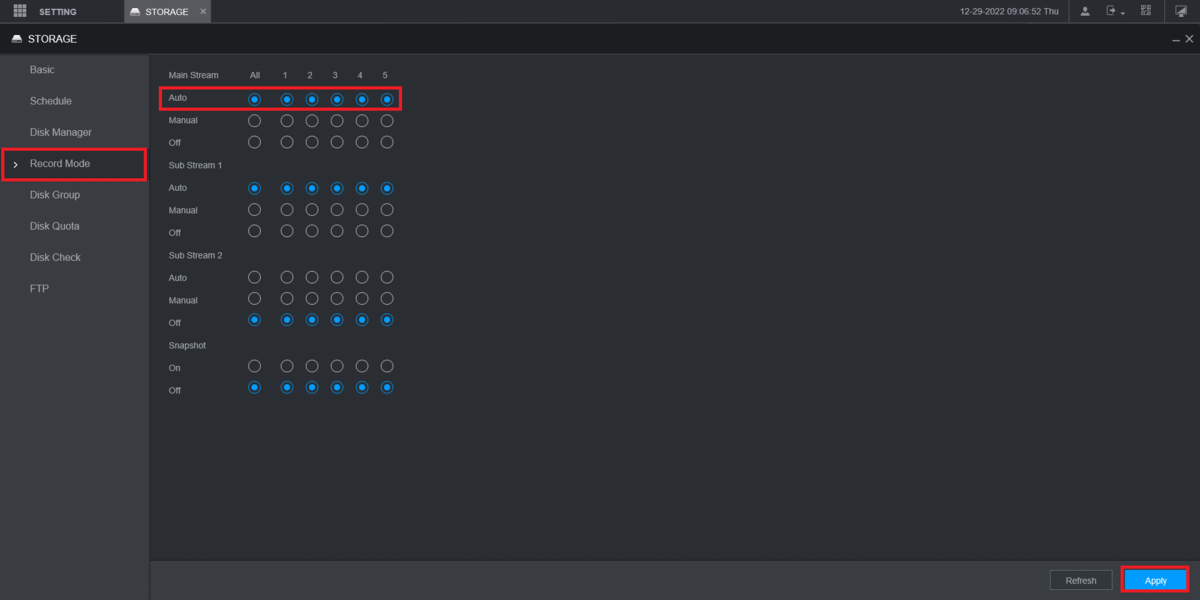
10. Select Record Mode on the left.
Then make sure Auto is enabled for the appropriate channel(s).
Click on Apply at the bottom.
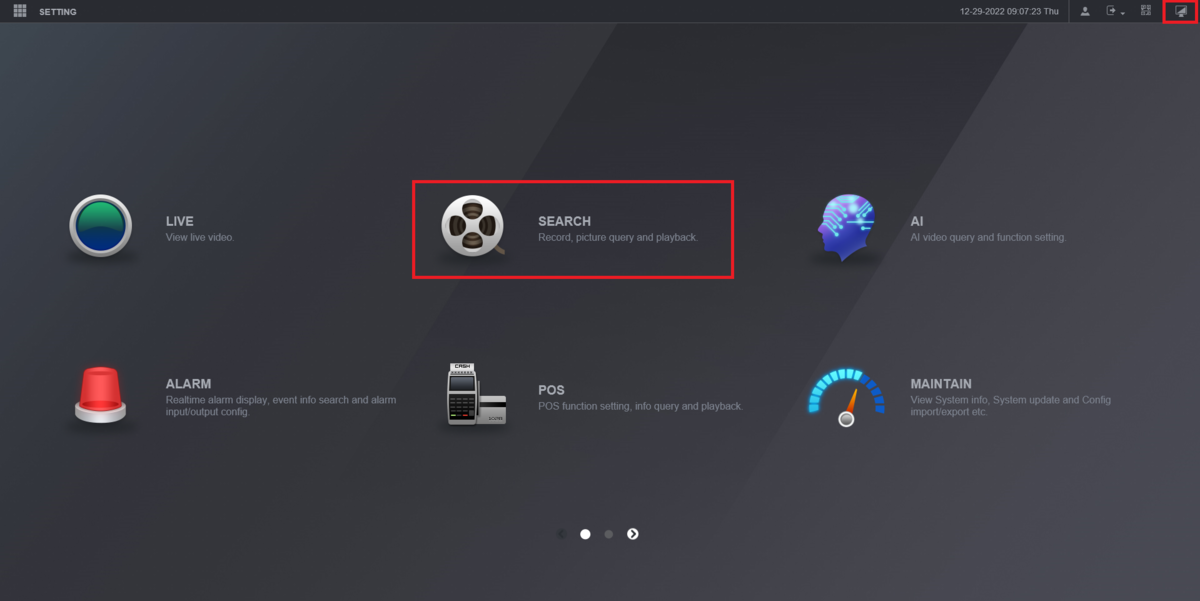
11. Click on the Main Menu icon at the top right.
Then select Search
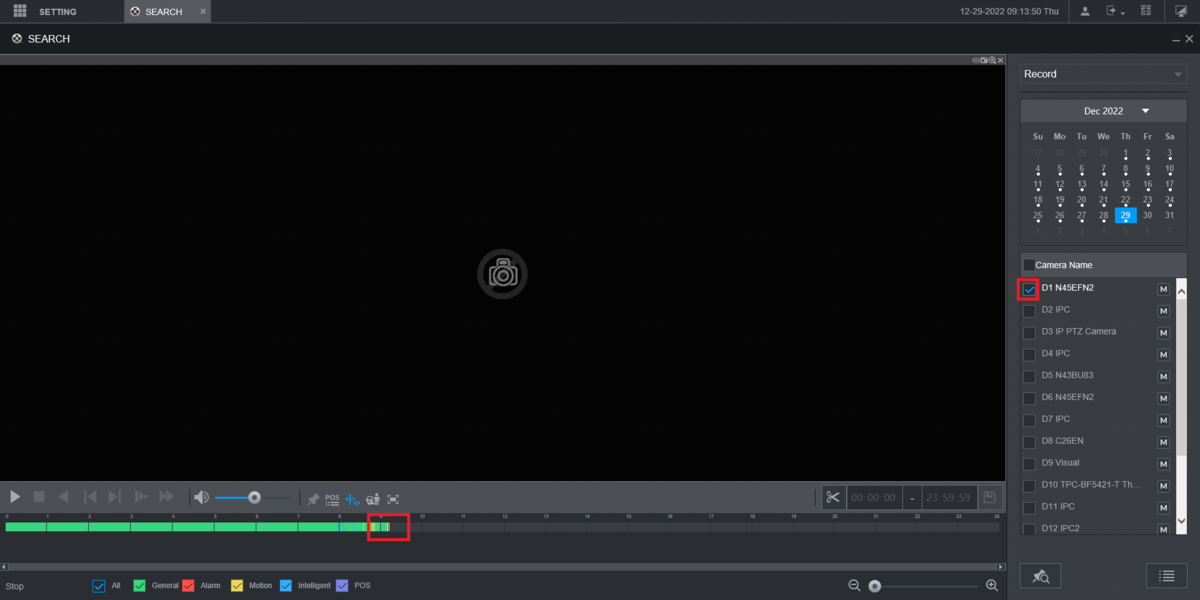
12. Check box next to the channel on the right.
You should see yellow lines/bars for motion recording
