3rd Party VMS/Milestone/Setup Fisheye
Contents
How to Setup a Fisheye in Milestone
Description
This article will run through configuring a Dahua fisheye camera with the Immervision Panomorph Lens configuration for de-warped camera viewing in X Protect.
Prerequisites
- X Protect 2017 R3
- A Dahua N68BR4V using firmware: DH_IPC-HX8XXX-Nova2_Eng_P_Stream3_V2.622.0000001.4.R.171107
already added to the X Protect Management Client.
Note
These instructions do not use the, "Milestone & Dahua Fisheye Dewarping Plugin" that is hosted on DahuaSecurity.com
File Name: Milestone___Dahua_Fisheye_Dewarping_Plugin.rar
Based on our testing, the Milestone & Dahua Fisheye Dewarping Plugin does not work with Dahua North America, fisheye cameras.
Video Instructions
Step by Step Instructions
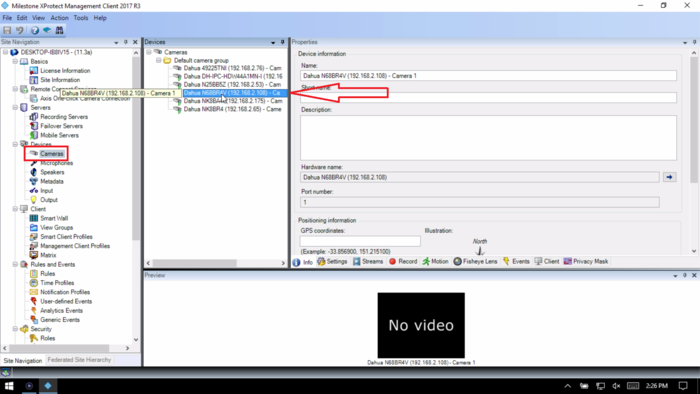
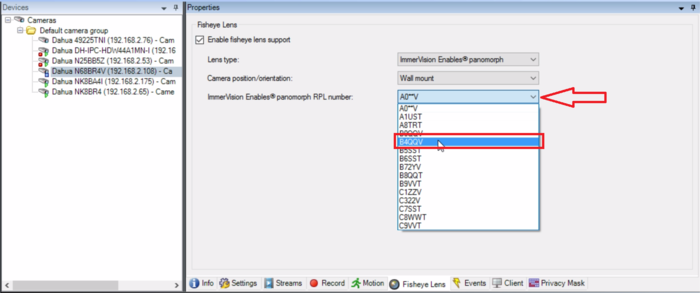
1. In the X Protect Management Client, select Devices -> Cameras. Under the device list expand the camera groups until you see your fisheye camera, then select it.
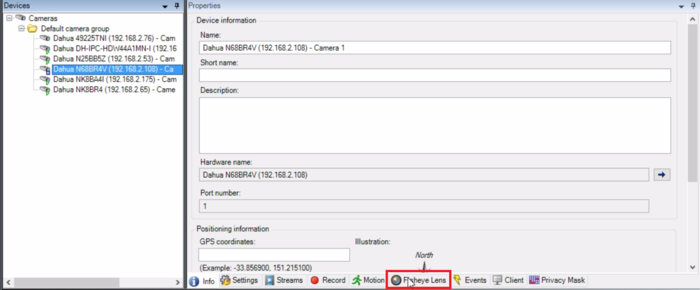
2. Select the Fisheye Lens tab.
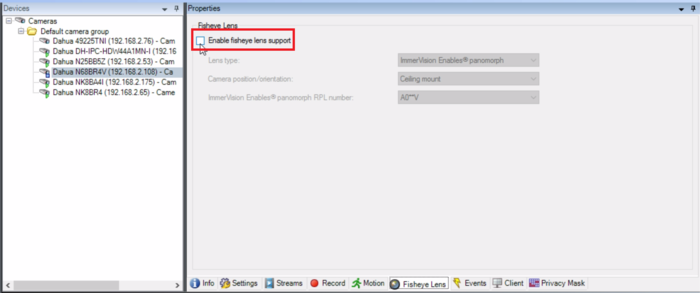
3. Check the box next to "Enable fisheye lens support".
4. Next to "Lens type", make sure it is set to "ImmerVision enables panomorph".
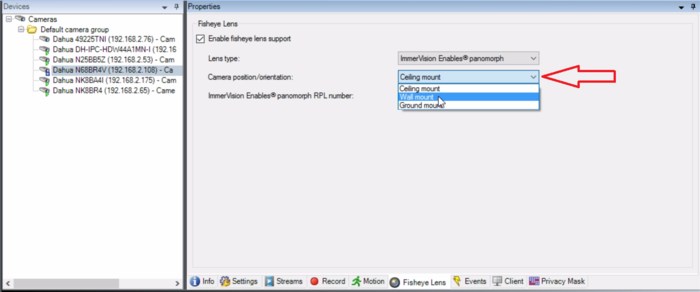
Then under "Camera position/orientation", select the orientation of your fisheye camera from the drop down (Ceiling mount, Wall mount, or Ground mount).
5. Next to "ImmerVision Enables panomorph RPL number, select "B4QQV" from the drop down.
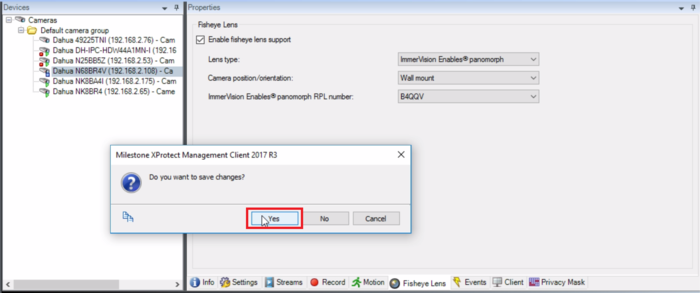
6. Select the "Info" tab at the bottom. When it asks you "Do you want to save changes?", select "Yes".
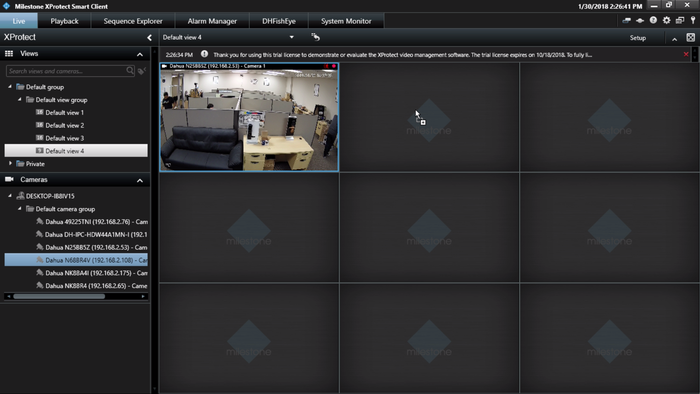
7. Open the X Protect Smart Client. (If it was open during the above steps, close it and then re-open it.)
Open the "Live" section at the top. Select your desired view from the view groups. Find the fisheye camera in the camera list on the left. Drag it into your current view.
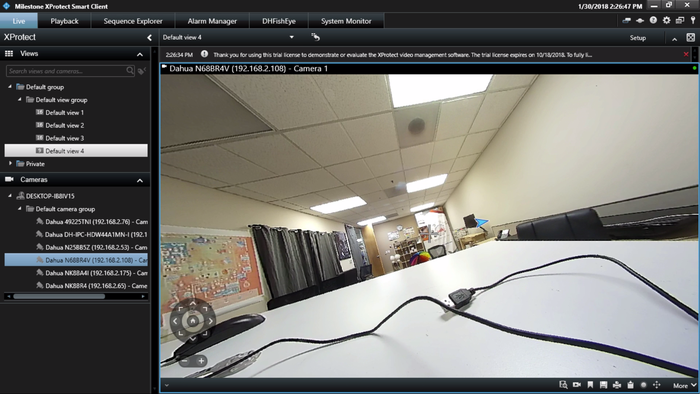
8. Double click on the live view of the fisheye camera to make it full-screen. Use your cursor to drag around the image to view different areas.
Alternatively, use the on-screen controls at the bottom left of the camera feed.
