Access Control/How To Setup DHI ASC3202B in SmartPSS Lite
Contents
How To Setup DHI ASC3202B in SmartPSS Lite
Description
This article will cover how to setup a DHI-ASC3202B in SmartPSS Lite
Prerequisites
- DHI-ASC3202B
- A Computer connected to the DHI-ASC3202B
- SmartPSS Lite
Video Instructions
Coming Soon
Step by Step Instructions
Initialization
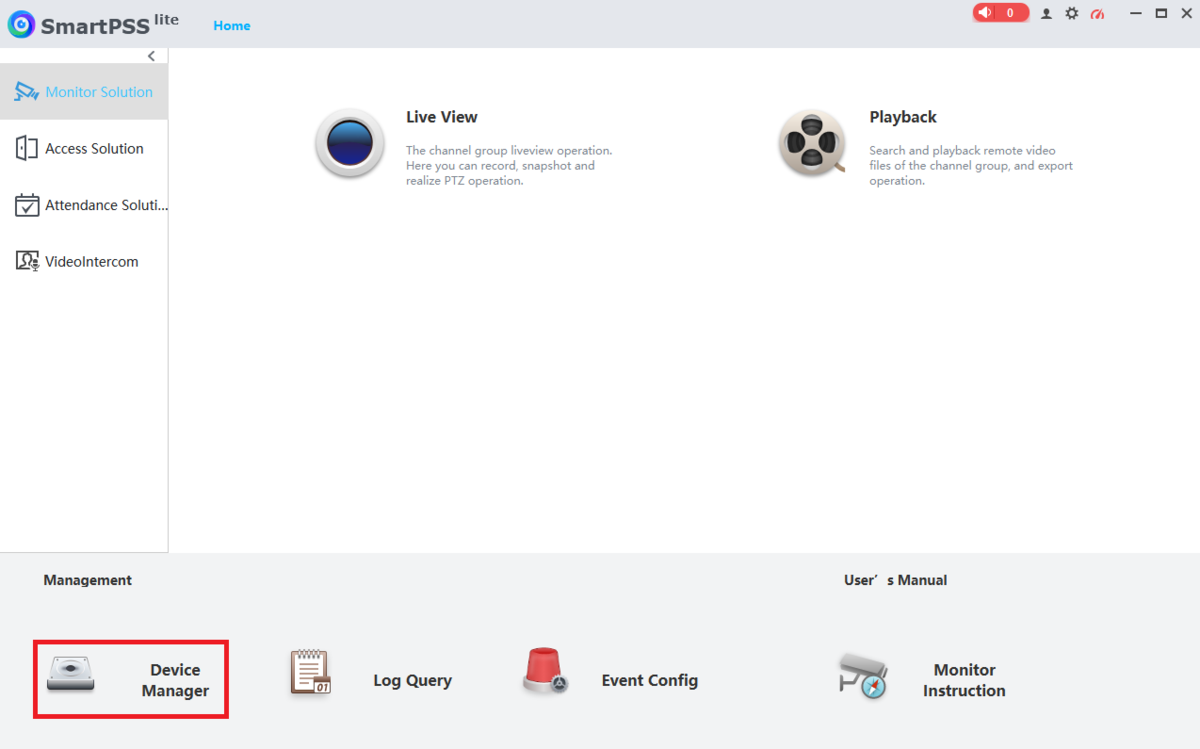
1. Open SmartPSS Lite
Select Device Manager at the bottom
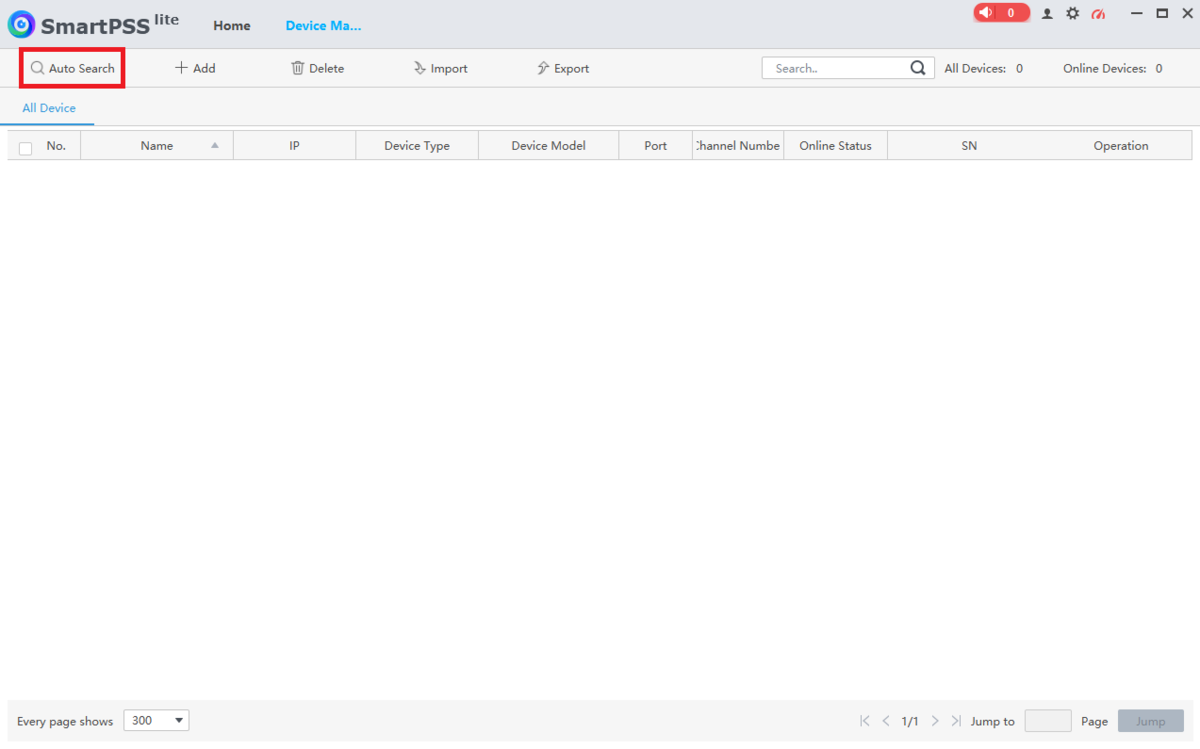
2. Select Auto Search at the top
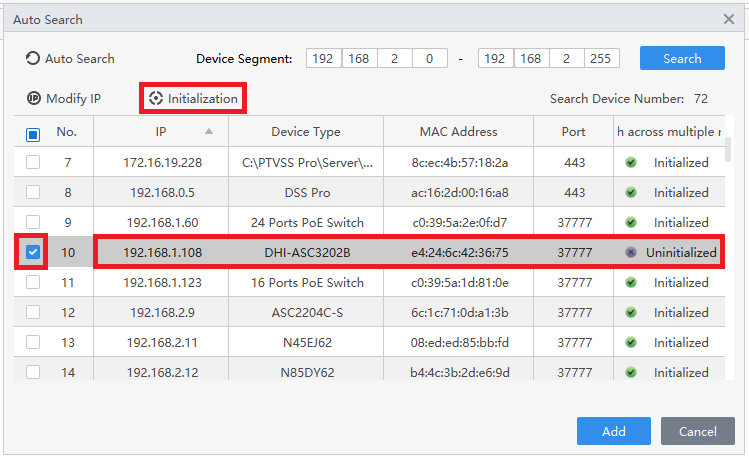
3. Search through the list of devices and check the box next to the ASC3202B.
If it says "Uninitialized" next to the device in the list, select Initialization at the top.
If it says "Initialized", skip to Step 8
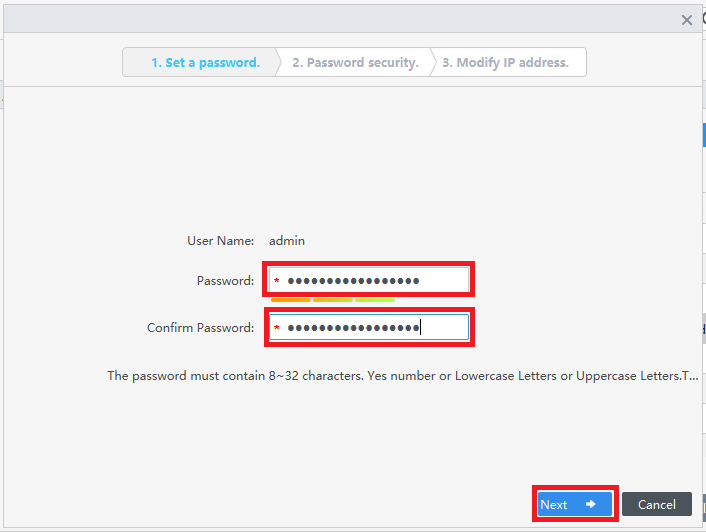
4. Enter a password in the Password field.
Type the same password in the Confirm Password field.
Select Next at the bottom
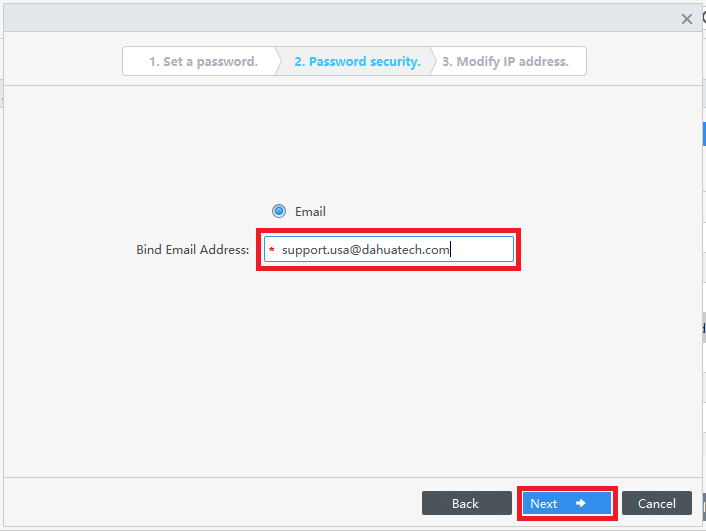
5. In the field titled Bind Email Address, enter an email address that will be used to reset the password of the ASC3202B in the case that you forget it.
Then select Next at the bottom
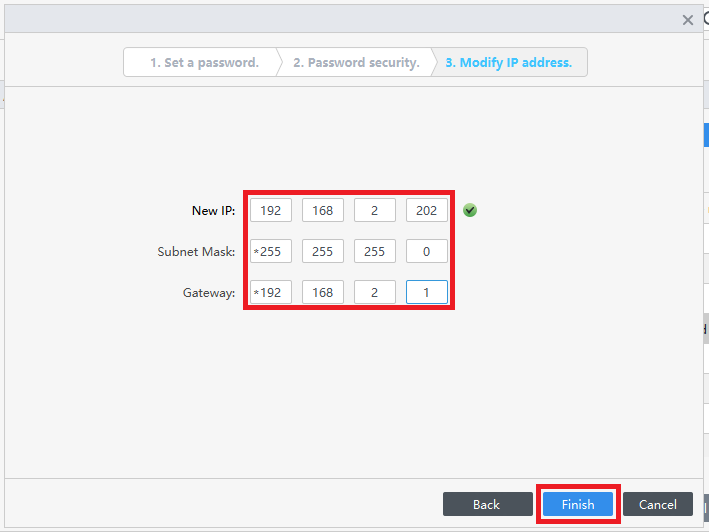
6. Enter a new IP address for the ASC3202B in the New IP field.
Enter the appropriately matching subnet in the Subnet Mask field.
Enter the appropriately matching gateway in the Gateway field.
Then select Finish at the bottom
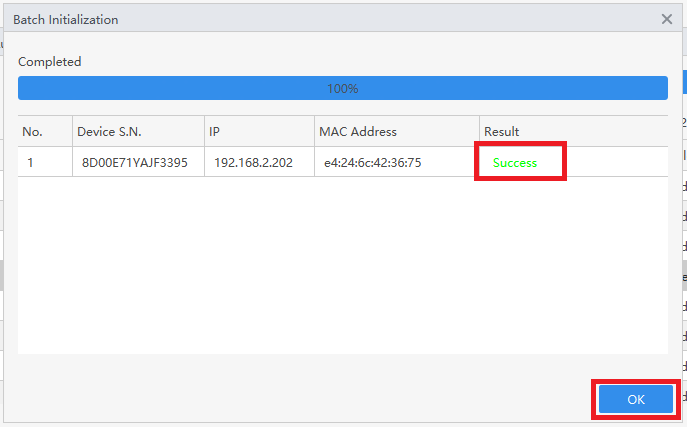
7. Once the ASC3202B has been successfully initialized it will show "Success" under "Results".
Once that has been completed, select OK
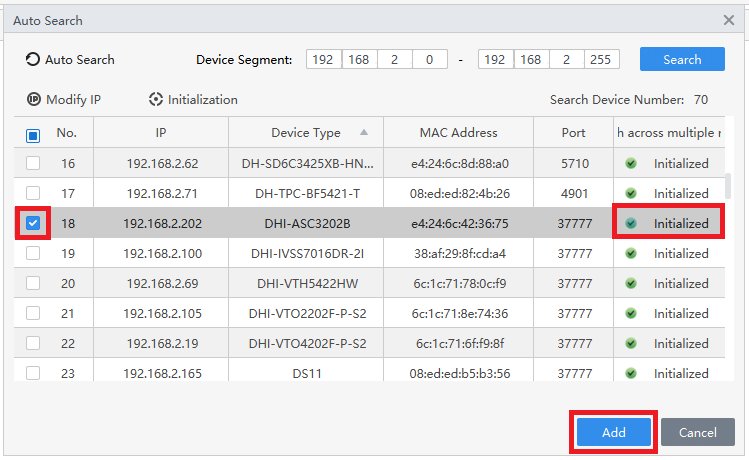
8. It will now show "Initialized" next to the ASC3202B in the list.
Check the box next to it.
Then select Add at the bottom
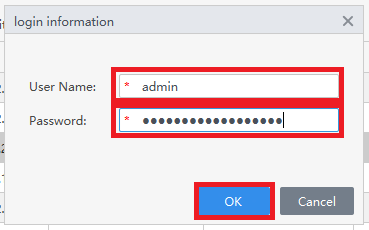
9. Enter the username of the ASC3202B in the User Name field.
Enter the password of the ASC3202B in the Password field.
Then select OK
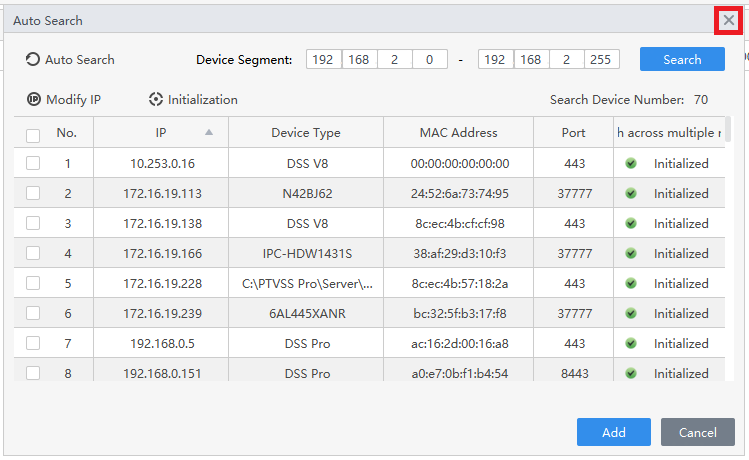
10. Click the X at the top right to close the Auto Search window
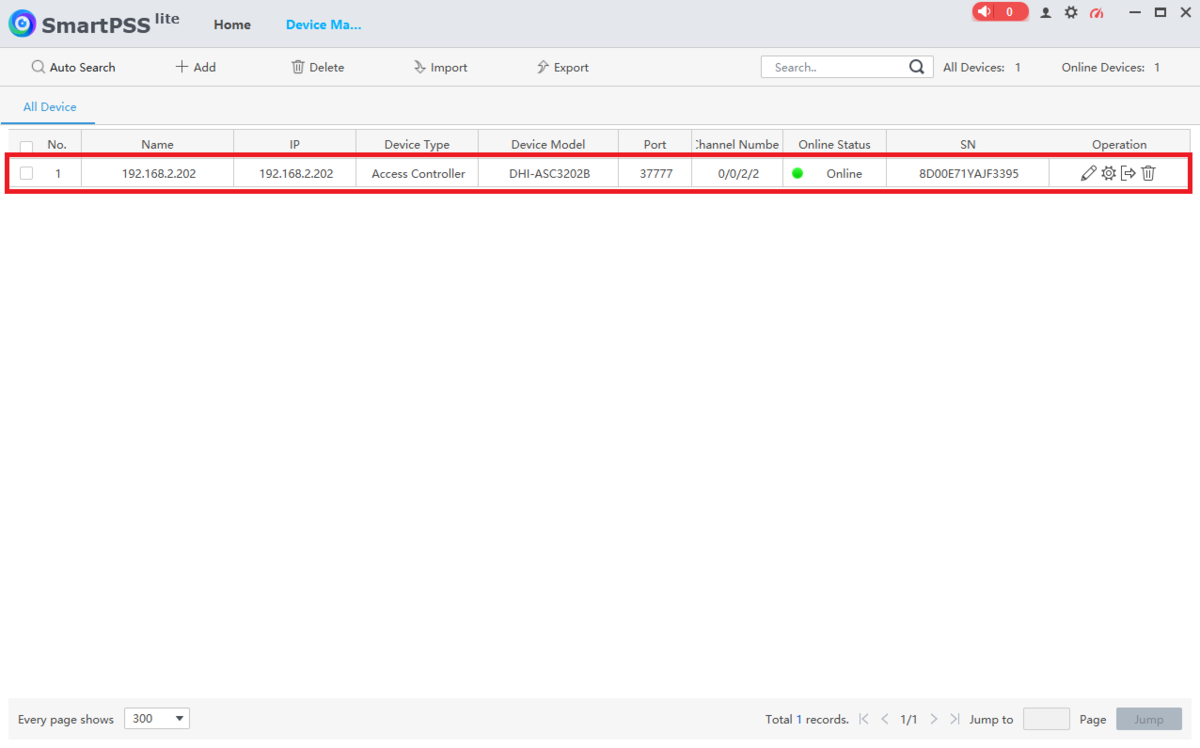
11. You will now see the ASC3202B in the list.
Make sure to verify that it says "Online" under "Online Status"
Creating New Users
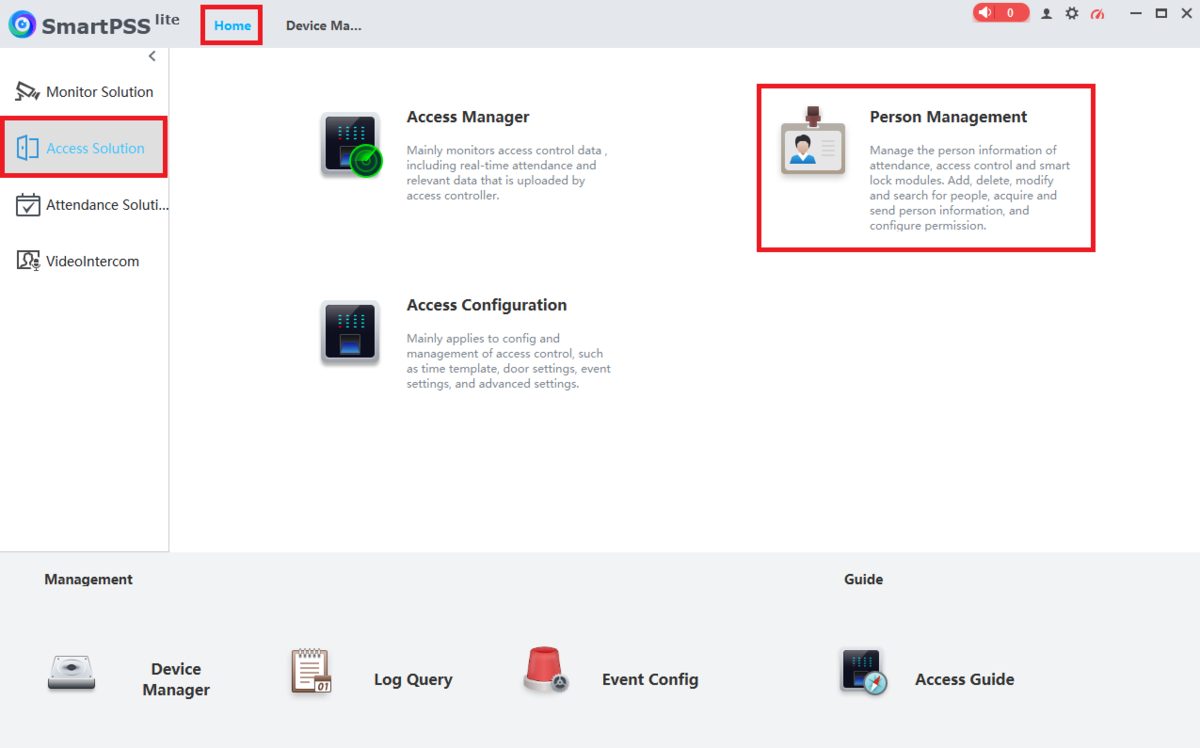
1. Select Home at the top of SmartPSS Lite.
Select Access Solution on the left.
Then select Person Management
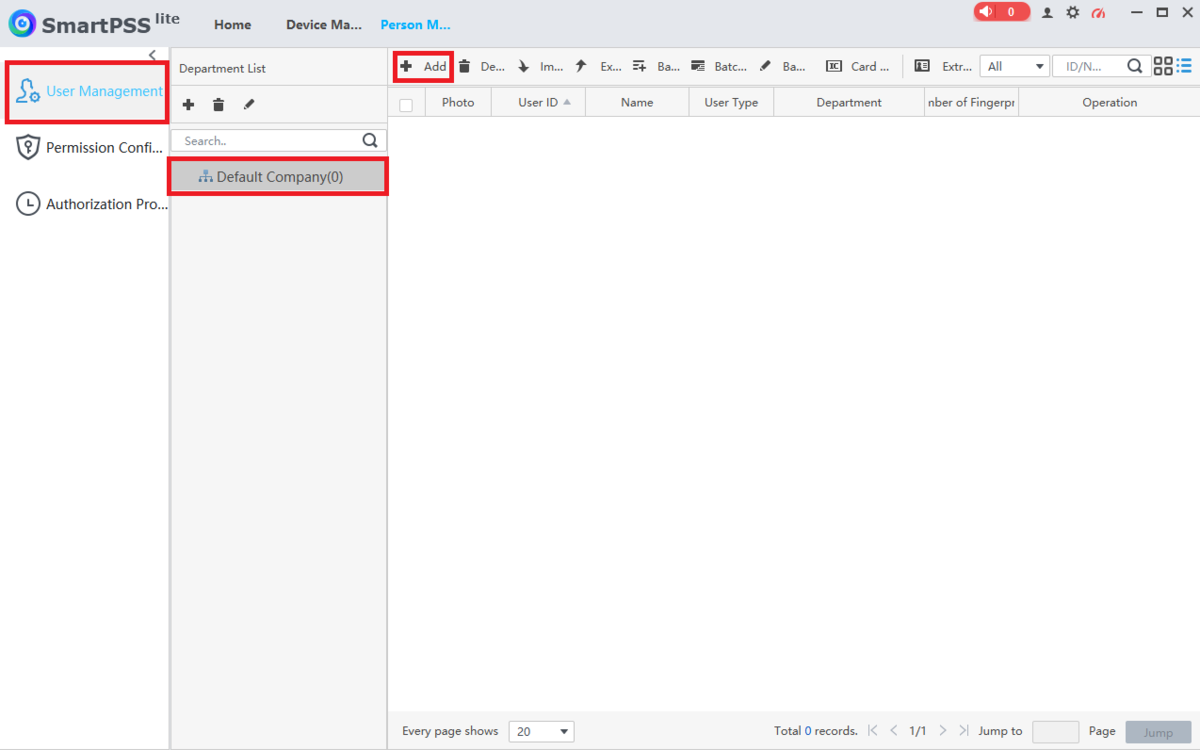
2. Select User Management on the left.
Select the Department or Sub-department from the "Department List".
Then click on + Add
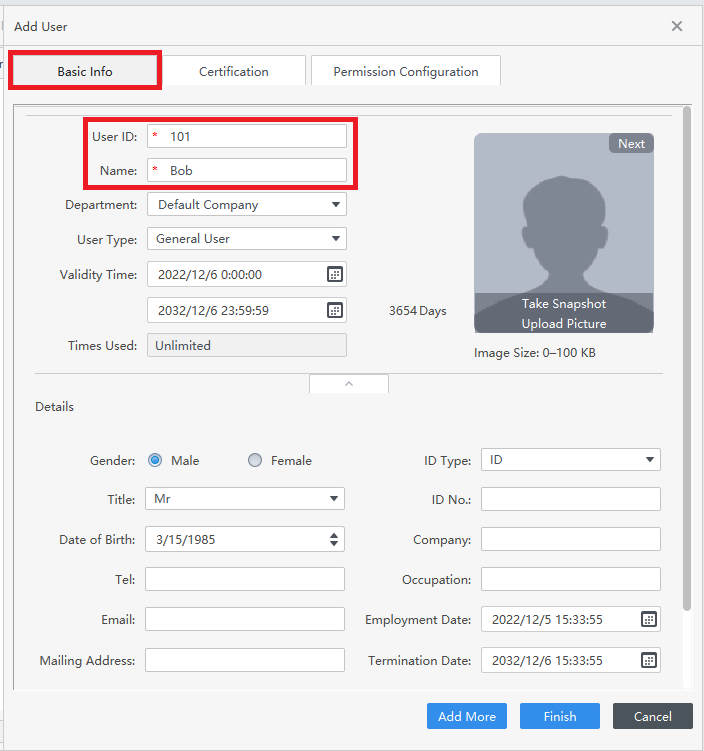
3. Select the Basic Info tab at the top.
Input a numberical ID number in the User ID field.
Then enter the name of the user in the Name field.
Adjust and fill in any other settings and fields on this page
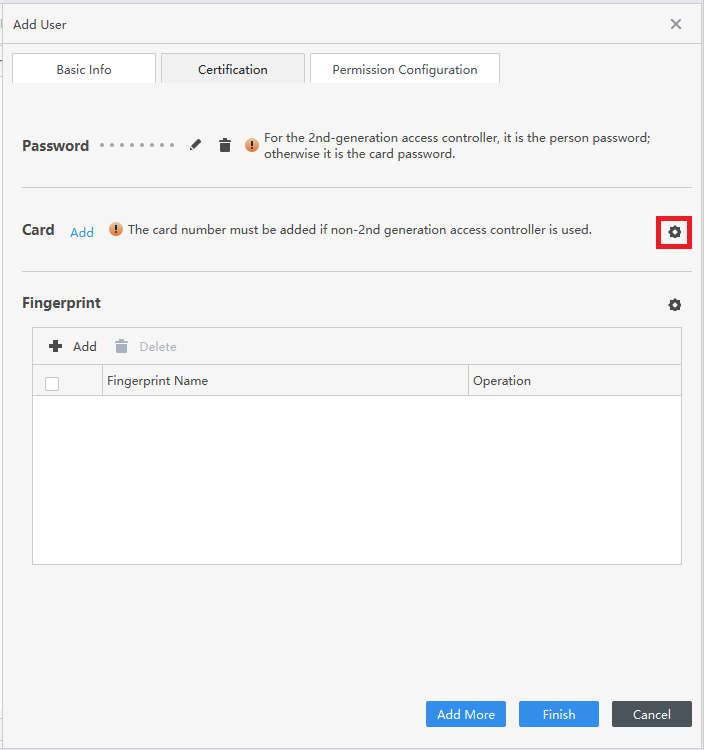
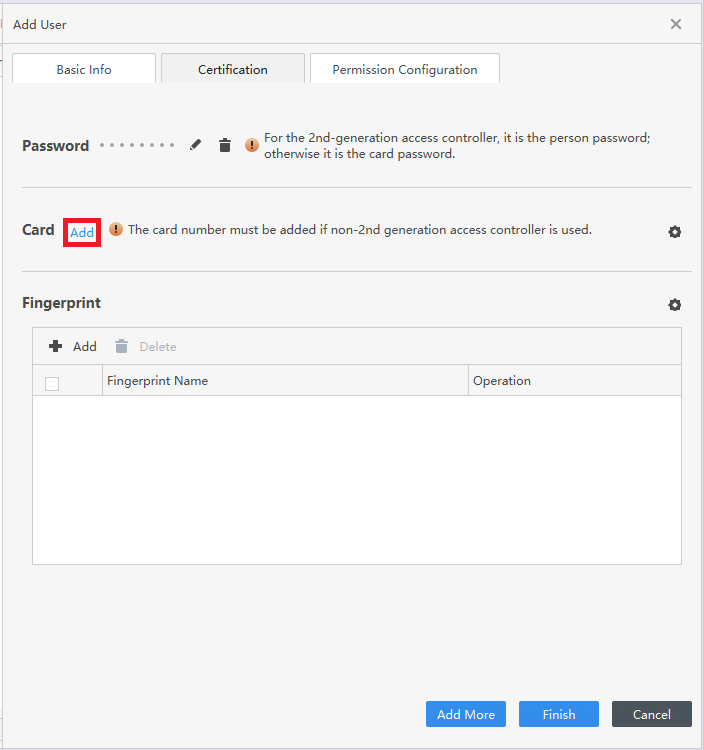
4. Select the Certification tab at the top.
If you want to give this user a numberical code for unlocking the doors on the access controller, select Add next to "Password", otherwise skip to the next step.
Enter a numerical code in the New Password field. (Passwords can be anywhere from 1 to 8 digits long.)
Enter the same numerical code in the Confirm Password field.
Then click OK
5. If you want to assign a card to this user, first select the Gear icon to the right of "Card", otherwise skip to Step 9
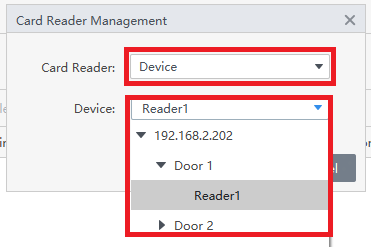
6. Click on the drop-down next to "Card Reader" and either select Card Issuer if you are using a USB card enrollment device connected to your computer, or Device if you are using a card reader that is already wired to the ASC3202B.
If you selected Device, click on the drop-down next to "Device" and select which reader you plan to use to scan in the card for this user.
Then click on OK
7. Select Add next to "Card"
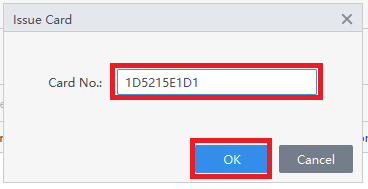
8.Scan the card on the physical reader connected to the connections on the ASC3202B associated with your selection from Step 6 above.
Once the card number appears in the field, click on OK
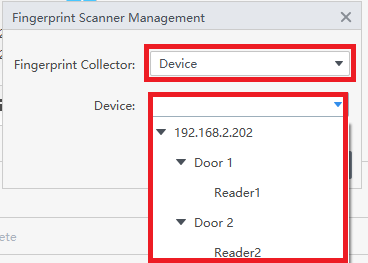
9. If you want to add a fingerprint to this user, first select the Gear icon to the right of "Fingerprint", otherwise skip to Step 14
10. Click on the drop-down next to "Fingerprint Collector" and either select Fingerprint Scanner if you are using a USB fingerprint enrollment device connected to your computer, or Device if you are using a fingerprint reader that is already wired to the ASC3202B.
If you selected Device, click on the drop-down next to "Device" and select which reader you plan to use to scan in the fingerprint for this user.
Then click on OK
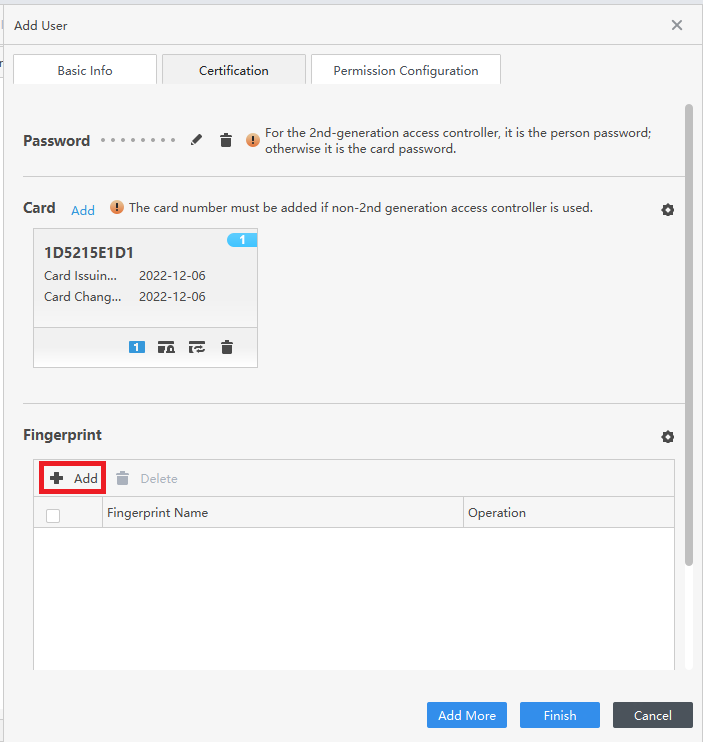
11. Select + Add below "Fingerprint"
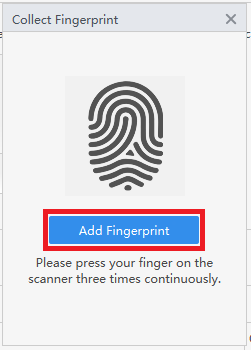
12. Select Add Fingerprint
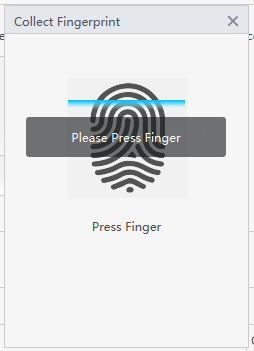
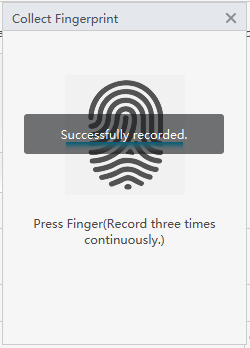
13. When it says "Please Press Finger", place a finger on the fingerprint scanner connected to the connections on the ASC3202B associated with your selection from Step 10 above.
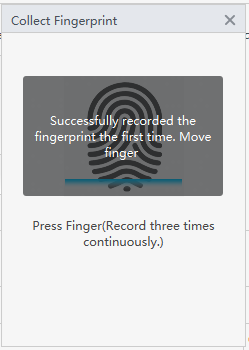
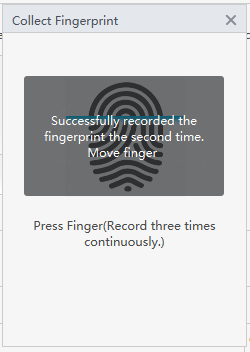
Once it says "Successfully recorded the fingerprnt the first time", lift up the finger and press it down again. Do this a total of 3 times, until it says "Successfully recorded"
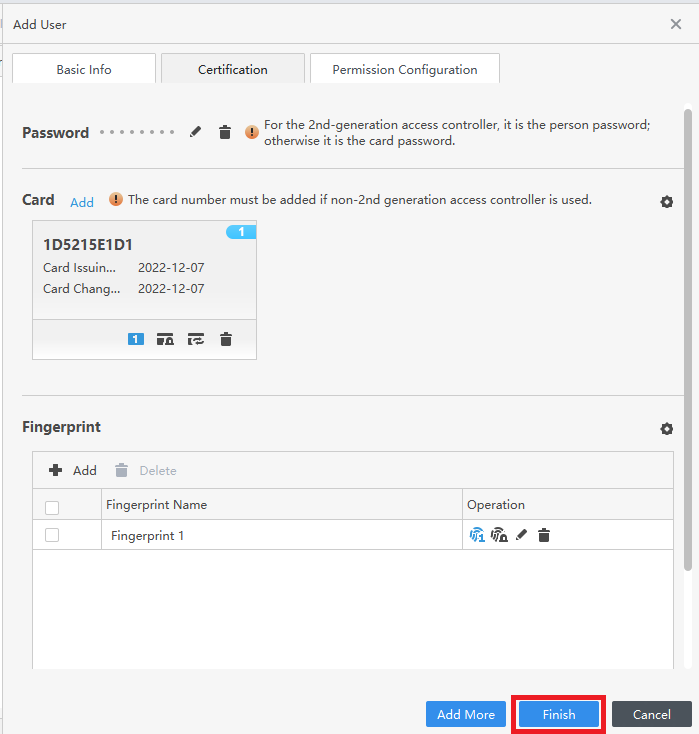
14. Once you are done adding a password, cards, and fingerprints, select Finish at the bottom
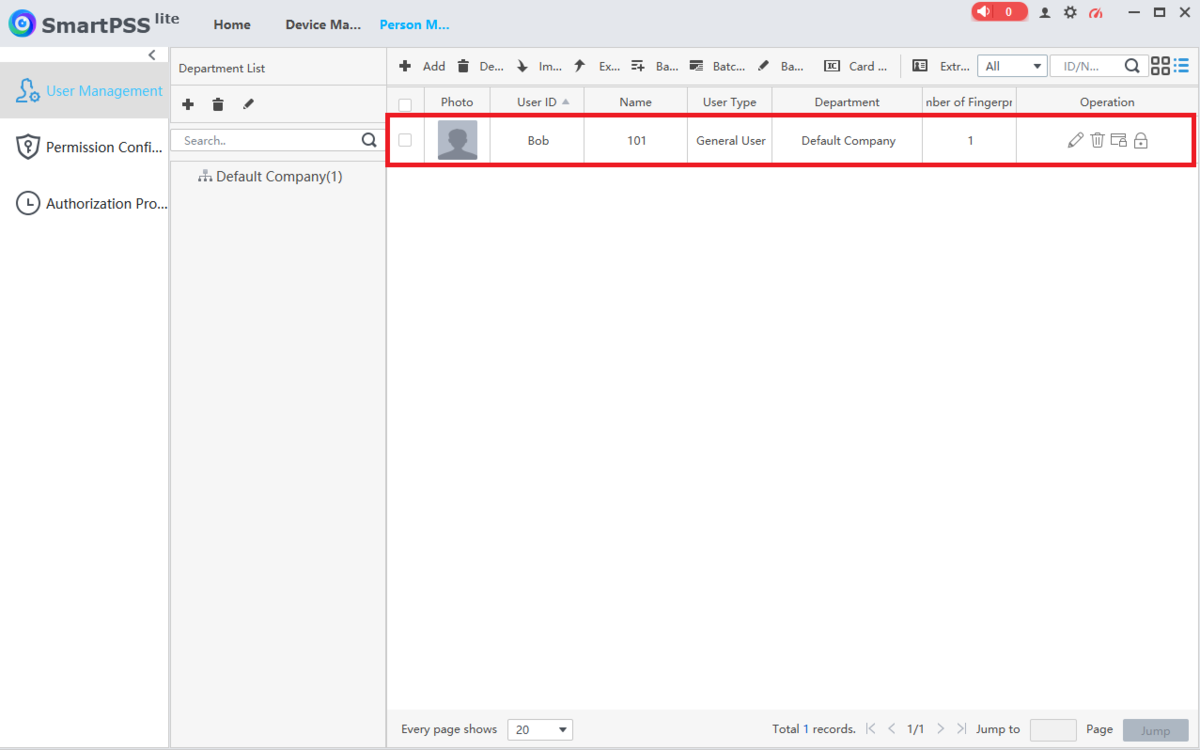
15. Now that the user has been added, you will see them in the list
Configuring User Permissions
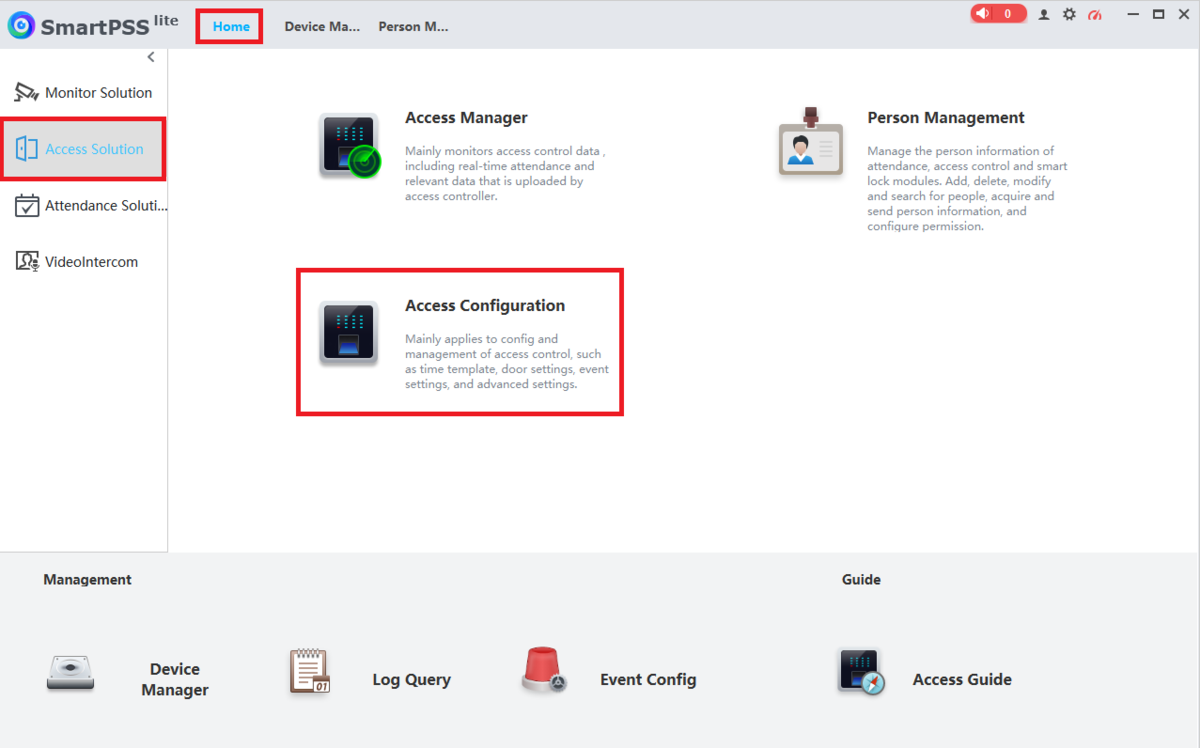
1. Select Home at the top of SmartPSS Lite.
Select Access Solution on the left.
Then select Access Configuration
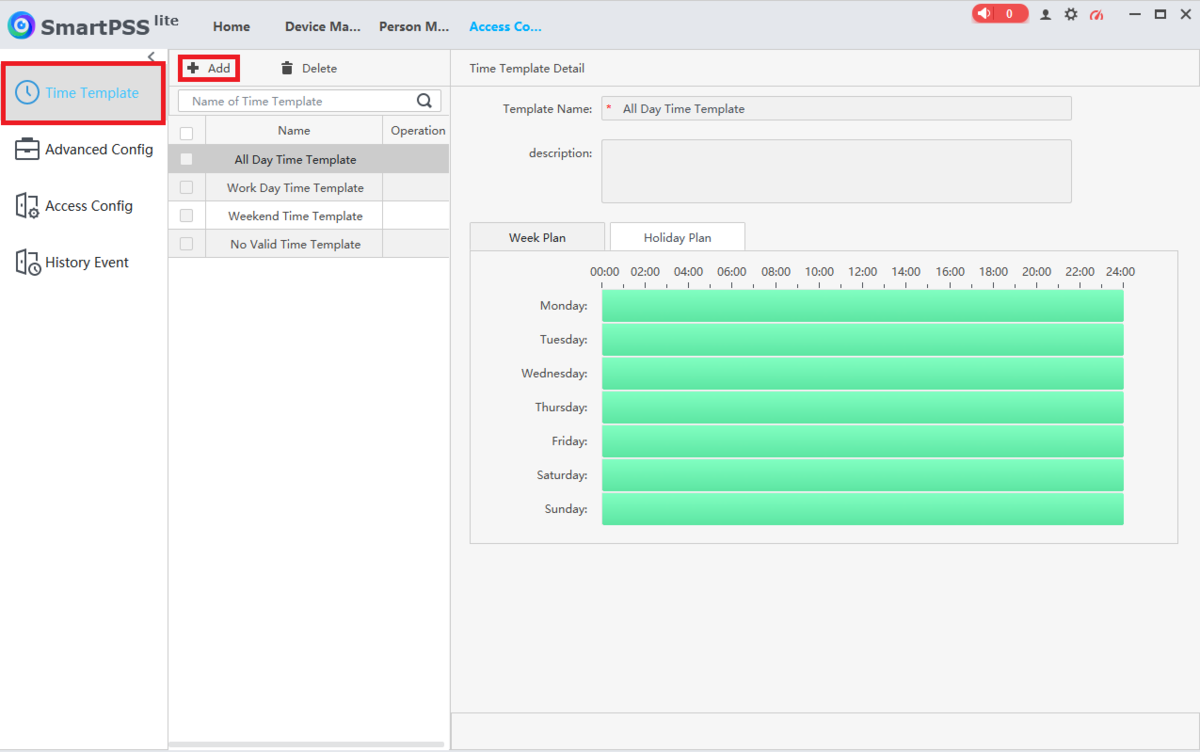
2. Select Time Template on the left.
Then select + Add at the top ot create a new Time Template
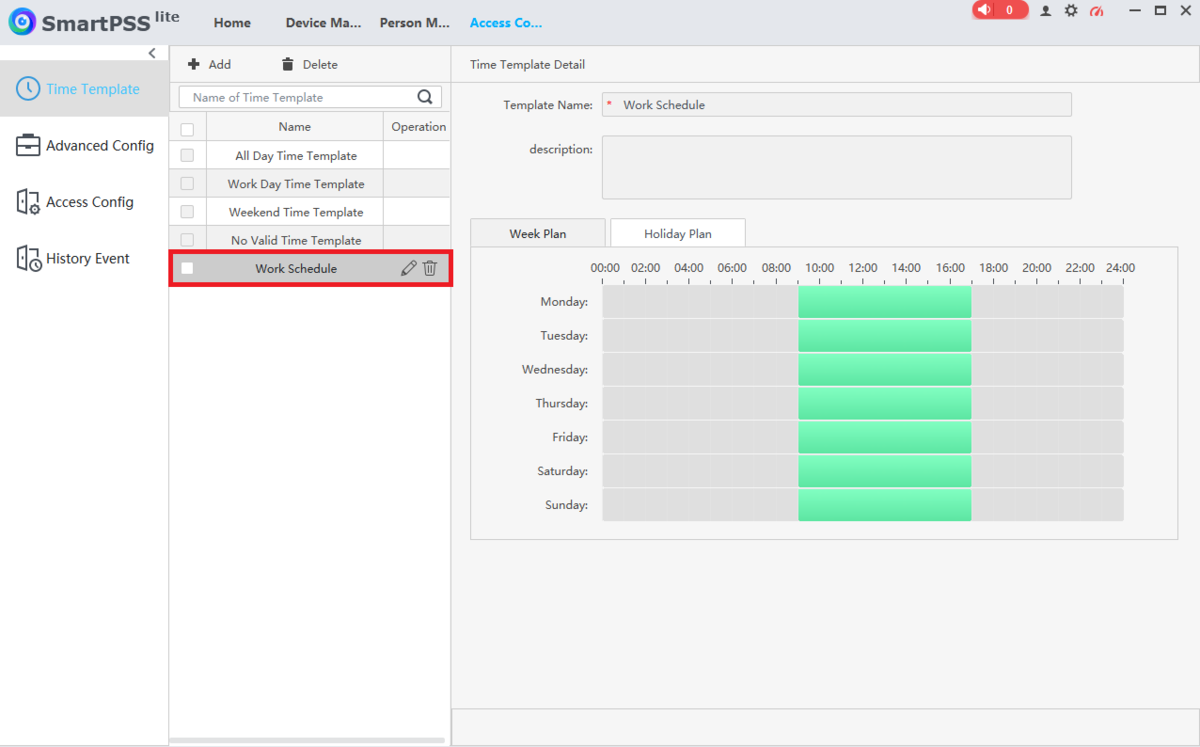
3. Enter a name for the Time Template you are creating in the Template Name field.
Optionally, put in any other extra information in the Description field.
Select the Week Plan tab and then modify the schedule for each day of the week below.
Then select Save at the bottom
4. You'll see the Time Template you just created in the list
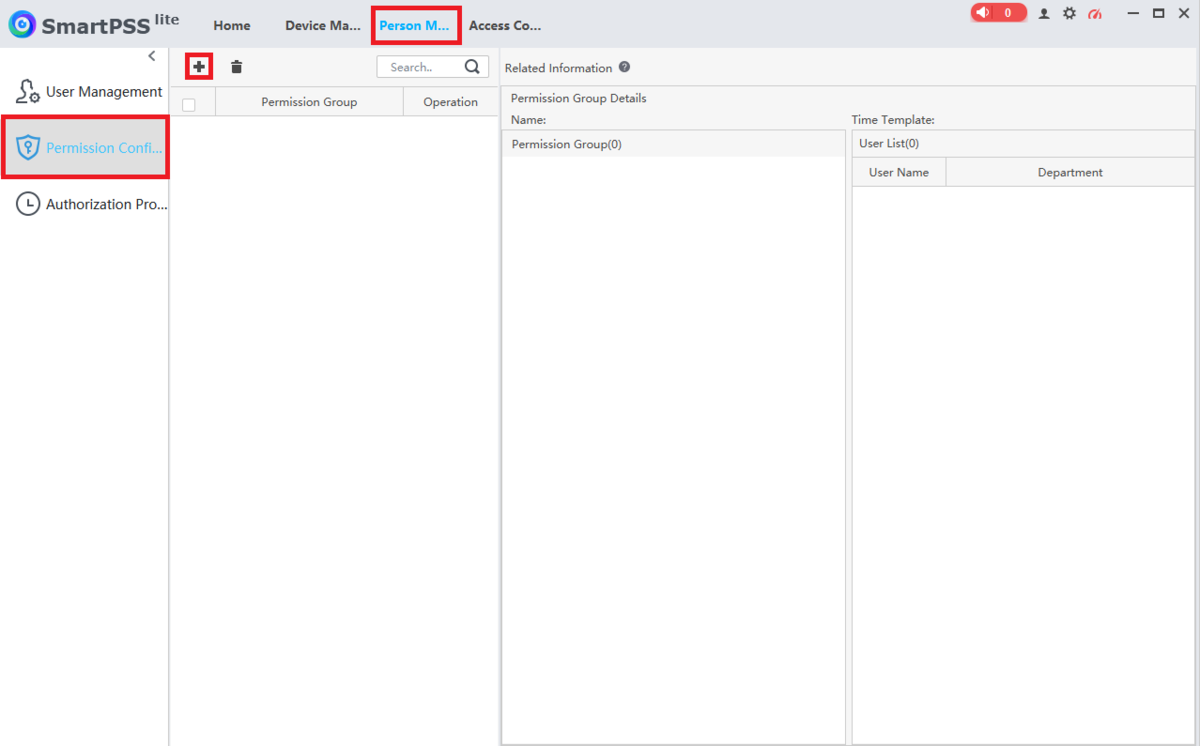
5. Select the Person Management tab at the top. (If you have closed it you can navigate to it via Home -> Access Solution -> Person Managment).
Select Permission Configuration on the left.
Then click on the + button at the top
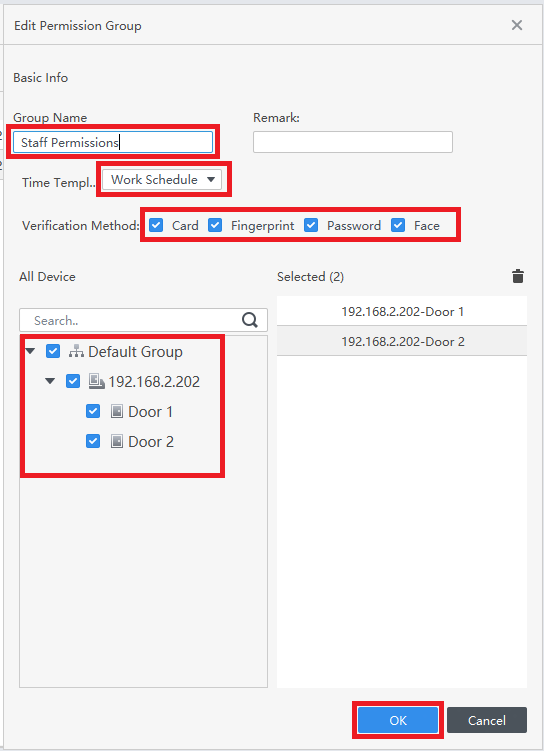
6. Enter the name for this permission group in the Group Name field.
Select the Time Template you want to use from the drop-down list labeled Time Template.
Check the boxes next to all the options you want to allow to unlock this group of doors, next to Verification Method.
Then check all the doors you want to include in this group at the bottom left.
Click on OK at the bottom
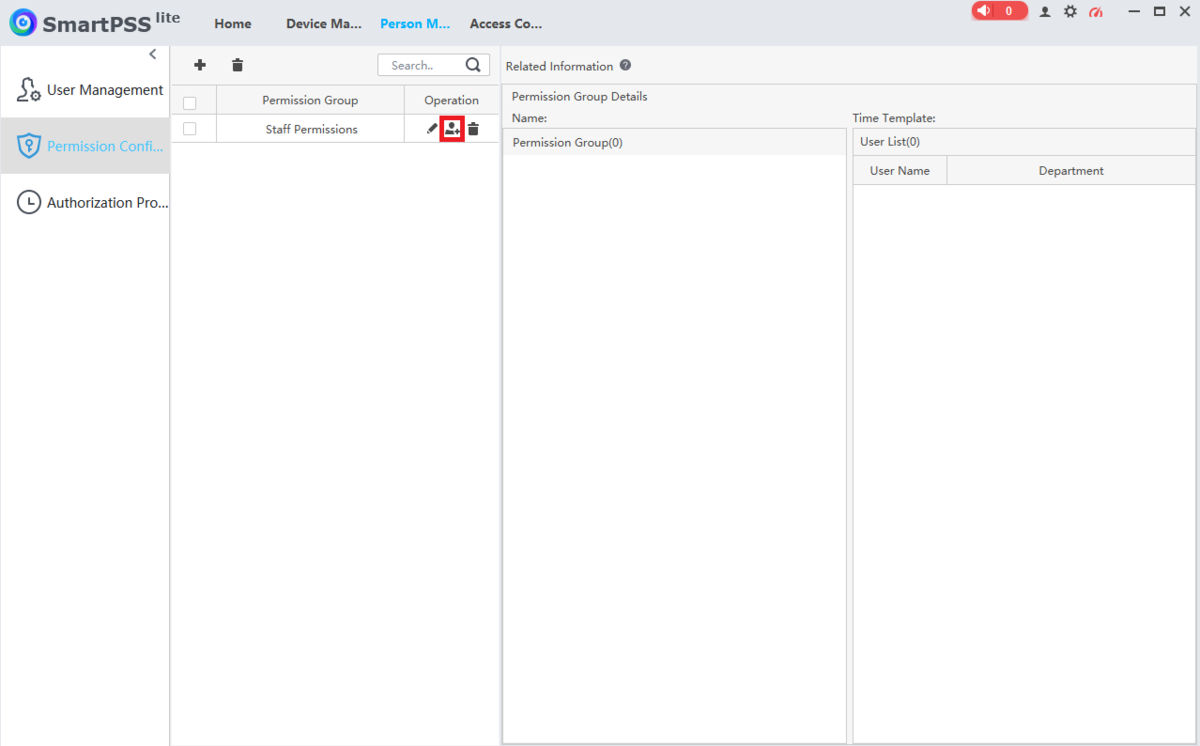
7. Select the Add a User icon under "Operation" next to the Permission Group you just created
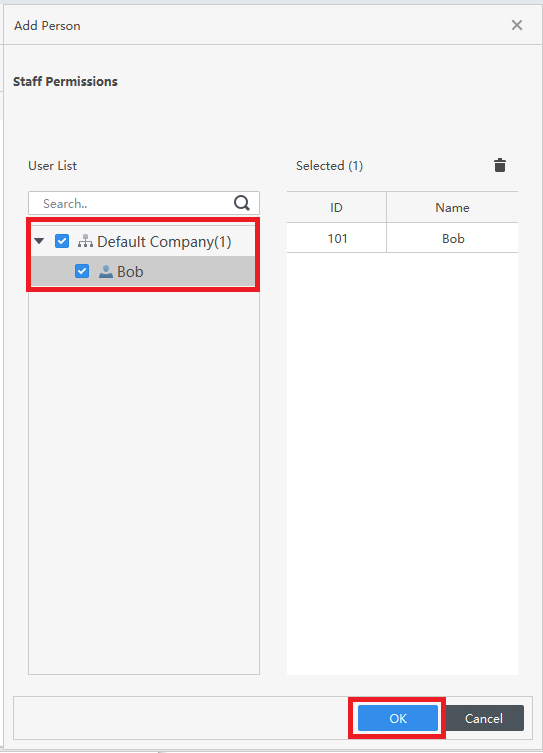
8. Check the boxes next to all the users on the left that you want to add to this Permission Group.
Then click OK at the bottom
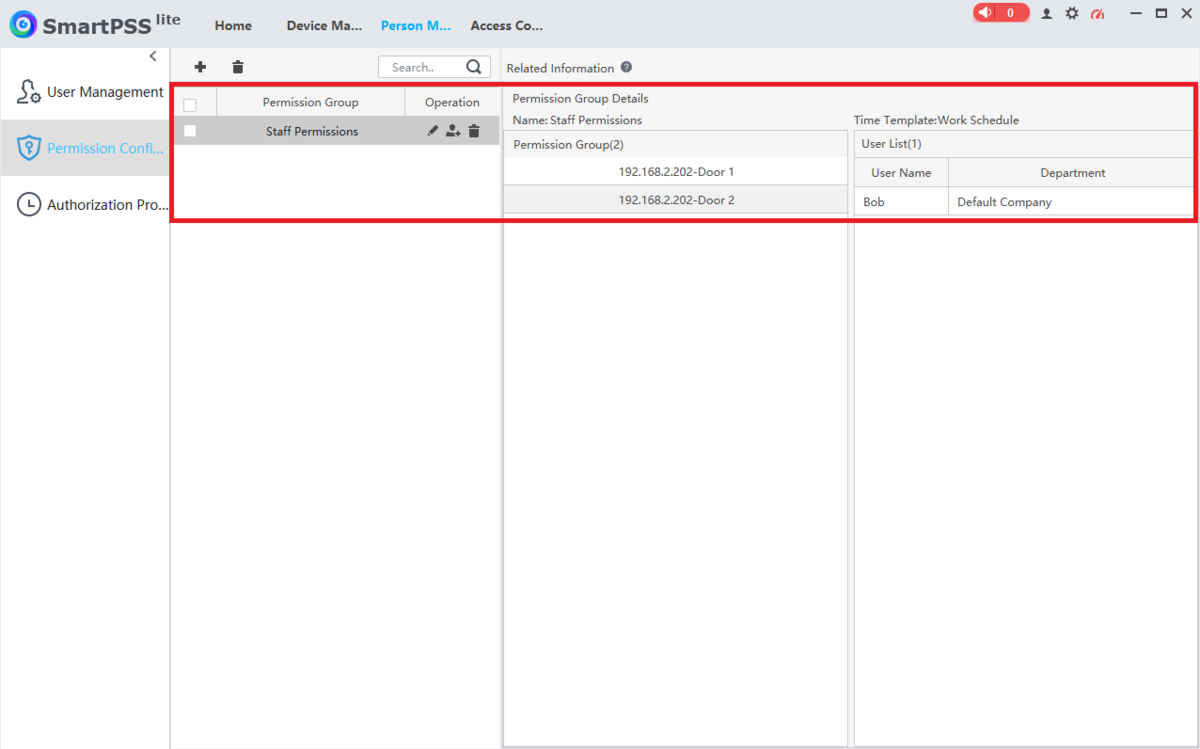
9. You will see the Permission Group with the saved permissions in the list
