Access Control/How To Setup Holiday Schedule On DHI ASC3202B
Contents
How To Setup Holiday Schedule On DHI-ASC3202B
Description
This article will cover how to setup a Holiday Schedule on a DHI-ASC3202B
Prerequisites
- Initialized DHI-ASC3202B
- A Computer connected to the DHI-ASC3202B
Video Instructions
Coming Soon
Step by Step Instructions
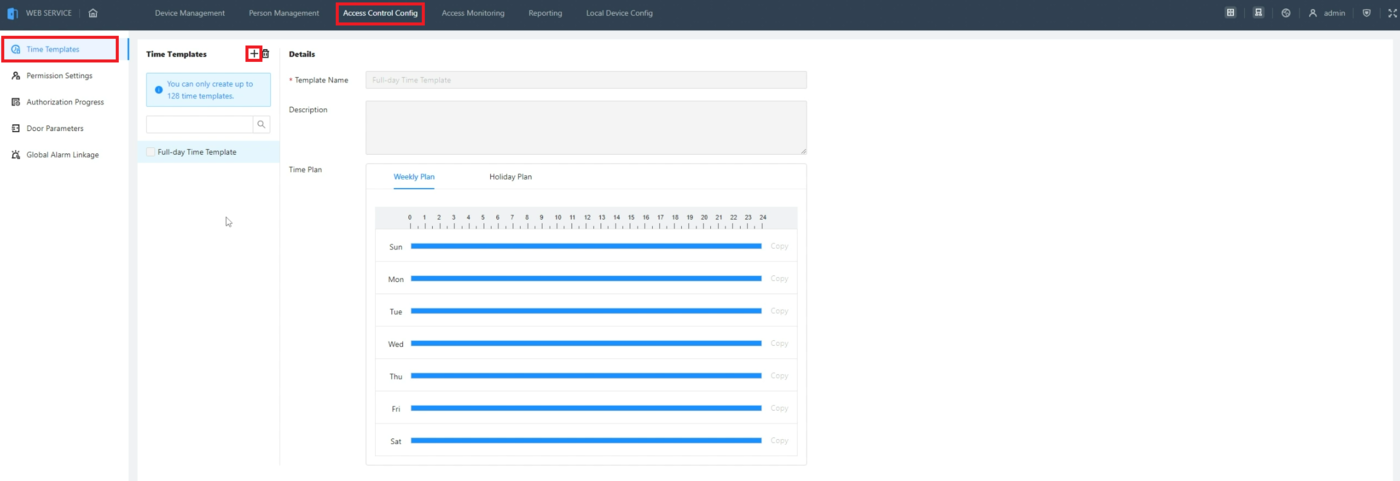
1. Log into the web interface of the ASC3202B and click on Access Control Config at the top.
Select Time Template on the left.
Then click on the + symbol to create a new Time Template
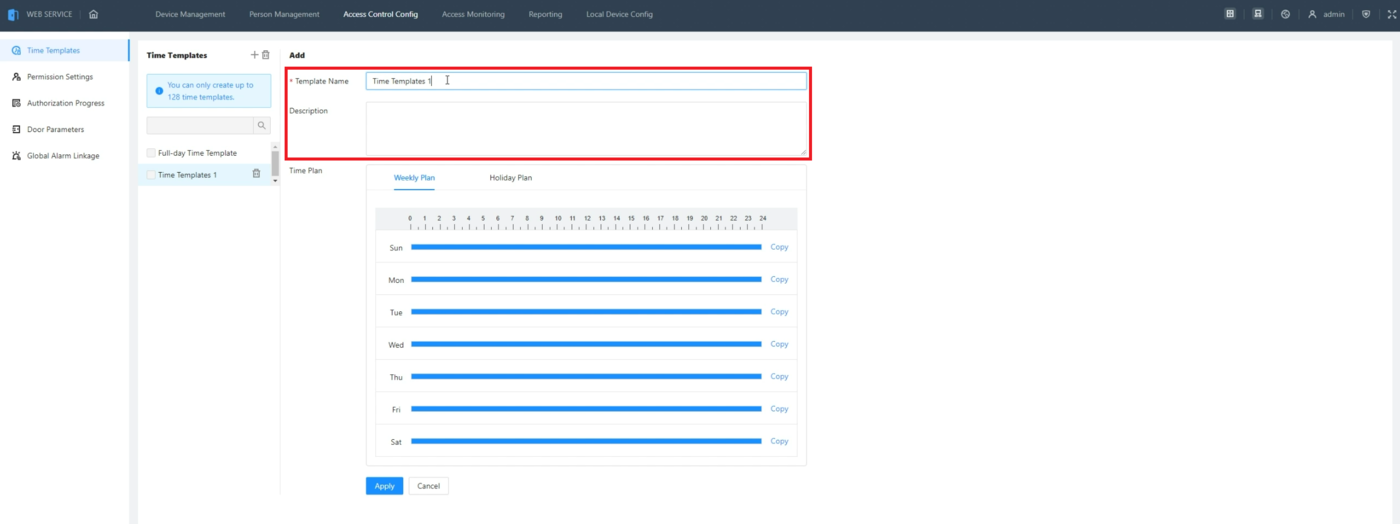
2. Enter a name for the Time Template you are creating in the field next to Template Name.
Optionally, put in any other extra information in the Description field
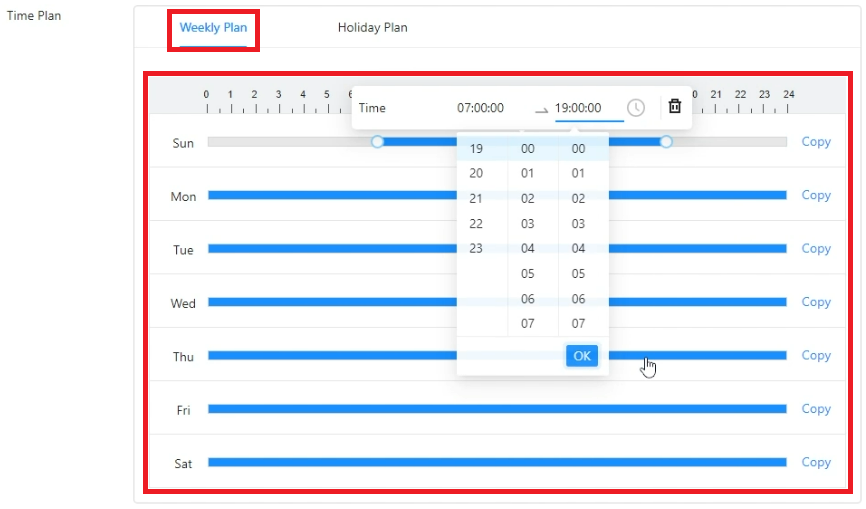
3. Select Weekly Plan at the top of the Time Plan section.
Then use the sliders or choose from the drop-downs to adjust the start and end time for the schedule for each day of the week
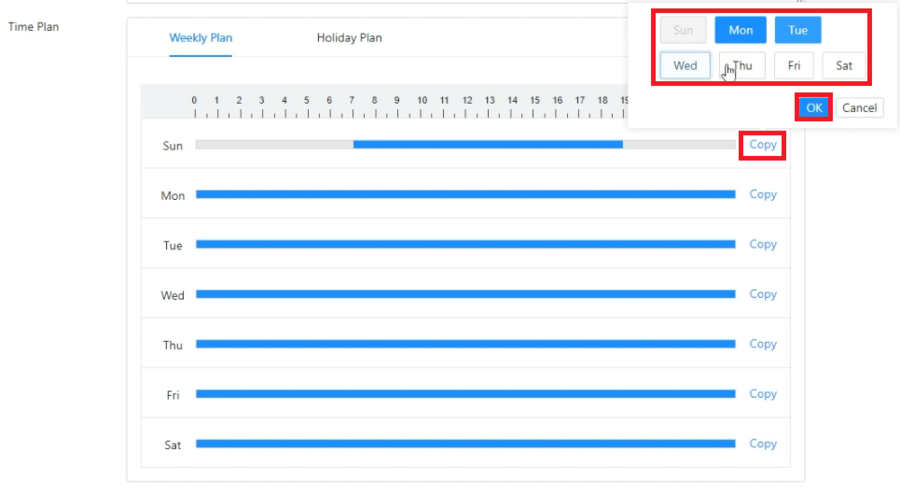
4. If you want to copy the time settings from one day to another, click on Copy to the right of that day and then select the days of the week to copy it to.
Then click on OK to push those changes to those days
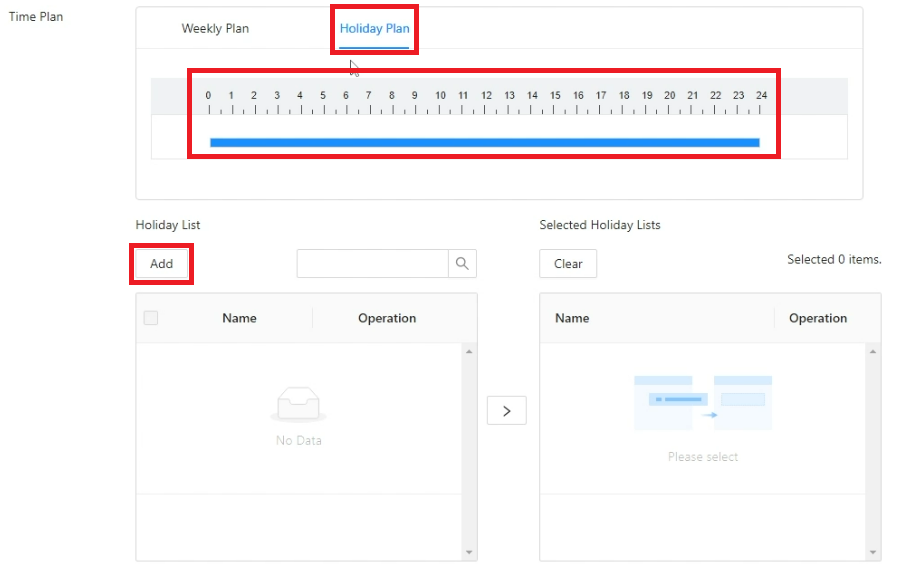
5. To set the Holiday schedule for this time template, click on Holiday Plan at the top of the Time Plan section.
Then adjust the access schedule for holidays. (If you don't want anyone to have access during holidays, you can clear out the holiday schedule.)
Select Add below Holiday List to add a specific day as a holiday
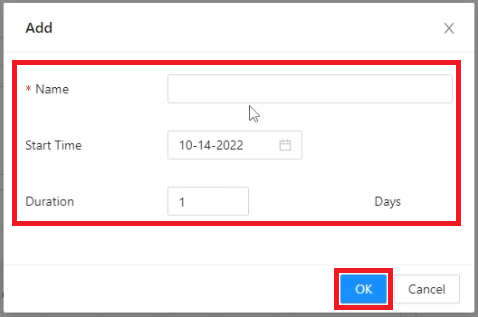
6. Enter the name of this holiday in the field next to Name.
Select the drop-down next to Start Time and set it to the day this holiday will start.
Then enter a number in the field next to Duration for how many days the holiday will last.
Click on OK at the bottom
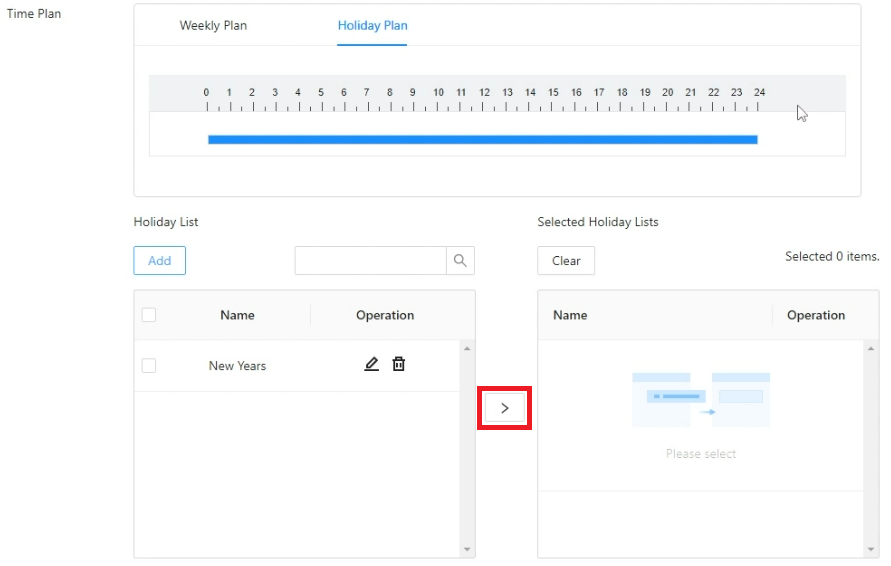
7. The holiday you just created will appear in the list on the left.
You can repeat the process from Steps 5-6 above for more holidays.
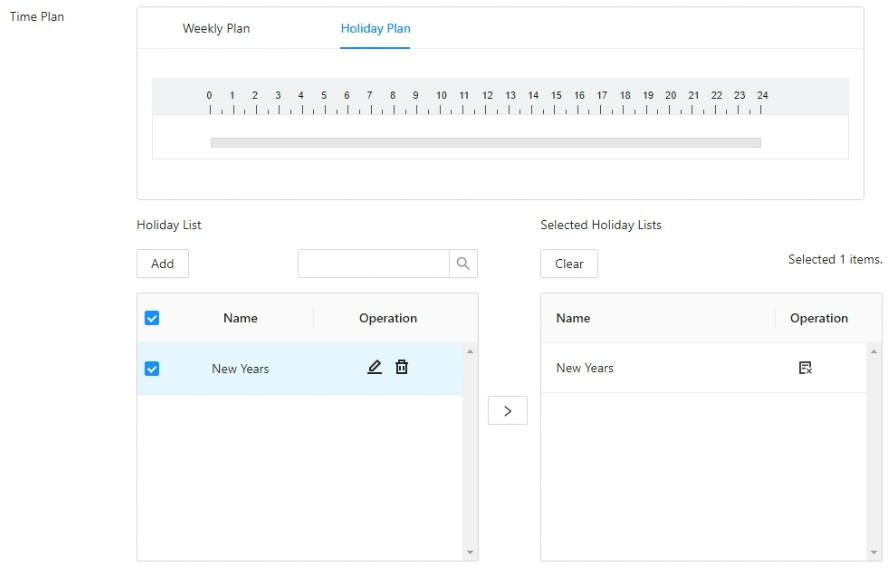
Once you have all the holidays you want in the list on the left, click on the > button to make them active on this Time Template
8. After setting up the Holiday schedule, you can apply the time template to a door group and when the holiday occurs, it will overwrite the regular schedule for those doors and users.
