3rdParty/How To Add an Empower Camera to A Dahua Recorder
Contents
How to Add an EmPower Camera to a Dahua Recorder
Description
This article will cover how to add a Unisight EmPower IP camera to a Dahua NVR, DVR, or XVR
Prerequisites
- Dahua NVR, DVR, or XVR on the latest firmware
- EmPower Camera on latest firmware. NOTE: Older firmware will not work.
- EmPower Config Tool: https://unisight.net/empowerconfigtool.php
Step by Step Instructions
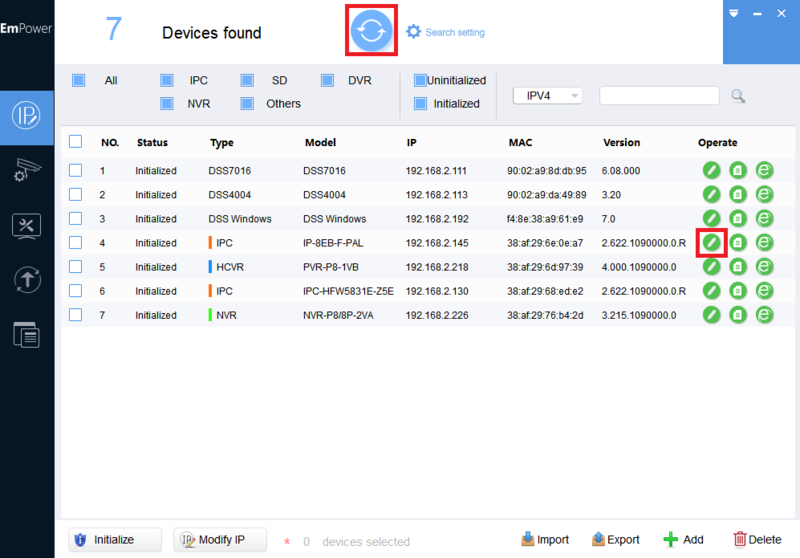
1. Open the EmPower Config Tool and select the Refresh Search button at the top to search for all EmPower device on the network
(You may need to select "Search setting" and input the IP range and/or username and password of the camera)
When you see the camera in the list, select the Edit (Pencil) button
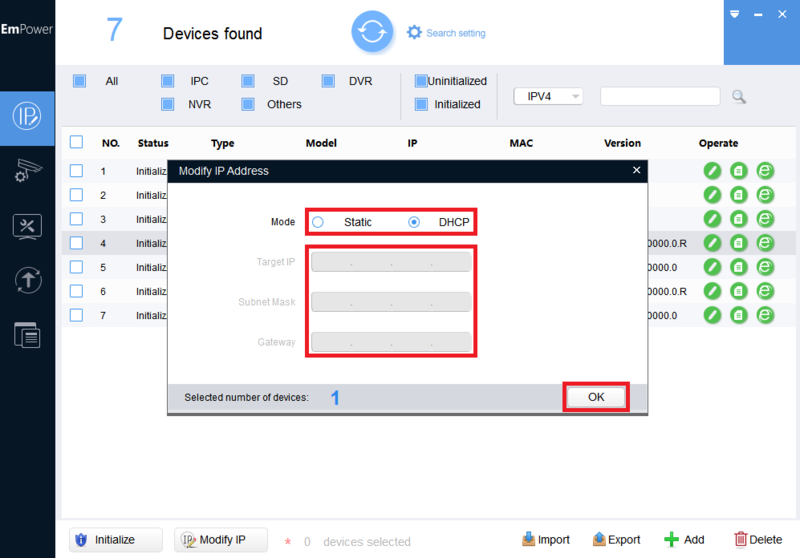
2. Select either "Static" or "DHCP" depending on if you want the manual choose the IP address or have the router choose the camera's IP address
If you choose "Static", fill in the "Target IP", "Subnet Mask", and "Gateway" to match the IP network scheme of the network the recorder is on
Select "OK" to save the settings
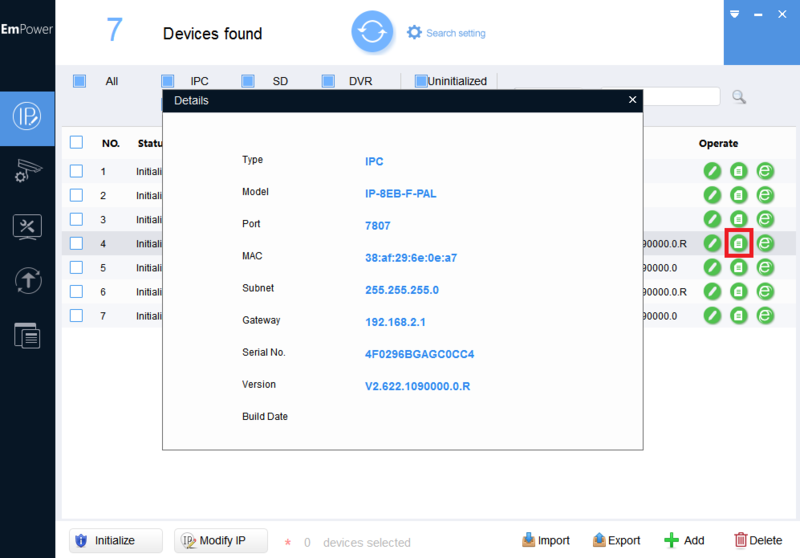
3. Select the Details (Paper) button to verify all the network details of the camera
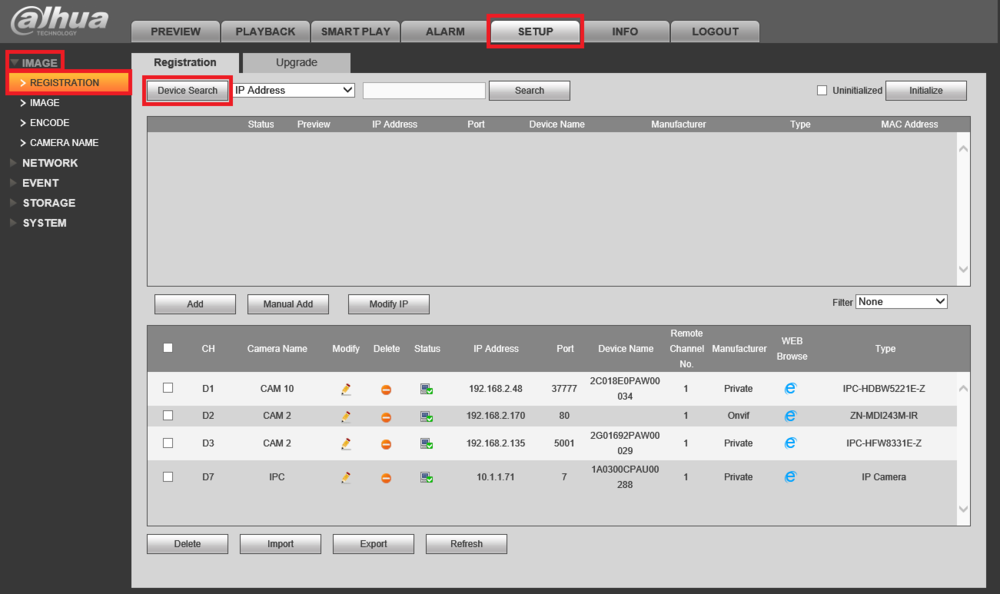
4. Log into the Dahua recorder
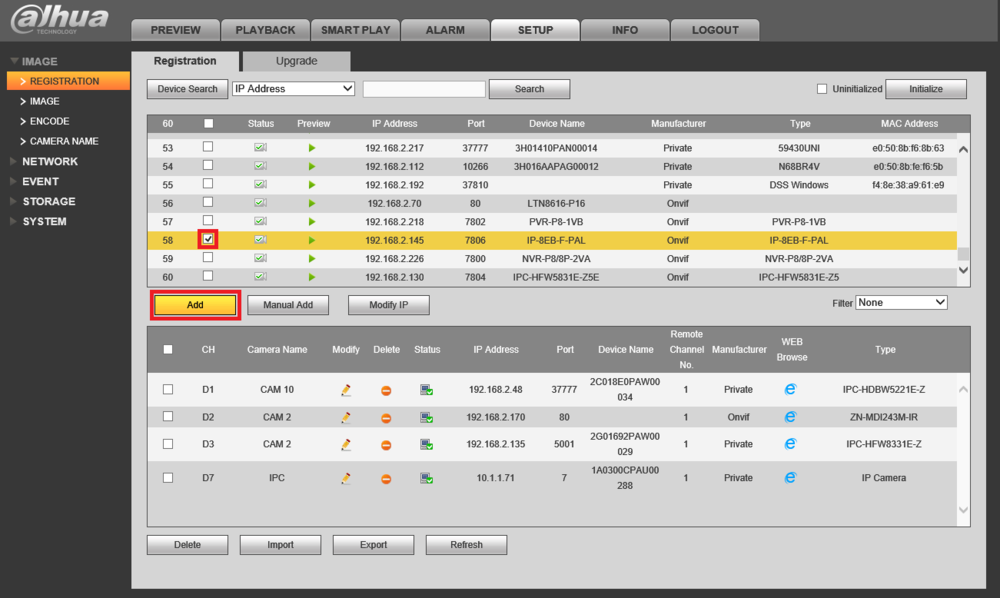
Select "Setup", "Image", and "Registration" to open the Camera Registration page
Select "Device Search"
5. Scroll through the list of cameras on the top until you see the EmPower camera you are going to add
Check the box next to the EmPower camera and select "Add"
(If you don't see the camera in the list, select "Manual Add" and skip to Step 7)
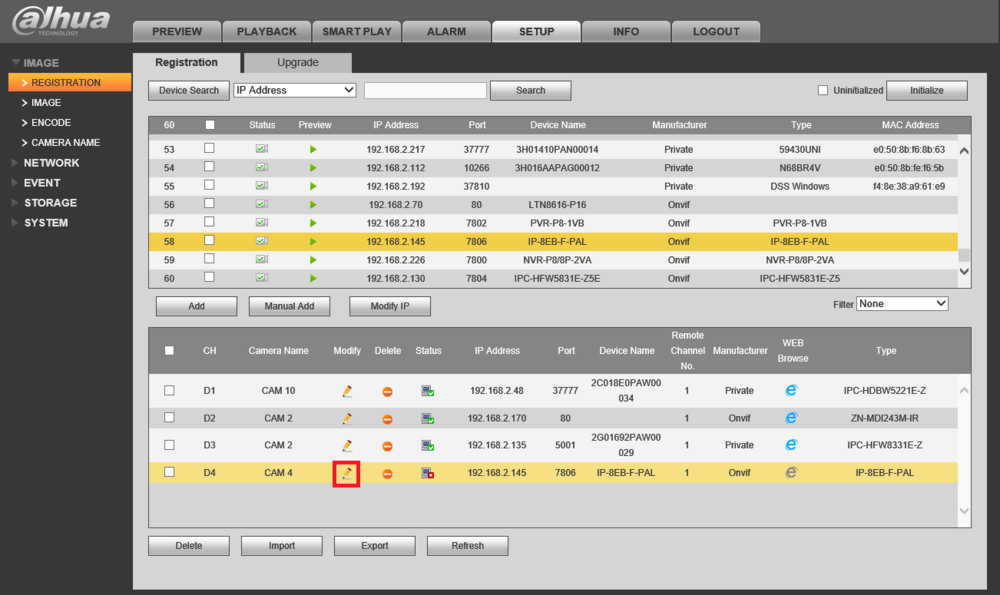
6. If the Status shows a Red X, select the Modify (Pencil) button next to the camera
(If the Status shows a Green Check Mark, skip to Step 9)
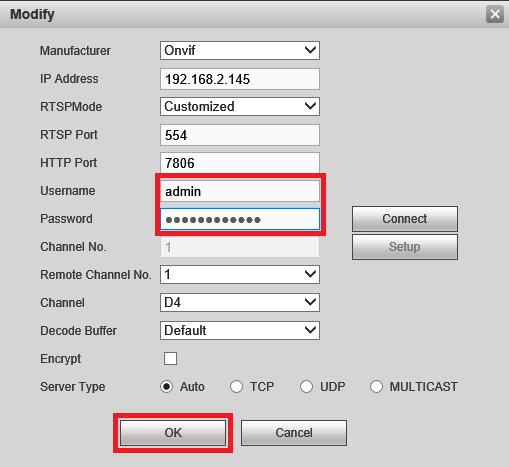
7. Verify all of the settings on this page match the network information for the camera from Step 3
Fill in the Username and Password for the camera
Select "OK"
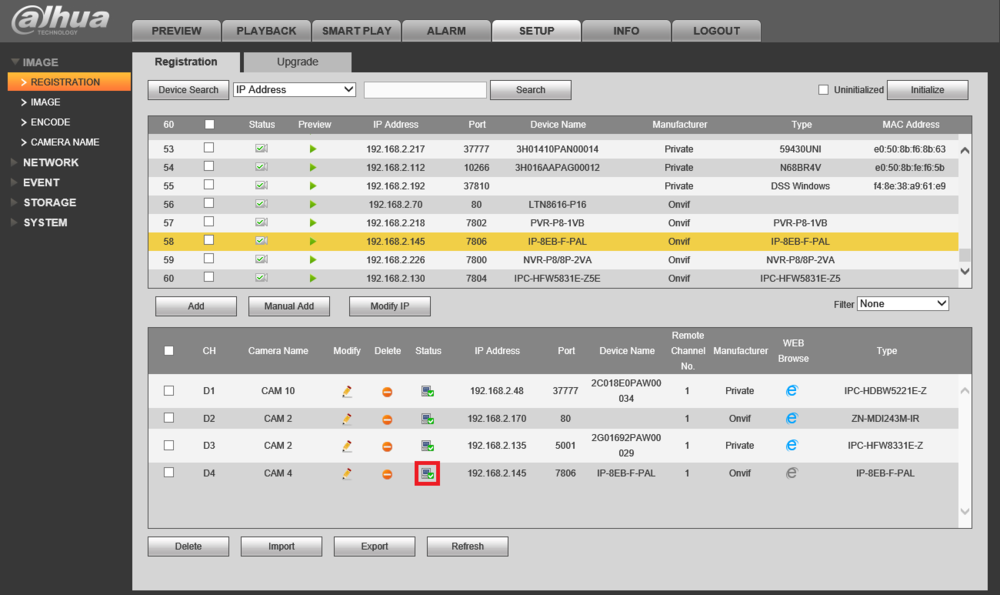
8. You should see the Status for the camera change from a Red X to a Green Check Mark
(If you don't see it change, select "Refresh". If it still doesn't change after refreshing repeat Steps 6 and 7)
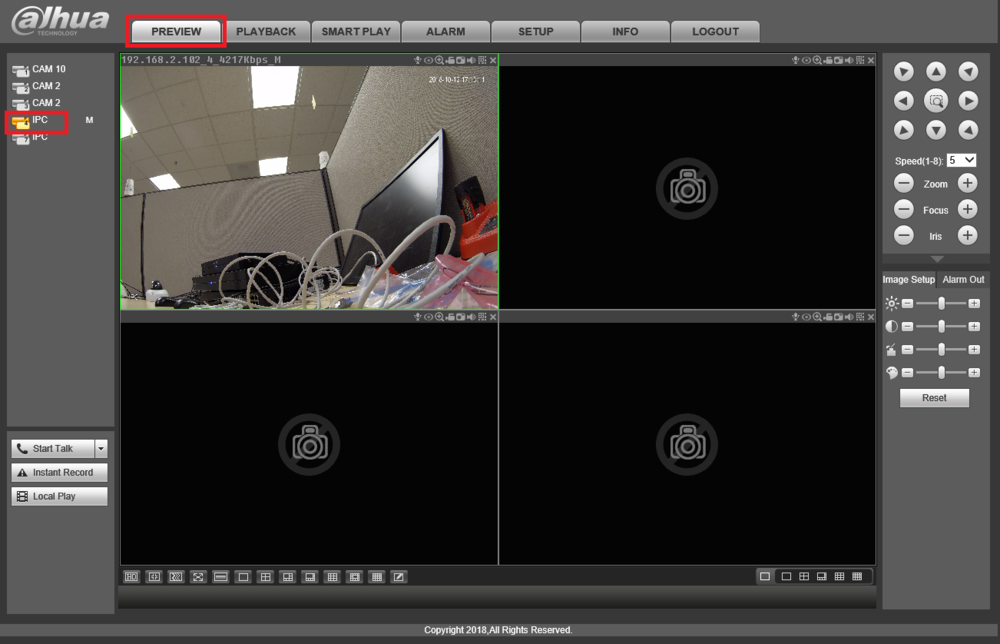
9. Select "Preview" and then select the channel for the newly added camera on the left
You should see a live view of the EmPower camera
