3rd Party VMS/Exacq
Contents
ExacqVision
Officially Support Device List
Instructions
- Add Dahua Camera
- Add Dahua Camera via ONVIF -Use this method to add Dahua devices
Additional Info
- H.265+ not currently working
- H.265 not currently working
- H.264+ is working
- RTSP Authentication must be set to, "Basic"
|
Feature or Product |
Status |
|
|
Motion Detection |
Motion Sensitivity and Grid Selection supported by Dahua plugin |
|
|
H.265 |
Supported by Dahua plugin up to 5MP; Above 5MP use H.264 |
|
|
180 Cameras |
Supported by Dahua plugin using H.264 only due to high MP |
|
|
Fisheye Dewarp |
Not Supported unless using immervision lens |
|
|
Dahua IVS |
Not Supported |
|
|
Multi-Channel Devices |
Not Supported by Dahua plugin, but ARE supported very well by Multi-Channel ONVIF. Our Multi-Channel devices include - DVRs and NVRs, Multi-Flex, Combo multi-sensor and PTZ (UFO), and the dual sensor corridor camera. |
|
|
Zoom and AutoFocus |
Zoom supported by PTZ controls; Autofocus not supported |
|
|
Area Masking |
Unknown; Need to test |
|
|
Input/Output |
Unknown; Need to test |
Adding Dahua Recorders
Tech Article Using Dahua HDCVI DVR’s as ONVIF Encoders with Exacqvision Date: 7/13/2018
Starting with Exacqvision version 8.2 (December 2016 Release), Exacq users can take advantage of Multi-Channel ONVIF support. Dahua HDCVI DVR’s can function as ONVIF encoders if the necessary architecture exists in your desired VMS platform.
SETUP This feature is not the result of a direct integration with Dahua recorders, but a more general ONVIF integration. Therefore, the Dahua recorder has to be added as an ONVIF device, and there are a few add-ons to the Hostname/IP address that need to be used to access the video streams.
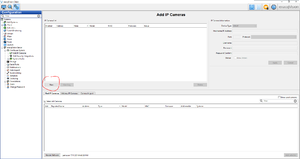
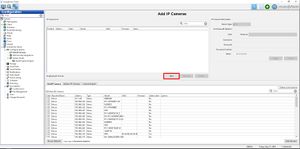
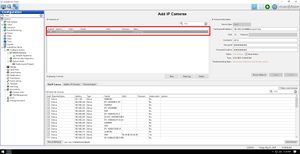
Add the recorder to Exacqvision In the Exacqvision Client, navigate to the configuration area, then through the tree on the left to access the “Add IP Cameras” menu. Click “New” to add the Dahua DVR.
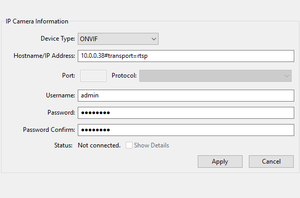
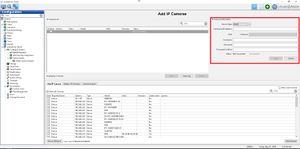
Next, add a device using the “ONVIF” option for device type. Multi-channel support for Dahua recorders is only available through the ONVIF device type. This will not function if the “Dahua” device type is chosen. The Dahua device type is meant for Dahua IP cameras. Notice below that it is necessary to add commands after the traditional Hostname/IP Address. The compatibility with Dahua recorders requires that the RTSP streams be accessed. The command #transport=rtsp points to the compatible stream from the DVR. Applying this will add the first 4 channels of the DVR and will take one camera license.
NOTE - Your IP address will most likely be different. 10.0.0.38 is being used for this example.
The first bank of channels should be connected at this point.
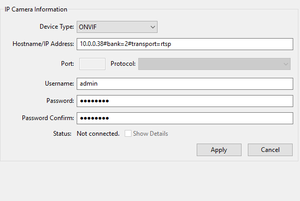
Adding Additional Banks of Cameras The procedure above, as stated, will add a bank of 4 channels from a Dahua DVR to Exacqvision. To make use of more channels from an 8 or 16 channel DVR, it is necessary to add a second, third or even fourth “bank” of cameras. On the Add IP Cameras screen click “New” again to add another ONVIF device. Use the same IP Address, but this time add #bank=2 to the Hostname/IP Address as shown below. This operation will add channels 5-8 and will take another camera license.
There should now be two Devices connected, one representing channels 1-4 and the next channels 5-8.
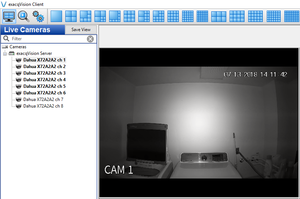
Note: To add channels 9-12 use #bank=3, for channels 13-16 use #bank=4. The live view tab of Exacqvision should show the channels broken out as if they were added as individual cameras. Just as individual cameras, the names can be modified in the settings menu.
Notice above that the first six channels are bold and 7 and 8 are not. It seems to take a few minutes for all channels to be acknowledged and synced completely.
Adding Dahua Multi Sensor Cameras
Adding Dahua Multi Sensor Cameras as ONVIF Encoders with Exacqvision
Starting with Exacqvision version 8.2 (December 2016 Release), Exacq users can take advantage of Multi-Channel ONVIF support.
This feature is not the result of a direct integration with Dahua IP Cameras, but a more general ONVIF integration. Therefore, the Dahua IP cameras has to be added as an ONVIF device, and there are a few modifications to the Hostname/IP address string/URL that need to be used to access the video streams.
The camera used for this guide is IPC-HDBW4231F-E2-M
Step By Step Instructions
In the Exacqvision Client, navigate to the configuration area, then through the tree on the left to access the “Add IP Cameras” menu. Click “New” to add the Dahua DVR.
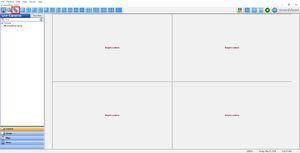
Open the exacqVision Client and select Config (Setup) Page
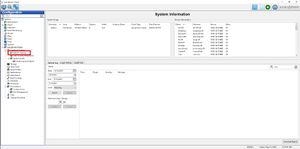
In the device tree on the left, under the Server you wish to add the camera to click 'Add IP Cameras'
Click 'New' to add a new device
The IP Camera Information must be filled entirely
Device Type: ONVIF
Hostname/IP Address: [IP of camera]#transport=rtsp For example, if the camera's IP address is 192.168.1.108, you can use the string '192.168.1.108#transport=rtsp' - If the HTTP port of the camera has been changed from default of 80, make sure to append the port number to the IP (for ex: IP camera at IP address 192.168.1.108 HTTP Port:8080 would use the string: 192.168.1.108:8080#transport=rtsp)
Username Password
Click Apply once all the information is entered
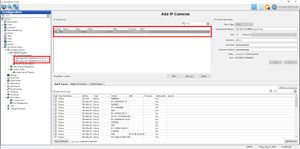
Once the server detects the camera it will appear in the IP Camera List.
After a few moments the fields should update with the camera information
Both streams will appear under the 'Camera Recording' as ch 1 and ch 2
