3rd Party VMS/Milestone/Setup PTZ Controls
Contents
How to Setup PTZ Controls (None, Relative, Absolute)
Description
This article will run through configuring a Dahua PTZ camera to be controlled using PTZ controls in X Protect.
None, Relative, and Absolute
The PTZ model groups the possible movements of the PTZ unit into a Pan/Tilt component and into a Zoom component. To steer the PTZ unit, the service provides absolute move, relative move and continuous move operations. Different coordinate systems and units are used to feed these operations.
- None
- Relative - A Relative Move operation is introduced by the PTZ service in order to steer the dome relative to the current position, but without the need to know the current position. The operation expects a positional translation as an argument referencing a relative coordinate system. This specification distinguishes between relative and absolute coordinate systems, since there are cases where no absolute coordinate system exists for a well-defined relative coordinate ONVIF™ – 6 – PTZ Spec. – Ver. 2.2.1 system. An optional speed argument can be added to the RelativeMove operation with the same meaning as for the AbsoluteMove operation
- Absolute - The PTZ service provides an AbsoluteMove operation to move the PTZ device to an absolute position. The service expects the absolute position as an argument referencing an absolute coordinate system. The speed of the Pan/Tilt movement and the Zoom movement can be specified optionally. Speed values are positive scalars and do not contain any directional information. It is not possible to specify speeds for Pan and Tilt separately without knowledge about the current position. This approach to specifying a desired position generally produces a non-smooth and non-intuitive action.
Source: ONVIF™ PTZ Service Specification
Prerequisites
- X Protect 2017 R3
- A Dahua ONVIF compliant PTZ camera already added to the X Protect Management Client.
Video Instructions
Step by Step Instructions
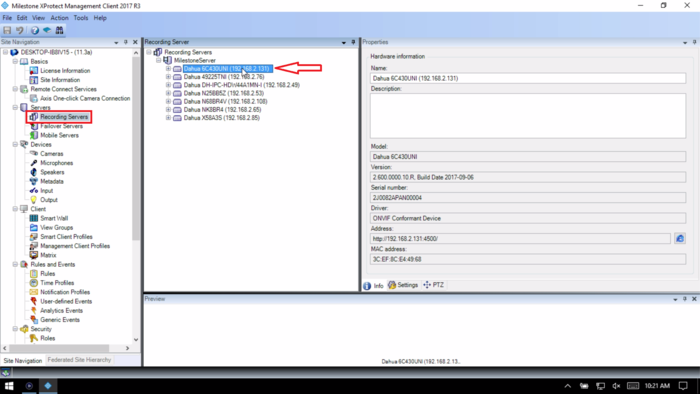
1. In the X Protect Management Client, select Devices -> Cameras. Under the device list expand the camera groups until you see your PTZ camera, then select it.
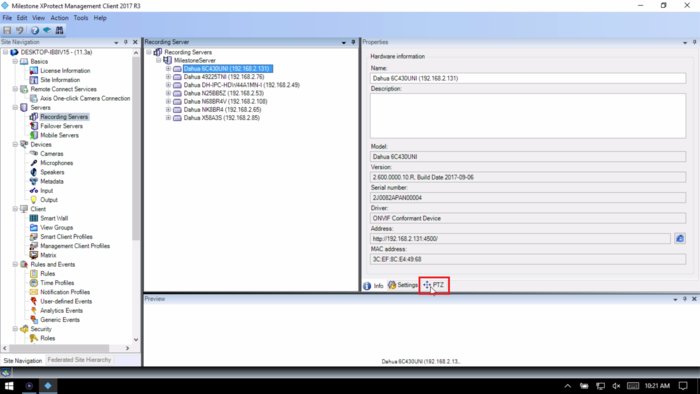
2. Select the PTZ tab.
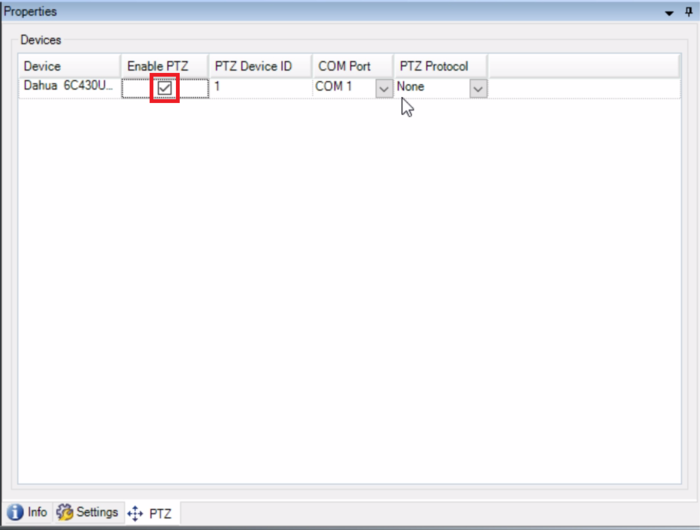
3. Check the box next under "Enable PTZ".
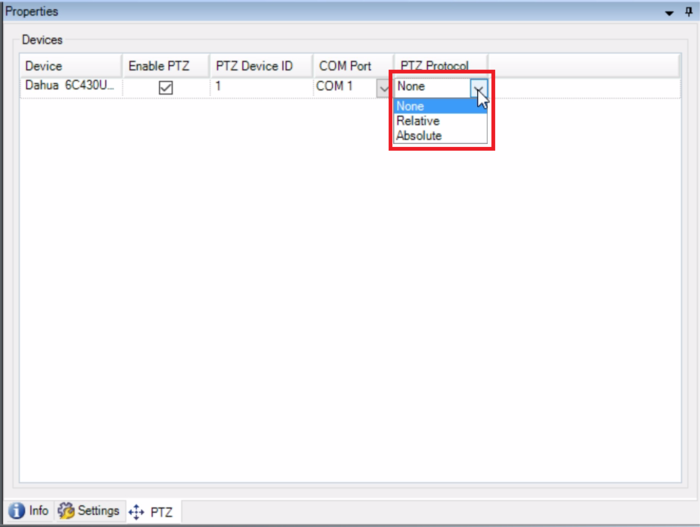
4. Under "PTZ Protocol", select the control scheme you would prefer from the drop down (None, Relative, or Absolute).
[See explanations of different control schemes at the top of this article.]
5. Select the "Info" tab at the bottom. When it asks you "Do you want to save changes?", select "Yes".
6. Open the X Protect Smart Client. (If it was open during the above steps, close it and then re-open it.)
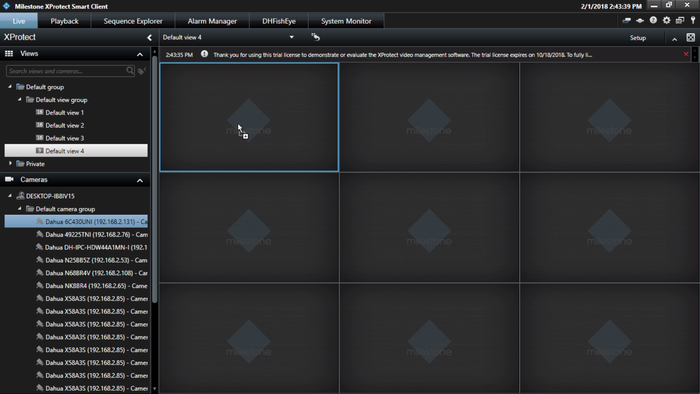
Open the "Live" section at the top. Select your desired view from the view groups. Find the PTZ camera in the camera list on the left. Drag it into your current view.
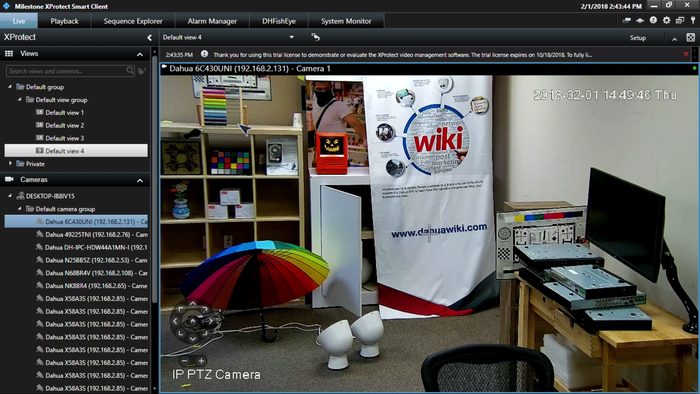
7. Double click on the live view of the PTZ camera to make it full-screen. Use your cursor to click in different directions to make the PTZ camera move in that direction.
Alternatively, use the on-screen controls at the bottom left of the camera feed.
