Access Control/How To Add Card Fingerprint Password to DHI ASC3202B User
Contents
How to Setup a DHI-ASC3202B
Description
This article will cover how to setup User Access Permission on DHI-ASC3202B Access Controller.
Prerequisites
- DHI-ASC3202B
- A Computer connected to the DHI-ASC3202B
Step by Step Instruction
Create New Person and Department.
*If user already exist, Click on the Edit icon under Operation and follow instruction from Step #5.
1. Click on Person Management at the top of the web interface.
Then click on the + symbol to create a new Department
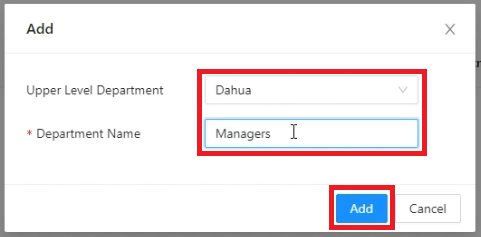
2. Click on the drop-down next to Upper Level Department to choose which department this new department will fall under.
Then click on Add
3. The new department will show up in the list on the left.
To add a user, select the department you want to add them to from the list, then click on Add
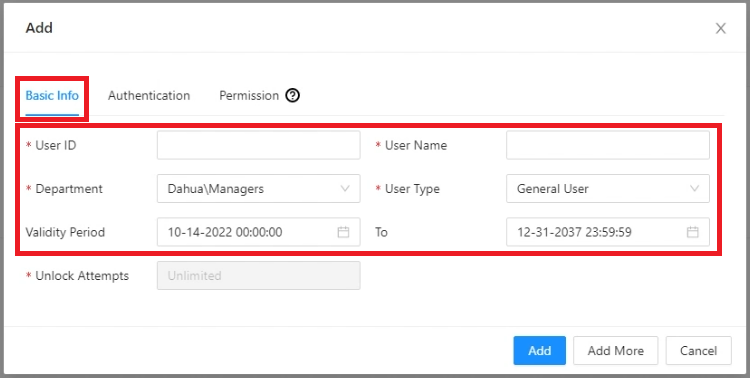
4. Enter a numerical user ID in the field next to User ID, making sure it is unique from any other exiting User ID on the ASC3202B.
Enter the name of the user in the field next to User Name.
Verify the department you are adding the user to in the drop-down next to Department.
Choose what type of user this will be from the drop-down next to User Type.
Verify the Dates and Times the user will have access via the fields next to Validity Period
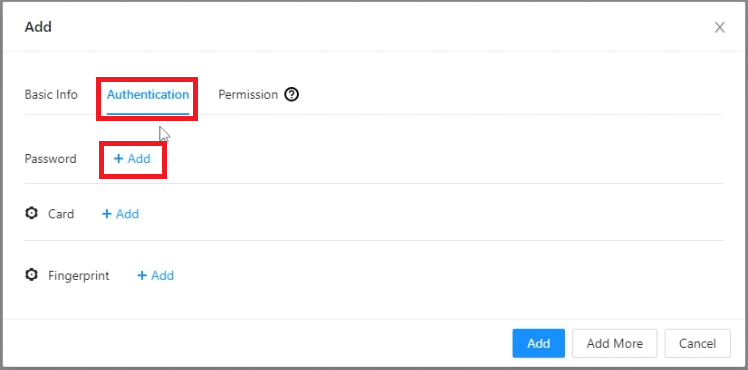
5. Click on Authentication at the top.
To add a PIN password, click on + Add next to Password.
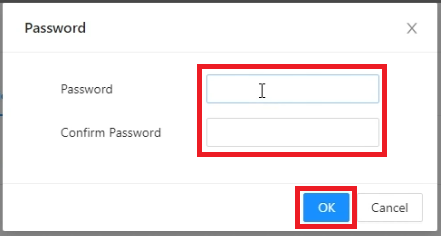
6. Enter the PIN password for the user in the Password and Confirm Password fields.
Then click on OK
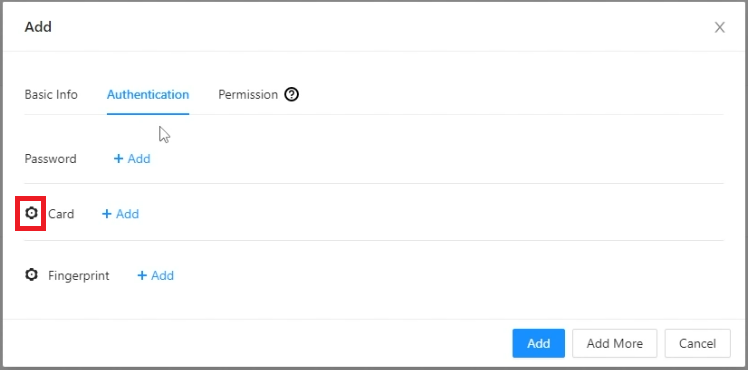
7. To configure the connected device that will capture the card number, first click on the Gear icon to the left of Card
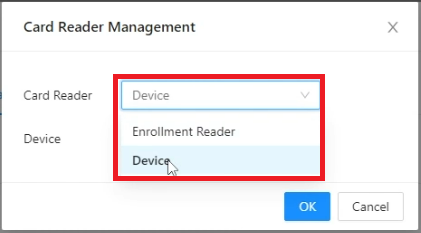
8. Click on the drop-down next to Card Reader and either select Enrollment Reader if you are using a USB card enrollment device connected to your computer, or Device if you are using a card reader that is already wired to the ASC3202B
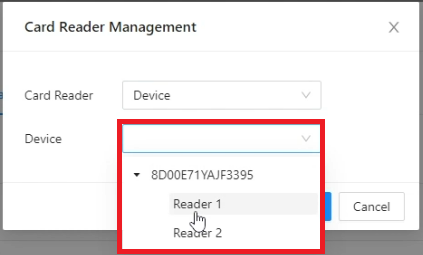
9. If you selected Device in the previous step, click on the drop-down next to Device and select which reader you plan to use to scan in the card for this user.
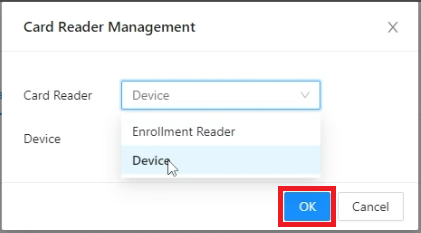
10. Click on OK at the bottom
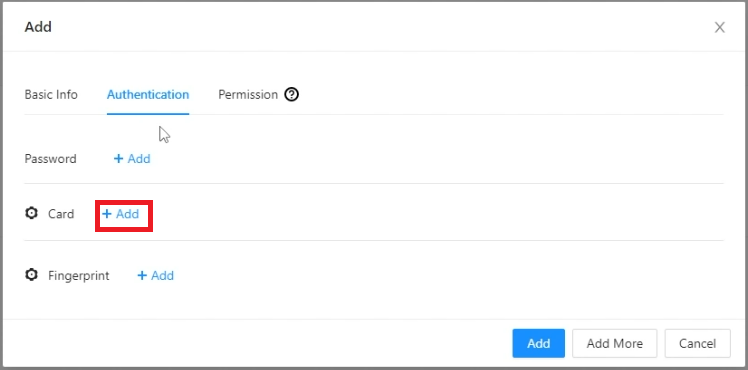
11. Click on + Add next to Card
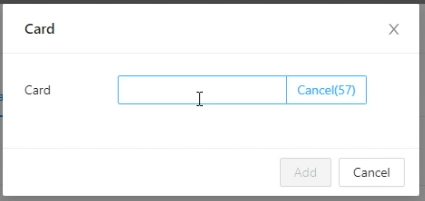
12. While the timer counts down on the right, scan the card on the physical reader connected to the connections on the ASC3202B associated with your selection from Step 9 above
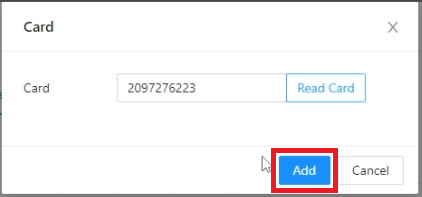
13. Once the card number appears in the field, click on Add
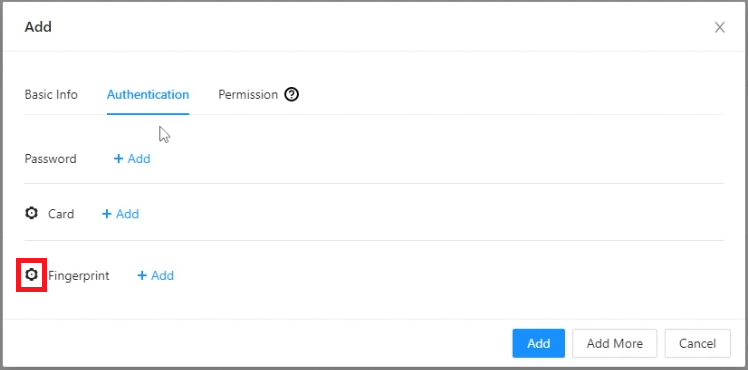
14. To configure the connected device that will capture a fingerprint, first click on the Gear icon to the left of Fingerprint
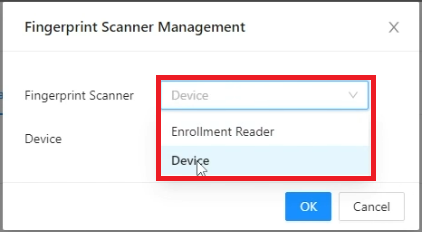
15. Click on the drop-down next to Fingerprint Scanner and either select Enrollment Reader if you are using a USB fingerprint enrollment device connected to your computer, or Device if you are using a fingerprint reader that is already wired to the ASC3202B
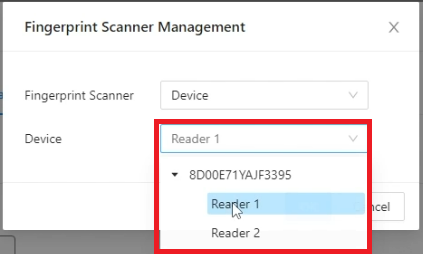
16. If you selected Device in the previous step, click on the drop-down next to Device and select which reader you plan to use to scan the fingerprint for this user.
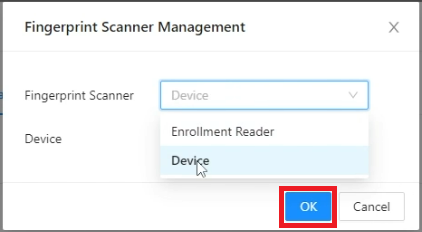
17. Click OK at the bottom
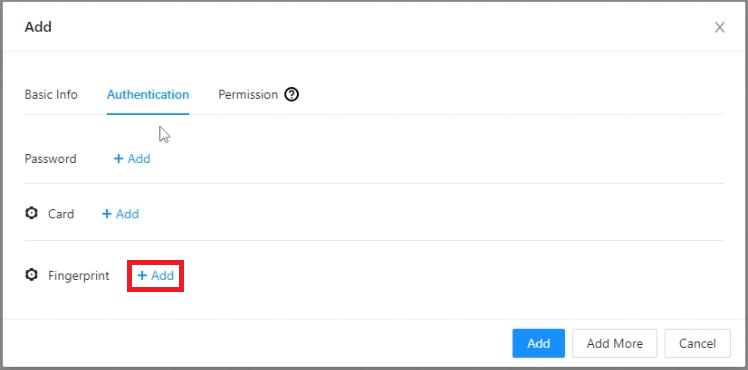
18. Click on + Add next to Fingerprint
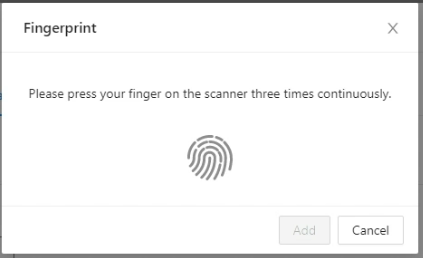
19. Have the user press their finger to the fingerprint scanner connected to the connections on the ASC3202B associated with your selection from Step 16 above.
Have the user lift up their finger and press it back down 3 times
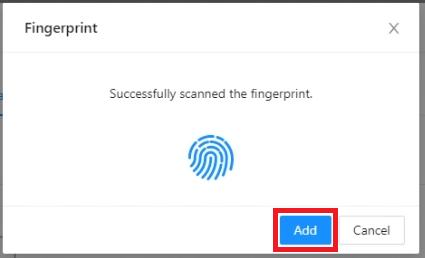
20. Once the user has scanned their fingerprint enough times successfully, it will show Successfully scanned the fingerprint.
Click on Add at the bottom
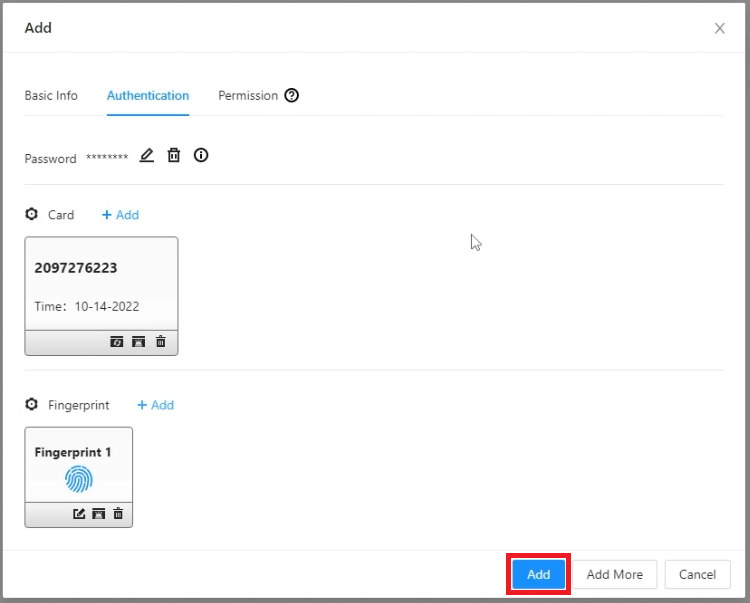
21. When you have added all cards, fingerprints, and the password that you want for this user, click on Add
22. Now that the user has been added, you will see them in the list

