Access Control/How To Use HID Cards On DHI ASC3202B
Contents
How To Use HID Cards On DHI ASC3202B
Description
This article will cover how to setup a DHI-ASC3202B for use with HID Readers and Cards
Prerequisites
- Initialized DHI-ASC3202B
- A Computer connected to the DHI-ASC3202B
- HID Card Reader
- HID Cards
Video Instructions
Coming Soon
Step by Step Instructions
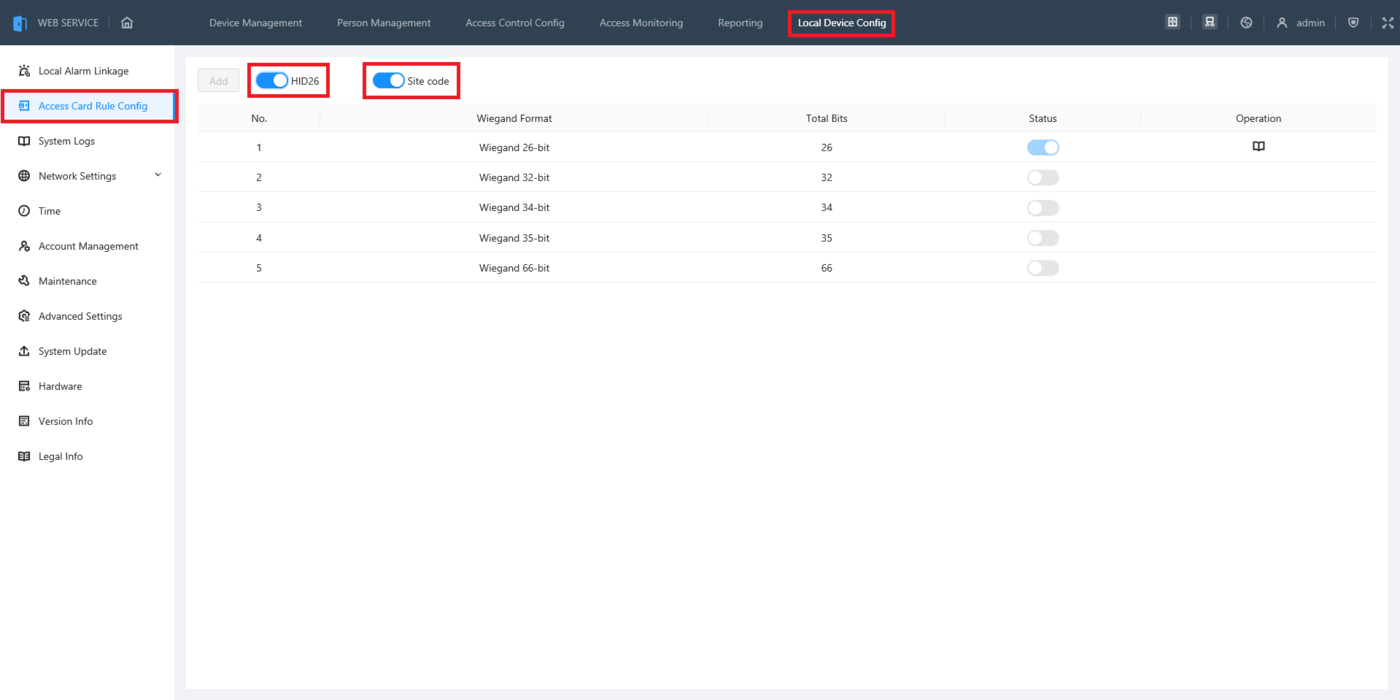
1. Log into the web interface of the ASC3202B and click on Local Device Config at the top.
Then select Access Card Rule Config on the left.
Enable the slider next to HID26 so HID readers and cards can be used.
Either enable Site Code to have the HID card numbers registered in the controller with the site code included,
or disable the slider to have the HID card numbers registered in the controller with the site code excluded (See Step 6 below for more information)
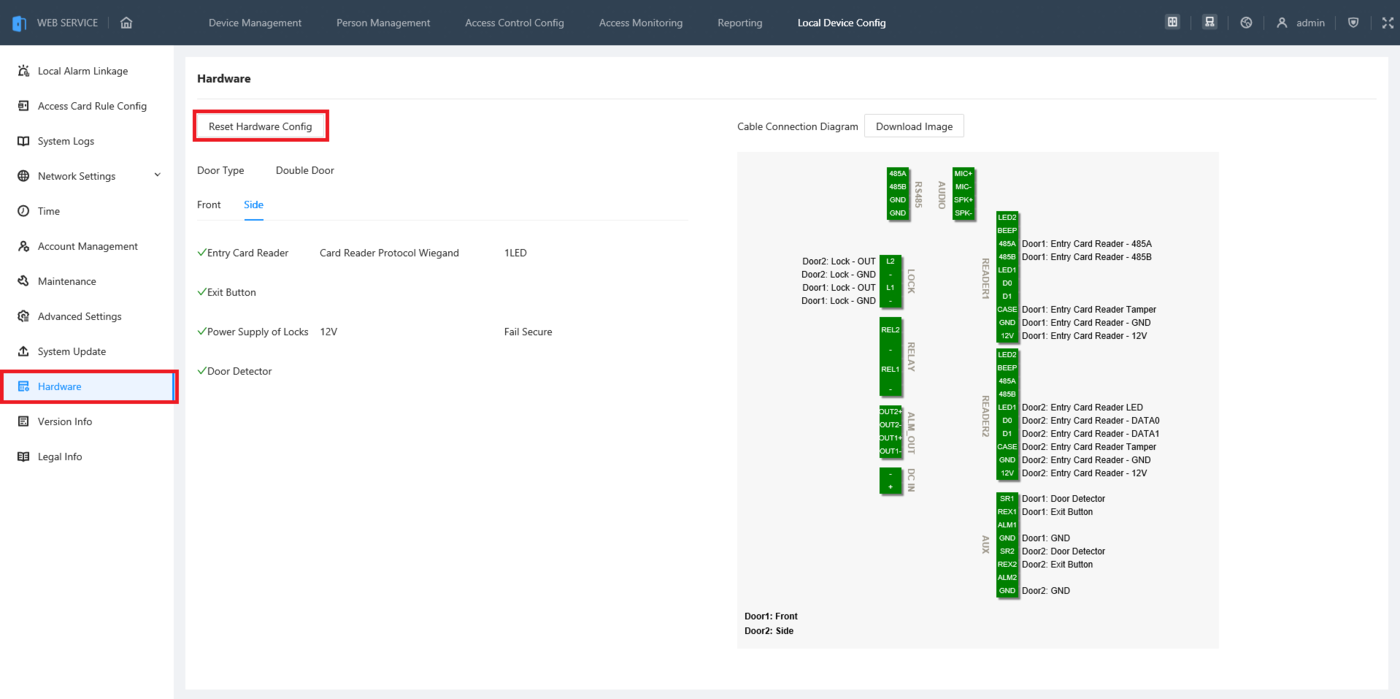
2. If you have not already configured the ASC3202B to work with Wiegand readers, select Hardware on the left. (If you have already, you can skip to Step 6)
Then select Reset Hardware Config
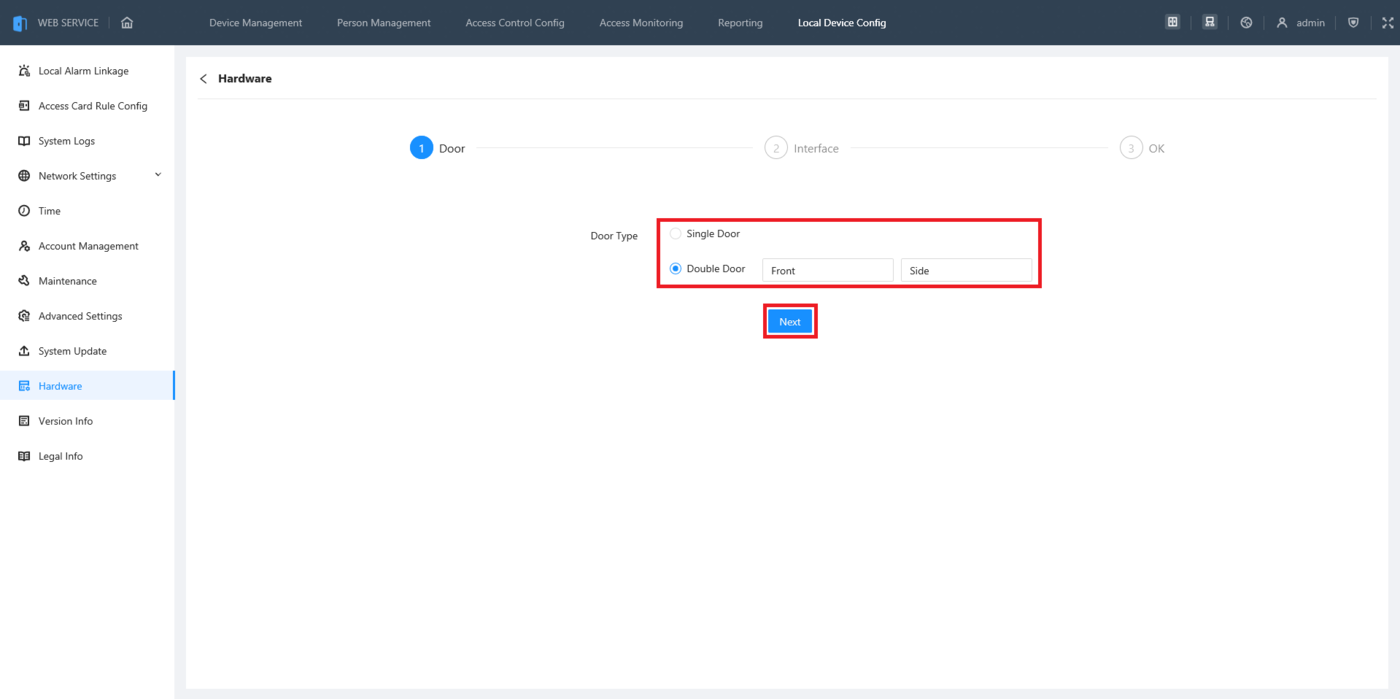
3. If you plan to use this as a single door access controller, select Single Door.
If you plan to use this as a 2 door access controller, select Double Door.
Type in the name(s) of the door(s) in the field(s) to the right.
Then click on Next
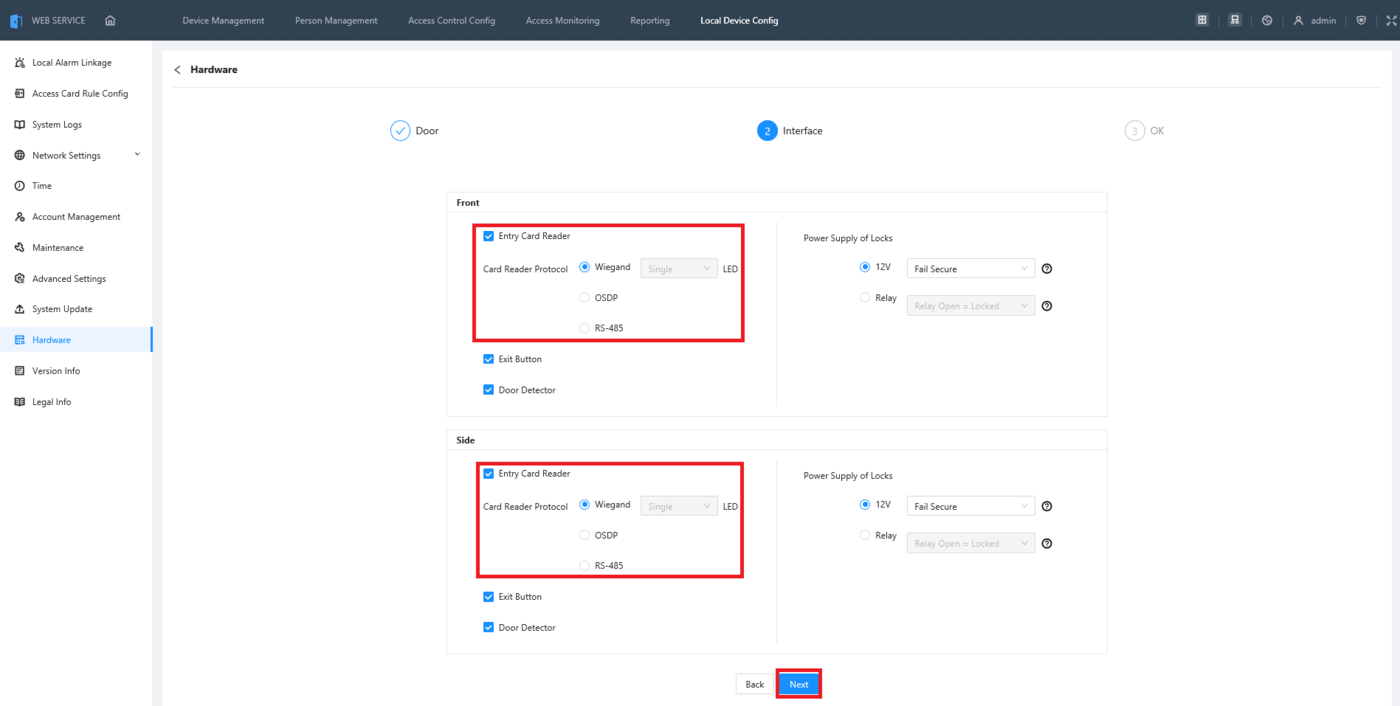
4. Check the boxes next to Entry Card Reader for each door.
Then enable the option for Wiegand.
Click on Next
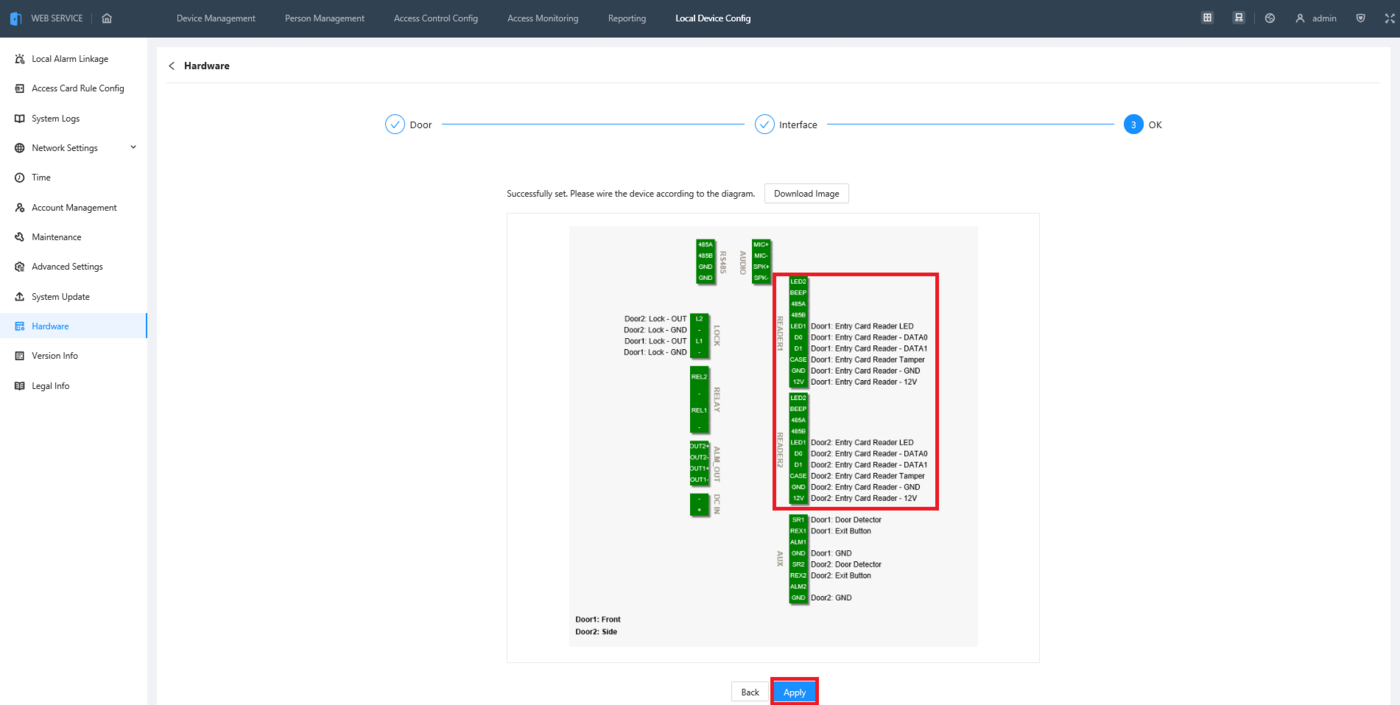
5. Use the diagram on this screen to guide you in wiring the HID card reader to the ASC3202B.
When you are done looking at the diagram, click on Apply
6. Follow the guide on "Creating New Users and Departments" from the page on How to Setup a DHI-ASC3202B
When you get to the part where you scan in a card, scan the HID card on the HID reader you connected to the ASC3202B.
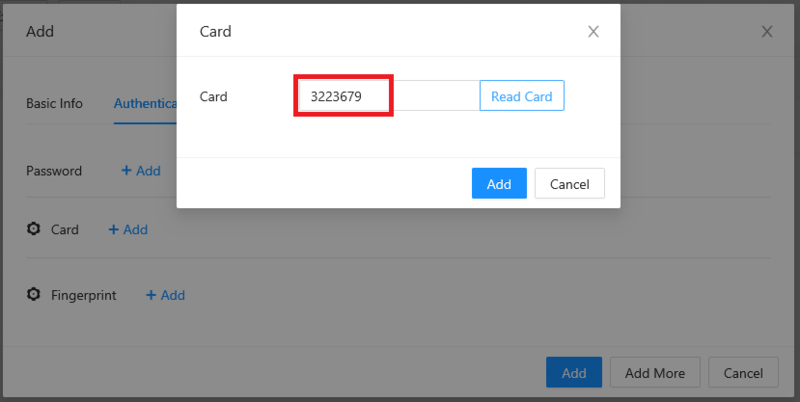
If you enabled the setting for "Site Code" in Step 1, you will see the site code as part of the card number:
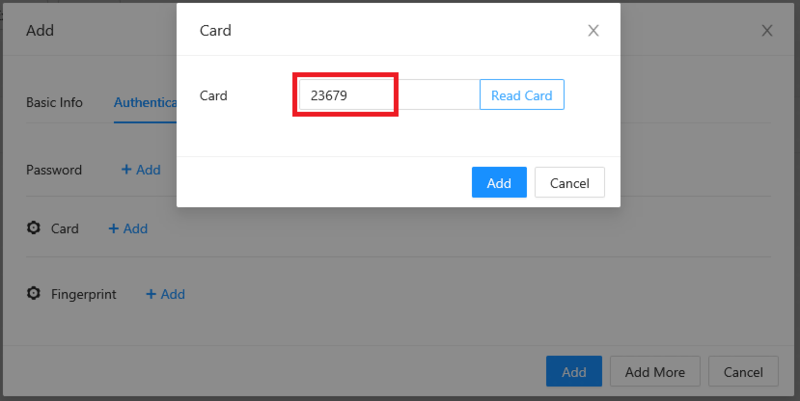
If you disabled the setting for "Site Code" in Step 1, you will see just the card number without a site code:
