DSS S2/User Portal/Setup Storage Disk
Contents
How To Setup A Storage Disk In DSS Manager Portal
Description
This article will show you how to setup a storage disk in the DSS Manager Portal.
DSS platform supports local and network disk setup as well as RAID with additional support for hot spare backup.
Prerequisites
- DSS
- Computer connected to the same local network / network segment as the server. The default IP address of the server is 192.168.1.108
- Hard disk(s) added to DSS
Video Instructions
Coming Soon
Step by Step Instructions
Local Disk
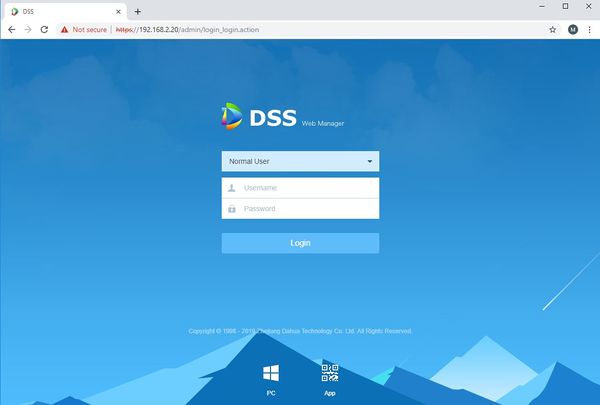
1. Open a web browser and enter the IP address of the server. Enter the username/password and click Login
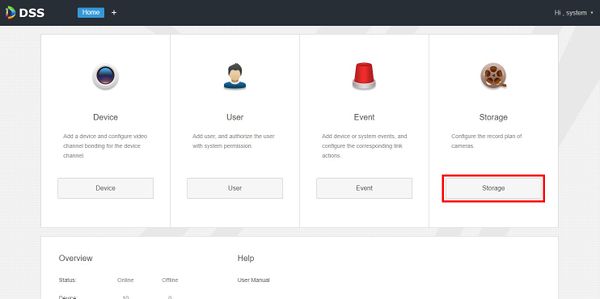
2. Click Storage
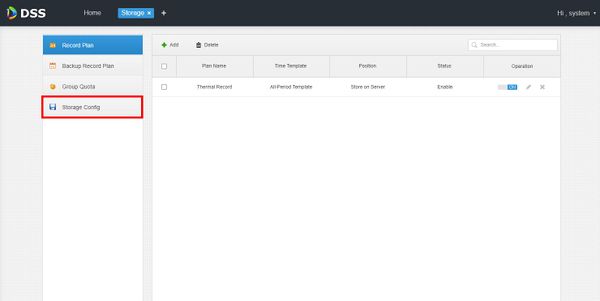
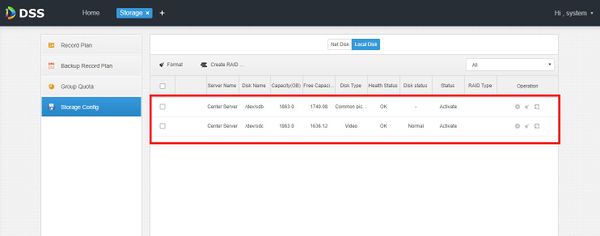
3. Click Storage Config
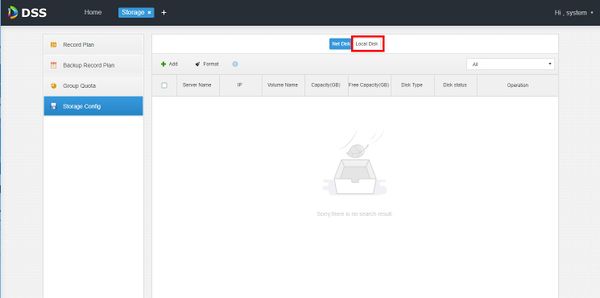
4. Click Local Disk
5. Currently installed local disks will appears in the menu
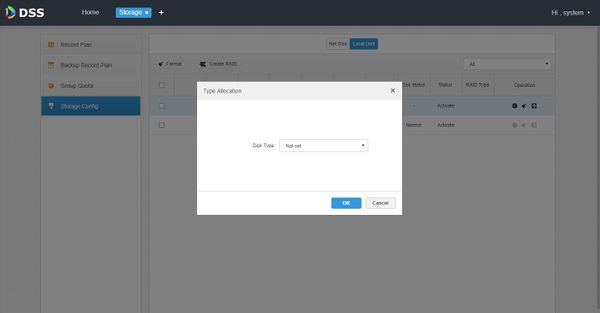
6. To set the disk type click the File:Disk config icon.jpg icon next to the drive in the list
The Type Allocation window will appear
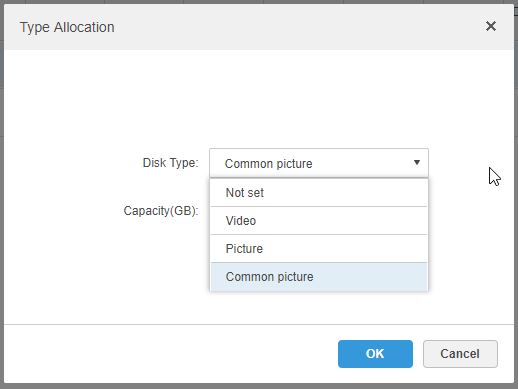
7. Use the drop-down box to select the Disk Type
Click OK
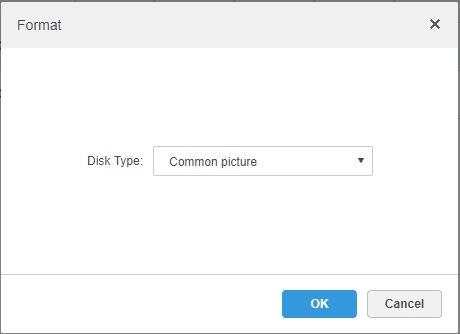
8. To format a disk click the File:Disk format icon.jpg icon
Click OK to format the disk
RAID
DSS platform supports creating a RAID group and provides higher storage performance than single disk and data redundancy technology.
Hot Spare
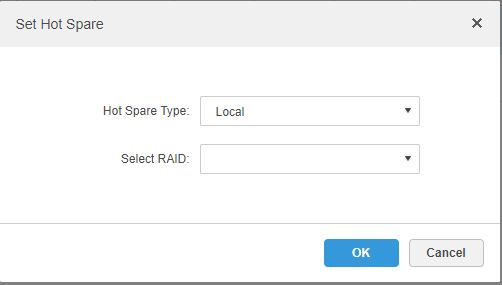
Click the File:Hot spare disk icon.jpg icon to set Hot spare disk settings
Hot spare allows a disk to be set as a backup disk of a RAID group or replace the damaged disk of a RAID group.
Hot Spare Types:
- Local - Set disk as a backup disk of a designated RAID group. Recreate the system immediately when a disk error happens in the RAID group
- Global - Set disk as backup disk for all RAID groups. Recreate the system immediately when a disk error happens in any RAID group
Net Disk
1. Open a web browser and enter the IP address of the server. Enter the username/password and click Login
2. Click Storage
3. Click Storage Config
4. To set the disk type click the File:Disk config icon.jpg icon next to the drive in the list
The Type Allocation window will appear
5. Use the drop-down box to select the Disk Type
Click OK
RAID
1. Open a web browser and enter the IP address of the server. Enter the username/password and click Login
2. Click Storage
