IPCCameraConfig
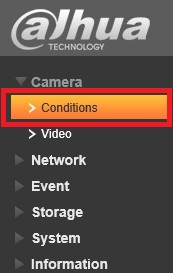
Conditions
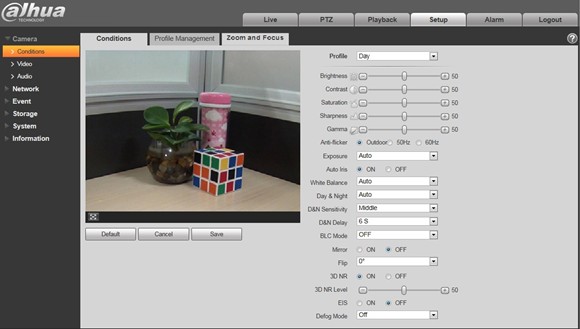
Conditions Here you can view device property information. Slight differences may be found due to different network camera series. The setups become valid immediately after you save it.
Note: Only motorized zoom lens device has zoom and focus function.
|
Parameter |
Function |
|
Profile |
You may select normal, day and night mode. Then you can set and view config and its effect. |
|
Brightness |
It is to adjust monitor window brightness. You can adjust this value if the video is too dark or too bright. The larger the number, the bright the video is. When you input the value here, the bright section and the dark section of the video will be adjusted accordingly. Please note the video may become hazy if the value is too high. The value ranges from 0 to 100. The recommended value ranges from 40 to 60. The default value is 50. |
|
Contrast |
It is to adjust monitor window contrast. The larger the number, the higher the contrast is. You can use this function when the whole video bright is OK but the contrast is not proper. Please note the video may become hazy if the value is too low. If this value is too high, the dark section may lack brightness while the bright section may over exposure. The value ranges from 0 to 100. The recommended value ranges from 40 to 60. The default value is 50. |
|
Saturation |
It is to adjust monitor window saturation. The larger the number, the strong the color is. This value has no effect on the general brightness of the whole video. The video color may become too strong if the value is too high. For the grey part of the video, the distortion may occur if the white balance is not accurate. Please note the video may not be attractive if the value is too low. The value ranges from 0 to 100. The recommended value ranges from 40 to 60. The default value is 50. |
|
Sharpness |
The value here is to adjust the edge of the video. The larger the value is, the clear the edge is and vice versa. Please note there is noise if the value here is too high. The value ranges from 0 to 100. The recommended value ranges from 40 to 60. The default value is 50. |
|
Gamma |
This threshold value mainly change image brightness via nonlinear method and improves dynamic display range. The higher this value, the brighter image will be and vice versa. The value ranges from 0 to 100. The recommended value ranges from 40 to 60. The default value is 50. |
|
Anti-flicker |
|
|
Exposure
|
Note: Only when anti-flicker is outdoor, exposure mode is available.
|
|
Auto Iris |
Before the setup, please make sure you have installed the auto iris. You can check the box before ON to enable this function. The auto iris may change if the light becomes different. When you disable this function, the iris is at the max. System does not add the auto iris function in the exposure control. This function is on by default. |
|
White Balance |
It is to set the white balance mode. It has effect on the general hue of the video. This function is on by default. You can select the different scene mode such as auto, sunny, cloudy, home, office, night, disable and etc to adjust the video to the best quality.
|
|
Day&Night |
It is to set device day/night mode switch independently from config file. Default is auto mode.
Note: Only some non-IR devices support sensor input function. |
|
Sensitivity |
It adjusts sensitivity of color and black/white switch. There are low, medium and high levels. Default is medium. Note: Available only when day/night is auto. |
|
Delay |
It adjusts delay value of color and black/white switch. Its value range is 2~10, and default is 6. Note: Available only when day/night is auto. |
|
BLC Mode |
BLC is used for backlight situation.
Note: It is to disable the BLC function. Please note this function is disabled by default. |
|
3D NR |
This threshold is mainly for multi-frame (at least 2) image processing. It reduces noise with info between a frame and previous frame. The higher the value, the better NR will be. Default is enabled. NR level ranges from 0 to 100. The recommended value to from 40 to 60. Default value is 50. |
|
EIS |
It can realize electronic anti-jitter function via algorithm of comparing image difference, which has efficiently solved the problem of image dithering during use and makes the picture much clearer. Default is off. |
|
The image quality will be lower when the device is exposed to the environment with fog and haze, the image can operate auto de-warp. It can also select different intensity manually according to the fog density to adjust the image definition. The default is off. | |
|
Mirror |
It is to switch video left and right limit. This function is disabled by default. |
|
Full-screen Test |
Click the button on the video window, you can begin full-screen test. |
|
Default |
It is to set device default setup. |
|
Cancel |
It is to cancel the operation in current interface and restore previously saved operation. |
|
OK |
Save config. |
Profile Management
Profile management has three modes: normal, full time and schedule. If you select normal, the video will be configured as normal.
If you select full time, you must select either day or night, and the video will be configured accordingly.
If you select schedule, you can decide detained day time interval and night time interval. You can set 0:00 ~ 12:00 as day, and 12:00 ~ 24:00 as night.
Important
- The setup becomes immediately effective after you click on OK.
- You can see WDR option only if your camera supports WDR function. System does not support long-time exposure or low noise mode.


