NVR/Basic Setup/Add Dahua IP Camera to FLIR Recorder
Contents
How to Add a Dahua Camera to a FLIR Recorder
Description
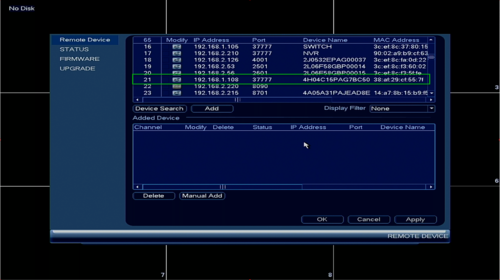
These instructions will show you how to add a Dahua IP Camera to a FLIR Recorder. The Dahua IP Camera will be defaulted, and at the standard, "192.168.1.108" address, and uninitialized. For the majority of FLIR recorders, you will not be able to initialize the camera from the NVR interface. This step must be completed before adding the Dahua IP Camera to the FLIR recorder, and must be done from a PC on the same LAN as the IP Camera.
WARNING!
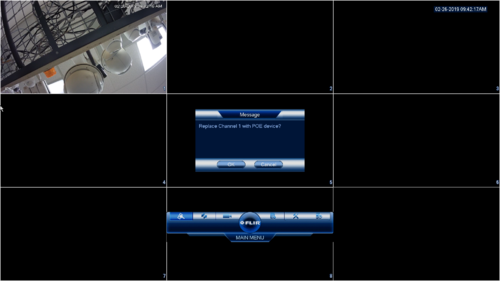
Do not connect Dahua IP cameras directly to the POE port of FLIR NVRs, unless you have completed the below instructions.
Leave Dahua IP Camera configured using DHCP, not Static IP.
If system is restarted and the message below displays, choose CANCEL not ok.
Prerequisites
- Dahua IP Camera on Latest Firmware
- POE Switch or POE Injector
- FLIR NVR or DVR with Available IP Channels
- Router with DHCP Enabled (Optional but not required, skip all DHCP steps. Configure using Static IP)
- The above devices all connected via Network Cable
- Dahua ConfigTool Click Here to Download
Step by Step Instructions
PC Setup
1. From a PC on the same LAN as the IP Camera, press the Windows Key or Icon and type, "cmd" and press enter.
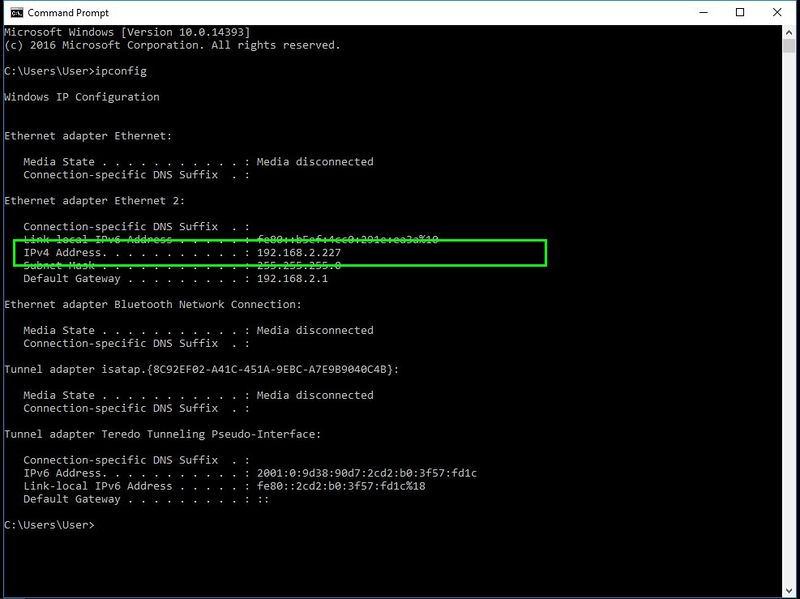
2. This will open a command prompt window, type, "ipconfig" and press, "Enter"
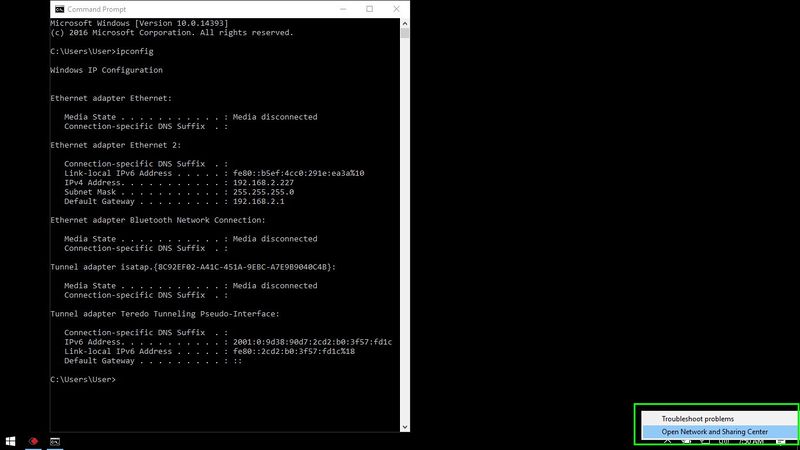
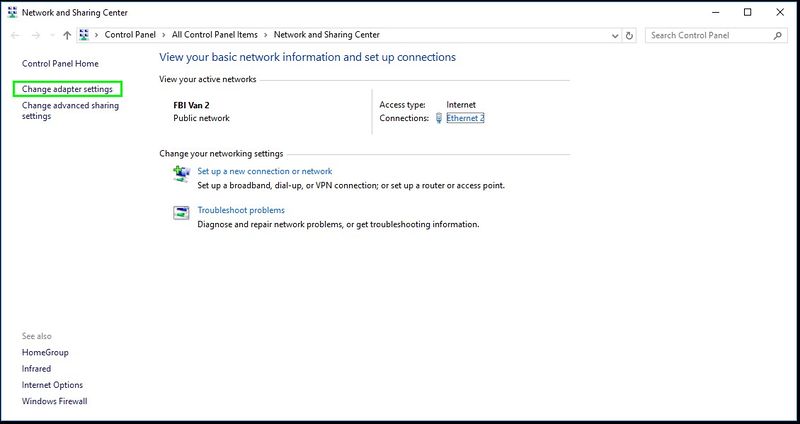
3. Next, we need to navigate to, "Network and Sharing Center" from the toolbar.
4. Then click, "Change Adapter Settings"
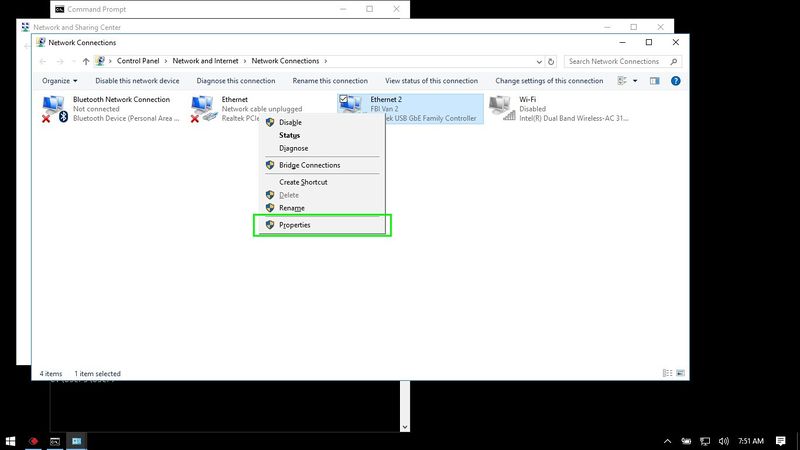
5. Right-click on your network adapter, and select, "Properties"
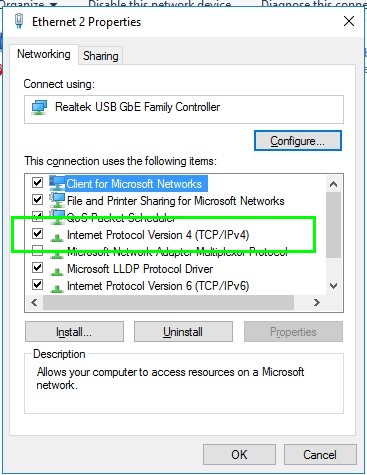
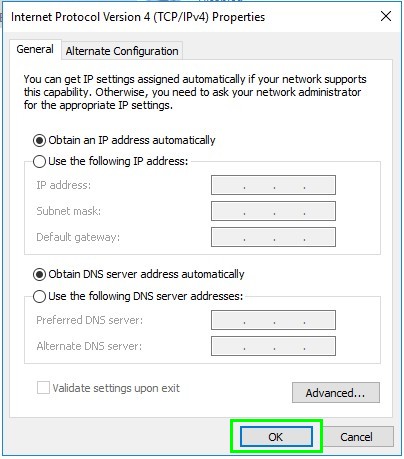
6. Double click, "Internet Protocol Version 4 (TCP/IPv4)"
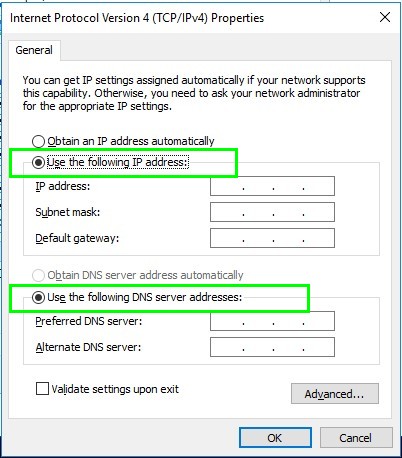
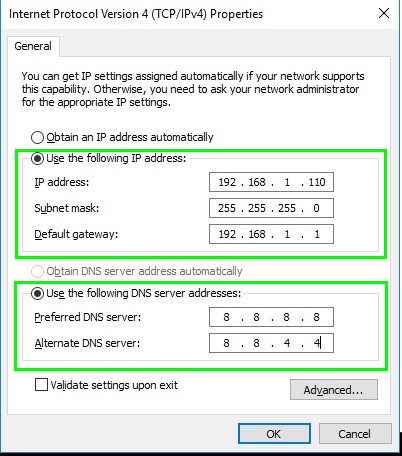
7. Click and check the boxes for, "Use the following IP address" and, "Use the following DNS Server Address"
8. Change the following:
- IP Address: 192.168.1.110
- Subnet Mask: 255.255.255.0
- Default Gateway: 192.168.1.1
- Preferred DNS Server: 8.8.8.8
Alternate DNS Server: 8.8.4.4
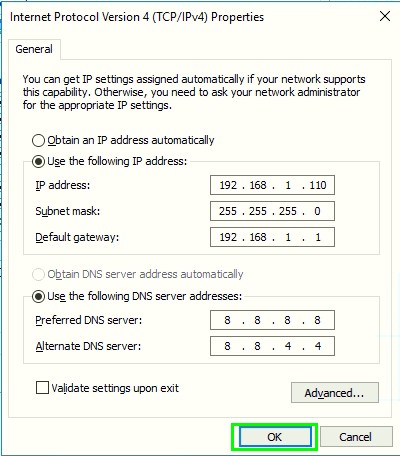
9. Click, "OK"
NOTE: You might lose internet connection after completing this step. This is normal.
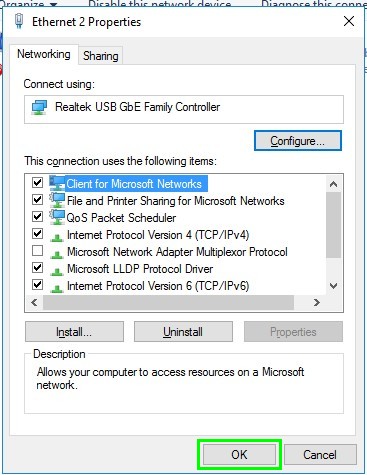
10. Click, "OK" again.
Initialize Camera
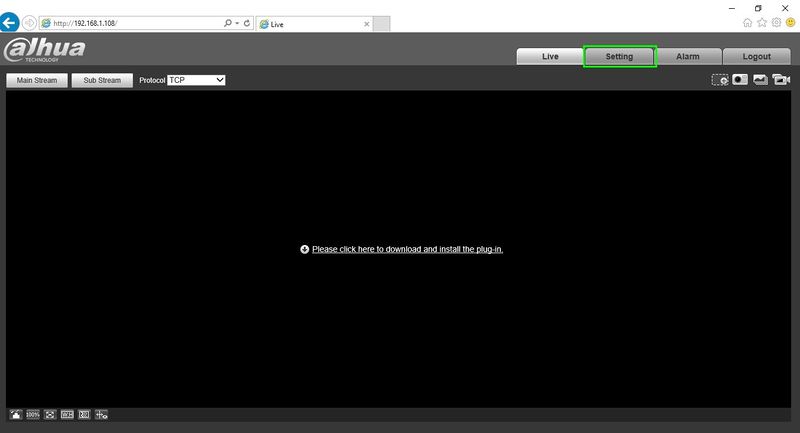
1. Open Internet Explorer, and navigate to, "http://192.168.1.108"
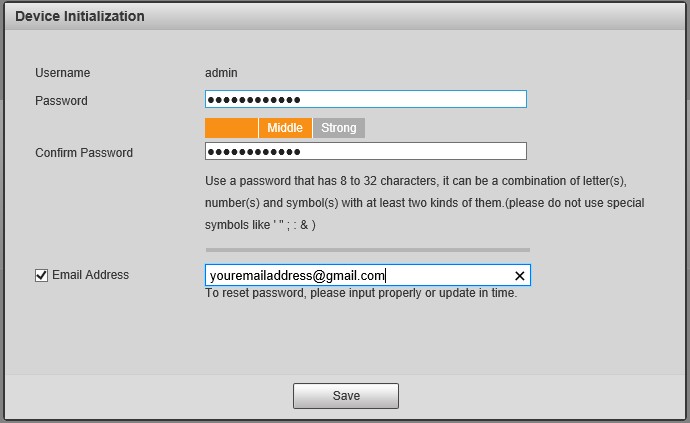
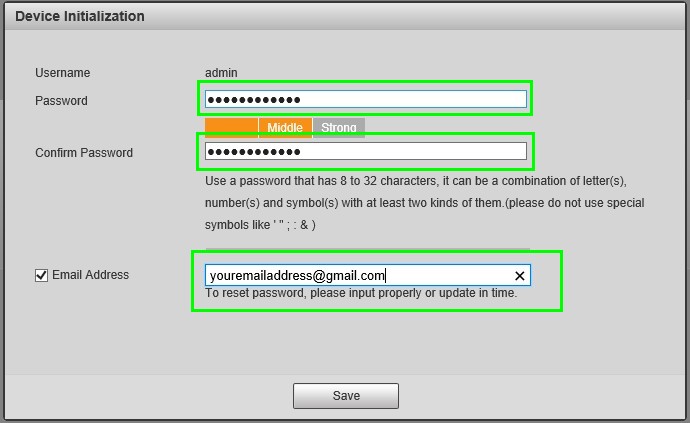
2. A Device Initialization page should pop up. DO NOT SKIP THESE STEPS!
3. Input the credentials you wish to establish for your Dahua IP Camera, and your email address. Click, "Save"
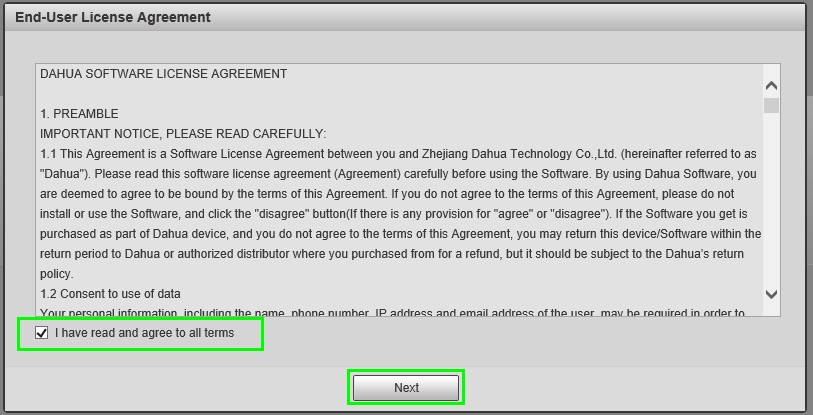
4. Review the End-User License Agreement, check the box next to, "I have read and agree to all terms" then click, "Next"
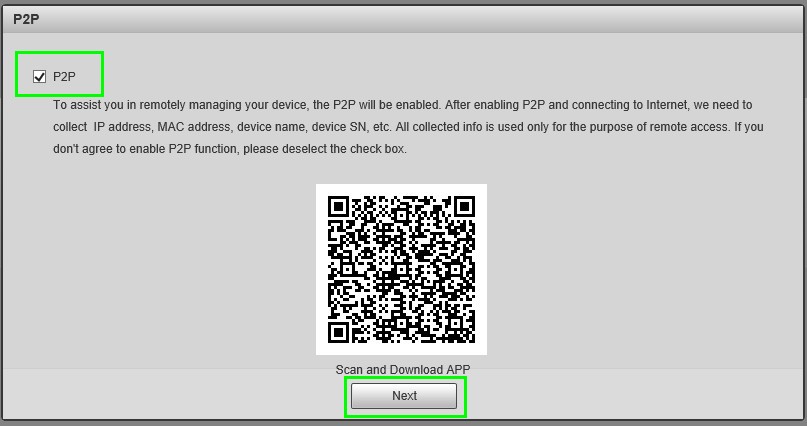
5. Leave the box checked if you wish to have P2P enabled. Then click, "Next"
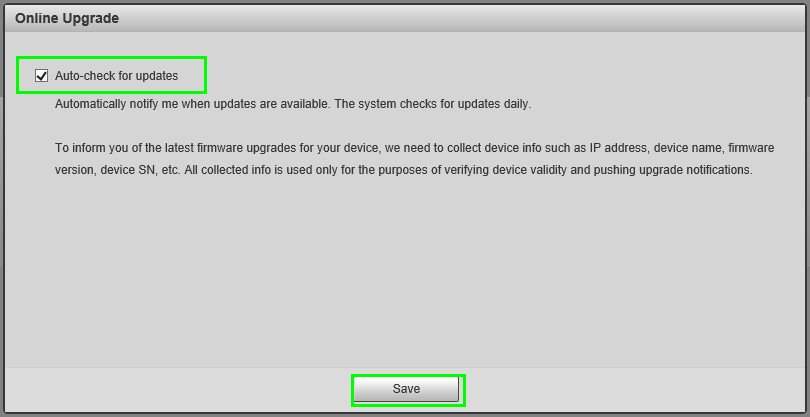
6. Leave the box checked if you wish to have the system auto check for updates. Then click, "Save"
7. You should not be able to login to the Dahua IP Camera using the credentials you just established.
Enable DHCP on Camera
1. Login to the Dahua IP Camera using Internet Explorer and this address: http://192.168.1.108
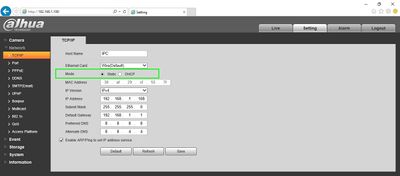
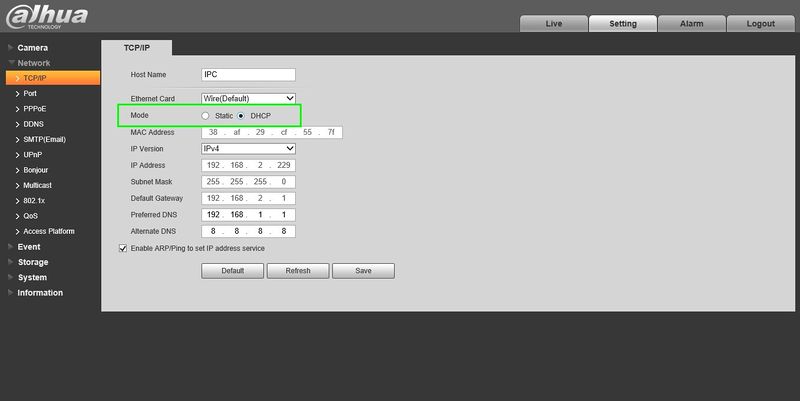
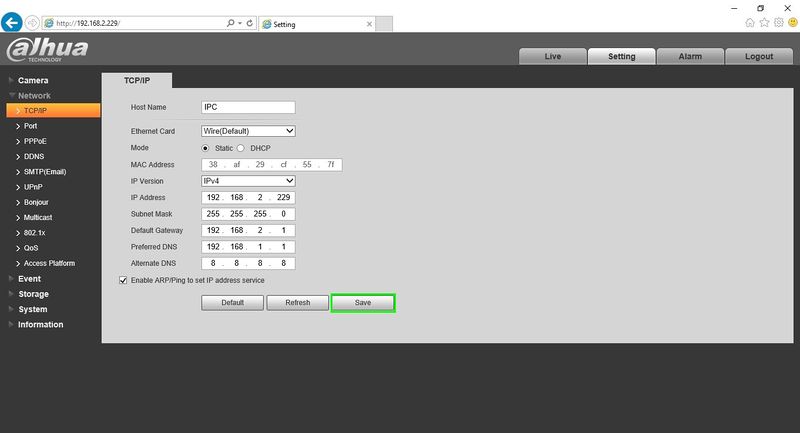
2. Navigate to, "Setting -> Network-> TCP/IP"
Be sure to note the MAC address of the Dahua IP Camera. For this example the MAC Address is "38:AF:29:CF:55:7f"
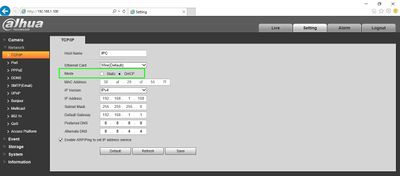
3. Change the mode setting from, "Static" to, "DHCP" and click, "Save"
PC Setup-Part 2
1. Navigate to, "Network and Sharing Center" from the toolbar.
2. Then click, "Change Adapter Settings"
3. Right-click on your network adapter, and select, "Properties"
4. Double click, "Internet Protocol Version 4 (TCP/IPv4)"
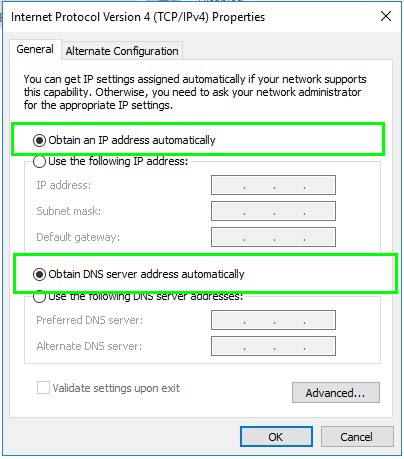
5. Click and check the boxes for, "Obtain an IP address automatically" and, "Obtain DNS server address automatically"
NOTE: If you were disconnected from the Internet from the earlier instructions, this should restore your Internet connection.
6. Click, "OK"
7. Click, "OK" again.
PC Setup-Locate Dahua IP Camera New IP Address
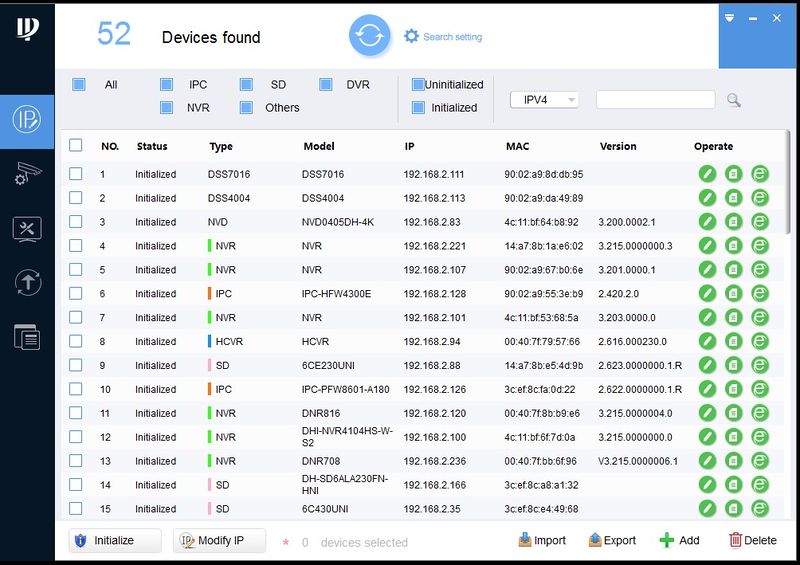
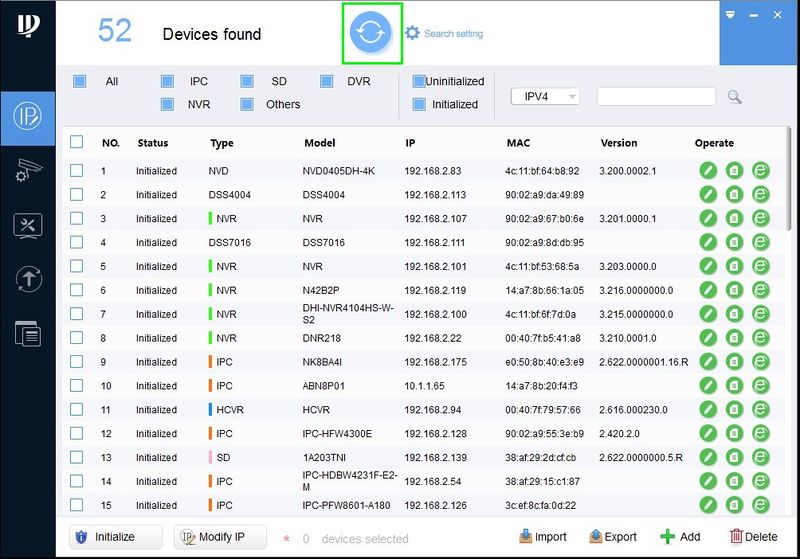
1. Launch, "ConfigTool"
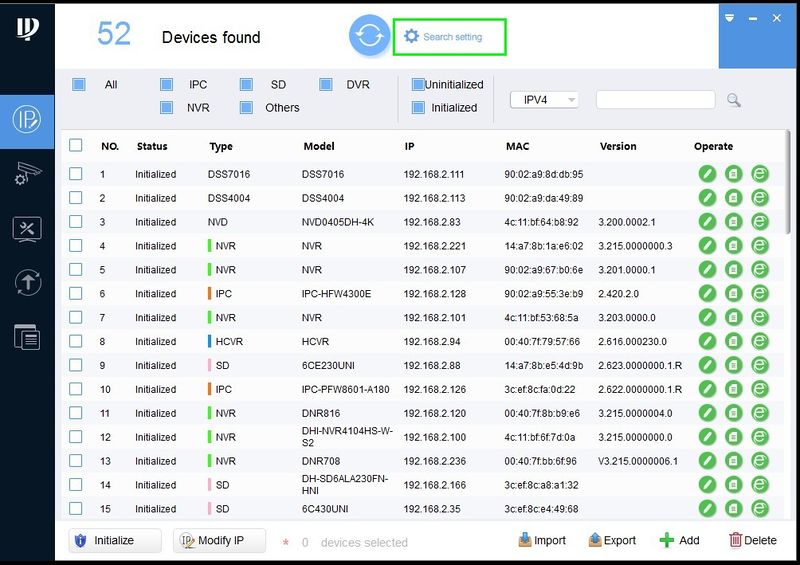
2. Click, "Search Setting"
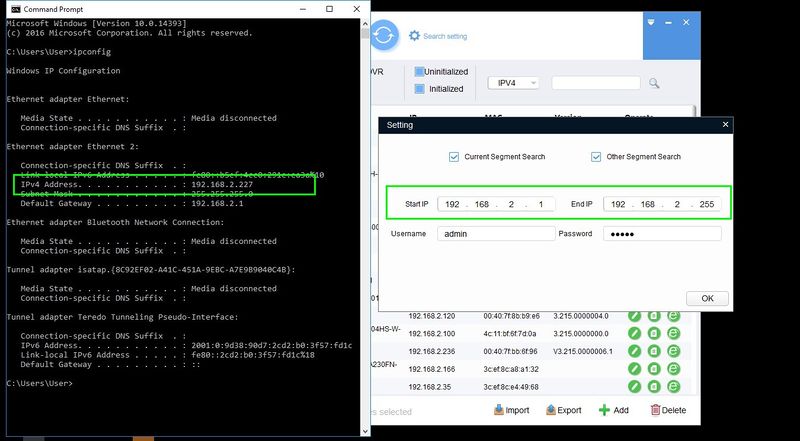
3. Input the IP range based on your current IP address. The first 3 sets of numbers might be different based on your network, but the final numbers should be as follows:
- Start IP: XXX.XXX.XXX.1
- End IP: XXX.XXX.XXX.255
For this example, the PC is on 192.168.2.227 therefore the range is as follows:
- Start IP: 192.168.2.1
- End IP: 192.168.2.255
4. Input your Dahua IP camera username and password, and click, "OK"
5. The device list will refresh on the ConfigTool, it it doesn't, click the, "Refresh" button.
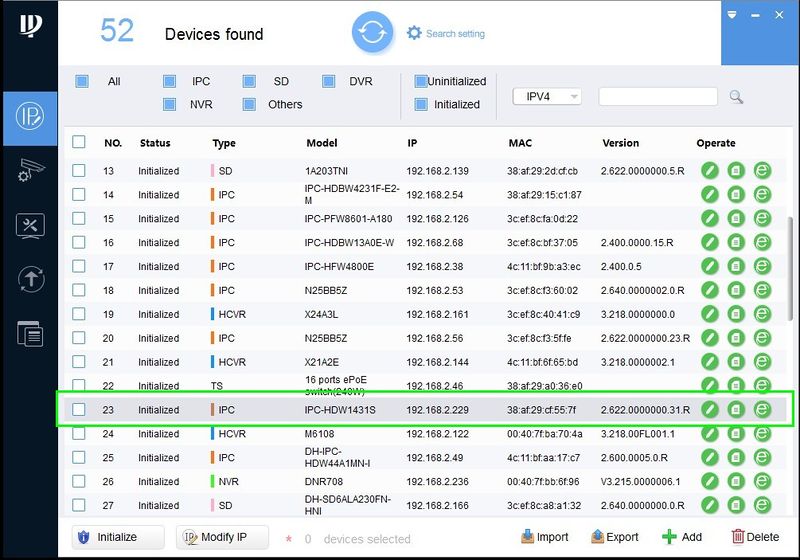
6. Locate the Dahua IP camera based on the MAC Address, we identified earlier, which is "38:AF:29:CF:55:7f"
7. Note the IP address of the Dahua IP Camera. For this example the IP address is, "192.168.2.229"
Configure Dahua IP Camera to Static IP Address (Optional)
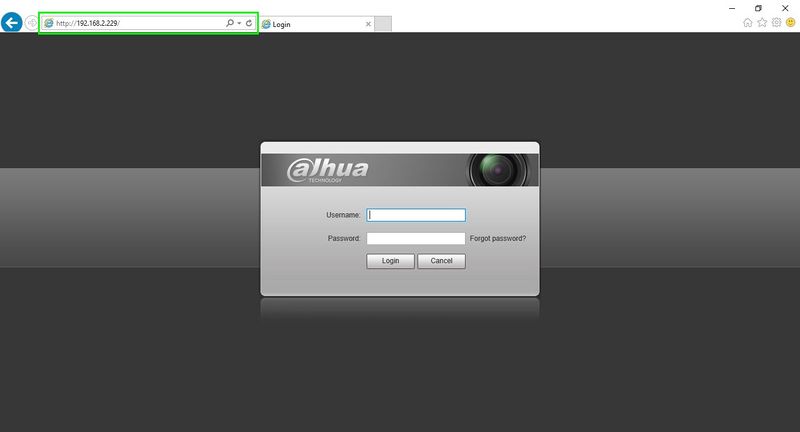
1. Input the IP address of the Dahua IP camera into Internet Explorer.
2. Navigate to, "Setting -> Network-> TCP/IP"
3. Change the mode from, "DHCP" to "Static" Ensure the information has not changed.
4. Click, "Save"
Add Dahua IP Camera to FLIR Recorder
1. You should now have the following information:
- Dahua IP Camera Details
- MAC Address: 38:AF:29:CF:55:7f
- IP address: 192.168.2.229
- User Name : admin
- Password: (YourCredentials)
2. You can add the Dahua IP camera to the FLIR recorder from the SystemUI, SmartPSS, or Internet Explorer. For this example we will use the SystemUI.
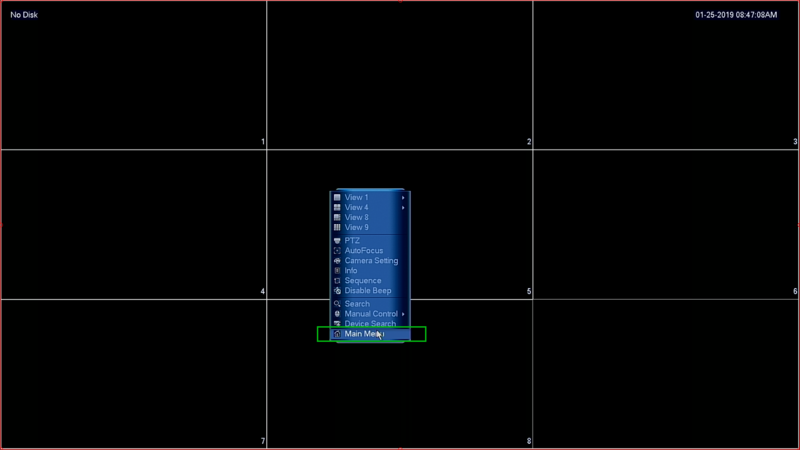
3. On the FLIR Recorder, navigate to the Main Menu.
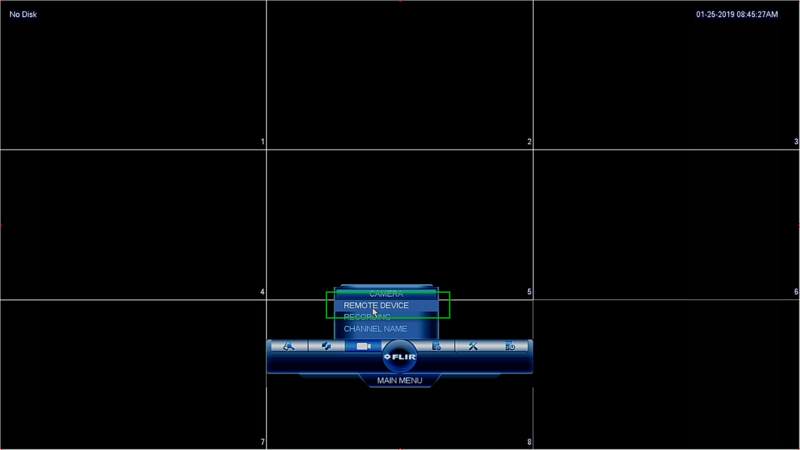
4. Then navigate to, "Remote Device"
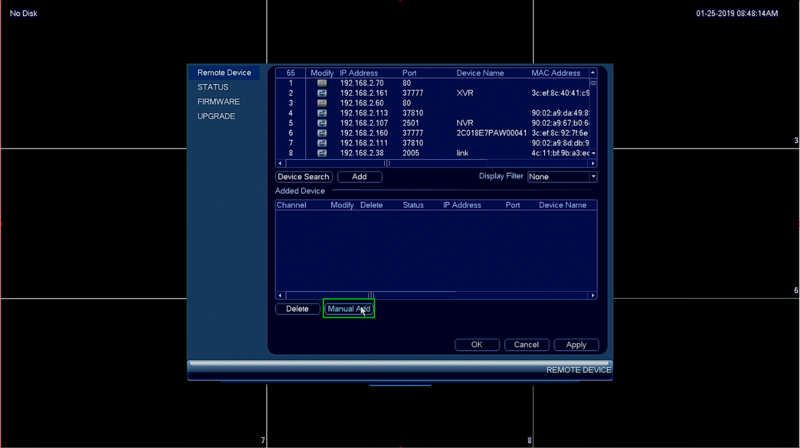
5. Click, "Manual Add"
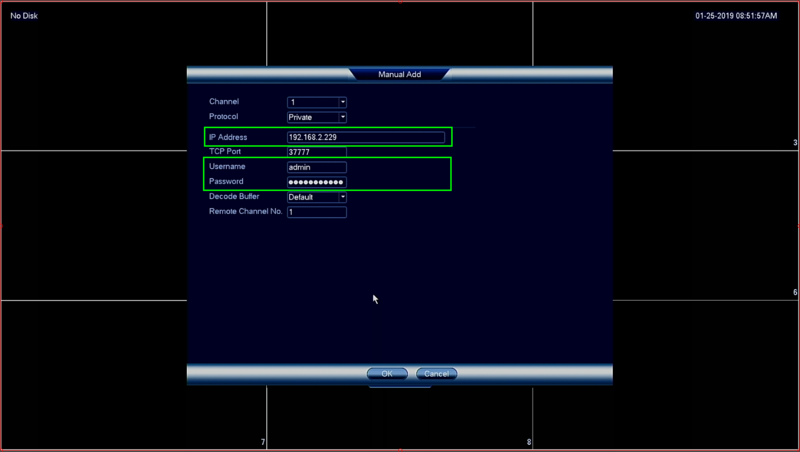
6. Input the following:
- Dahua IP Camera Details
- IP address: (Your Dahua IP Camera's IP Address)
- User Name : admin
- Password: (YourCredentials)
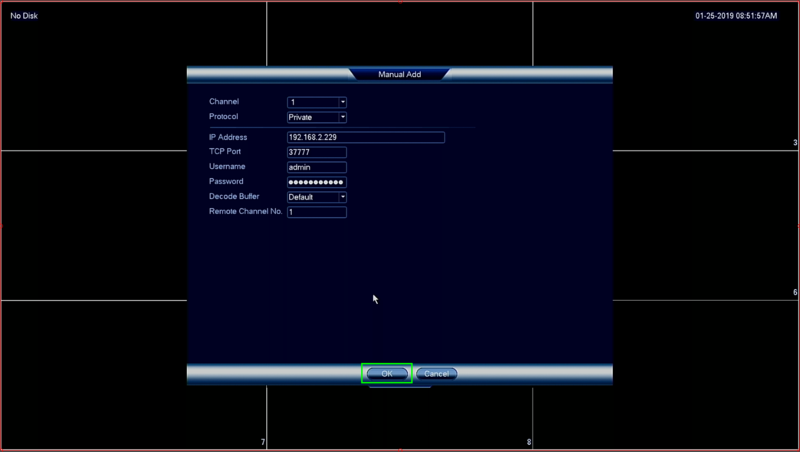
7. Click, "OK"
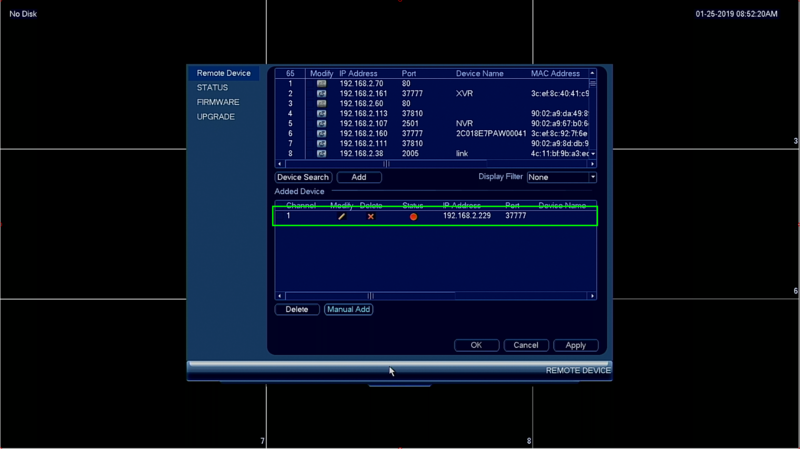
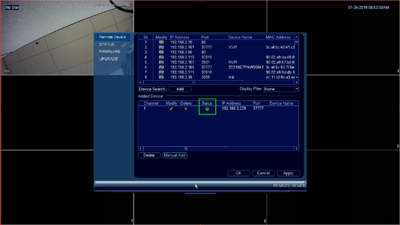
8. The Dahua IP Camera should now be listed under, "Added Device"
9. After a few moments the Status Icon should switch from Red to Green.
