NVR/Recording Setup/iSCSI Setup Windows Server 2012
How to Setup iSCSI with Windows Server 2012
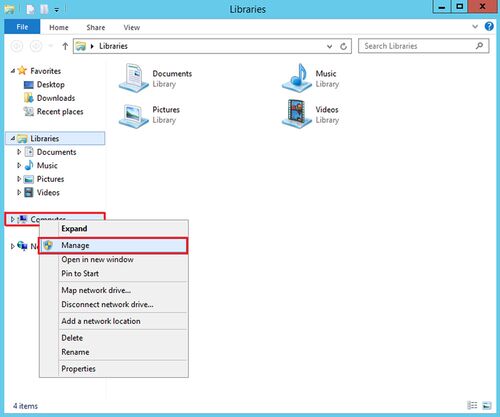
1. Log onto your Windows Server 2012 machine and launch the file explorer. Right click on Computer and select Manage.
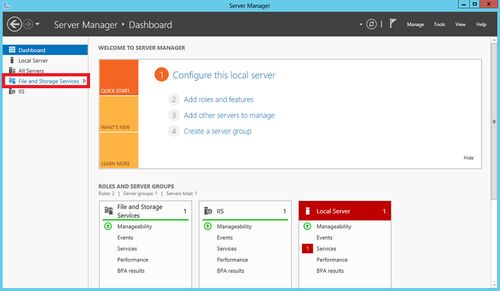
2. Under the Server Manager screen select File and storage Services.
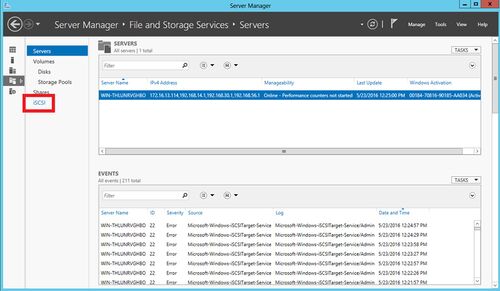
3. Now select iSCSI
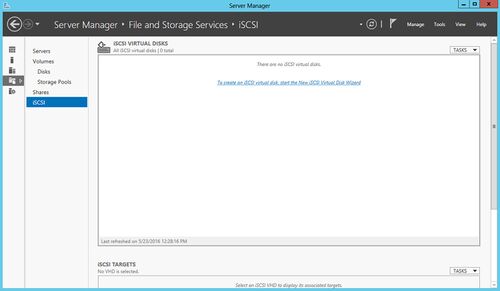
4. Select "To create an iSCSI virtual disk, start the New iSCSI Virtual Disk Wizard" link.
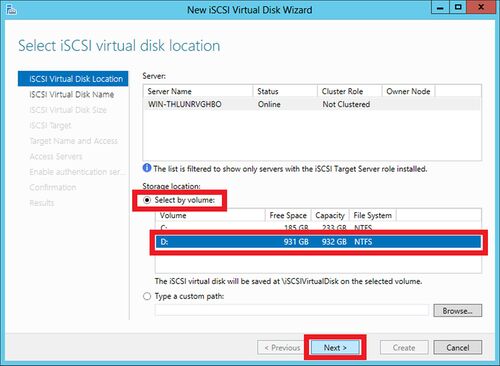
5. Select the volume (or disk) that the virtual drive will live on and click next.
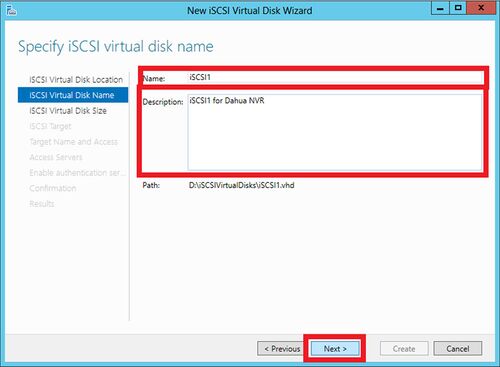
6. Name your Virtual Disk, and enter a description for filing purposes, then click next.
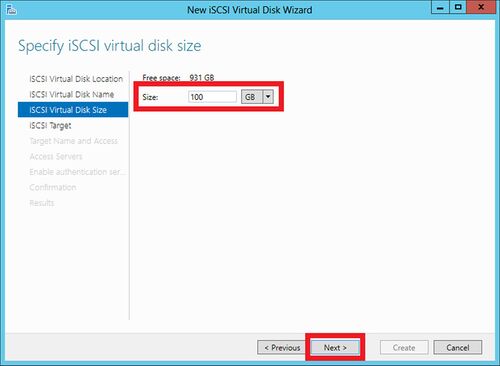
7. Define the size for your iSCSI Virtual Disk (must be above 32gb to work with Dahua NVR's that support iSCSI), then click next.
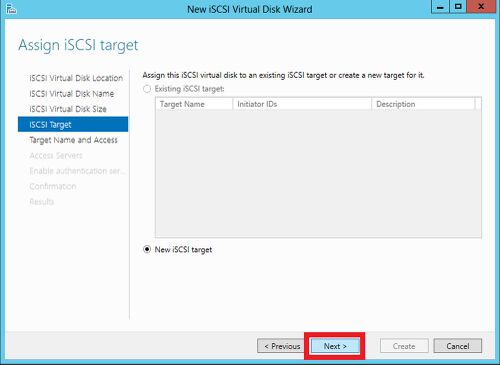
8. Click New iSCSI target (target = NVR's IP), then click next.
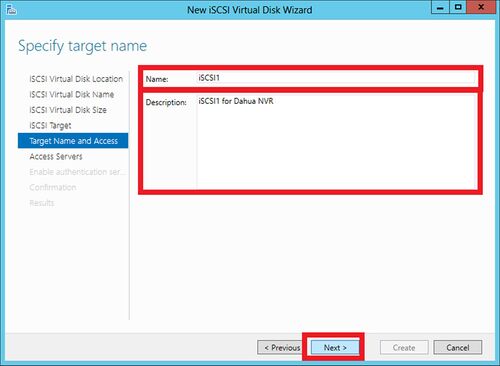
9. Name and describe the Target as you see fit, then click next.
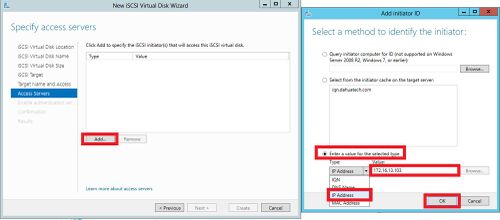
10. Select Add and select "Enter a value for the selected type, then use IP Address as the type and enter your NVR's IP Address, then click OK, then click next.
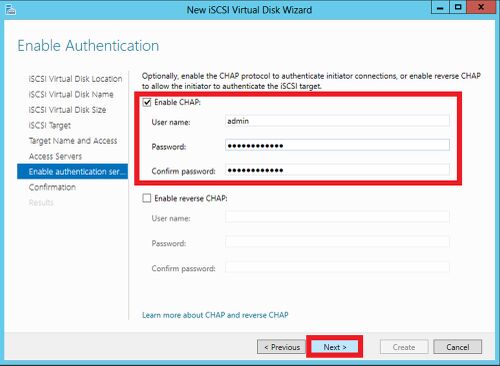
11. Now enable CHAP and enter a username and a password of 12 characters, then click next.
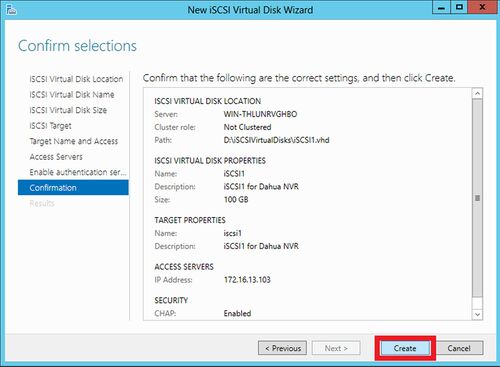
12. Click Create
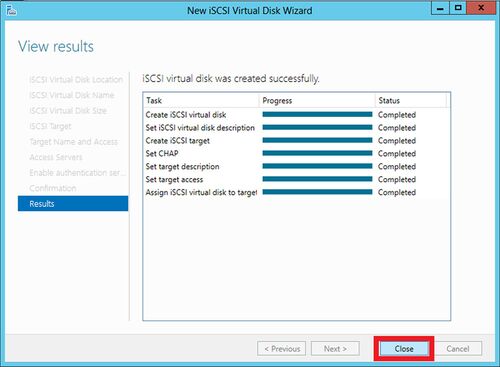
13. Once all tasks are completed close out the setup wizard.
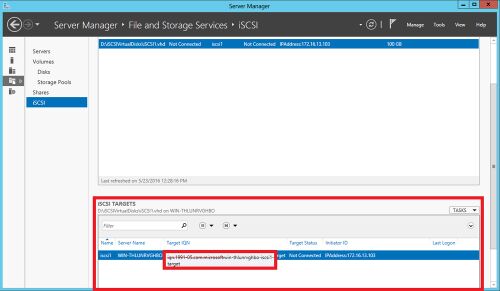
14. In the Server Manager window scroll down and you will now see your target IQN and iSCSI setup information.
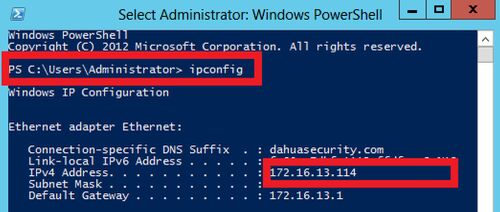
15. Run PowerShell and enter in "ipconfig" in order to get the IP of your device, this IP will be inputted into your NVR's settings.
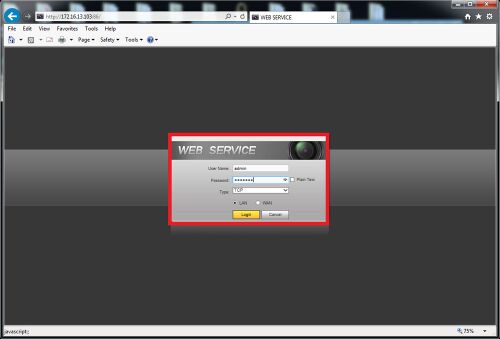
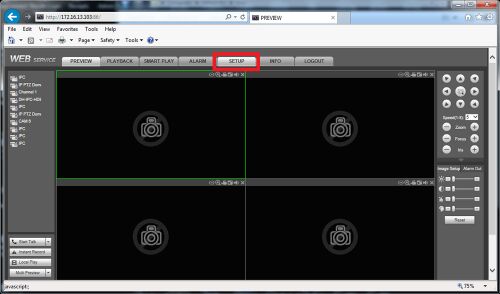
16. Now log into your NVR
17. Select Setup
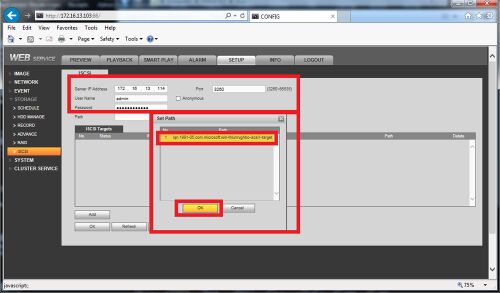
18. Select Storage then select iSCSI in the drop down menu and enter in the Server IP Address (the one returned on PowerShell) and configured port (the default is 3260), User name, and password, then click add on path and the NVR should automatically find the path. Select the path and click OK.
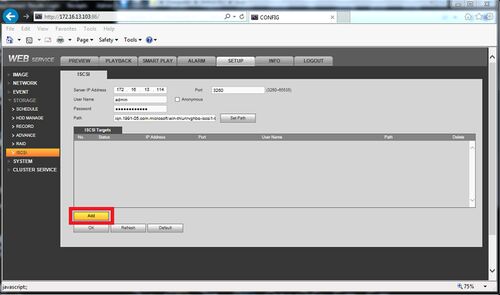
19. Now click add
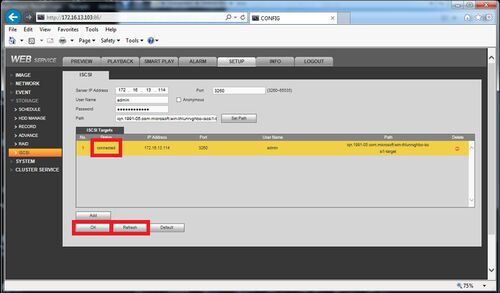
20. Click refresh if your iSCSI doesn't connect at first. In time it will initiate and connect, then click OK.
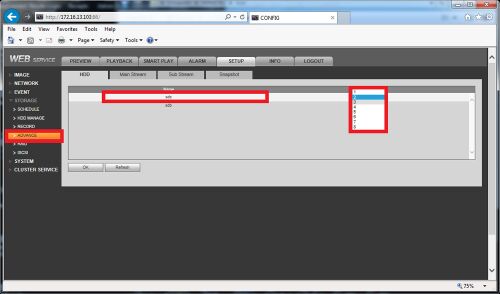
21. Click the advanced tab to configure your newly added iSCSI disk to a HDD group
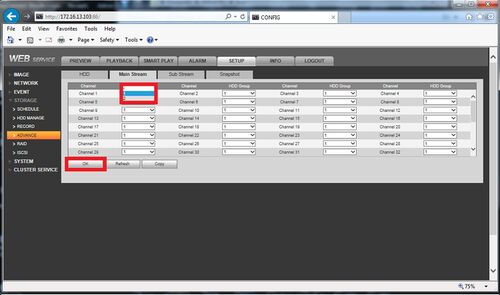
22. Click the other tabs (main stream, sub stream, or snapshot) to configure where each channel will be saved to.
