Solution Delivery/Vehicle Entrance And Exit Management
Description
This guide will cover how to setup Vehicle Entrance and Exit on DSS Pro V8
Prerequisites
- DSS Pro V8 Server
- DSS Pro V8 Client
- Dahua License Plate Recognition Camera
Step by Step Instructions
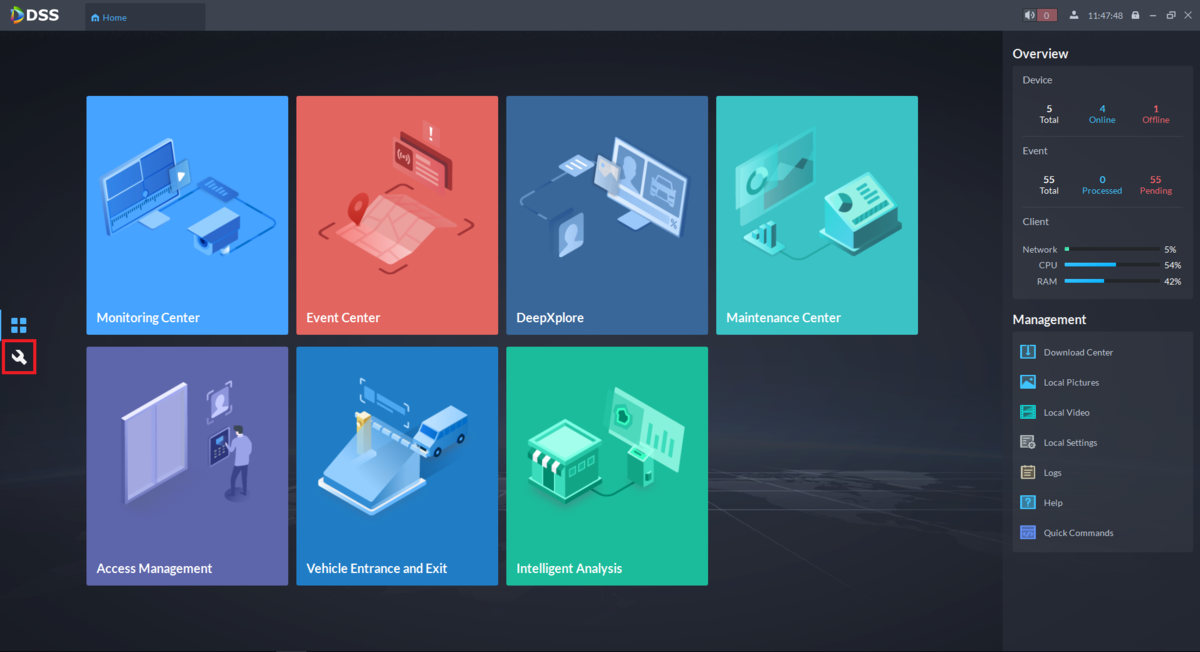
1. Open the DSS Pro V8 Client.
From the Home page select the Wrench icon on the left
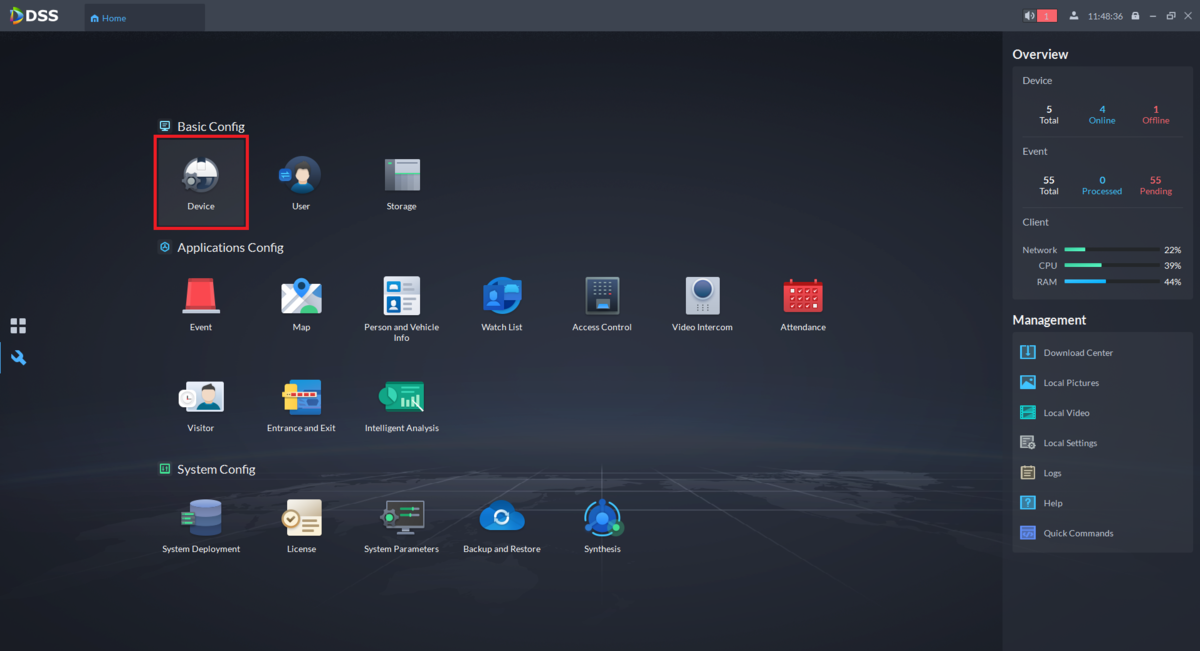
2. Under "Basic Config" select Device
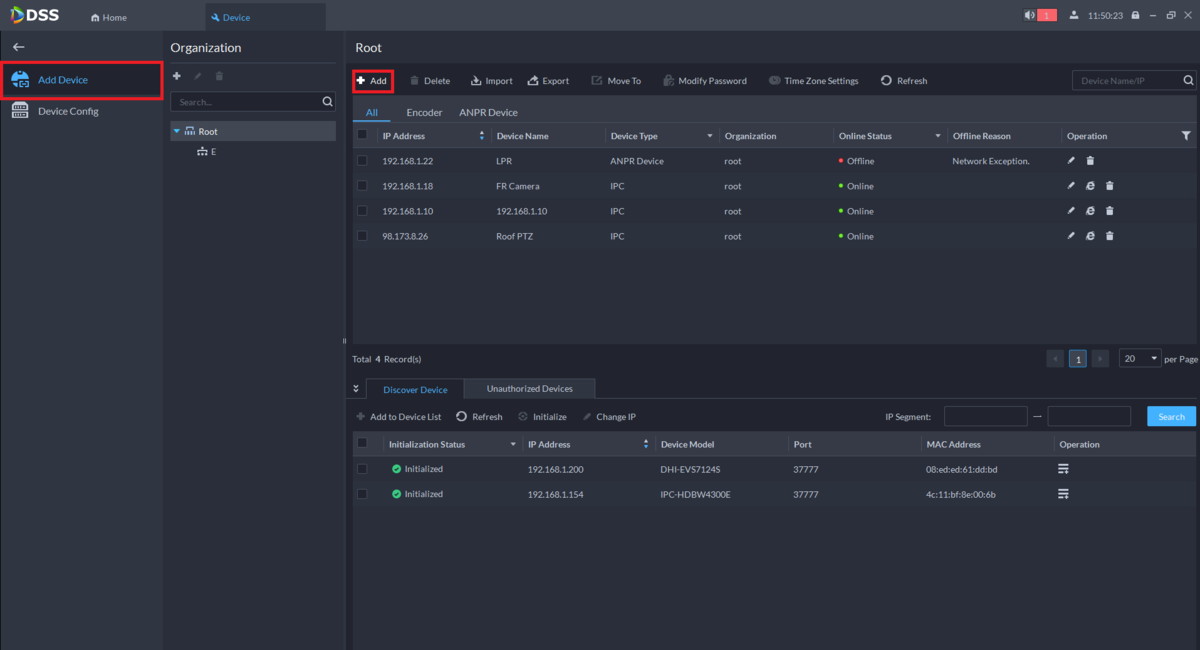
3. Select Add Device on the left.
Then select the Add option at the top
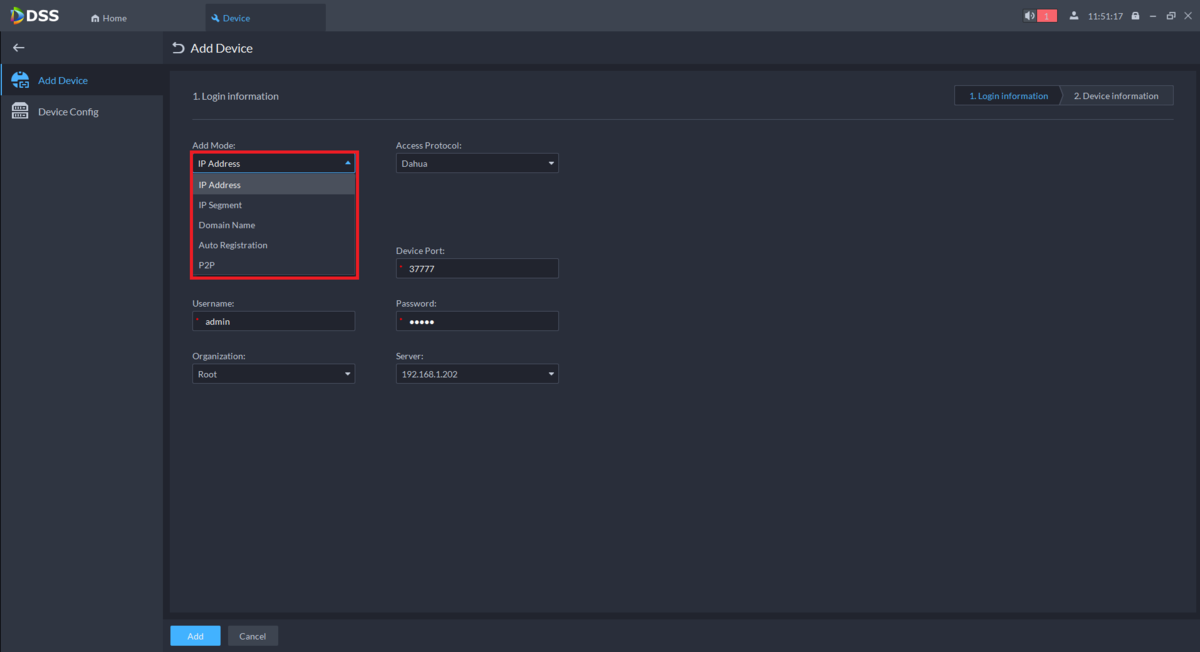
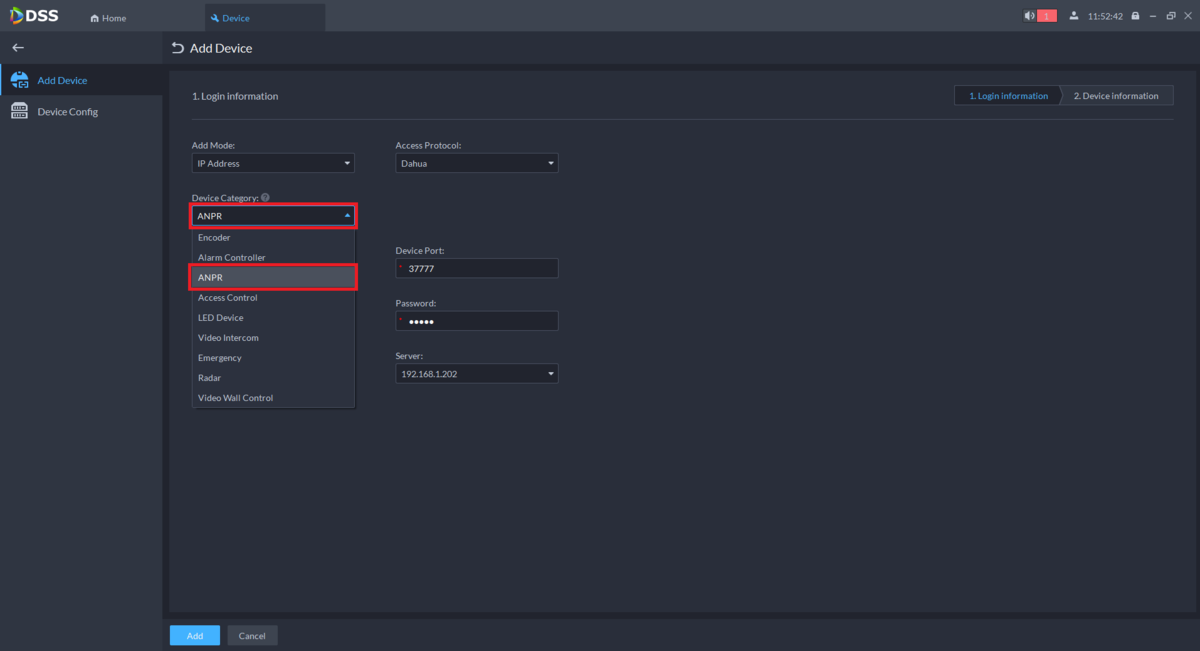
4. Under "Add Mode" click on the drop-down and select the appropriate option for how the DSS will connect to the License Plate Recognition Camera
5. Under "Device Category" click on the drop-down and select ANPR
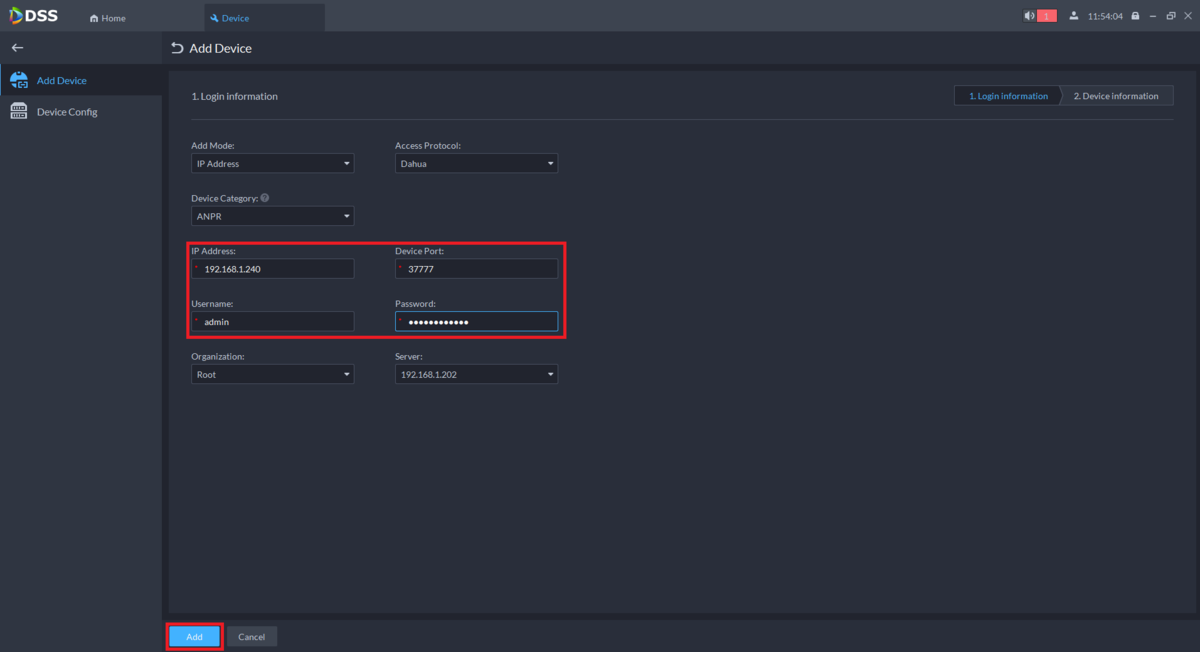
6. Enter the information for connecting to the camera.
(In this case IP Address was selected as the Add Mode.)
Then select Add at the bottom
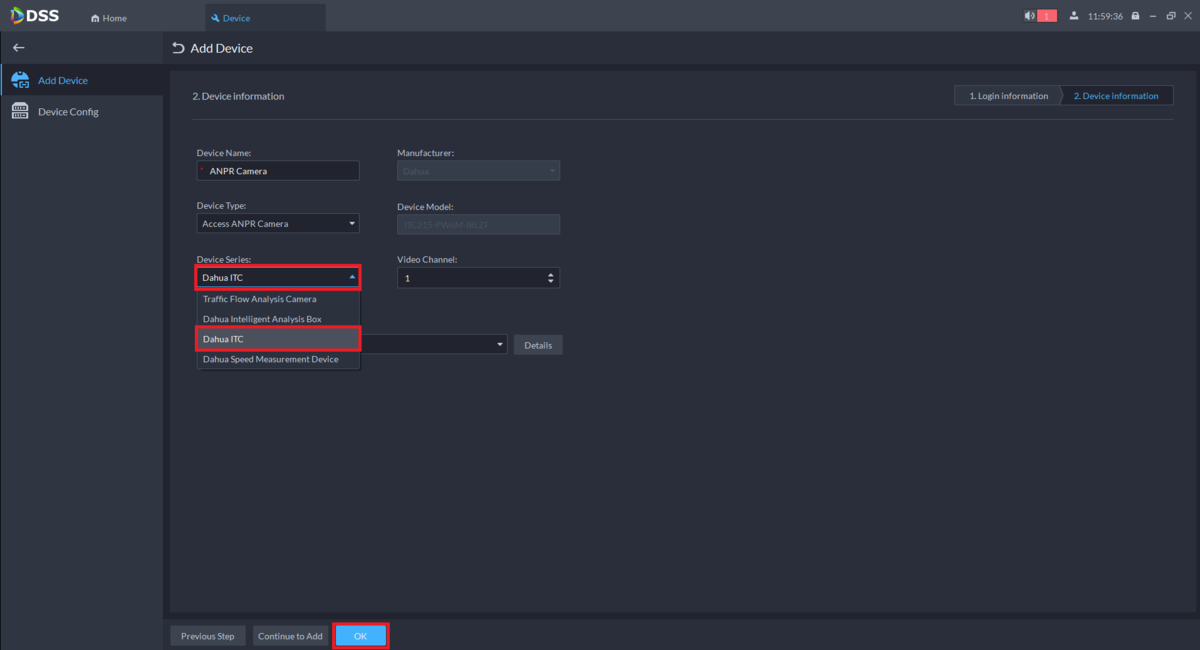
7. Enter a name for the camera under "Device Name".
Then click on the drop-down below "Device Type" and select Access ANPR Camera
8. Click on the drop-down below "Device Series" and select Dahua ITC
Make sure the number of channels and the Timezone are correct.
When you are done, select OK at the bottom
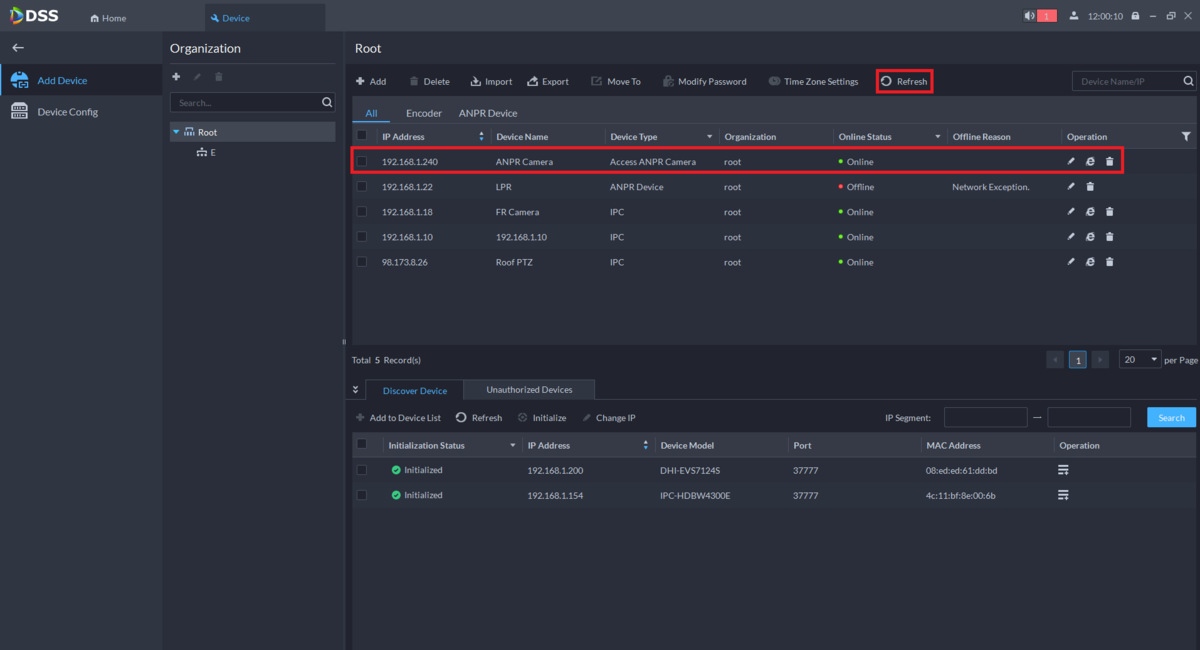
9. You should see the camera listed in your device list at the top.
If it does not show an Online Status of "Online" immediately, select the Refresh option at the top until it does
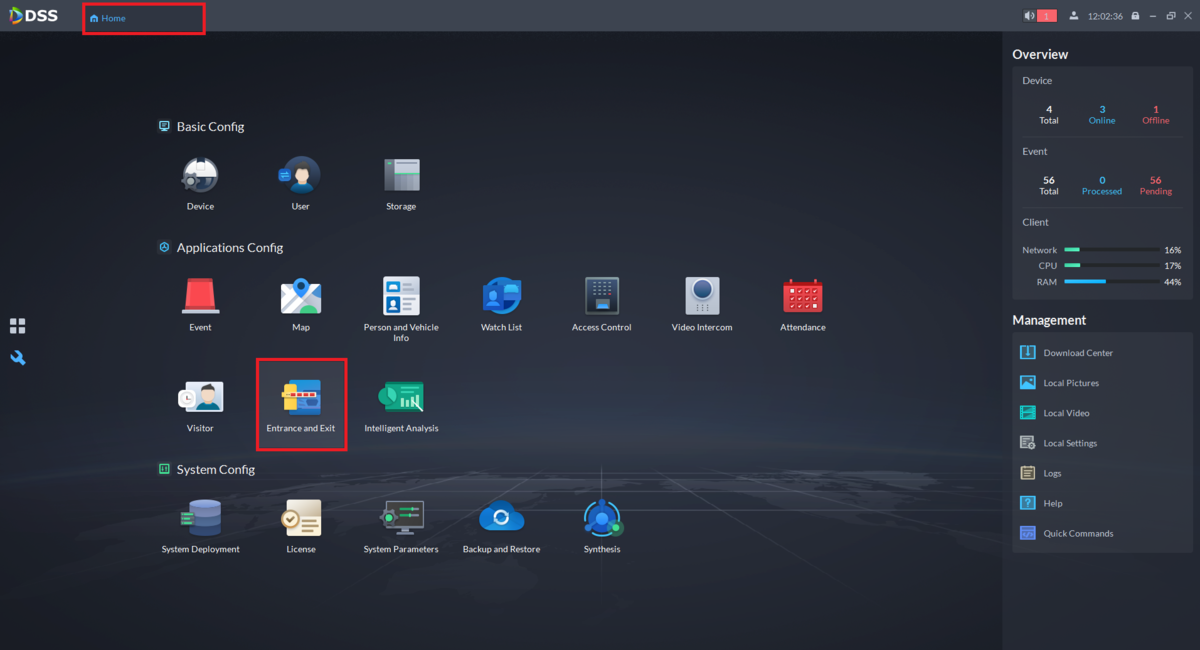
10. Select the Home tab at the top.
Then select Entrance and Exit under "Applications Config"
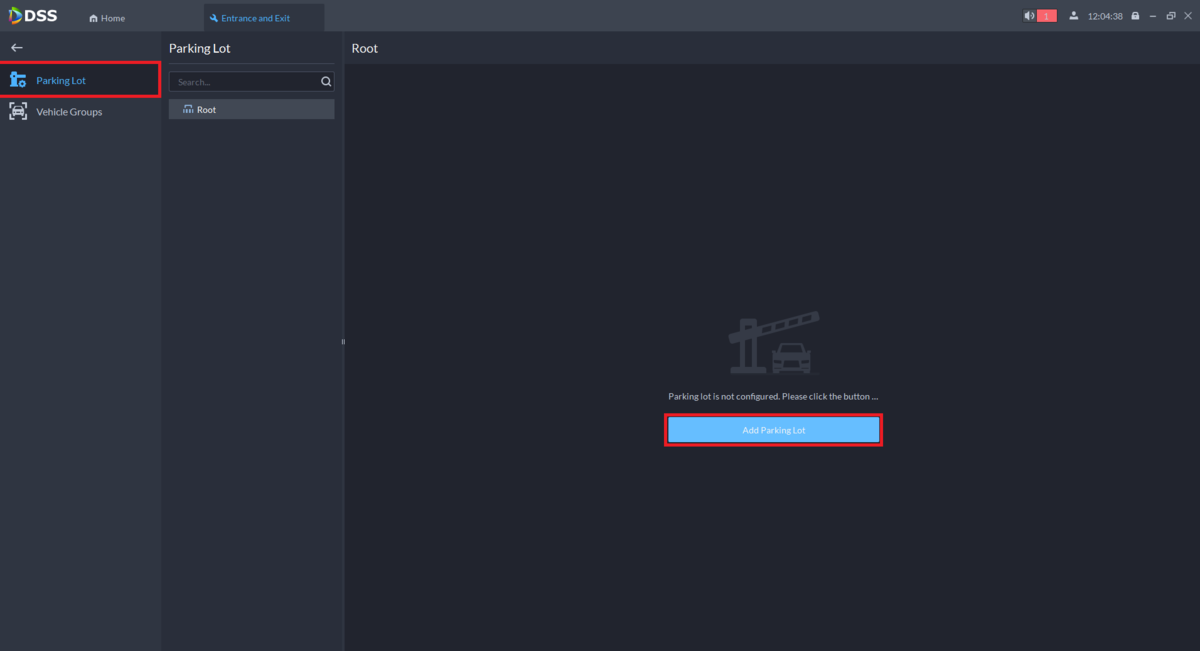
11. Select Parking Lot on the left.
Then select Add Parking Lot in the middle
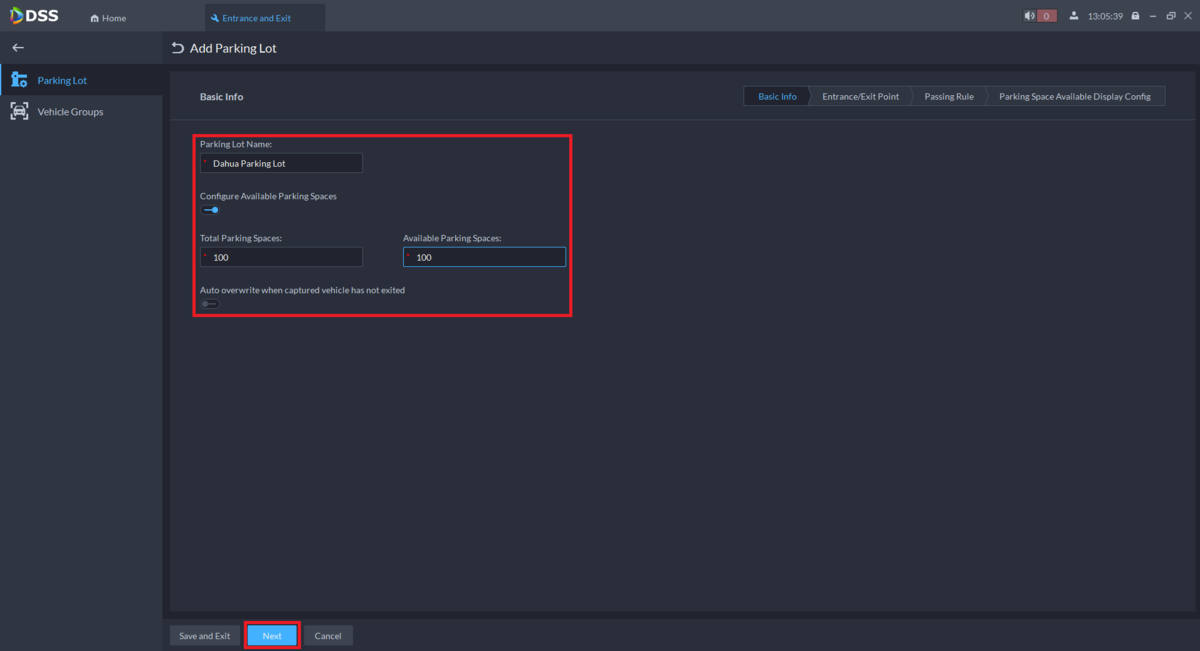
12. Enter the name of the parking lot under "Parking Lot Name".
Then enable Configure Available Parking Spaces if you want to have a specific number of parking spaces in your parking lot.
If you enabled the above, enter the "Total Parking Spaces" and "Available Parking Spaces" in the appropriate fields.
Then select Next at the bottom
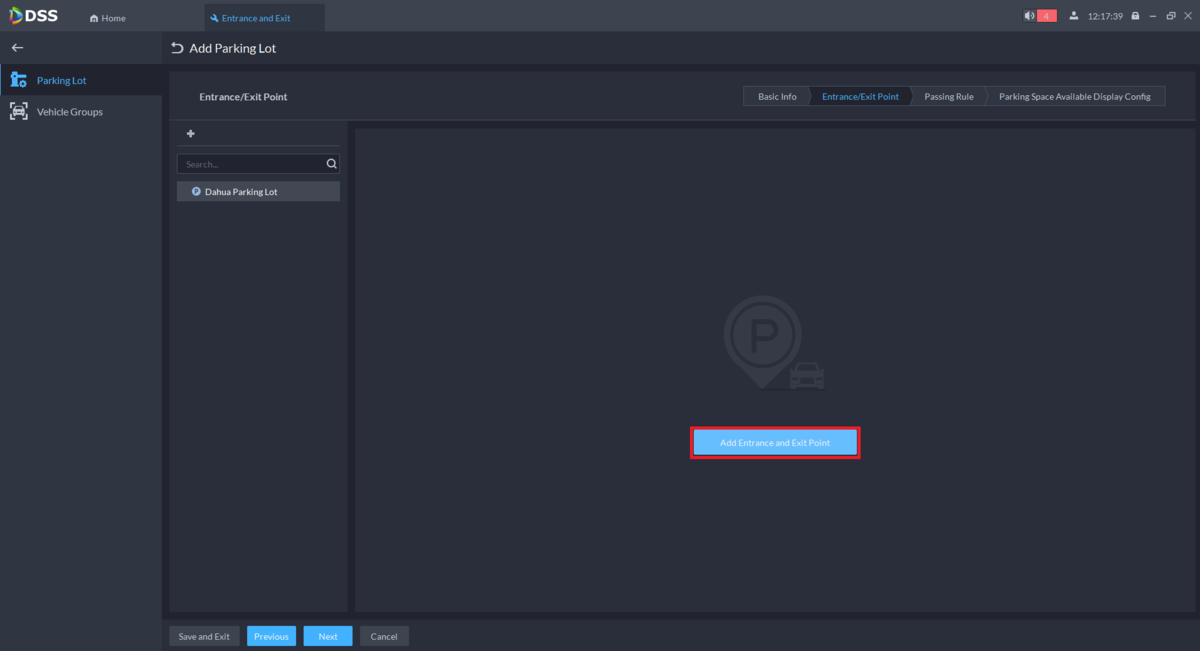
13. Select Add Entrance and Exit Point in the center
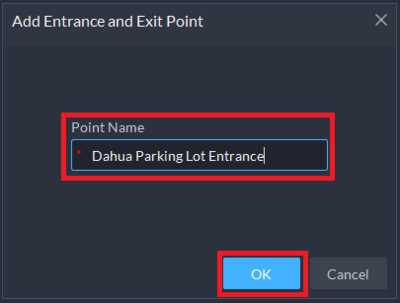
14. Enter the name of the Entrance/Exit point you are adding under "Point Name"
Then select OK
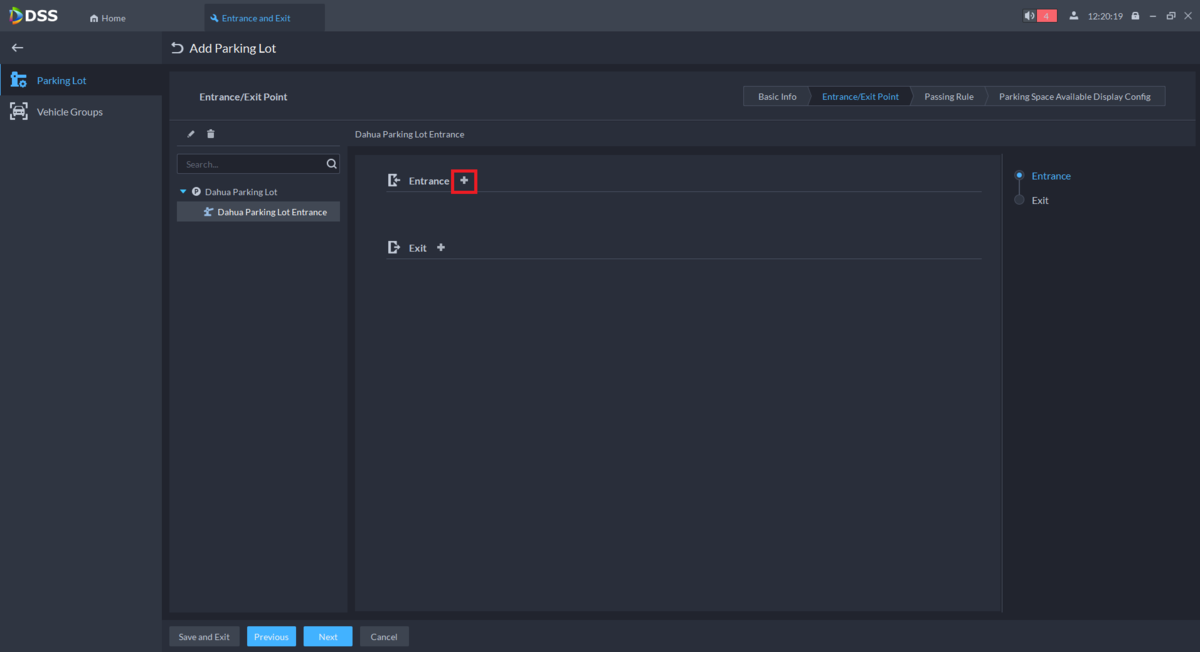
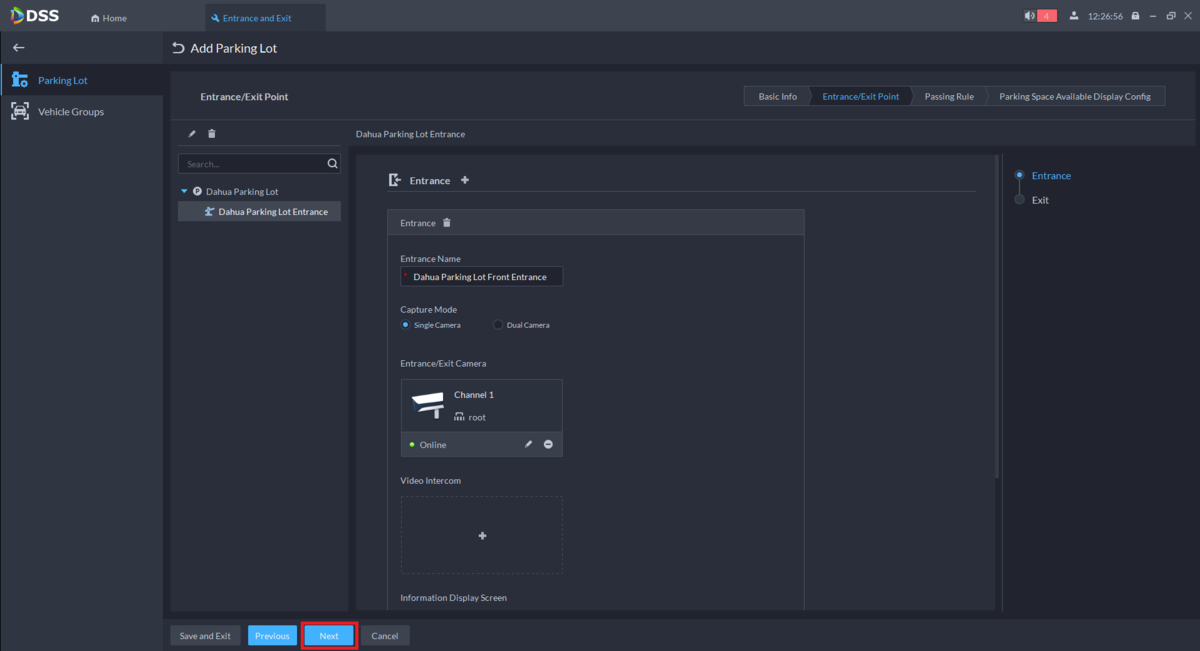
15. Press the + button next to "Entrance"
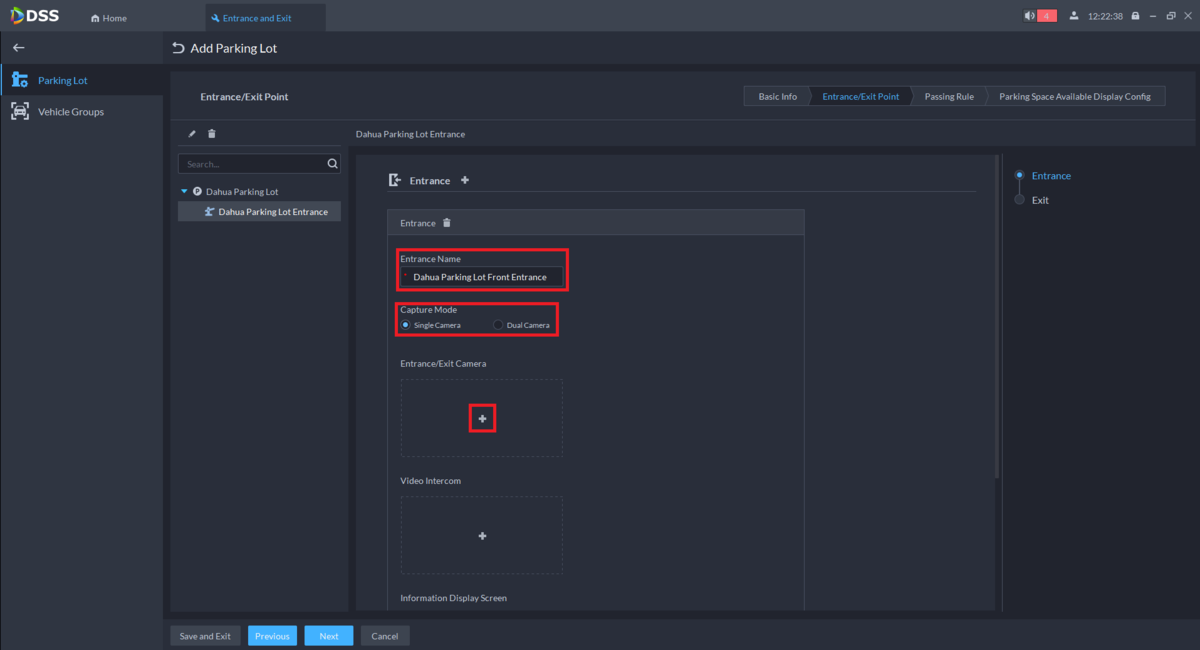
16. Enter the name of this Entrance under "Entrance Name".
Then select the type of camera you have (Single or Dual Lens) under "Capture Mode".
And then press the + button under "Entrance/Exit Camera"
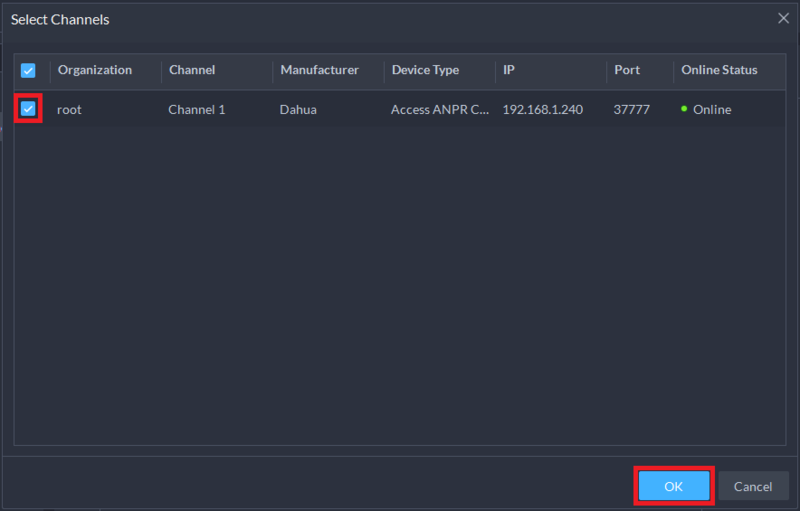
17. Check the box to the left of the License Plate Recognition camera you added in Steps 1-9
Then select OK at the bottom
18. You should see the camera you just added listed under "Entrance/Exit Camera".
If you want to add a Video Intercom device or Information Display Screen you can press the + button below each of those and select he appropriate devices that you have already added to your DSS system.
Additionally, if you want to add an Exit, scroll down and select the + next to "Exit", and repeat steps 15-18 for an exit.
When you are done making changes, select Next at the bottom.
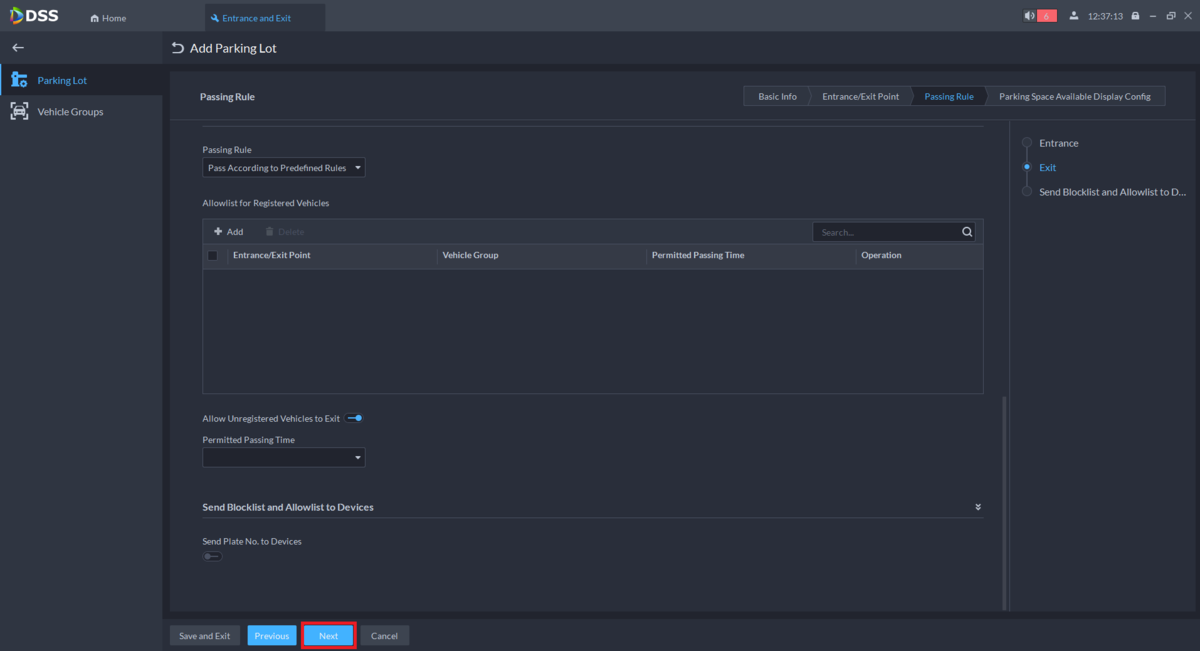
19. You can setup the Allowlist and Blocklist for vehicles entering and exiting the parking lot on this page: Allowlist and Blocklist Setup
If you don't want to set that up, just select Next at the bottom
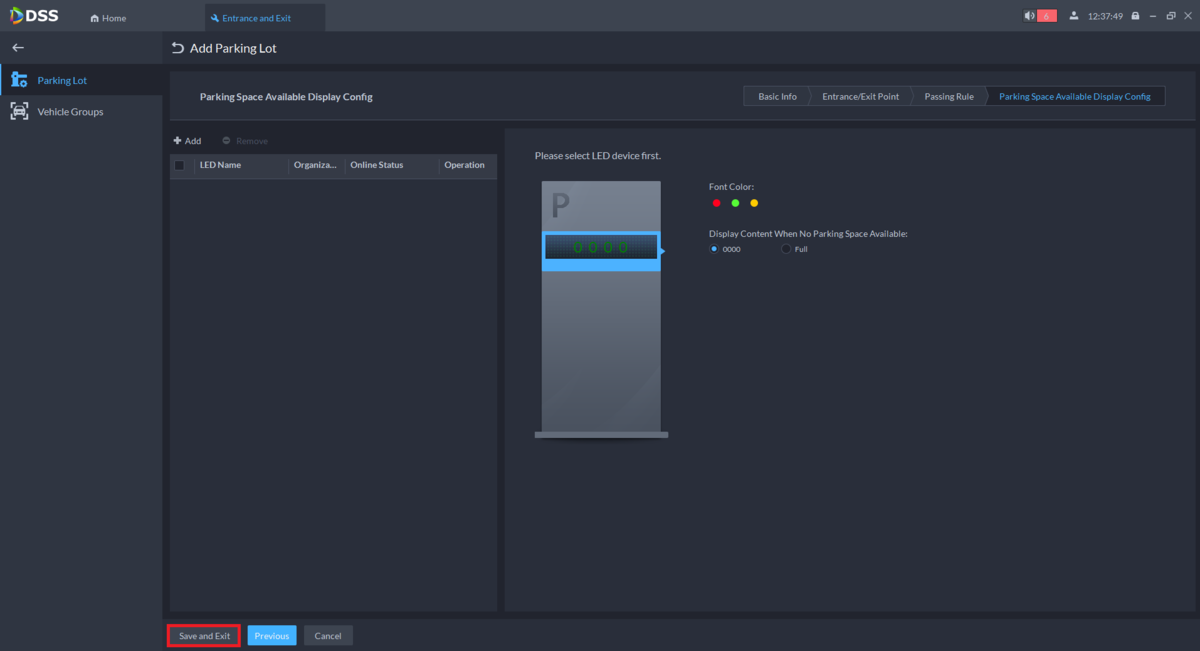
20. If you have a Parking Space Available Display unit you want to setup to display the current available spaces in the parking lot, you can set that up on this screen.
When you are done select Save and Exit at the bottom
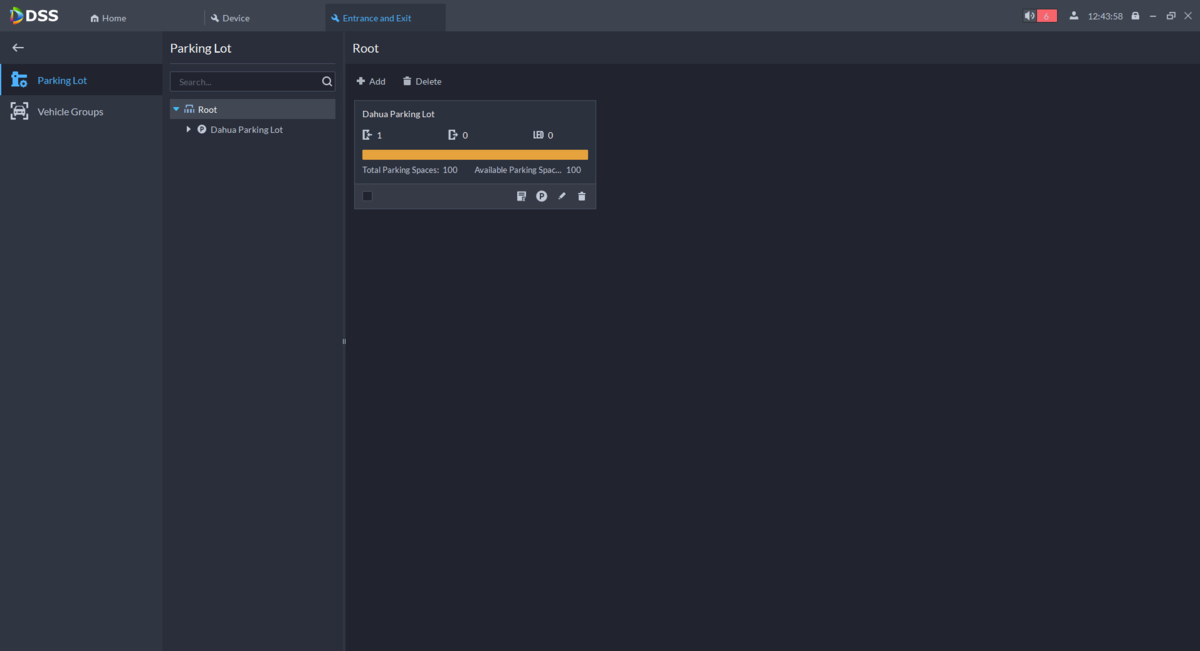
21. You will now see the parking lot you setup with information on how many vehicles enter and exit, as well as information on the number of available parking spaces.
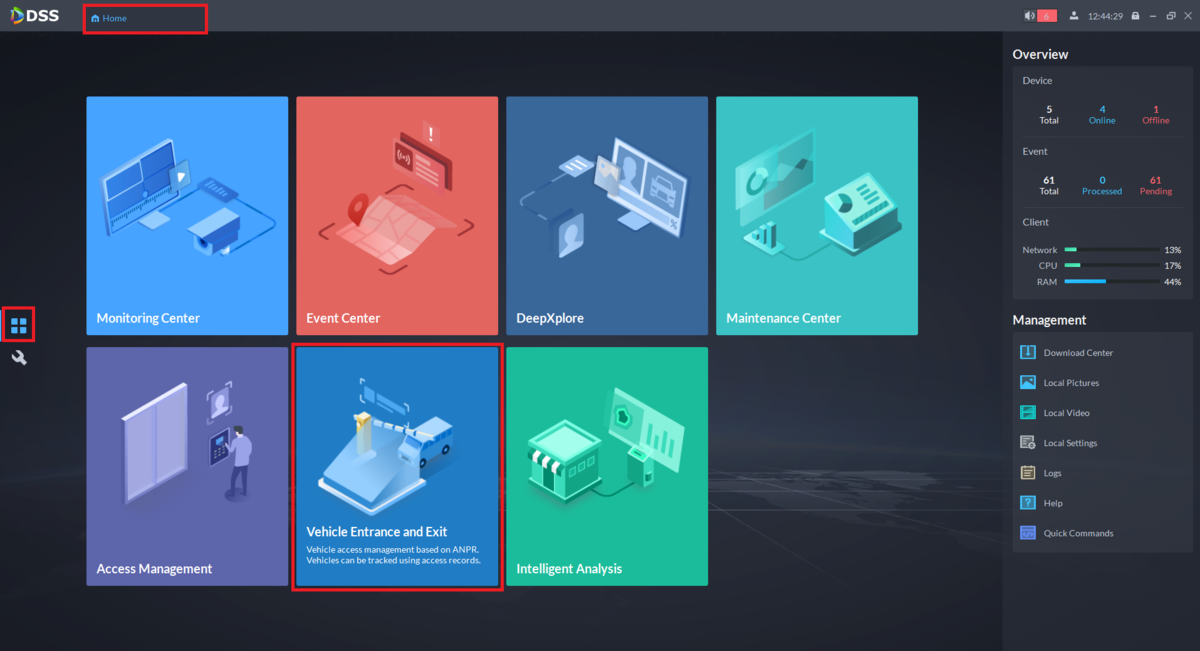
22. To view the live view for your parking lot, first select the Home tab at the top.
Then select the Grid icon on the left.
And then select the Vehicle Entrance and Exit box
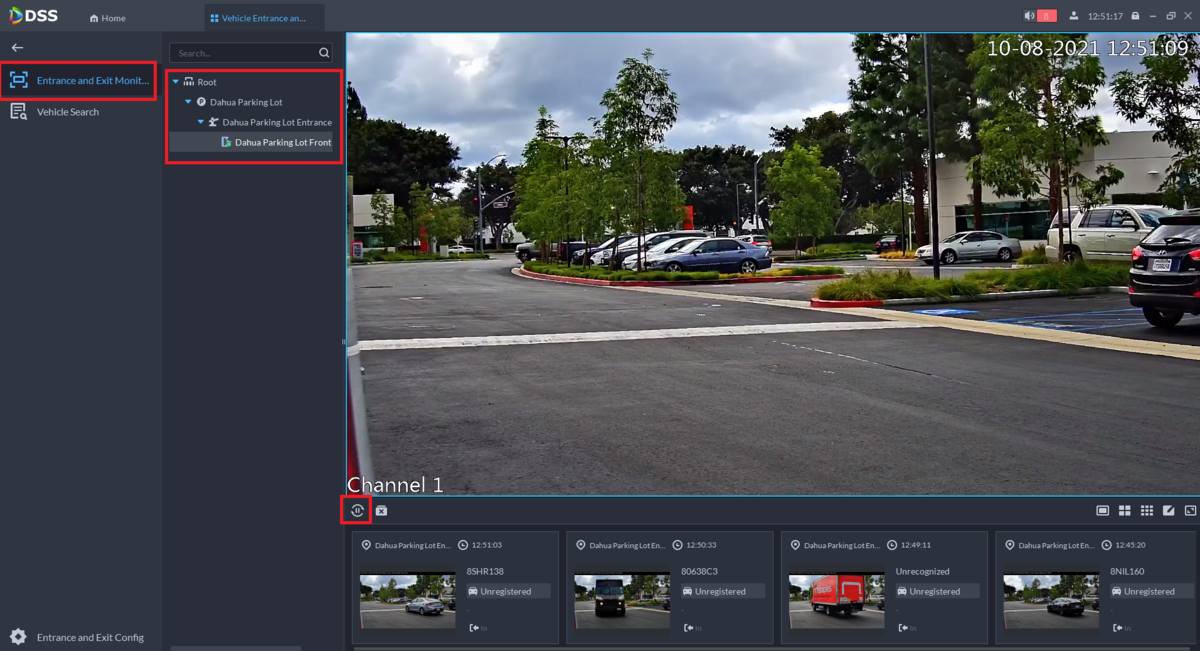
23. Select Entrance and Exit Monitoring on the left.
Then expand the options under the parking lot you setup in previous steps.
Then double-click on the Entrance or Exit name to see the live view of that camera.
Make sure to enable the refresh button, at the bottom left of the live view, so it displays a Pause icon.
You will see vehicle information as vehicles enter and exit at the bottom of the screen.
(If the icon changes to a Play button, select it to change it back to a Pause button.)
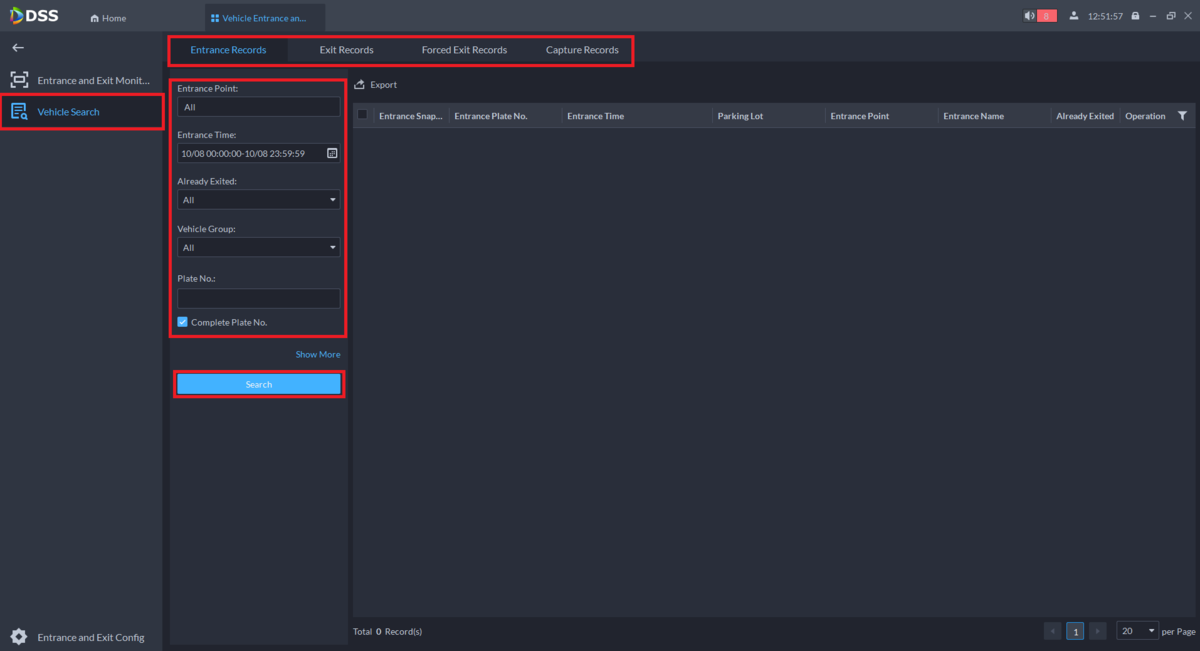
24. To search all vehicles that have entered or exited the parking lot, select Vehicle Search on the left.
Then select which type of records to search at the top: Entrance Records, Exit Records, Forced Exit Records, or Capture Records.
Then choose all the filters on the left, including the Date and Time Range.
And then select Search
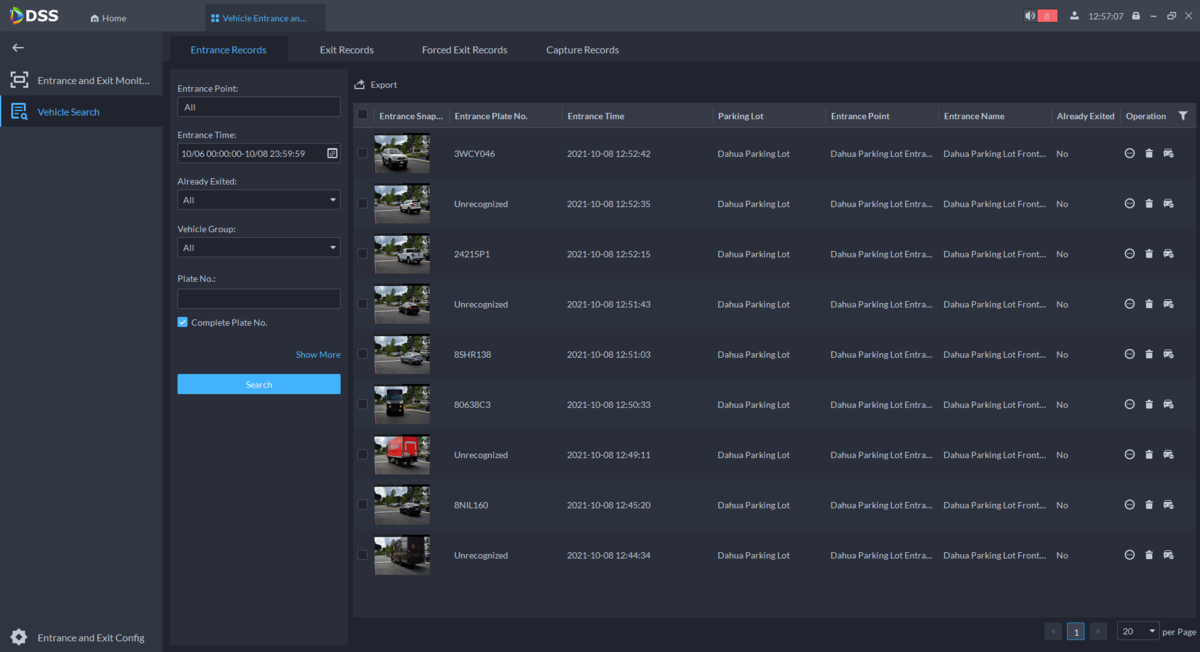
25. You will see the list of all vehicles that have Entered or Exited the parking lot based on the filters you selected on the previous step
