Template:Motion Record WebUI New
Description
This article will go over Motion Recording setup in detail on the recorder's new GUI
Prerequisites
- Dahua Recorder with new GUI
- Dahua Camera
Video Instructions
Step by Step Instructions
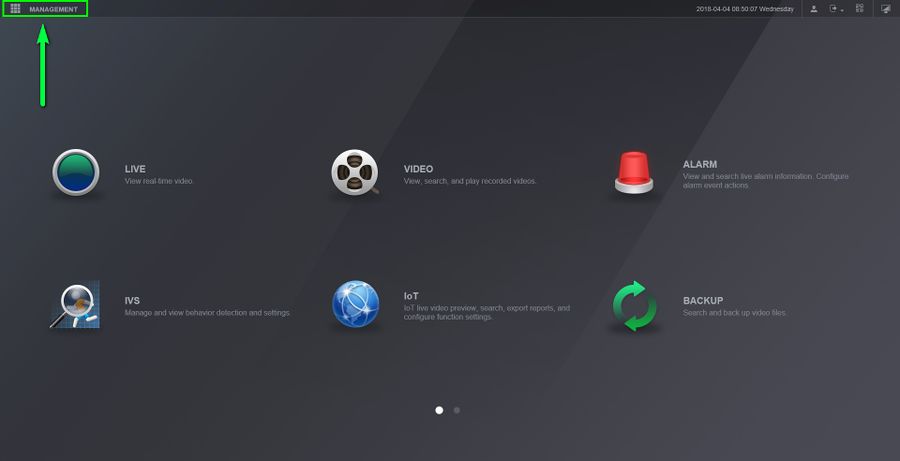
1. On the main menu go to Management
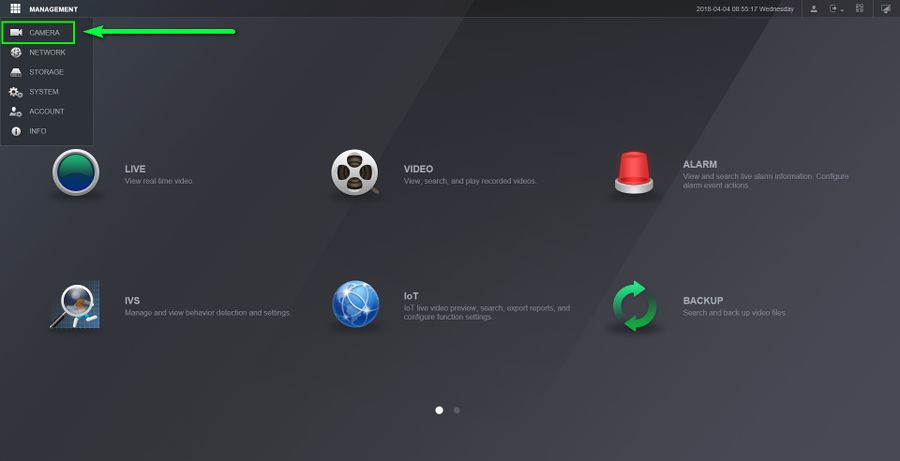
2. Click on Camera
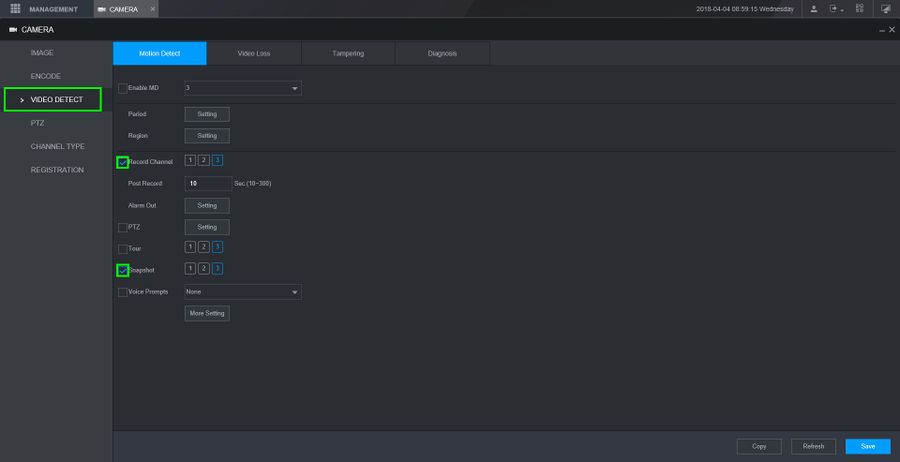
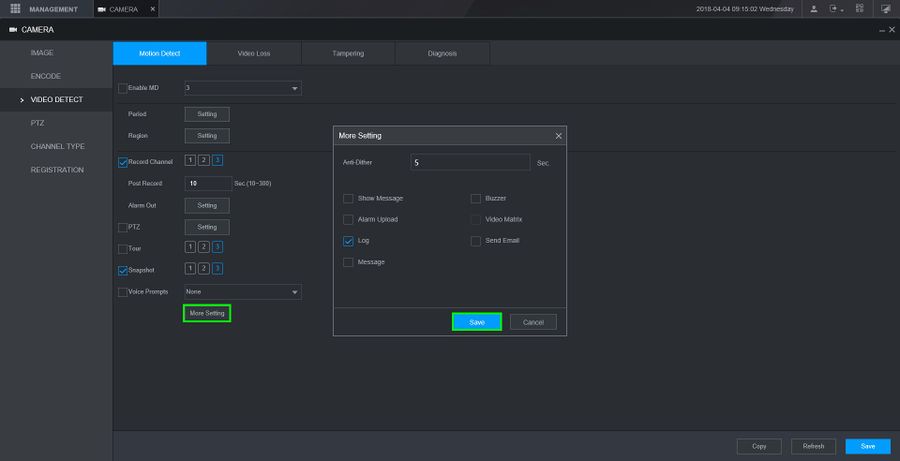
3. Under Camera select "Video Detect" to enter the Motion Detect settings and enable the functions for your application
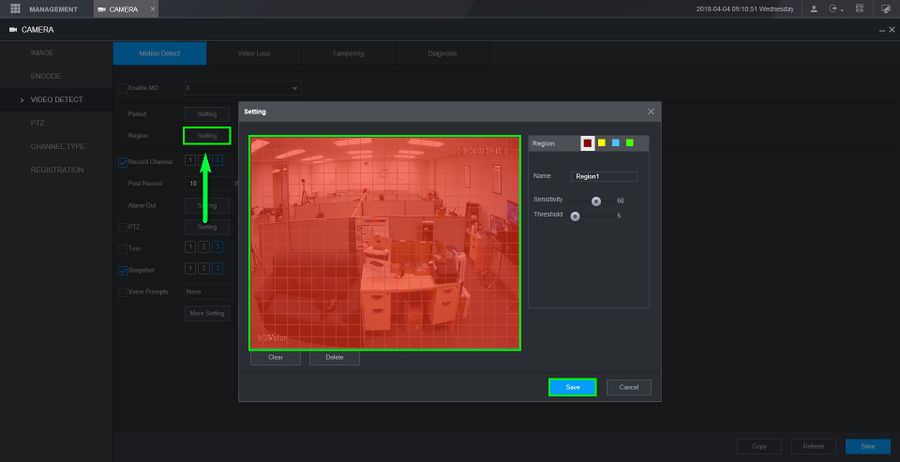
4. Click on "Settings" next to region to modify hot spots.
Note-Colored boxes detect motion, transparent boxes do not detect motion
5. Click on "More Settings" to open up the rest of the options for Motion Detect
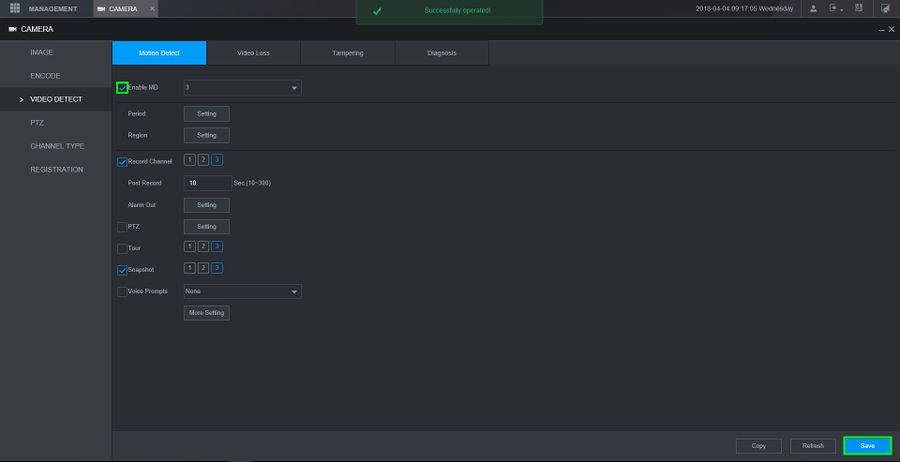
6. After configuring the settings, check "Enable MD" to enable motion detect and save the configurations by clicking on "Save"
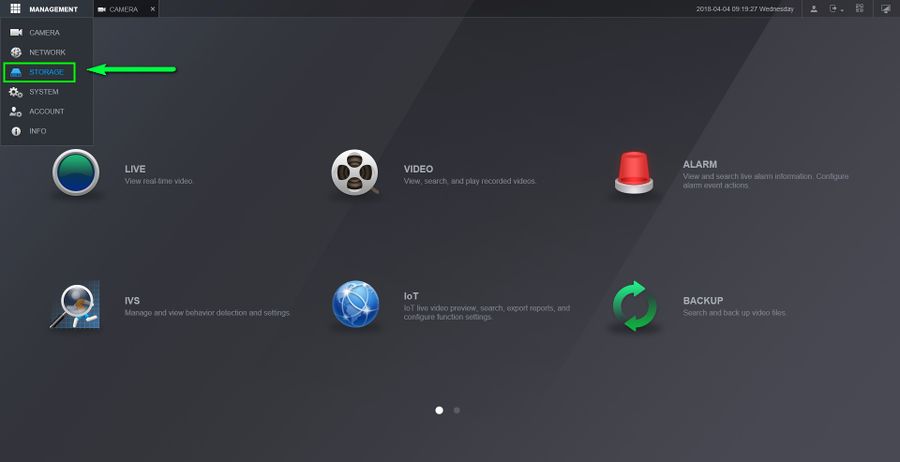
7. We need to setup a schedule now so go to "Management" and click on "Storage"
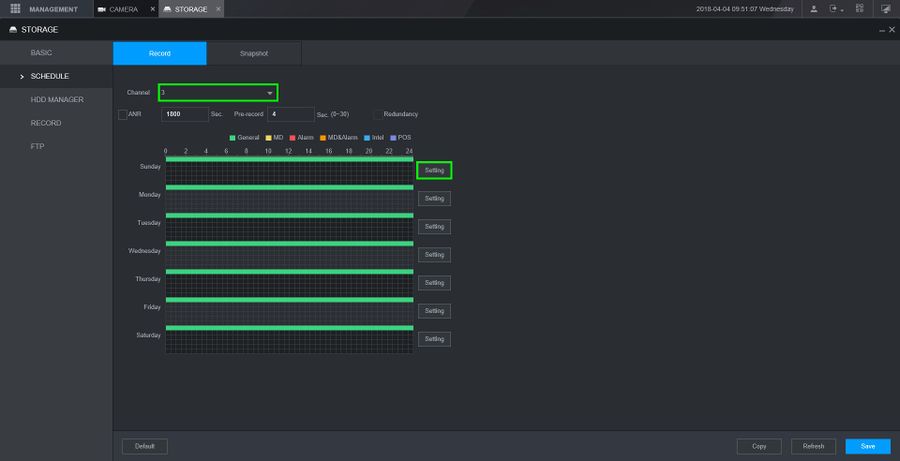
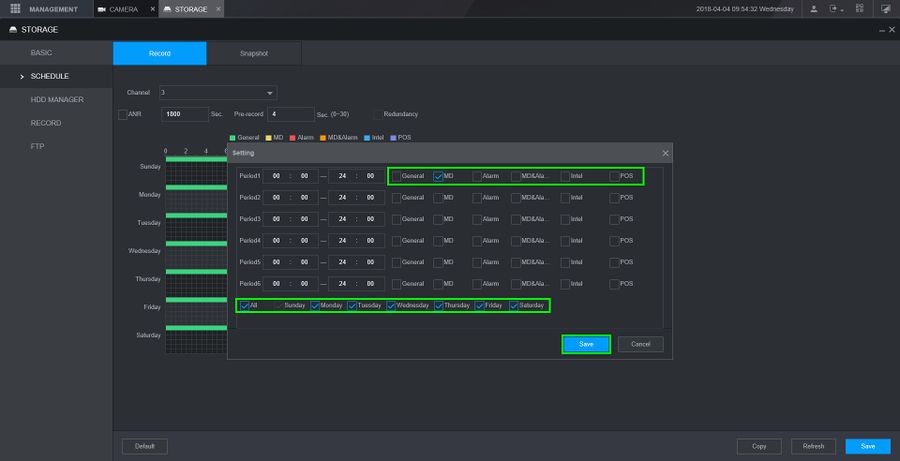
8. Select the channel you are working with and go to settings
9. For this example we are doing Motion recording only for everyday of the week, so we disabled General recording and only kept Motion
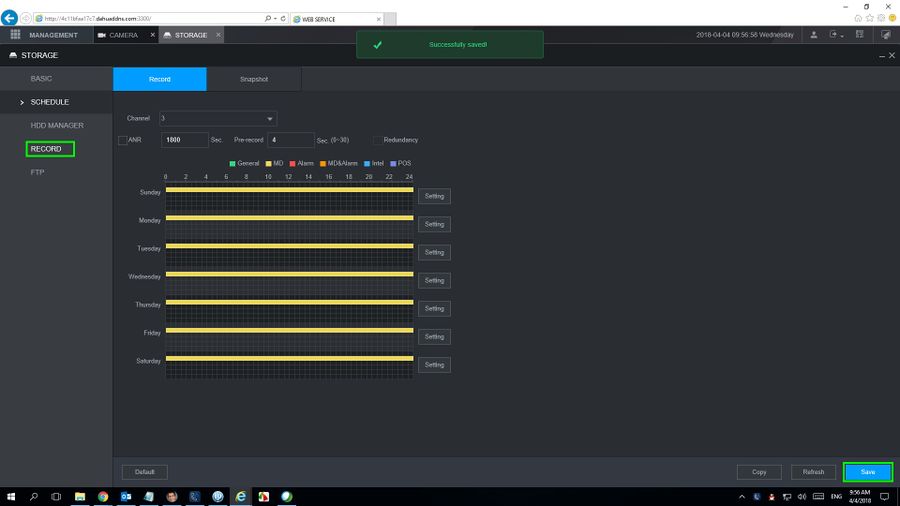
10. After setting up a schedule make sure you save any changes. Next go to "Record"
- Note- Clicking to "Copy" will allow you copy the current settings to other channels
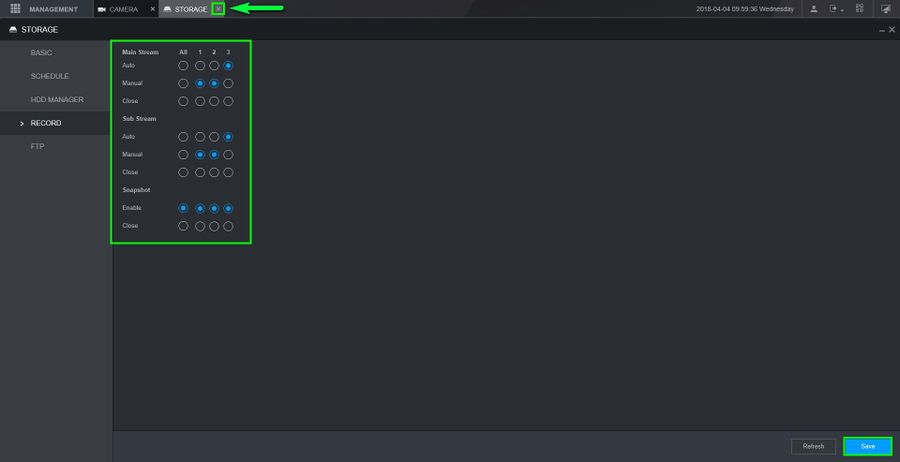
11. Make sure the channel(s) you are working with are set to "Auto" for the streams you want to enable. After doing so, exit the "Storage" tab.
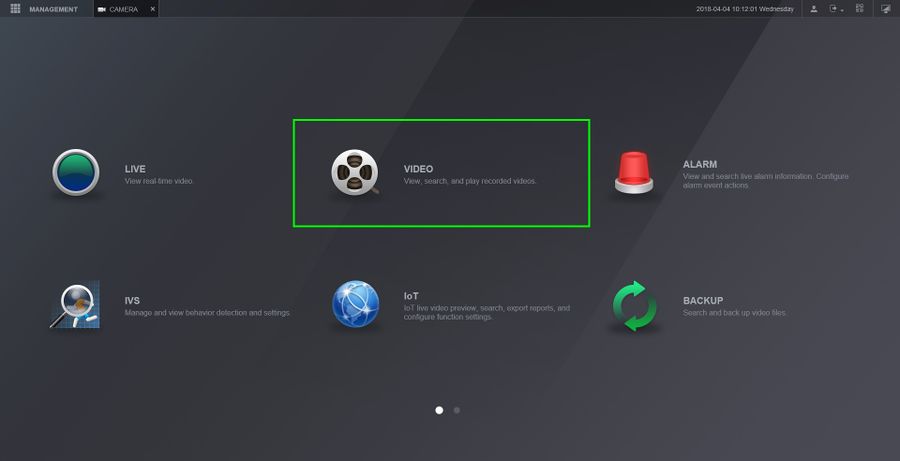
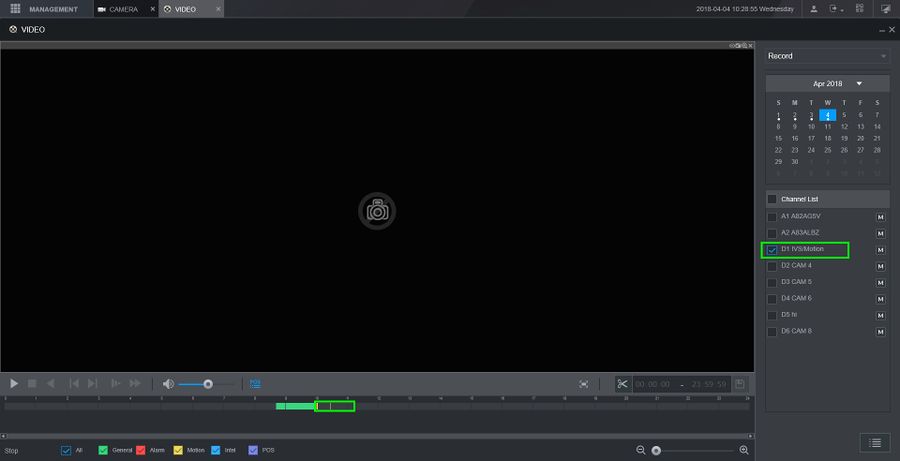
12. Go to "Video"
13. You can now check recording for motion. It will be indicated with yellow bars
