Thermal/DHI-ASI7213X-T1/Instructions/Initial Setup Software
Contents
DHI-ASI7213X-T1 Initial Setup
Description
This guide will cover the initial thermal station setup which includes device initialization and creating secondary admin user.
Prerequisites
Video Instruction
Step by Step Instruction
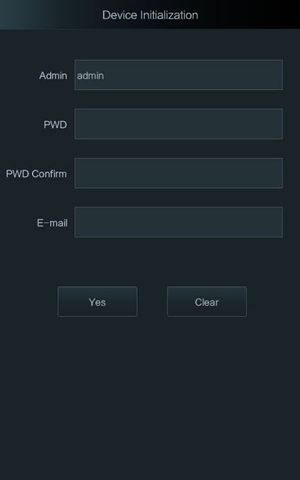
1. Administrator password and an email should be set the first time the access controller is turned on or after factory reset.
 Administrator and password set on this interface are used to log in to the web and local UI.
 The administrator password can be reset through the email address you entered if the administrator forgets the password.
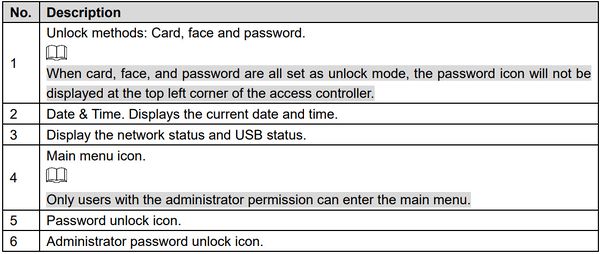
2. Once device is initialized, it will bring up the homepage of the thermal station.
3. Tap on ![]() to access the main menu.
to access the main menu.
4. You will see several option to login to the main menu. For initialization process, you can only use Admin option.
5. Enter the password that you use to initialize the device.
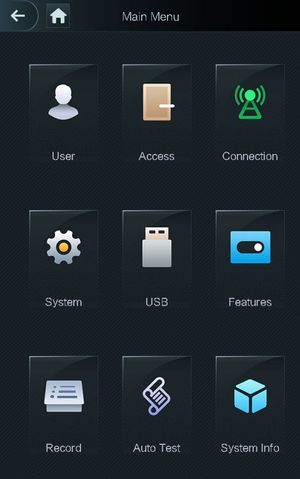
6. Main menu page will launch.
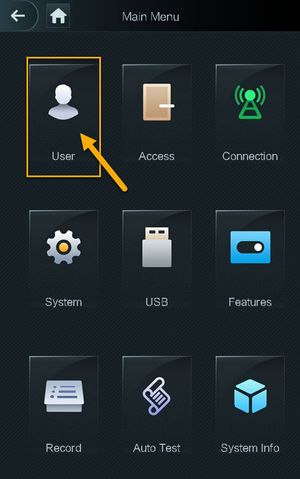
7. Tap on User.
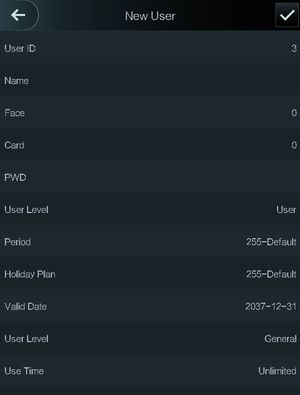
8. Tap on New User. Enter all information for new user.
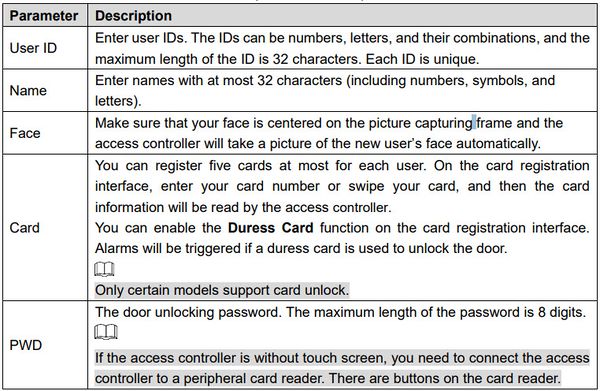
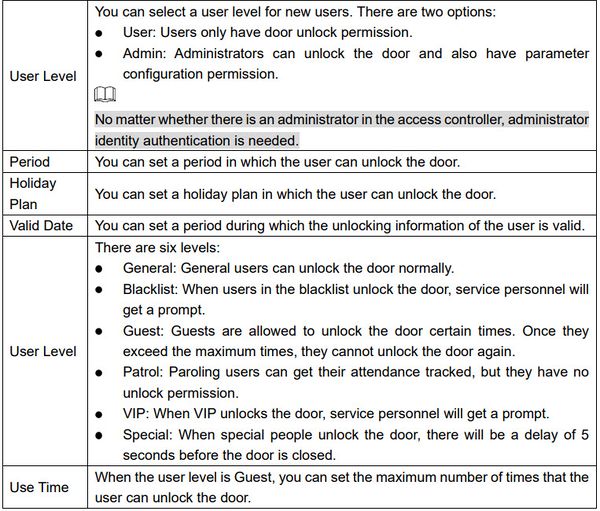
New User parameter description:
