Video Intercom/SIP 2.0/How To Add More VTHs To Modular Video Intercom
Contents
How to add more VTHs to modular Video Intercom
Description
This guide will go over adding more Rooms (VTHs) to an already existing Video Intercom system
Prerequisites
- An already existing Video intercom setup
- Additional VTHs
- Configtool 5.000.0000001.7
- PC
Video Instructions
Step by Step Instructions
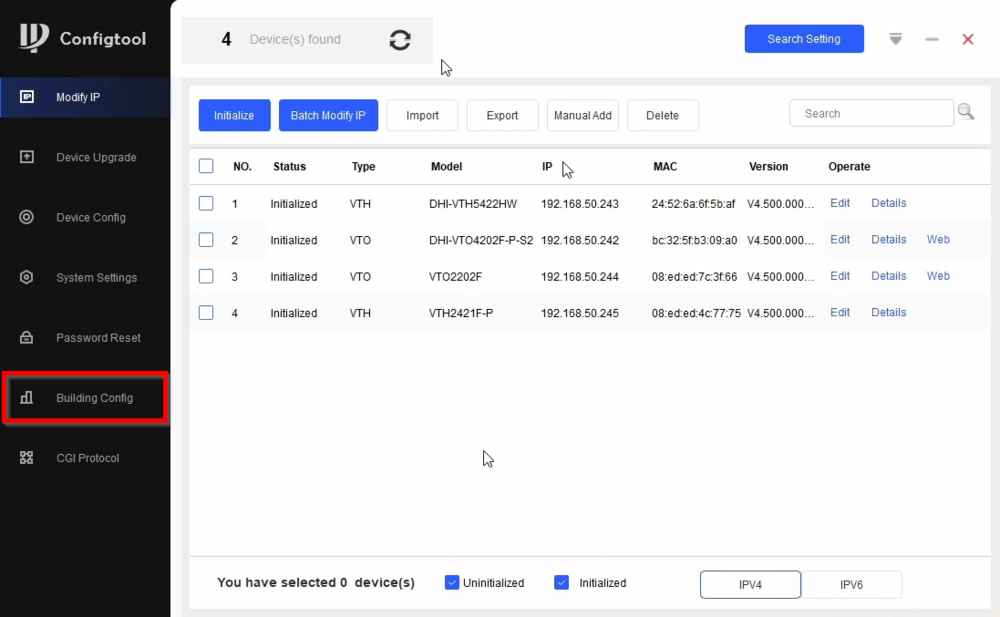
1. Initialize and change the IP Scheme to all additional VTHs Then go to Building Config
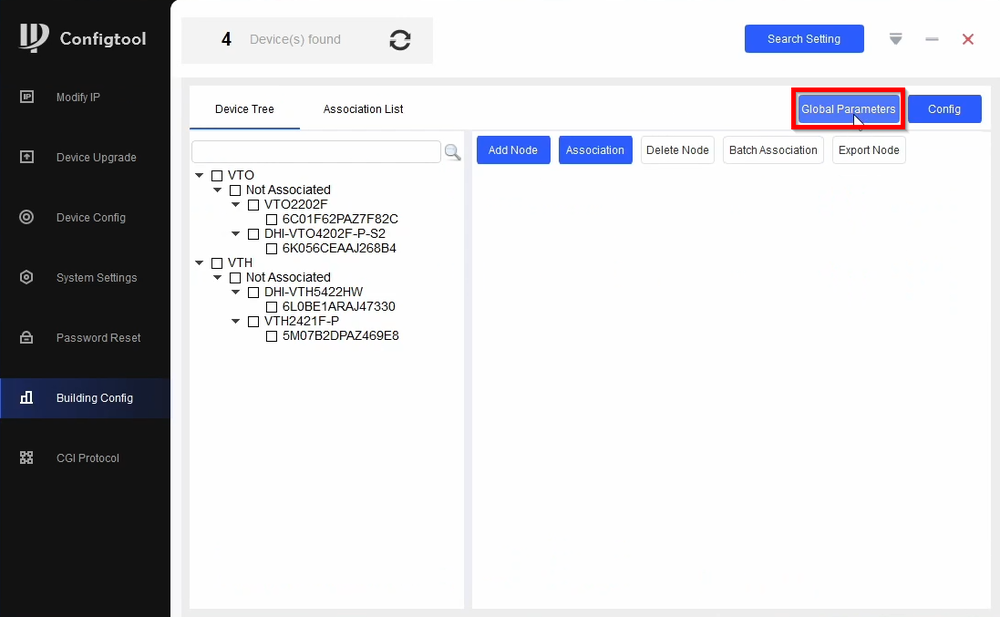
2. Go to Global Parameters
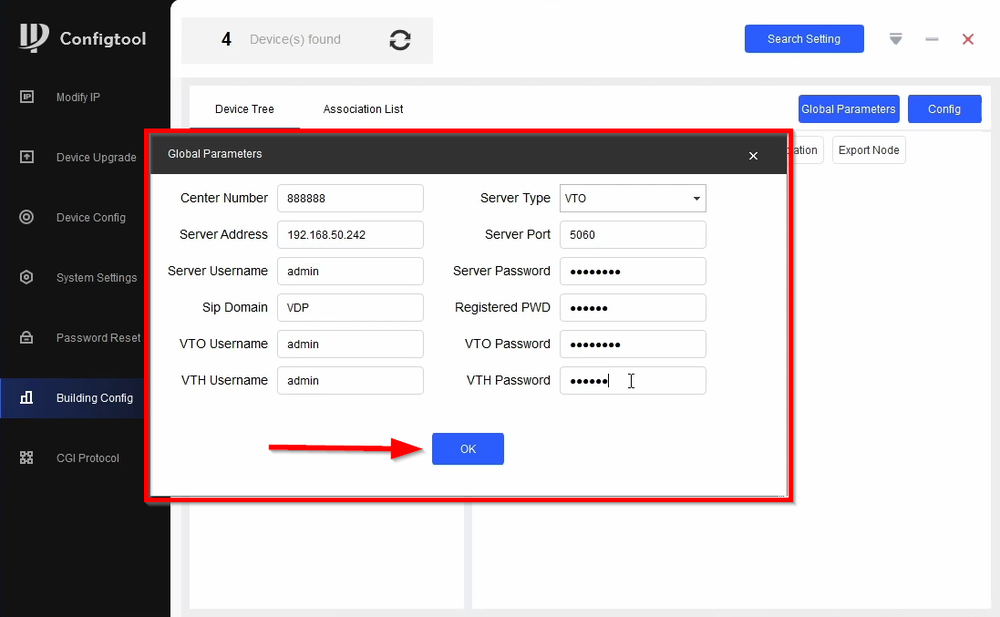
3.
| Global Parameters | |
|---|---|
| Center Number = 888888 | Server Type = VTO |
| Server Address = Enter VTO IP | Server Port = 5060 |
| Server Username = Recommended to use VTO's Username | Server Password = Recommended to use VTO's Password |
| Sip Domain = VDP | Register PWD = Leave as Default |
| VTO Username = Enter VTO's Username | VTO Password = Enter VTO's Password |
| VTH Username = Enter VTH's Username (admin is default) | VTH Password = Enter VTH's Password |
Enter the VDP device's information and click on OK
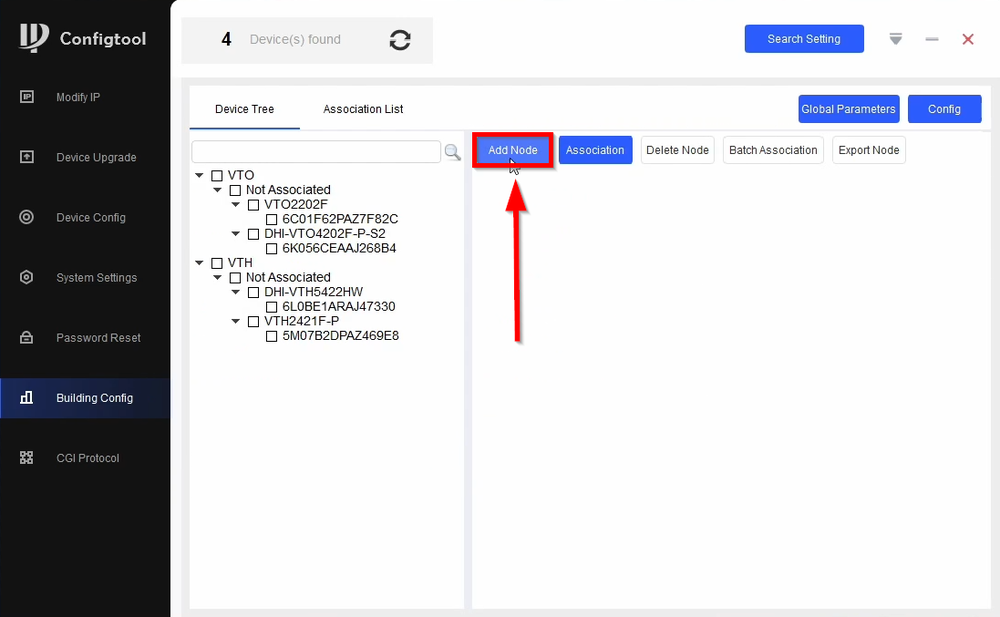
4. Click on Add Node to start your project
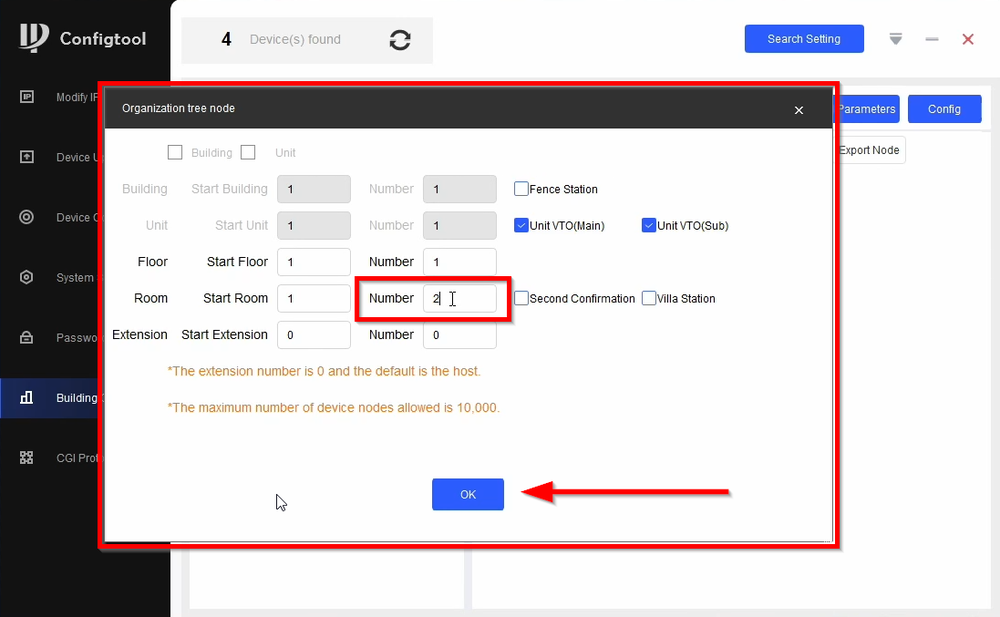
5. Change the Number of Rooms to the amount of VTHs of your setup. In this guide we are only adding 1 more VTH. That's a total of 2 VTHs. Click on OK
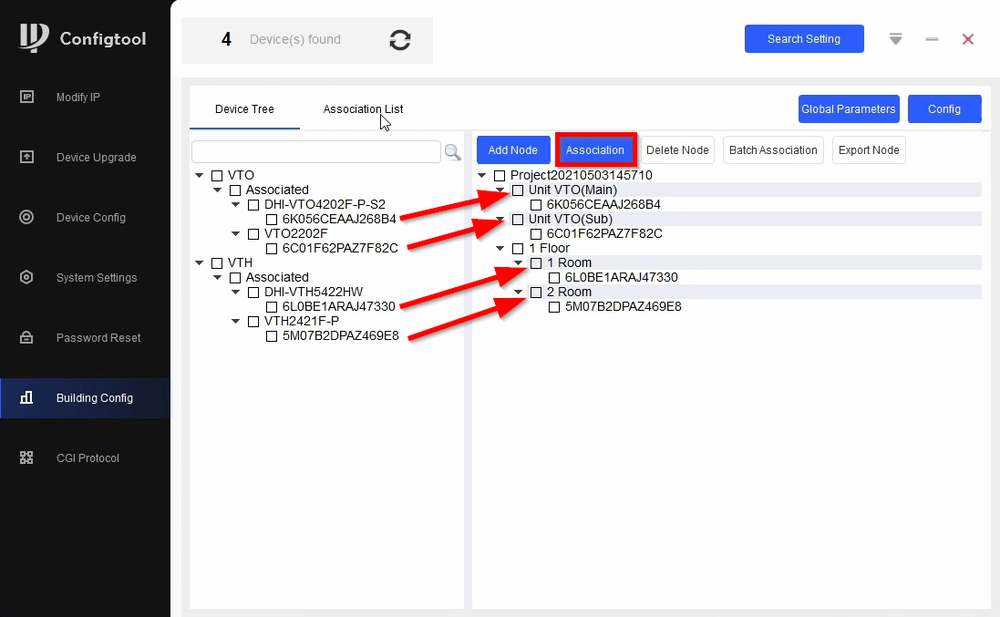
6. Associate the devices to the project entry. Make sure to do them one at a time.
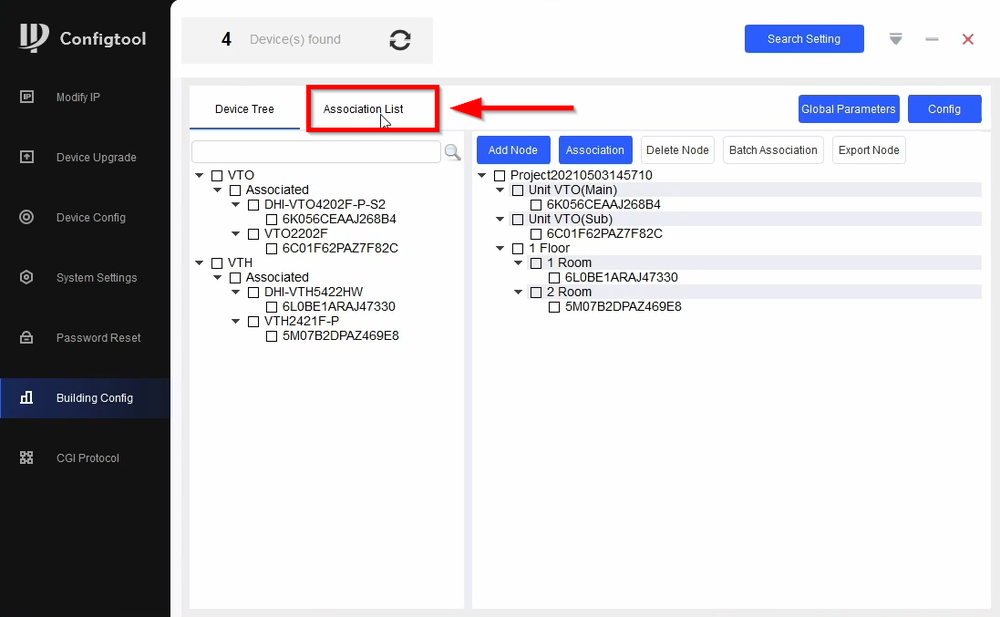
7. Go to Association List
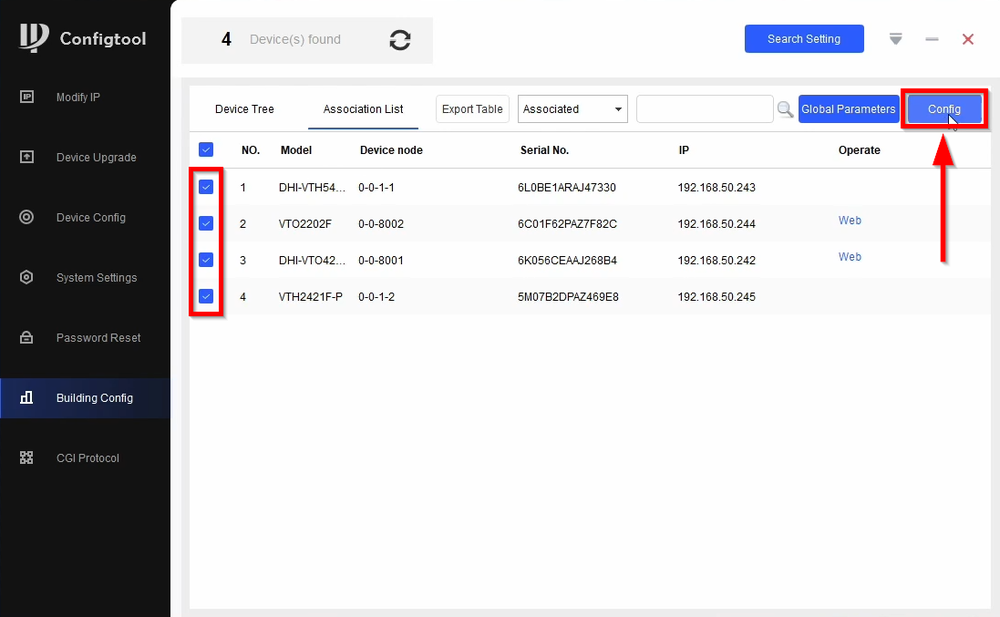
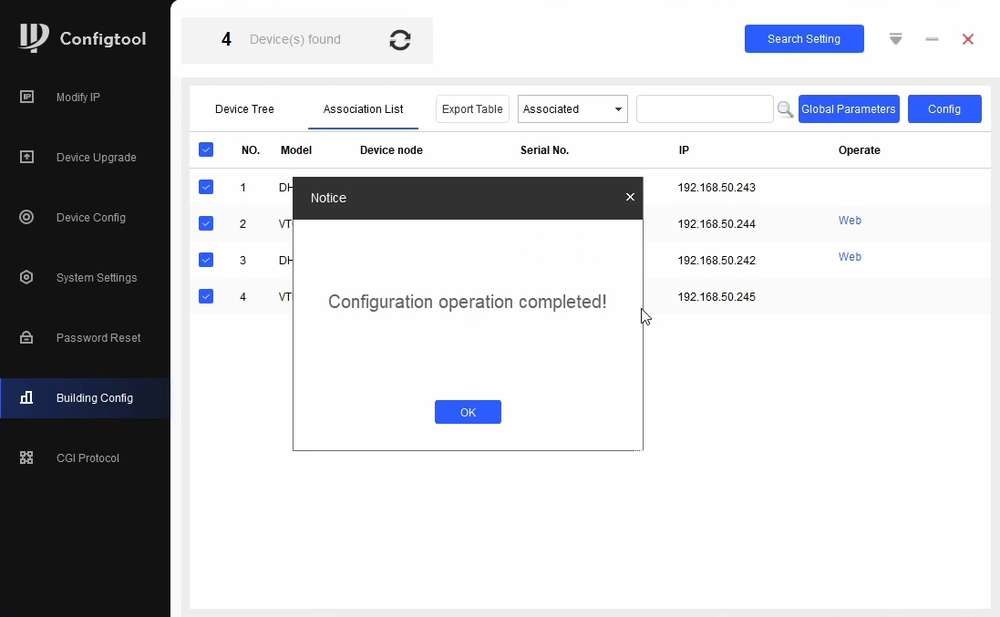
8. Check all the devices and click on Config
9. Configtool will then finalize the configuration and the devices will reboot
