Video Intercom/SIP 2.0/How to setup DHI-VTO4202F-P-S2 with Multiple Floors via ConfigTool
Contents
How to setup DHI-VTO4202F-P-S2 with Multiple Floors via ConfigTool
Description
This article will cover the Building Config feature on Configtool.
We will be setting up multiple Floors using the VTO4202F-P-S
Prerequisites
- Initialized VDP devices Click here for Instructions
- Latest version of Configtool
Video Instructions
Step by Step Instructions
1. Make sure VTOs and VTHs are initialized and using the same password.
Note: VTOs and VTHs have different password requirements. VTOs will use 8-Character Alpha Numerical password and VTHs will use a 6-digit password
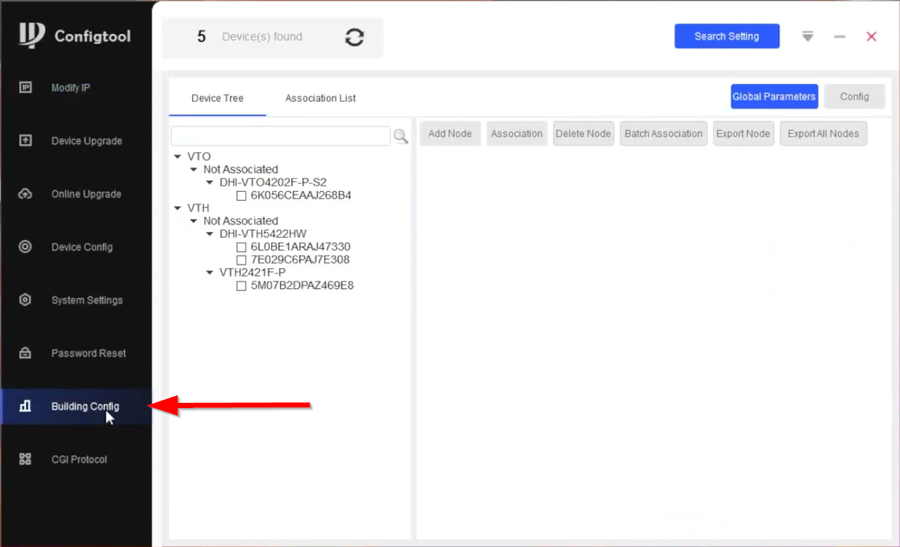
2. Navigate over to Building Config
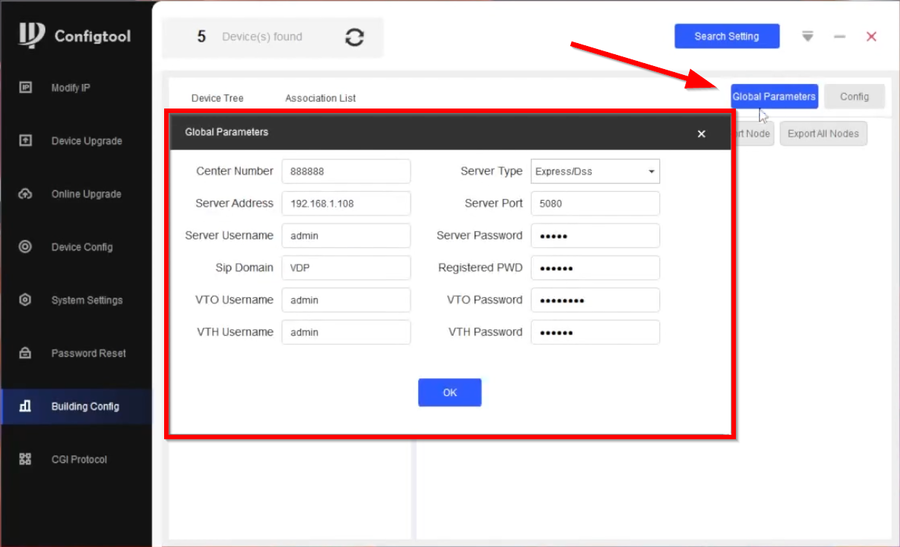
3. Click on Global Parameters and you will get a popup to fill in login credentials.
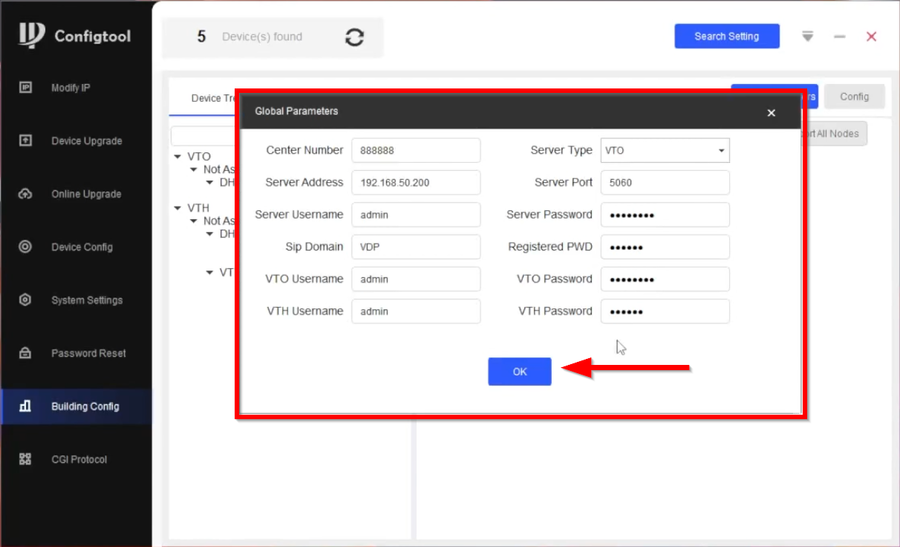
4. Enter the information for the SIP server and login information to the units to give Configtool permission to login to the units and push the SIP Server Configuration. Then click on OK to save.
| Global Parameter | |
|---|---|
| Center Number = Leave Default | Server Type = VTO |
| Sever Address = Main VTO IP Address | Server Port = 5060 |
| Sever Username = Enter VTO username | Sever Password = Enter VTO password |
| Sip Domain = VDP | Register PWD = Leave Default |
| VTO Username = Enter VTO username | VTO Password = Enter VTO password |
| VTH Username = Enter VTH username | VTH Password = Enter VTH Password |
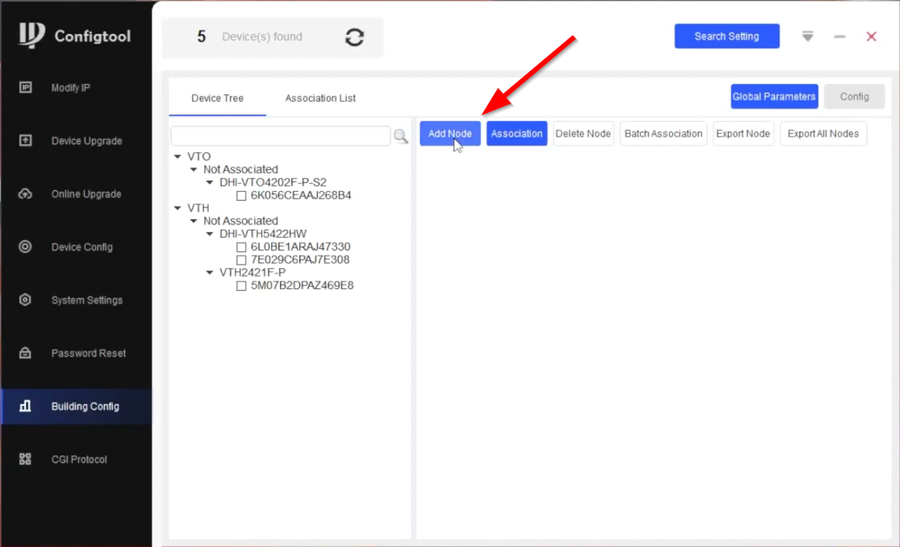
5. Click on Add Node to start your project
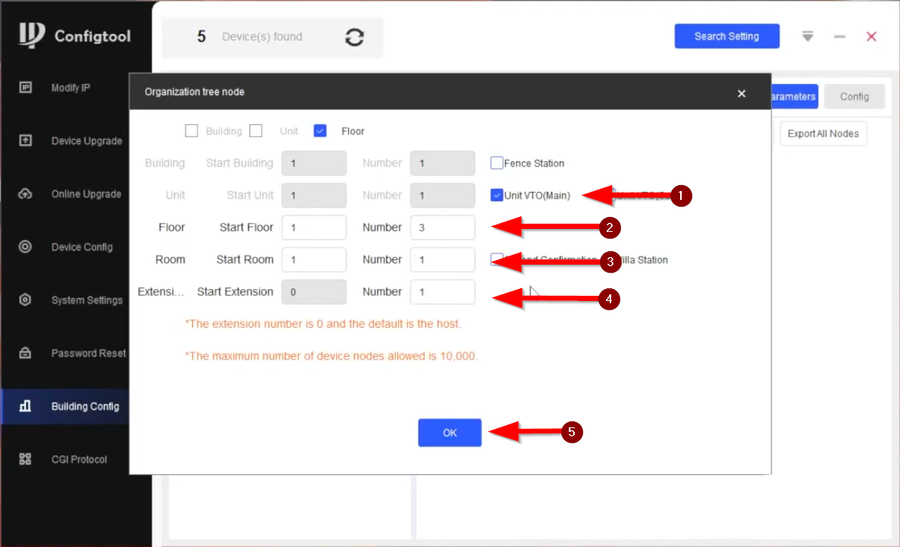
6. Enter the information for your node and click on OK to save.
| Unit VTO(Main) = Check it to add Main VTO | ||
|---|---|---|
| Floor | Start Room = (Starting number for the first floor) | Number = (The amount of Floors in the building) |
| Room | Start Room = (Starting number for the first room per floor) | Number = (The amount of Rooms per Floor) |
| Extension | Start Extension = (Starting number for VTH extension) | Number = (The amount of VTHs per Room) |
Note: Start Extension cannot be changed. All VTHs in a room MUST start at #0
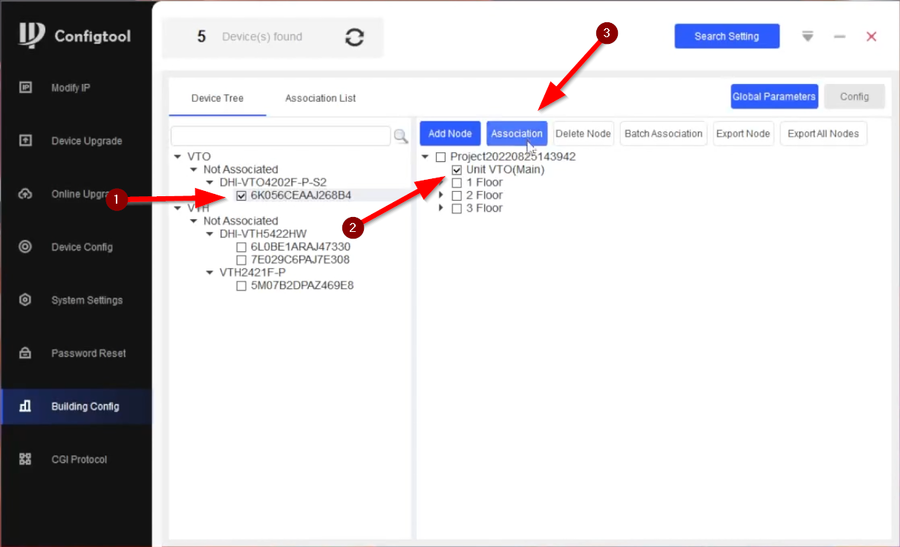
7. You now need to individually associate each device to its corresponding entry on the node. Start by checking the VTO entry under the device tree and then checking the node entry for Unit VTO(Main). Then click on the Association button to link them.
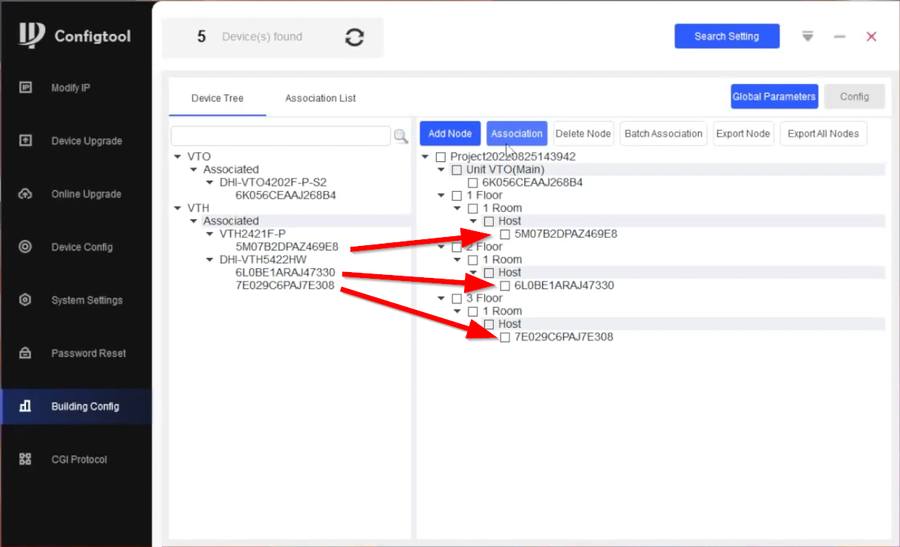
8. Do the same for all the VTHs. Remember, they need to be associated one at a time.
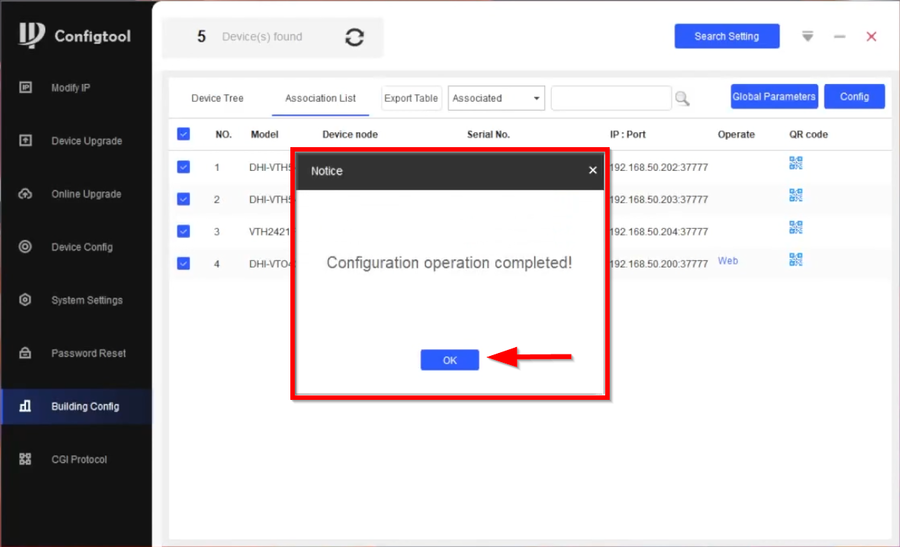
9. Once all the devices are associated to go Association List, Check all the devices and then Config
Configtool will now push the SIP configuration to all the devices.
10. If done correctly you will get the Configuration operation completed! popup and the devices will have a green check mark next to them.

