Difference between revisions of "PTZ/SmartPSS 1.16/Pattern"
(Created page with "==How to Set A Tour in SmartPSS 1.16== ===Description=== The Tour feature allows you to set a up multiple locations for the PTZ to cycle through using already established Pre-...") |
|||
| (7 intermediate revisions by 3 users not shown) | |||
| Line 1: | Line 1: | ||
| − | ==How to Set A | + | =='''NOTICE'''== |
| + | [https://dahuawiki.com/Discontinuation_of_SmartPSS Notice of Discontinuation of SmartPSS] | ||
| + | |||
| + | ==How to Set A Pattern in SmartPSS 1.16== | ||
===Description=== | ===Description=== | ||
| − | The | + | The Pattern feature allows you to set a predetermined path to multiple locations, and adjust Zoom, Focus, and Iris as the camera moves between positions |
| + | |||
===Prerequisites=== | ===Prerequisites=== | ||
* Dahua Network PTZ | * Dahua Network PTZ | ||
| Line 7: | Line 11: | ||
* SmartPSS 1.16 | * SmartPSS 1.16 | ||
*PTZ added to SmartPSS Device List | *PTZ added to SmartPSS Device List | ||
| − | |||
===Video Instructions=== | ===Video Instructions=== | ||
| − | <embedvideo service="youtube">https://youtu.be/ | + | <embedvideo service="youtube">https://youtu.be/YSDj2vYGxH4</embedvideo> |
| + | |||
===Step by Step Instructions=== | ===Step by Step Instructions=== | ||
1. Launch SmartPSS. | 1. Launch SmartPSS. | ||
| Line 28: | Line 32: | ||
[[file:PTZ_Scan_SmartPSS1.16_4.png|600px]] | [[file:PTZ_Scan_SmartPSS1.16_4.png|600px]] | ||
| − | 5. Click the drop down list, and select, " | + | 5. Click the drop down list, and select, "Pattern" |
[[file:PTZ_Scan_SmartPSS1.16_5.png|600px]] | [[file:PTZ_Scan_SmartPSS1.16_5.png|600px]] | ||
| + | |||
| + | 6. Input the pattern number you wish to establish. | ||
| + | |||
| + | [[file:PTZ_Pattern_SmartPSS1.16_1.png|600px]] | ||
| + | |||
| + | 7. Click the icon on the lower left to begin recording. | ||
| + | |||
| + | [[file:PTZ_Pattern_SmartPSS1.16_2.png|600px]] | ||
| + | |||
| + | 8. Use the arrow keys to move the PTZ in the desired pattern. | ||
| + | |||
| + | [[file:PTZ_Pattern_SmartPSS1.16_3.png|600px]] | ||
| + | |||
| + | 9. Click the icon on the lower left again, to stop recording. | ||
| + | |||
| + | [[file:PTZ_Pattern_SmartPSS1.16_4.png|600px]] | ||
| + | |||
| + | 10. To activate the pattern, click on the, "Power" button. | ||
| + | |||
| + | [[file:PTZ_Pattern_SmartPSS1.16_5.png|600px]] | ||
| + | |||
| + | |||
| + | |||
| + | [[Category:SmartPSS]] | ||
Latest revision as of 22:12, 2 October 2024
Contents
NOTICE
Notice of Discontinuation of SmartPSS
How to Set A Pattern in SmartPSS 1.16
Description
The Pattern feature allows you to set a predetermined path to multiple locations, and adjust Zoom, Focus, and Iris as the camera moves between positions
Prerequisites
- Dahua Network PTZ
- IP Address of Network PTZ
- SmartPSS 1.16
- PTZ added to SmartPSS Device List
Video Instructions
Step by Step Instructions
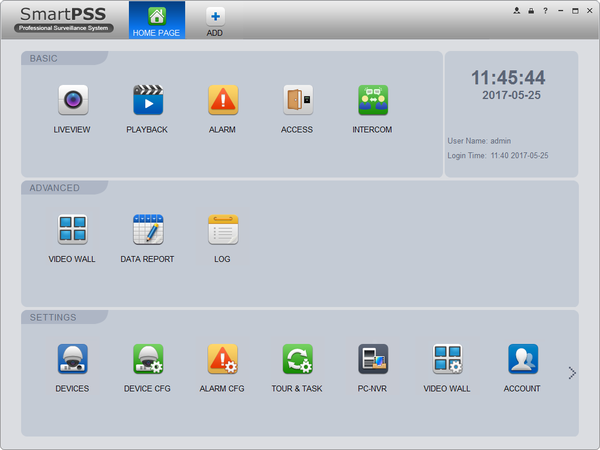
1. Launch SmartPSS.
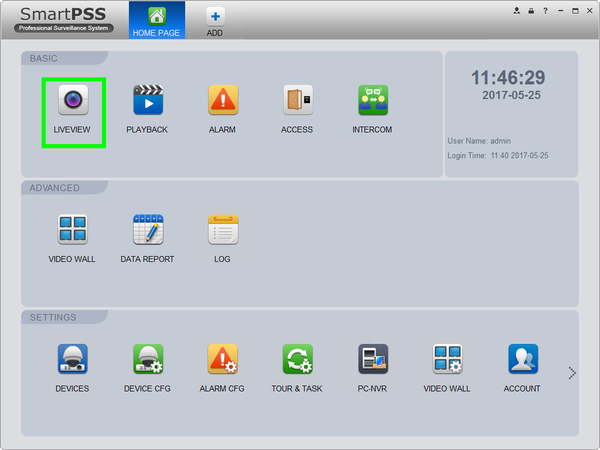
2. Click, "Liveview"
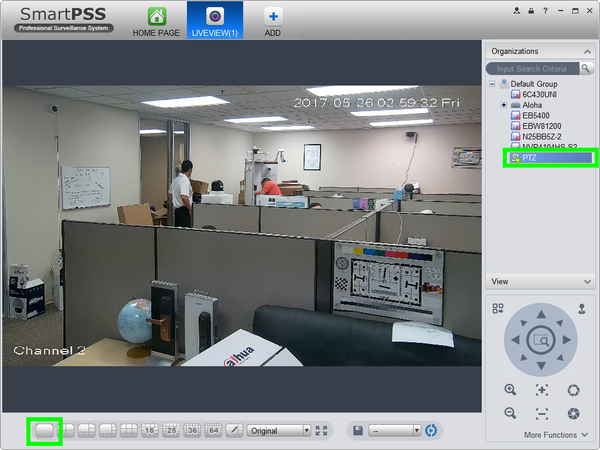
3. Double click the PTZ on the device list on the left, and click the box on the lower left to bring the PTZ up full screen.
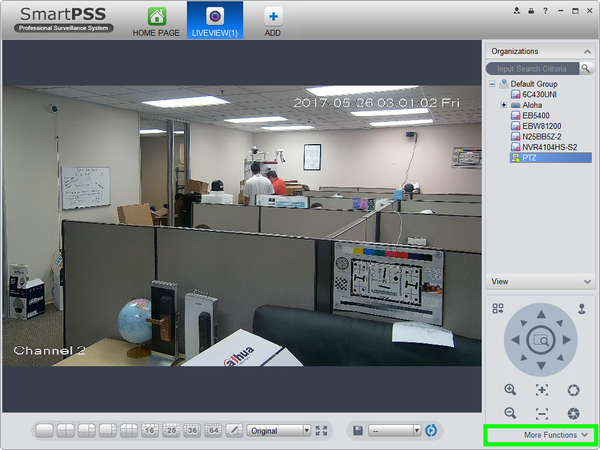
4. Click, "More Functions" in the lower left.
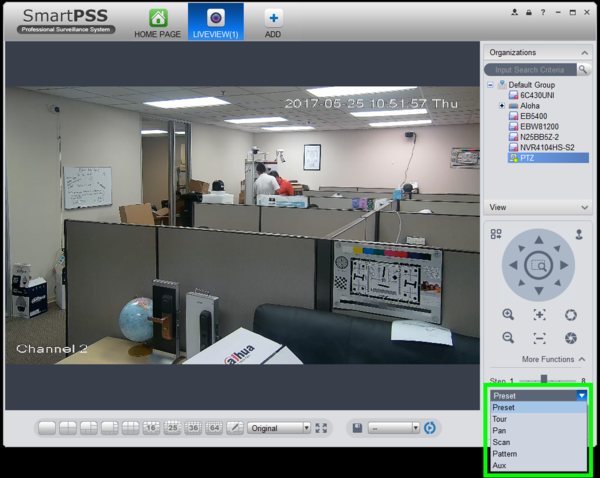
5. Click the drop down list, and select, "Pattern"
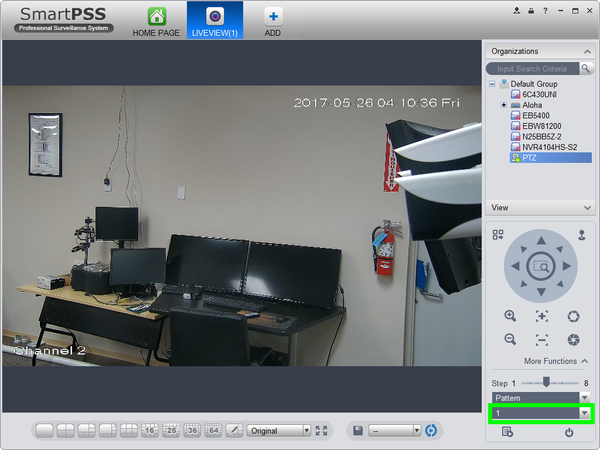
6. Input the pattern number you wish to establish.
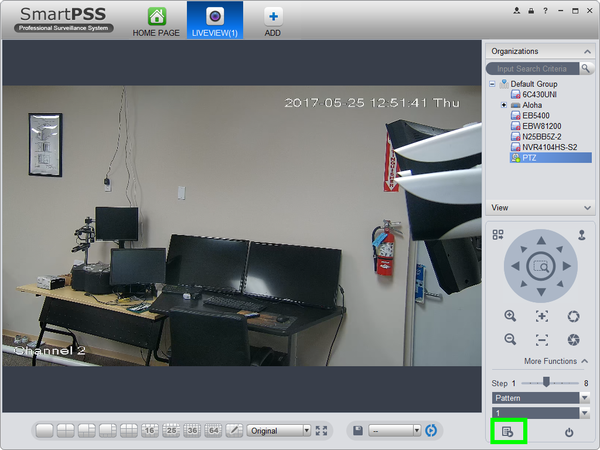
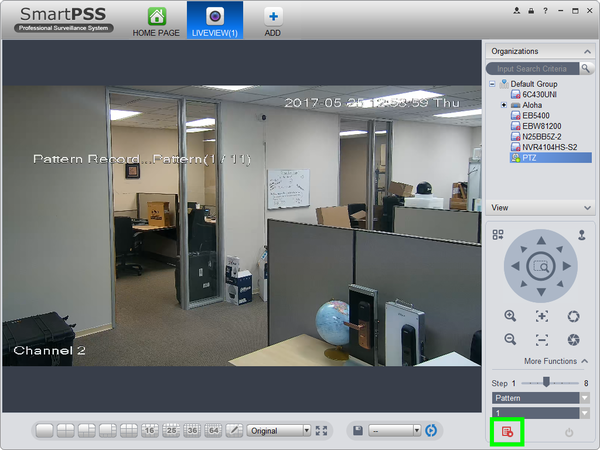
7. Click the icon on the lower left to begin recording.
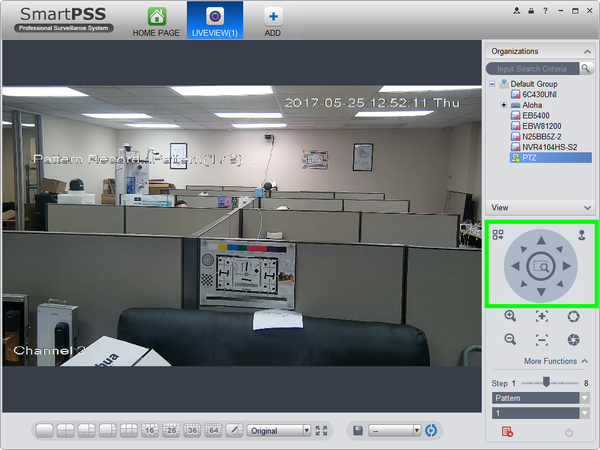
8. Use the arrow keys to move the PTZ in the desired pattern.
9. Click the icon on the lower left again, to stop recording.
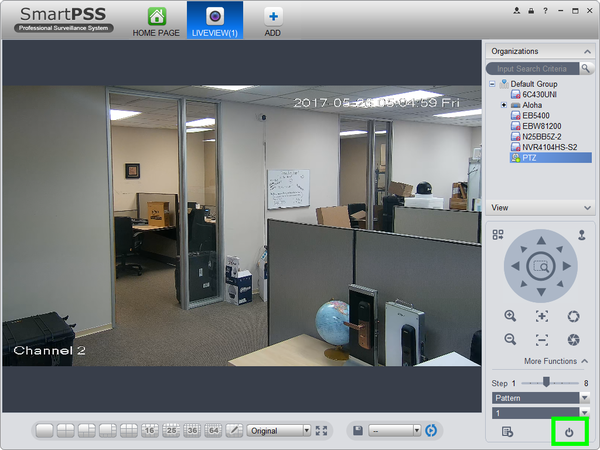
10. To activate the pattern, click on the, "Power" button.
