Difference between revisions of "ToolBox ConfigTool Modify IP"
(Created page with "==Modify IP address of Dahua Device through ConfigTool via Dahua ToolBox== ===Description=== * Modify IP address of Dahua Device if user name and password are factory default....") |
(→Step by Step Instructions) |
||
| (11 intermediate revisions by the same user not shown) | |||
| Line 6: | Line 6: | ||
===Prerequisites=== | ===Prerequisites=== | ||
| − | * Dahua | + | * [[File:Dahua-Toolbox_Icon.png|link=https://dahuawiki.com/images/Software/Dahua_Toolbox/Dahua_ToolBox_Eng_V1.02.1.T.20170314.zip|40px]] Dahua Toolbox installed |
| − | |||
* Dahua Devices on the same LAN as the PC for using the ConfigTool | * Dahua Devices on the same LAN as the PC for using the ConfigTool | ||
| + | * Windows PC | ||
===Step by Step Instructions=== | ===Step by Step Instructions=== | ||
| − | 1. | + | 1. Launch the Dahua ToolBox and open the ConfigTool. |
| + | |||
| + | [[File:DahuaTBconfig8.png|600px]] | ||
| + | |||
| + | * Upon opening the ConfigTool application, here you can see Dahua Devices on the same LAN are located. Refresh if Dahua devices are not located. You can also manually locate the device by typing in the IP address of the device in the search. | ||
[[File:configtoolbox2.png|600px]] | [[File:configtoolbox2.png|600px]] | ||
| − | 2. To modify IP address of selected device, select the edit button | + | 2. To modify IP address of selected device, select the edit button. |
* Note: this step pertains if Dahua Devices are using factory default user names and passwords. | * Note: this step pertains if Dahua Devices are using factory default user names and passwords. | ||
[[File:configtoolbox3.png|600px]] | [[File:configtoolbox3.png|600px]] | ||
| + | |||
| + | * Select DHCP or for static change the IP address according to the LAN configuration -> Select "OK" to save changes. | ||
[[File:configtoolbox4.png|600px]] | [[File:configtoolbox4.png|600px]] | ||
| Line 26: | Line 32: | ||
[[file:DahuaTBconfig1.png|600px]] | [[file:DahuaTBconfig1.png|600px]] | ||
| + | |||
| + | 3. To modify IP of device with modified user names and passwords, click on the IE (Internet Explorer) icon of the selected device. This will open the web service of the device through IE. | ||
| + | |||
| + | [[File:DahuaTBconfig2.png|600px]] | ||
| + | |||
| + | * Log in with associated user name and password. | ||
| + | |||
| + | [[File:DahuaTBconfig3.png|600px]] | ||
| + | |||
| + | * Select the setup tab -> Select TCP/IP | ||
| + | |||
| + | [[file:DahuaTBconfig7.png|600px]] | ||
| + | |||
| + | * Select DHCP or Static to modify IP along with associated LAN configuration -> Select Save. | ||
| + | |||
| + | [[file:DahuaTBconfig9.png|600px]] | ||
Latest revision as of 20:16, 27 February 2018
Contents
Modify IP address of Dahua Device through ConfigTool via Dahua ToolBox
Description
- Modify IP address of Dahua Device if user name and password are factory default.
- Modify IP address of Dahua Device if user name and password are modified.
- Note: If your IP Camera is connected to the back of an NVR, these instructions will not apply. Please see, "How to Connect IP Camera to NVR"
Prerequisites
Step by Step Instructions
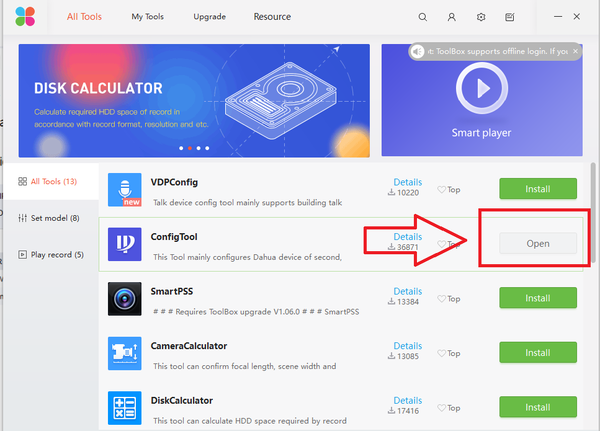
1. Launch the Dahua ToolBox and open the ConfigTool.
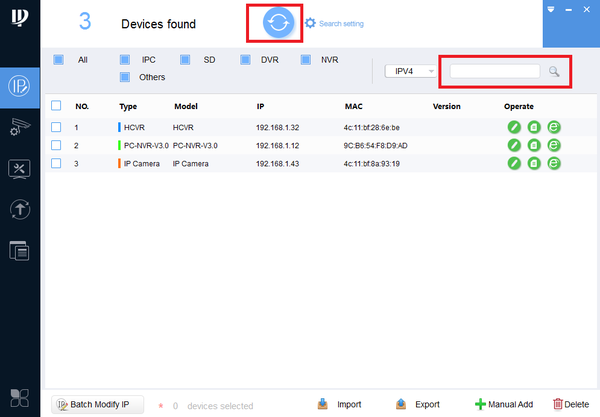
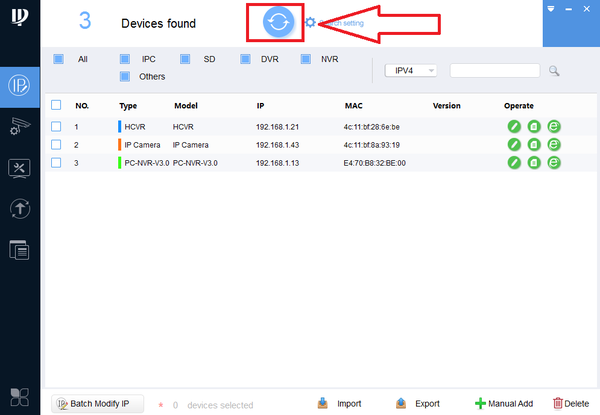
- Upon opening the ConfigTool application, here you can see Dahua Devices on the same LAN are located. Refresh if Dahua devices are not located. You can also manually locate the device by typing in the IP address of the device in the search.
2. To modify IP address of selected device, select the edit button.
- Note: this step pertains if Dahua Devices are using factory default user names and passwords.
- Select DHCP or for static change the IP address according to the LAN configuration -> Select "OK" to save changes.
- Refresh to verify modified IP address.
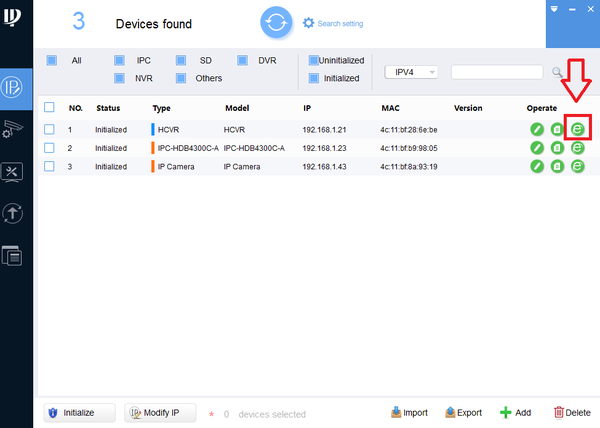
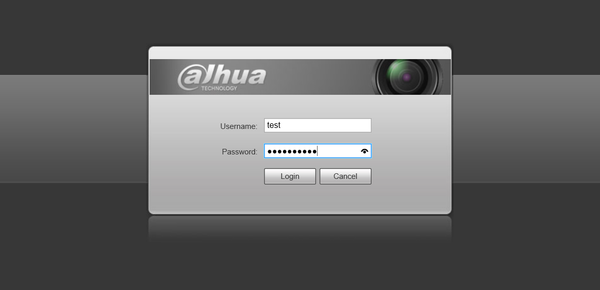
3. To modify IP of device with modified user names and passwords, click on the IE (Internet Explorer) icon of the selected device. This will open the web service of the device through IE.
- Log in with associated user name and password.
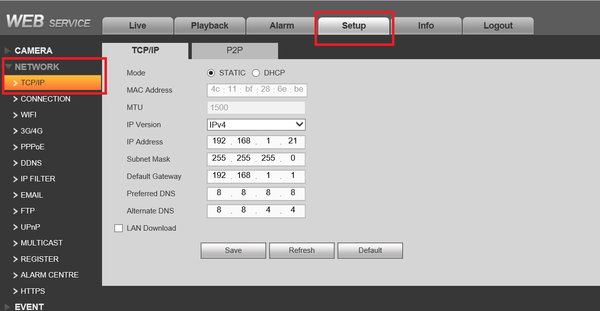
- Select the setup tab -> Select TCP/IP
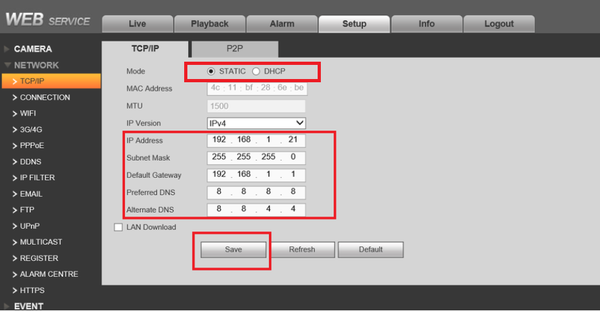
- Select DHCP or Static to modify IP along with associated LAN configuration -> Select Save.
