Difference between revisions of "DSS S2/Client/Live View"
(→Live View In DSS Client) |
|||
| (12 intermediate revisions by 2 users not shown) | |||
| Line 1: | Line 1: | ||
| − | + | =Live View in DSS Client= | |
| − | + | ==Description== | |
| − | This article will show you how to view live video from devices added to DSS Server | + | This article will show you how to use Live View in DSS Client to view live video from devices added to DSS Server |
[[File:Live_View_-_DSS_Client.jpg|500px]] | [[File:Live_View_-_DSS_Client.jpg|500px]] | ||
| − | + | ==Prerequisites== | |
* [https://dahuawiki.com/DSS DSS] | * [https://dahuawiki.com/DSS DSS] | ||
| − | * | + | * DSS Client - [[CMS/DSS/DSS Client Download and Install|How To Download and Install]] |
* Dahua device that supports video added to DSS Server | * Dahua device that supports video added to DSS Server | ||
| − | + | ==Video Instructions== | |
Coming Soon | Coming Soon | ||
| − | + | ==Step by Step Instructions== | |
| + | ===View Live Video=== | ||
1. Launch and Log in to DSS Client | 1. Launch and Log in to DSS Client | ||
| Line 23: | Line 24: | ||
[[File:Live_View_-_DSS_Client_-_1.jpg|600px]] | [[File:Live_View_-_DSS_Client_-_1.jpg|600px]] | ||
| − | 3. | + | 3. The device tree on the left will show video devices currently added to DSS |
| + | |||
| + | [[File:Live_View_-_DSS_Client_-_2.jpg|600px]] | ||
| + | |||
| + | Click the [[File:expand_device.jpg]] icon next to a device to show all channels from the device | ||
| + | |||
| + | 4. To view real-time video from a device there are several options: | ||
| + | |||
| + | *Double click or drag a device to the video window. | ||
| + | |||
| + | [[File:Live_View_-_DSS_Client_-_3.2.jpg|600px]] | ||
| + | |||
| + | [[File:Live_View_-_DSS_Client_-_3.3.jpg|600px]] | ||
| + | |||
| + | |||
| + | *Right click a device in the list, select Tour, then select a time. The system will play (in loops) videos of all channels for the selected device within the set time | ||
| + | |||
| + | [[File:Live_View_-_DSS_Client_-_3.1.jpg|600px]] | ||
| + | |||
| + | ===Setup A Custom Screen View=== | ||
| + | |||
| + | 1. To adjust the layout of the video windows or create a custom layout use the icons in the bottom right of the screen: | ||
| + | |||
| + | [[File:Live_View_-_DSS_Client_-_4.jpg|600px]] | ||
| + | |||
| + | [[File:window_layout_options_DSS_Client.jpg]] | ||
| + | |||
| + | 2. To save the current layout click the [[File:save_layout_DSS_Client.jpg]] icon in the bottom left of the screen | ||
| + | |||
| + | [[File:Live_View_-_DSS_Client_-_5.jpg|600px]] | ||
| + | |||
| + | 3. The Save View window will appear. | ||
| + | |||
| + | [[File:Live_View_-_DSS_Client_-_6.jpg|600px]] | ||
| + | |||
| + | Enter a name for the View | ||
| + | Select which View Group to add View to | ||
| + | |||
| + | Click '''OK''' | ||
| + | |||
| + | 4. To view all created Views, click to expand the View section on the left side of the screen | ||
| + | |||
| + | [[File:Live_View_-_DSS_Client_-_7.jpg|600px]] | ||
| + | |||
| + | 5. Double click or drag and drop a View in the list to load | ||
| + | |||
| + | [[File:Live_View_-_DSS_Client_-_8.jpg|600px]] | ||
| + | |||
| + | |||
| + | ===Right-Click Shortcut Menu=== | ||
| + | |||
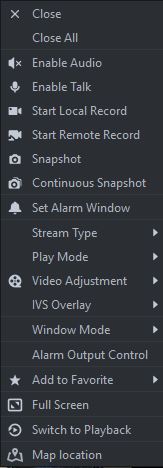
| + | In the Live View video window, right click a window to enter a shortcut menu with various options for viewing and displaying the device | ||
| + | |||
| + | [[File:Right_Click_Shortcut_Menu_-_Live_View_-_DSS_Client.jpg]] | ||
| + | |||
| + | Use the Layout Options in the bottom right of the screen to adjust the Live View to 2X2, 3x3, 4x4, or create your own custom layout | ||
Latest revision as of 00:05, 26 June 2020
Contents
Live View in DSS Client
Description
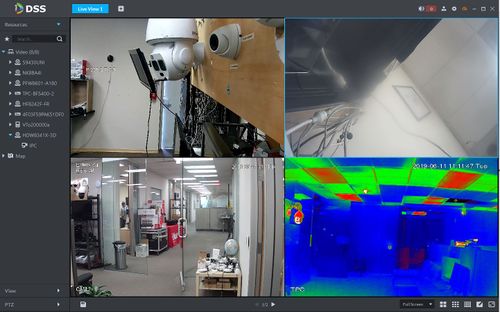
This article will show you how to use Live View in DSS Client to view live video from devices added to DSS Server
Prerequisites
- DSS
- DSS Client - How To Download and Install
- Dahua device that supports video added to DSS Server
Video Instructions
Coming Soon
Step by Step Instructions
View Live Video
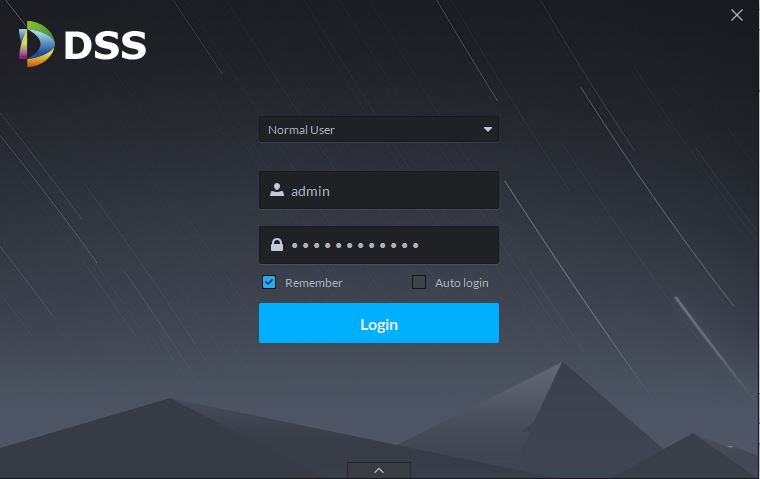
1. Launch and Log in to DSS Client
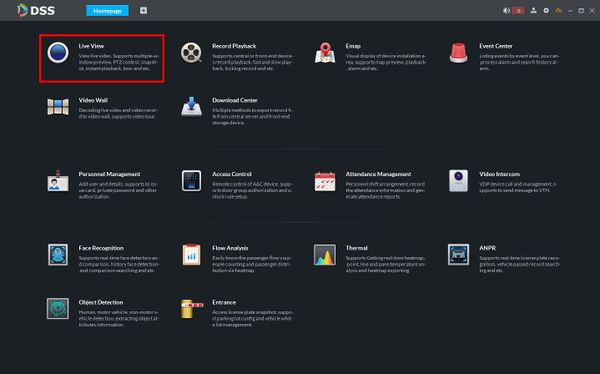
2. Click Live View
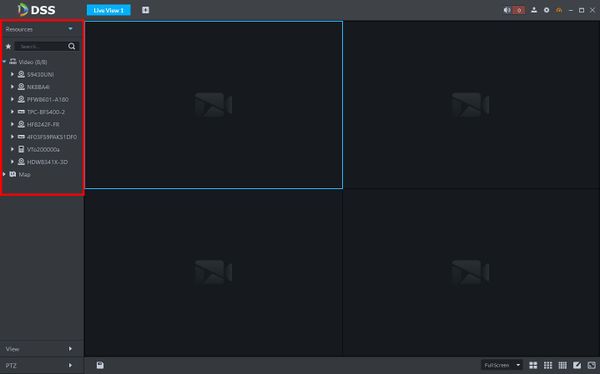
3. The device tree on the left will show video devices currently added to DSS
Click the ![]() icon next to a device to show all channels from the device
icon next to a device to show all channels from the device
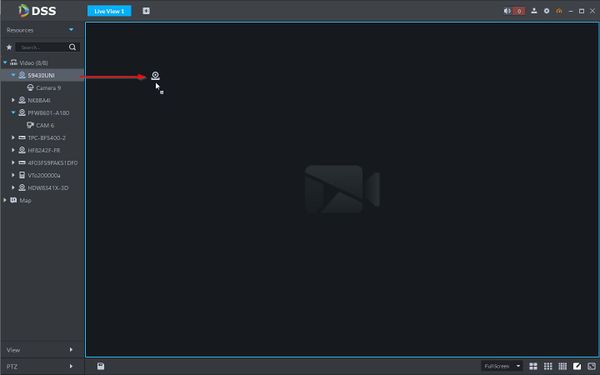
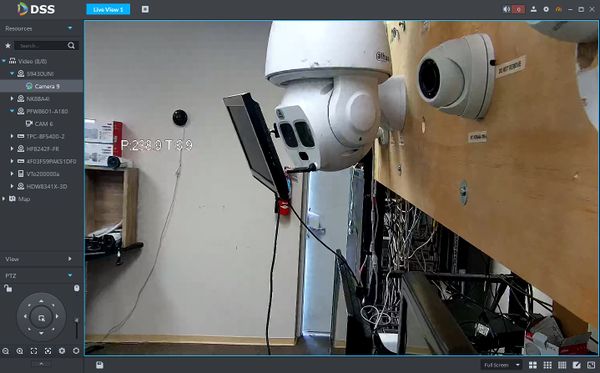
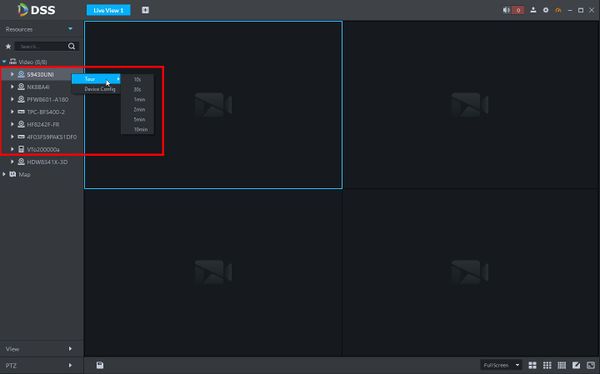
4. To view real-time video from a device there are several options:
- Double click or drag a device to the video window.
- Right click a device in the list, select Tour, then select a time. The system will play (in loops) videos of all channels for the selected device within the set time
Setup A Custom Screen View
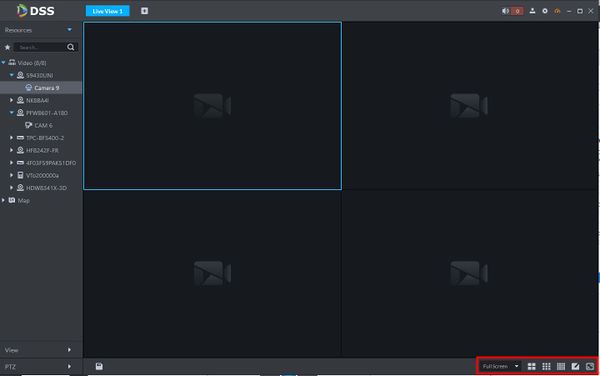
1. To adjust the layout of the video windows or create a custom layout use the icons in the bottom right of the screen:
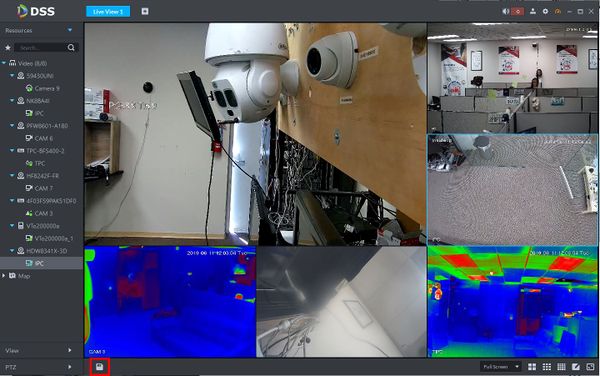
2. To save the current layout click the ![]() icon in the bottom left of the screen
icon in the bottom left of the screen
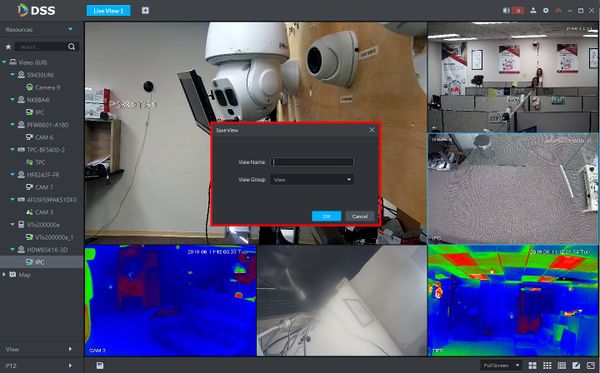
3. The Save View window will appear.
Enter a name for the View Select which View Group to add View to
Click OK
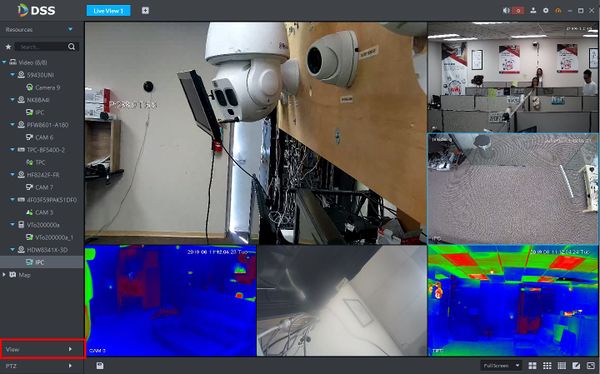
4. To view all created Views, click to expand the View section on the left side of the screen
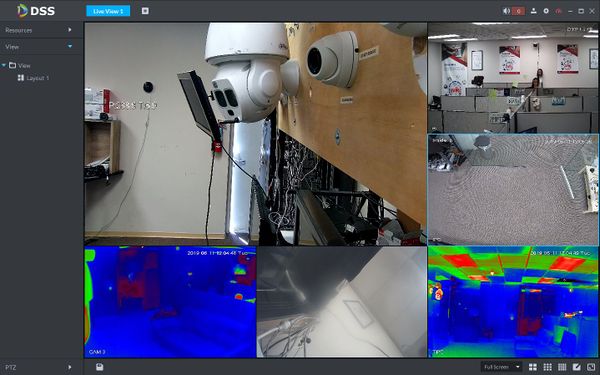
5. Double click or drag and drop a View in the list to load
Right-Click Shortcut Menu
In the Live View video window, right click a window to enter a shortcut menu with various options for viewing and displaying the device
Use the Layout Options in the bottom right of the screen to adjust the Live View to 2X2, 3x3, 4x4, or create your own custom layout
