Difference between revisions of "Template:SD Card Record SmartPSS"
(Created page with " ==Prerequisites== ==Video Instructions== <embedvideo service="youtube">https://youtu.be/AyZdlXbBLFs</embedvideo> ==Step by Step Instructions==") |
(→Step by Step Instructions) |
||
| (One intermediate revision by the same user not shown) | |||
| Line 4: | Line 4: | ||
<embedvideo service="youtube">https://youtu.be/AyZdlXbBLFs</embedvideo> | <embedvideo service="youtube">https://youtu.be/AyZdlXbBLFs</embedvideo> | ||
==Step by Step Instructions== | ==Step by Step Instructions== | ||
| + | |||
| + | Login to SMART PSS and choose the camera. | ||
| + | |||
| + | [[File:SD_SmartPSS1.JPG|600px]] | ||
| + | |||
| + | Click on "HDD Manager". | ||
| + | |||
| + | [[File:SD_SmartPSS2.JPG|600px]] | ||
| + | |||
| + | Click on "Local Store" | ||
| + | |||
| + | [[File:SD_SmartPSS3.JPG|600px]] | ||
| + | |||
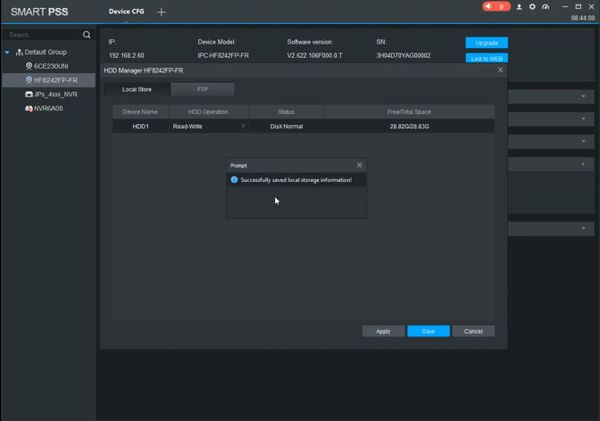
| + | Click on "HDD Operation" and choose "Read-Write", "Read-Only" or "Format HDD" | ||
| + | |||
| + | [[File:SD_SmartPSS4.JPG|600px]] | ||
| + | |||
| + | Click "OK" | ||
| + | |||
| + | [[File:SD_SmartPSS5.JPG|600px]] | ||
| + | |||
| + | [[File:SD_SmartPSS6.JPG|600px]] | ||
| + | |||
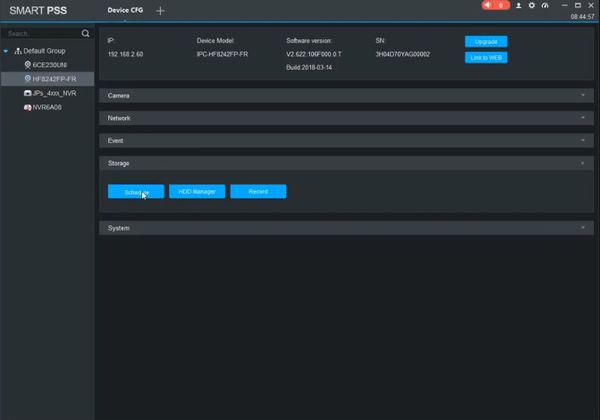
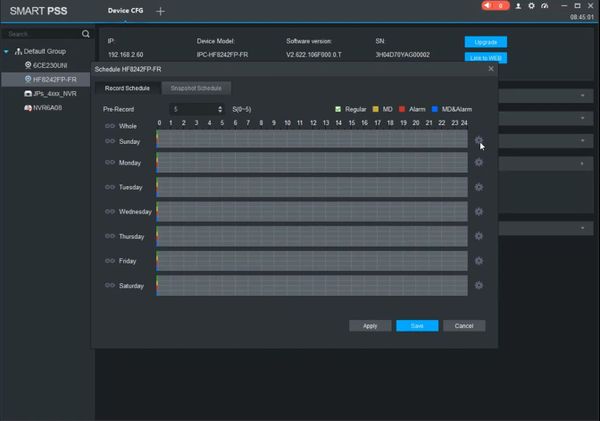
| + | Click on "Schedule" | ||
| + | |||
| + | [[File:SD_SmartPSS7.JPG|600px]] | ||
| + | |||
| + | [[File:SD_SmartPSS8.JPG|600px]] | ||
| + | |||
| + | [[File:SD_SmartPSS9.JPG|600px]] | ||
| + | |||
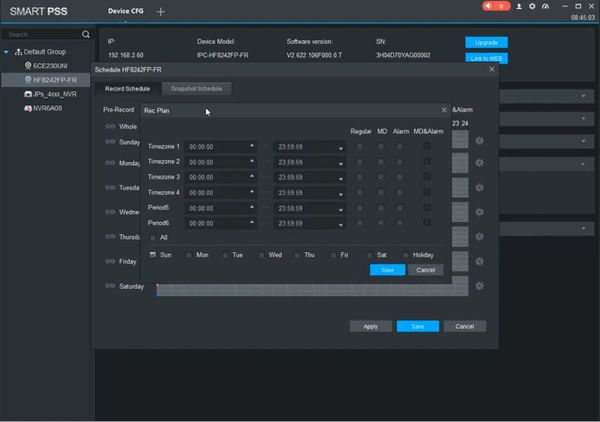
| + | Chose the "Rec Plan" | ||
| + | |||
| + | [[File:SD_SmartPSS10.JPG|600px]] | ||
| + | |||
| + | Click on "Save" | ||
| + | |||
| + | [[File:SD_SmartPSS11.JPG|600px]] | ||
Latest revision as of 21:03, 5 February 2020
Prerequisites
Video Instructions
Step by Step Instructions
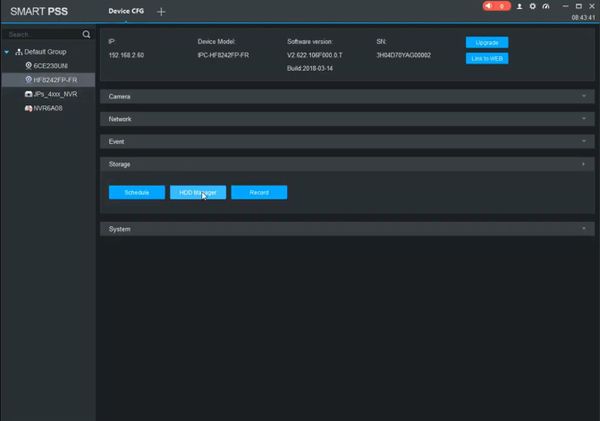
Login to SMART PSS and choose the camera.
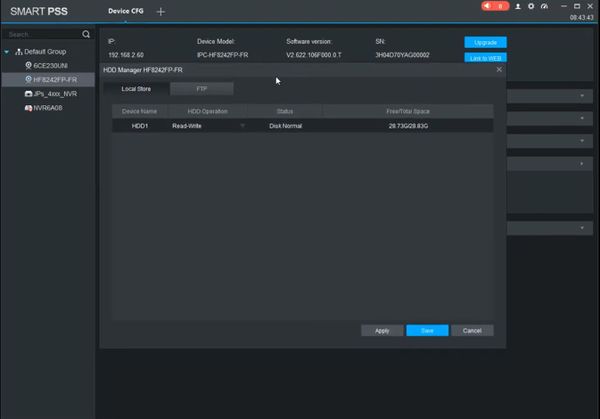
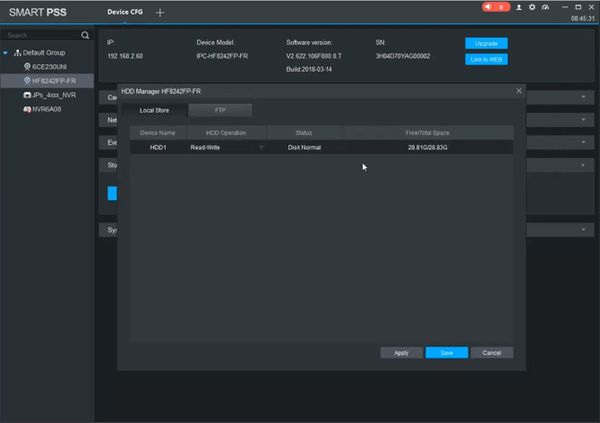
Click on "HDD Manager".
Click on "Local Store"
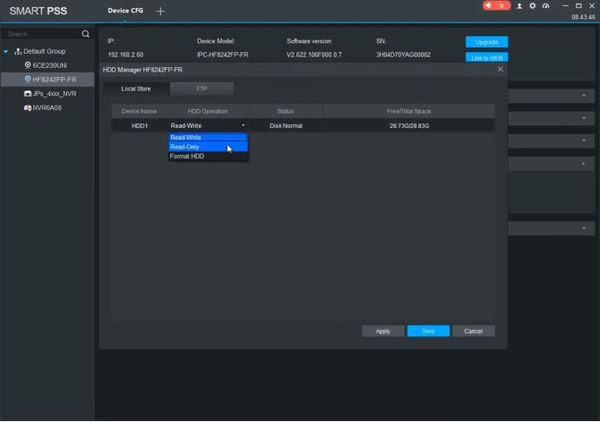
Click on "HDD Operation" and choose "Read-Write", "Read-Only" or "Format HDD"
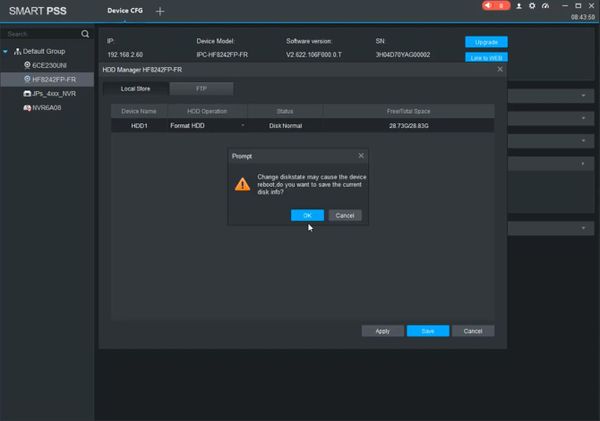
Click "OK"
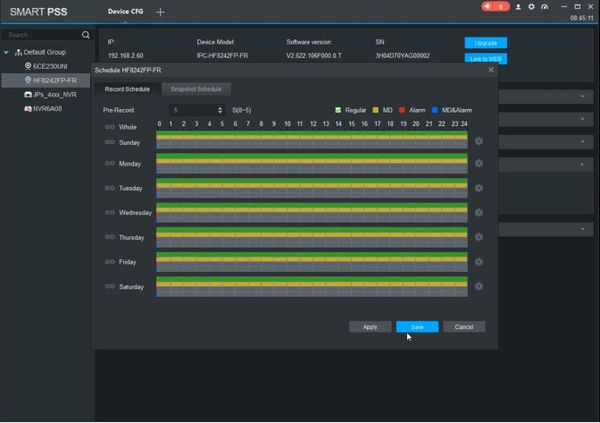
Click on "Schedule"
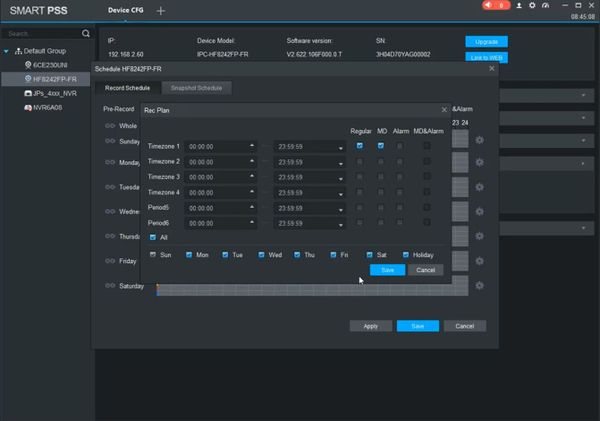
Chose the "Rec Plan"
Click on "Save"
