Difference between revisions of "Template:Alarm Record MobileUI DMSS"
(Created page with " ==How To Setup Alarm Record== ===Prerequisites=== * Dahua device that supports Alarm Input recording * Physical alarm devices wired into Dahua devices - Template:Alarm Rec...") |
|||
| (4 intermediate revisions by one other user not shown) | |||
| Line 1: | Line 1: | ||
==How To Setup Alarm Record== | ==How To Setup Alarm Record== | ||
| + | |||
| + | =='''NOTICE'''== | ||
| + | [https://dahuawiki.com/Discontinuation_of_iDMSS_and_gDMSS Notice of Discontinuation of iDMSS and gDMSS] | ||
===Prerequisites=== | ===Prerequisites=== | ||
| Line 11: | Line 14: | ||
===Step by Step Instructions=== | ===Step by Step Instructions=== | ||
| − | 1. | + | 1. Press Device |
| + | |||
| + | [[File:Alarm_Record_-_Mobile_-_1.jpg|400px]] | ||
| + | |||
| + | 2. Select the device in the list | ||
| + | |||
| + | [[File:Alarm_Record_-_Mobile_-_2.jpg|400px]] | ||
| + | |||
| + | 3. Select Remote Configuration | ||
| + | |||
| + | [[File:Alarm_Record_-_Mobile_-_3.jpg|400px]] | ||
| + | |||
| + | 4. Select Alarm Setting | ||
| + | |||
| + | [[File:Alarm_Record_-_Mobile_-_4.jpg|400px]] | ||
| + | |||
| + | 5. Select Local Alarm | ||
| + | |||
| + | [[File:Alarm_Record_-_Mobile_-_5.jpg|400px]] | ||
| + | |||
| + | 6. Select the Alarm Input to configure | ||
| + | |||
| + | [[File:Alarm_Record_-_Mobile_-_6.jpg|400px]] | ||
| + | |||
| + | 7. Toggle to enable the Local Alarm | ||
| + | |||
| + | Toggle the switch next to Advanced Configuration | ||
| + | |||
| + | [[File:Alarm_Record_-_Mobile_-_7.jpg|400px]] | ||
| + | |||
| + | 8. Select Arm/Disarm Period to set the schedule for the alarm input | ||
| + | |||
| + | [[File:Alarm_Record_-_Mobile_-_8.jpg|400px]] | ||
| + | |||
| + | 9. Tap the pencil icon to edit the schedule | ||
| + | |||
| + | [[File:Alarm_Record_-_Mobile_-_9.jpg|400px]] | ||
| + | |||
| + | 10. Use the interface to create | ||
| + | |||
| + | Tap the save icon to save | ||
| + | |||
| + | [[File:Alarm_Record_-_Mobile_-_10.jpg|400px]] | ||
| + | |||
| + | Tap the arrow to return to the device configuration | ||
| + | |||
| + | [[File:Alarm_Record_-_Mobile_-_11.jpg|400px]] | ||
| + | |||
| + | 11. Select Sensor Type | ||
| + | |||
| + | Select which Alarm Input type is being used: Normally Open (NO) or Normally Closed (NC) | ||
| + | |||
| + | [[File:Alarm_Record_-_Mobile_-_12.jpg|400px]] | ||
| + | |||
| + | 12. Toggle the switch next to Record to enable | ||
| + | |||
| + | Tap Select Channel | ||
| + | |||
| + | [[File:Alarm_Record_-_Mobile_-_13.jpg|400px]] | ||
| + | |||
| + | Select which channel(s) to record when the alarm input is triggered | ||
| + | |||
| + | Tap the save icon to save | ||
| + | |||
| + | [[File:Alarm_Record_-_Mobile_-_14.jpg|400px]] | ||
| + | |||
| + | 13. Tap the save icon at Local Alarm to save all settings | ||
| + | |||
| + | [[File:Alarm_Record_-_Mobile_-_15.jpg|400px]] | ||
| + | |||
| + | 14. A prompt will appear to confirm | ||
| + | |||
| + | [[File:Alarm_Record_-_Mobile_-_16.jpg|400px]] | ||
Latest revision as of 17:13, 2 October 2024
Contents
How To Setup Alarm Record
NOTICE
Notice of Discontinuation of iDMSS and gDMSS
Prerequisites
- Dahua device that supports Alarm Input recording
- Physical alarm devices wired into Dahua devices - How To Connect A Physical Alarm To A Dahua Device
- iDMSS / gDMSS app
- Device added to iDMSS / gDMSS app
Video Instructions
Step by Step Instructions
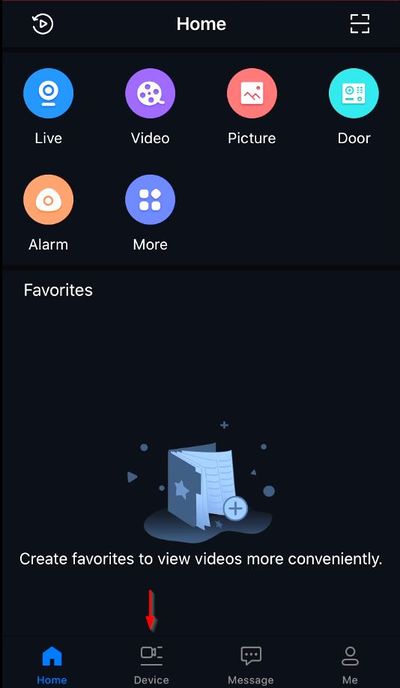
1. Press Device
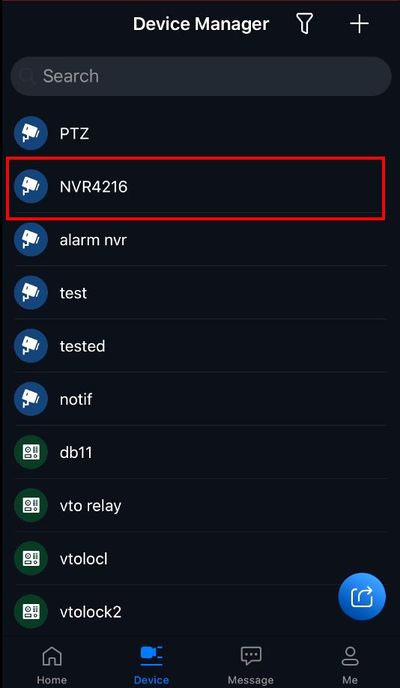
2. Select the device in the list
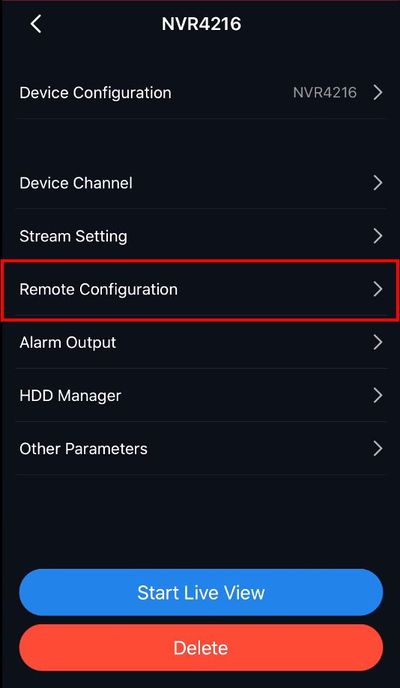
3. Select Remote Configuration
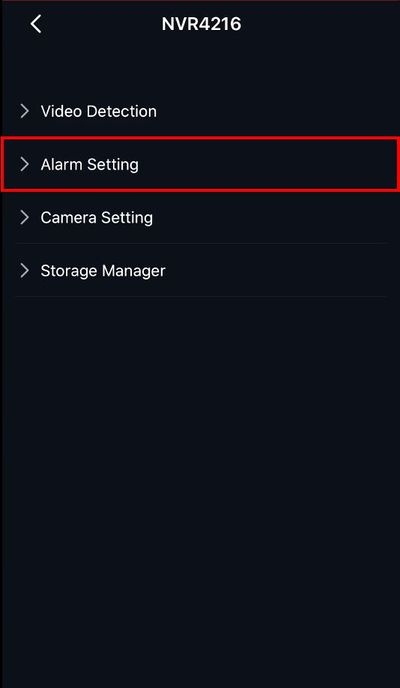
4. Select Alarm Setting
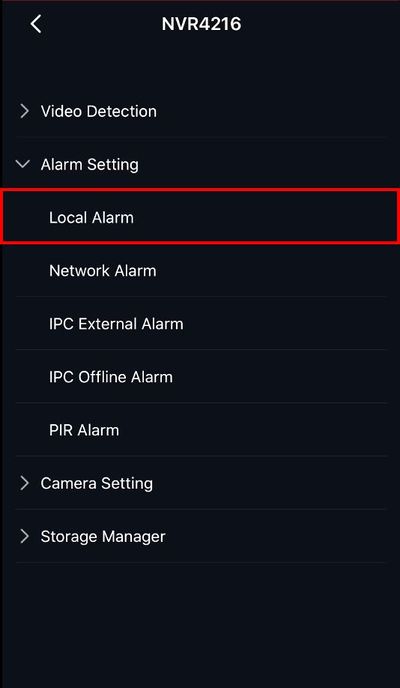
5. Select Local Alarm
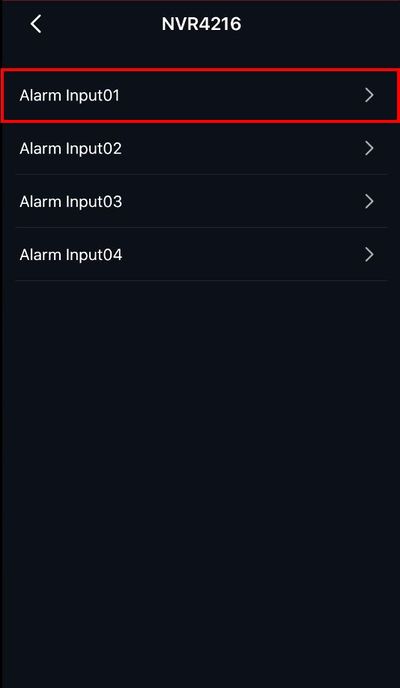
6. Select the Alarm Input to configure
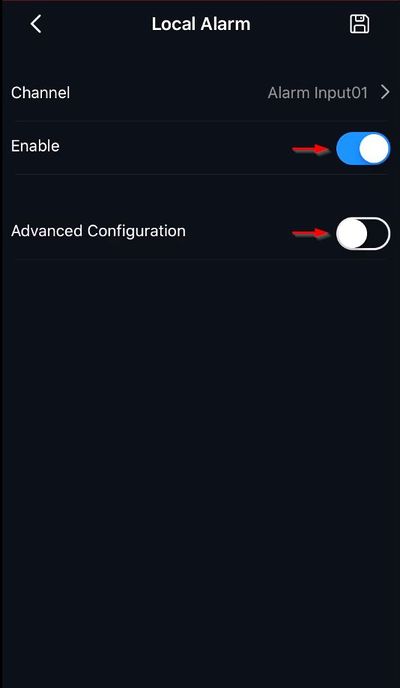
7. Toggle to enable the Local Alarm
Toggle the switch next to Advanced Configuration
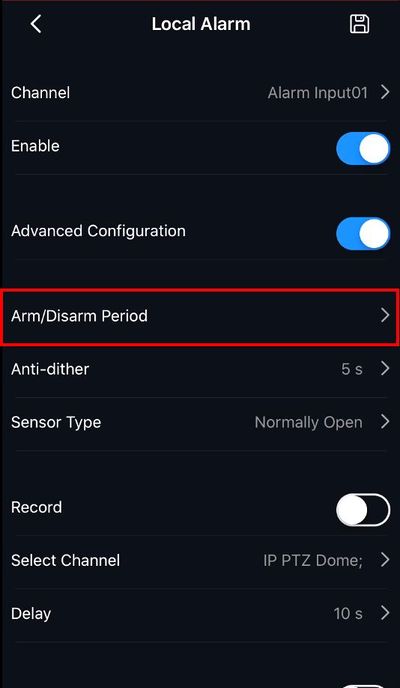
8. Select Arm/Disarm Period to set the schedule for the alarm input
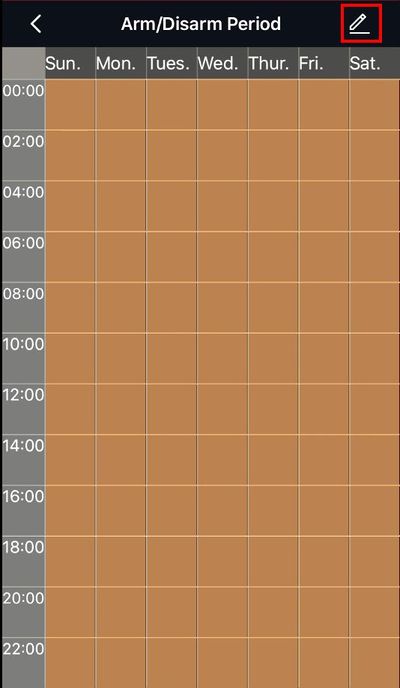
9. Tap the pencil icon to edit the schedule
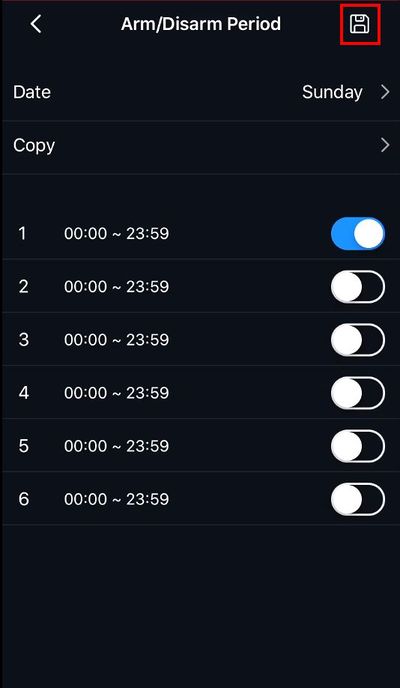
10. Use the interface to create
Tap the save icon to save
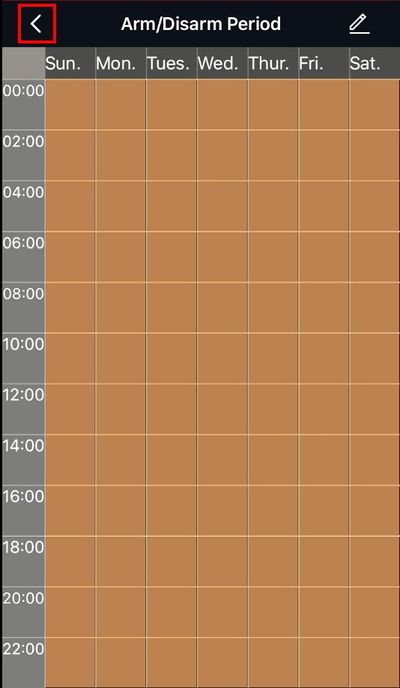
Tap the arrow to return to the device configuration
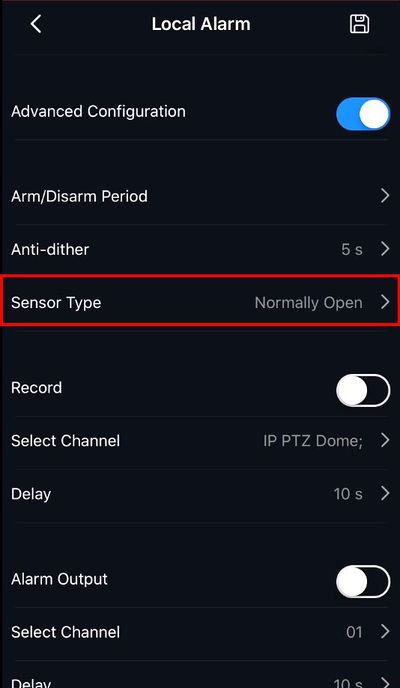
11. Select Sensor Type
Select which Alarm Input type is being used: Normally Open (NO) or Normally Closed (NC)
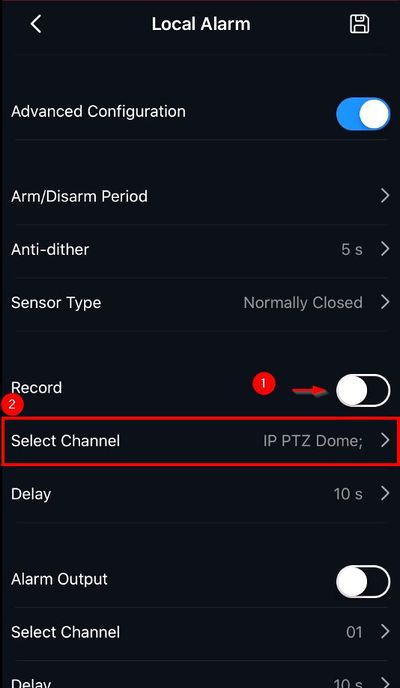
12. Toggle the switch next to Record to enable
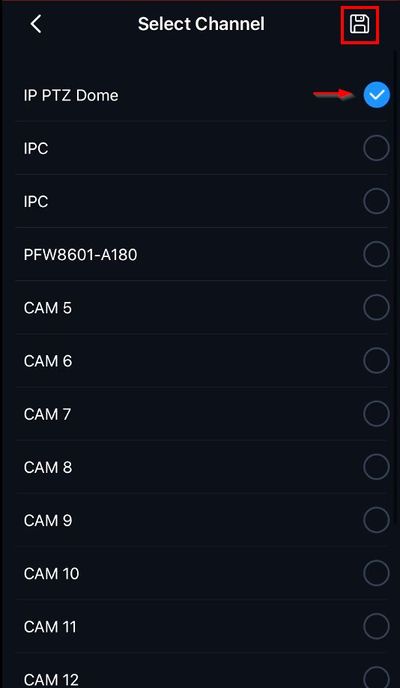
Tap Select Channel
Select which channel(s) to record when the alarm input is triggered
Tap the save icon to save
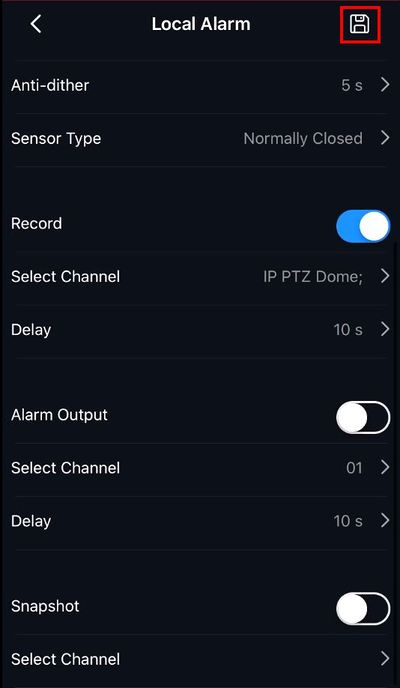
13. Tap the save icon at Local Alarm to save all settings
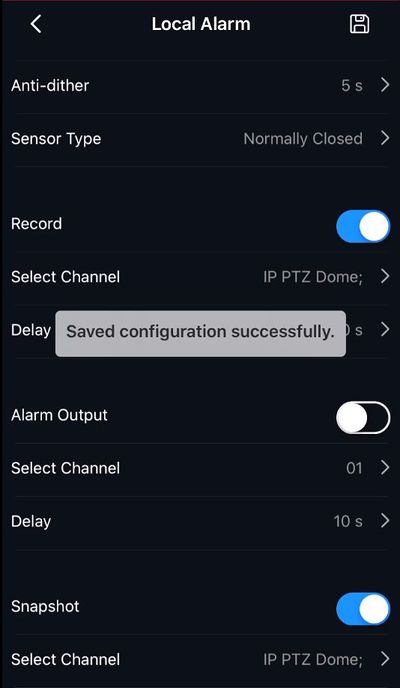
14. A prompt will appear to confirm
