Difference between revisions of "LincX2PRO/DB11 Physical Install"
(→Step by Step Instructions) |
(→Prerequisites) |
||
| (6 intermediate revisions by 2 users not shown) | |||
| Line 6: | Line 6: | ||
==Prerequisites== | ==Prerequisites== | ||
*[[Doorbell/DB11|DB11]] (And all the parts included in the box) | *[[Doorbell/DB11|DB11]] (And all the parts included in the box) | ||
| − | * | + | *DMSS |
*[[Mobile/Create_Dahua_Online_Account|Dahua Online Account]] | *[[Mobile/Create_Dahua_Online_Account|Dahua Online Account]] | ||
*A Mechanical or Electronic Door Chime | *A Mechanical or Electronic Door Chime | ||
| + | *When using 2 wires, it’s recommended to use cables that are at least 18 gauge. | ||
==Video Instructions== | ==Video Instructions== | ||
| Line 53: | Line 54: | ||
[[File:DB11PhysicalInstall7.png|800px]] | [[File:DB11PhysicalInstall7.png|800px]] | ||
| − | 8. Open your mobile app and follow instruction below. | + | 8. Open your mobile app and you '''MUST''' follow instruction below to complete your Door Chime Setup. |
'''Note:''' There are two mobile apps that available to support this product series. | '''Note:''' There are two mobile apps that available to support this product series. | ||
| − | + | {{Template:Ring_Linkage_Setup_MobileUI_New_DMSS}} | |
| − | |||
| − | |||
| − | |||
| − | |||
| − | |||
| − | |||
| − | |||
| − | |||
| − | |||
| − | |||
| − | |||
| − | |||
| − | |||
| − | |||
| − | |||
| − | |||
| − | |||
| − | |||
| − | |||
| − | |||
| − | |||
| − | |||
| − | |||
| − | |||
| − | |||
| − | |||
| − | |||
| − | |||
| − | |||
| − | |||
| − | |||
| − | |||
| − | |||
| − | |||
| − | |||
| − | |||
| − | |||
Latest revision as of 00:38, 14 November 2024
Contents
DB11 Physical Install
Description
This article will cover how to physically connect a DB11 to a door chime
Prerequisites
- DB11 (And all the parts included in the box)
- DMSS
- Dahua Online Account
- A Mechanical or Electronic Door Chime
- When using 2 wires, it’s recommended to use cables that are at least 18 gauge.
Video Instructions
Step by Step Instructions
IMPORTANT NOTICE: Disable the power to your doorbell and door chime before beginning physical installation
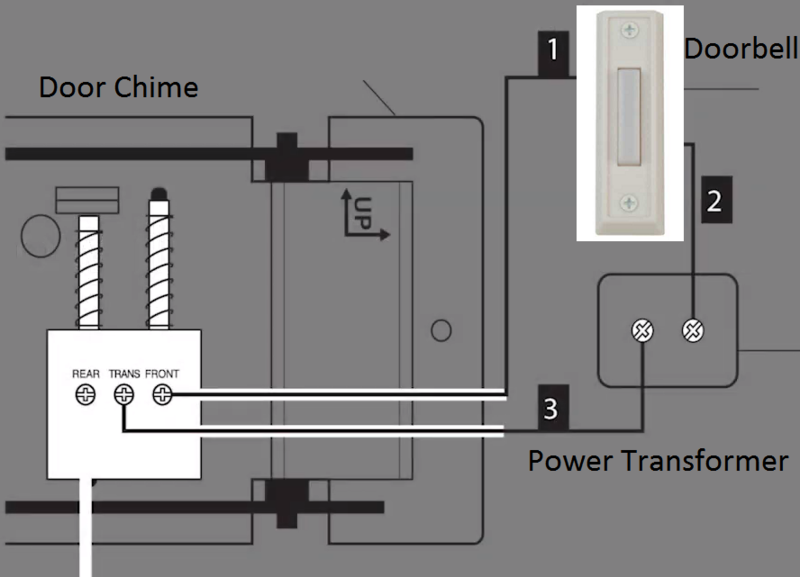
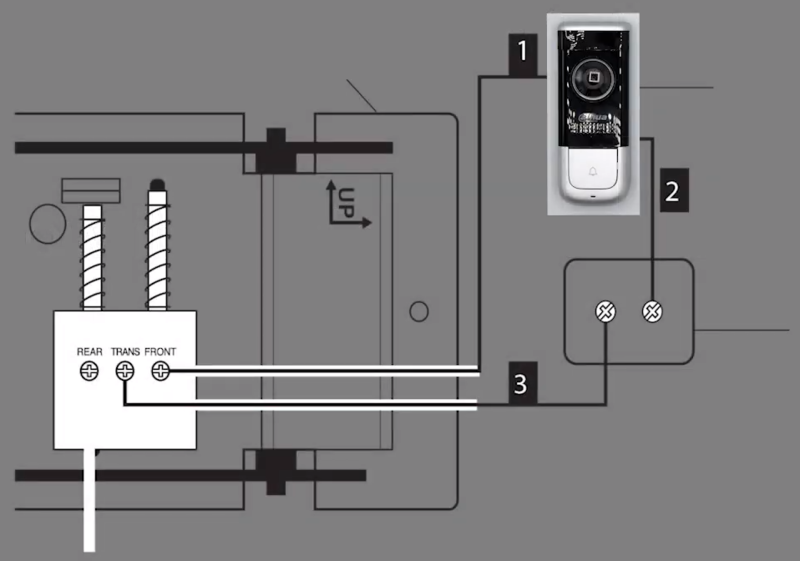
1. If not already done, disconnect the wire from the existing doorbell, that goes between it and the "FRONT" terminal on the door chime (#1 below).
Disconnect the wire from the exisiting doorbell, that goes between it and the Power Transformer (#2 below)
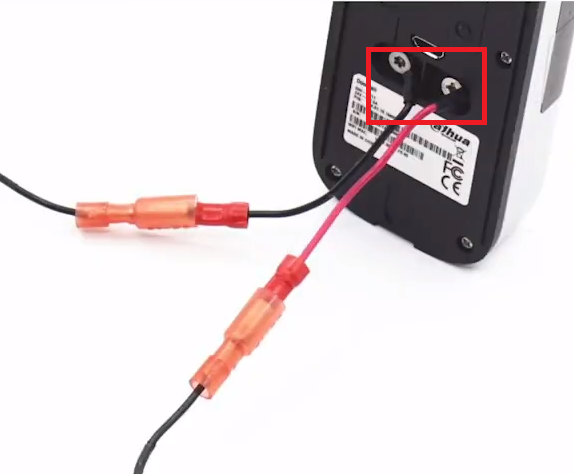
2. Flip over the DB11 and connect the Wire Harness wires, included in the box, to the back of DB11
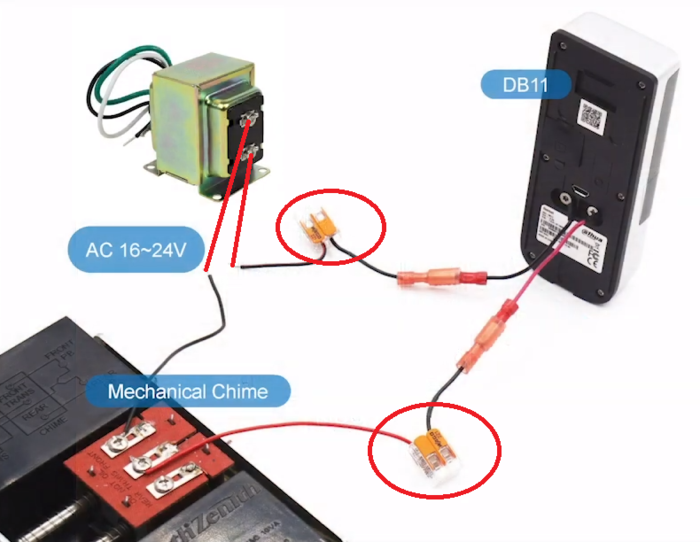
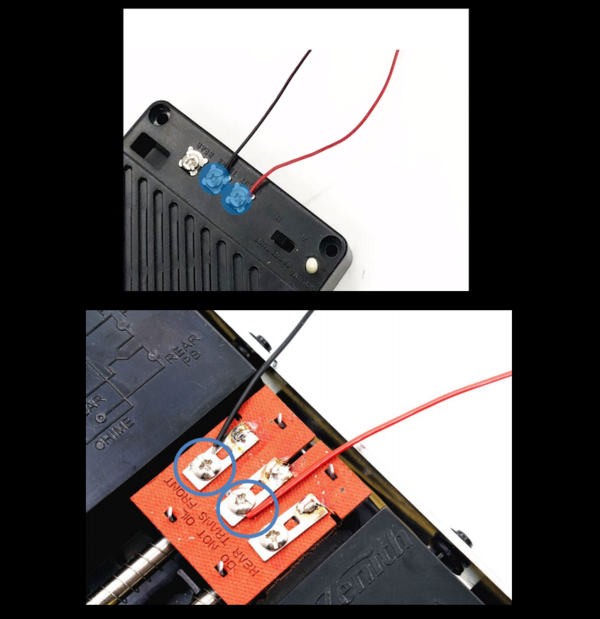
3. From the DB11 and the door chime, twist the two wires, one from the end of the Wire Harness and one from the door chime, and connect them together with a Wire Nut or Clip (included in the box).
Repeat this for the other set of wires from the DB11 and the Power Transformer.
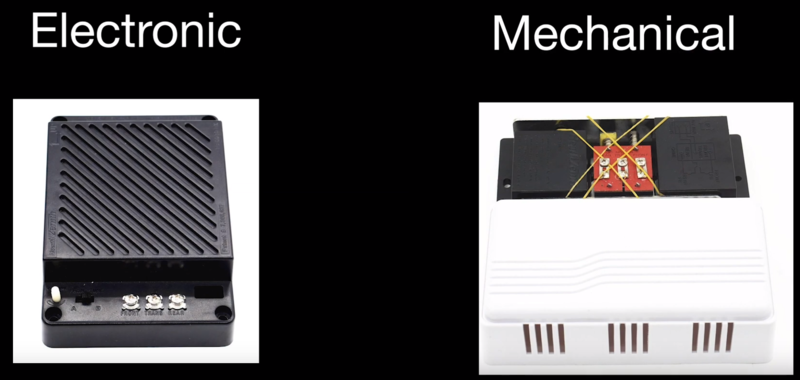
4. The door chime that is already installed will either be Electronic or Mechanical.
Make sure the two wires are already connected to the FRONT and TRANS connections. If they are not, adjust them so they are.
5. If you are using a Mechanical door chime skip to Step 7. If you are using an Electronic door chrime continue from here.
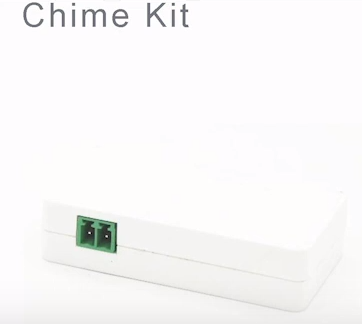
With the Electronic door chime, you will need to add the Chime Kit (included in the box)
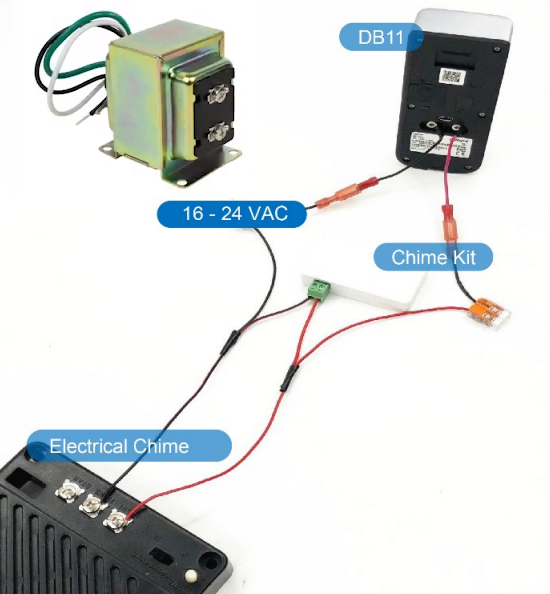
6. Connect the wire set shown below (included in the box) to the Chime Kit with the green Terminal Block (also included in the box).
Connect the wire set in line with the DB11, door chime, and AC Power Transformer in the configuration shown in the diagram below:
7. The DB11 will now be installed in place of your previous doorbell.
It is safe to turn the power back on to the door bell system/power transformer
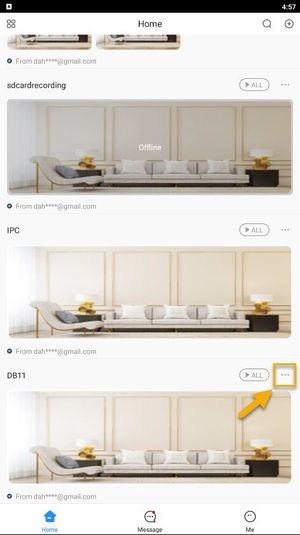
8. Open your mobile app and you MUST follow instruction below to complete your Door Chime Setup.
Note: There are two mobile apps that available to support this product series.
Tap on ![]() Home to locate your device list.
Select your DB11 device and tap on ... icon.
Home to locate your device list.
Select your DB11 device and tap on ... icon.
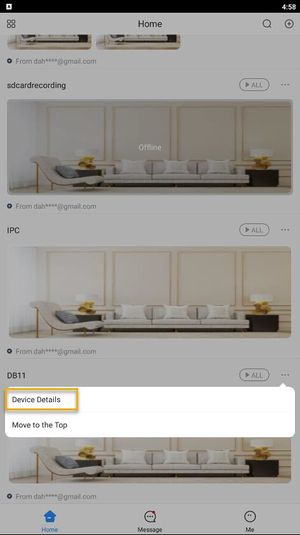
9. Tap on Device Details.
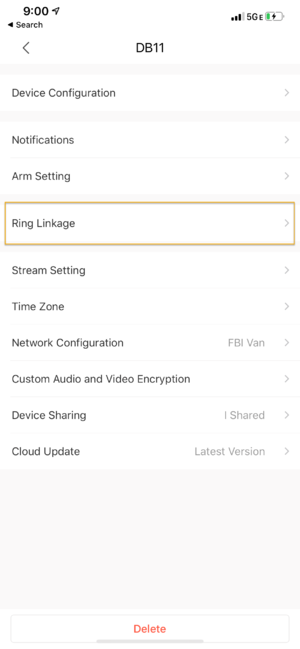
10. Tap on Ring Linkage
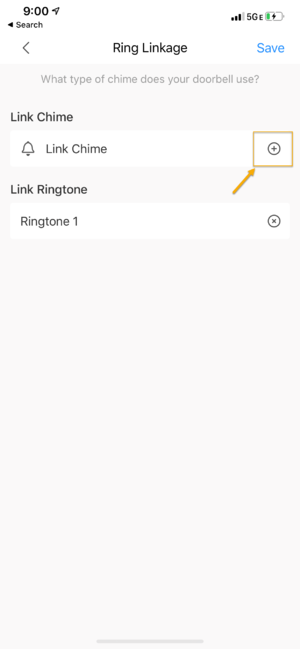
11. Under Link Chime, Tap on the + button to add the Door Chime.
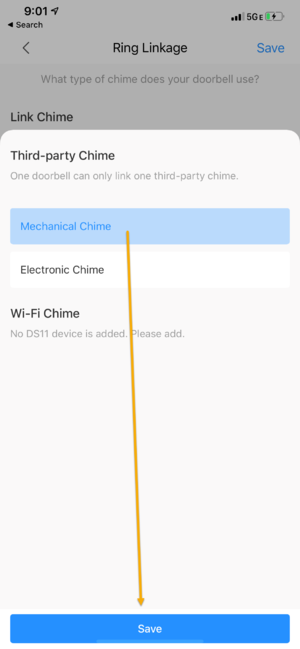
12. Select either Electronic Chime if you are using an Electronic door chime or Mechanical Chime if you are using a Mechanical door chime.
Then tap on Save on the bottom.
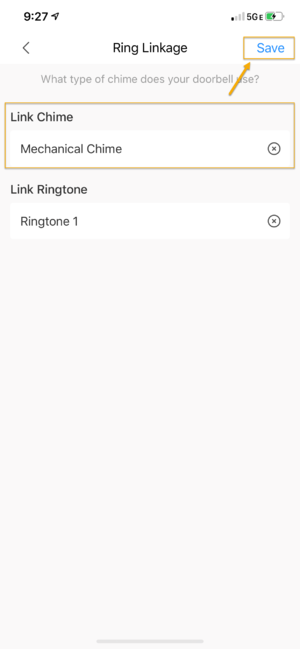
13. Tap on Save again to complete the setup.
