Difference between revisions of "Thermal/Temperature Monitoring/3rd Party VMS/Milestone Add DHI ASI7213X T1"
(→Description) |
(→Step by Step Instructions) |
||
| (4 intermediate revisions by 2 users not shown) | |||
| Line 8: | Line 8: | ||
You will be able to view the video feeds, and see the alarm messages in XProtect Smart client. | You will be able to view the video feeds, and see the alarm messages in XProtect Smart client. | ||
| − | [[file:DHI-ASI7213X-T1_Milestone_Client_Example1.png|400px]] [[File:DHI-ASI7213X- | + | [[file:DHI-ASI7213X-T1_Milestone_Client_Example1.png|400px]] [[File:DHI-ASI7213X-T1_Milestone_Client_Example2.png|400px]] |
'''You will not be able to aggregate snapshots of people's faces in the Dahua Thermal Plugin. ''' | '''You will not be able to aggregate snapshots of people's faces in the Dahua Thermal Plugin. ''' | ||
| Line 28: | Line 28: | ||
==Step by Step Instructions== | ==Step by Step Instructions== | ||
| − | 1. | + | 1. Click Recording Servers |
| − | [[File: | + | |
| + | Find the server in the list | ||
| + | |||
| + | [[File:Dahua_Thermal_Solution_DHI_ASI7213X_T1_Add_to_Milestone_-1.jpg|800x800px]] | ||
| + | |||
| + | Right click | ||
| + | |||
| + | Select '''Add Hardware''' | ||
| + | |||
| + | [[File:Dahua_Thermal_Solution_DHI_ASI7213X_T1_Add_to_Milestone_-2.jpg|800x800px]] | ||
| + | |||
| + | 2. Select Manual | ||
| + | |||
| + | Click Next | ||
| + | |||
| + | [[File:Dahua_Thermal_Solution_DHI_ASI7213X_T1_Add_to_Milestone_-3.jpg|800x800px]] | ||
| + | |||
| + | 3. Click Next on this screen | ||
| + | |||
| + | [[File:Dahua_Thermal_Solution_DHI_ASI7213X_T1_Add_to_Milestone_-4.jpg|800x800px]] | ||
| + | |||
| + | 4. Select ONVIF drivers as shown | ||
| + | |||
| + | Click Next | ||
| + | |||
| + | [[File:Dahua_Thermal_Solution_DHI_ASI7213X_T1_Add_to_Milestone_-5.jpg|800x800px]] | ||
| + | |||
| + | 5. Left click in the field under IP Address | ||
| + | |||
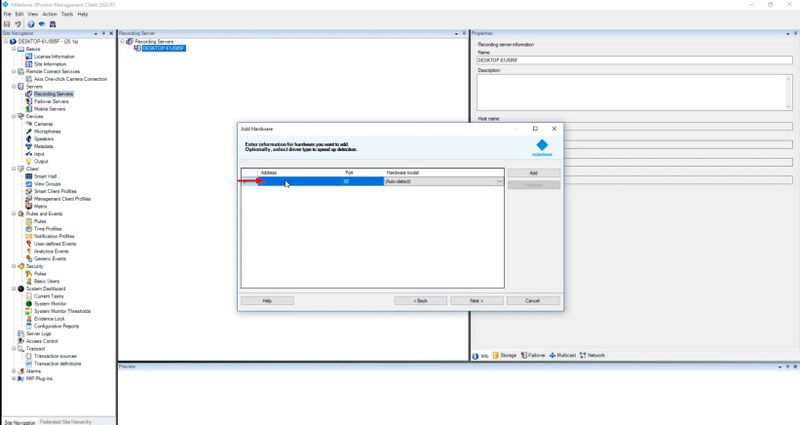
| + | [[File:Dahua_Thermal_Solution_DHI_ASI7213X_T1_Add_to_Milestone_-6.jpg|800x800px]] | ||
| + | |||
| + | Enter the IP address of the DHI-ASI7213X-T1 and click Next | ||
| + | |||
| + | [[File:Dahua_Thermal_Solution_DHI_ASI7213X_T1_Add_to_Milestone_-7.jpg|800x800px]] | ||
| + | |||
| + | After a moment it will connect | ||
| + | |||
| + | [[File:Dahua_Thermal_Solution_DHI_ASI7213X_T1_Add_to_Milestone_-8.jpg|800x800px]] | ||
| + | |||
| + | Click Next | ||
| + | |||
| + | [[File:Dahua_Thermal_Solution_DHI_ASI7213X_T1_Add_to_Milestone_-9.jpg|800x800px]] | ||
| + | |||
| + | 6. Check the box to enable all Hardware features | ||
| + | |||
| + | [[File:Dahua_Thermal_Solution_DHI_ASI7213X_T1_Add_to_Milestone_-10.jpg|800x800px]] | ||
| + | |||
| + | Click Next | ||
| + | |||
| + | [[File:Dahua_Thermal_Solution_DHI_ASI7213X_T1_Add_to_Milestone_-11.jpg|800x800px]] | ||
| + | |||
| + | Click Finish | ||
| + | |||
| + | [[File:Dahua_Thermal_Solution_DHI_ASI7213X_T1_Add_to_Milestone_-12.jpg|800x800px]] | ||
| + | |||
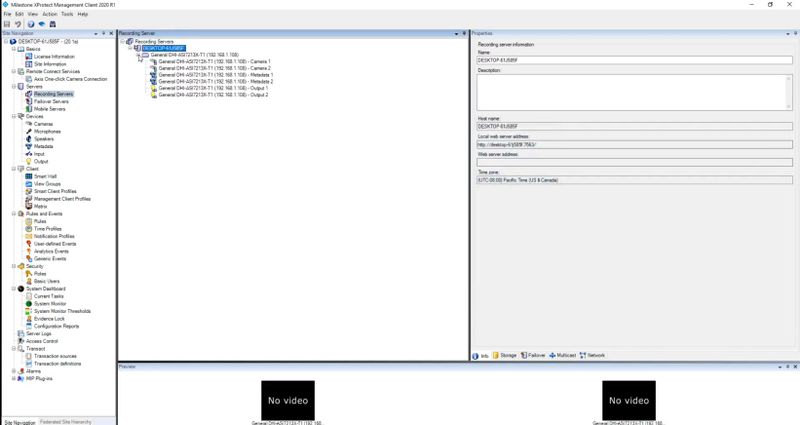
| + | The device will now appear in the list | ||
| + | |||
| + | [[File:Dahua_Thermal_Solution_DHI_ASI7213X_T1_Add_to_Milestone_-13.jpg|800x800px]] | ||
| + | |||
| + | [[File:Dahua_Thermal_Solution_DHI_ASI7213X_T1_Add_to_Milestone_-14.jpg|800x800px]] | ||
Latest revision as of 22:31, 17 June 2020
Contents
Add DHI-ASI7213X-T1 To Milestone
Description
These instructions will show you how to add a DHI-ASI7213X-T1 To Milestone XProtect Corporate 2020 R1.
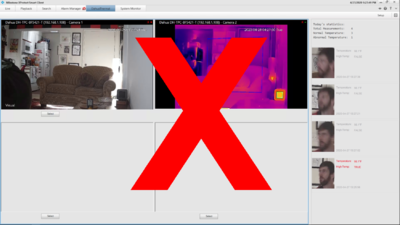
PLEASE NOTE The DHI-ASI7213X-T1 solution is not currently compatible with any of the Dahua Milestone Plugins including the "Dahua Thermal Plugin"
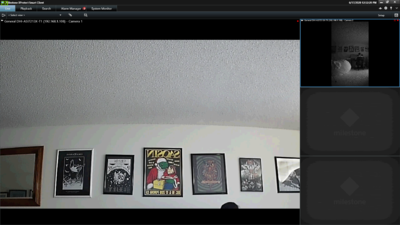
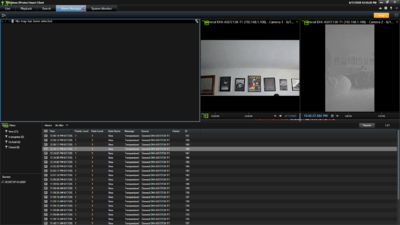
You will be able to view the video feeds, and see the alarm messages in XProtect Smart client.
You will not be able to aggregate snapshots of people's faces in the Dahua Thermal Plugin.
Prerequisites
There is specific software and firmware to support the DHI-ASI7213X-T1
| Milestone XProtect DHI-ASI7213X-T1 Firmware |
|---|
Video Instructions
Step by Step Instructions
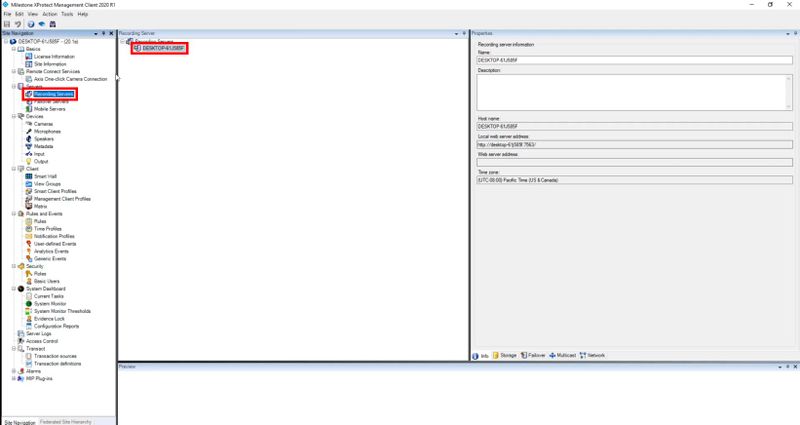
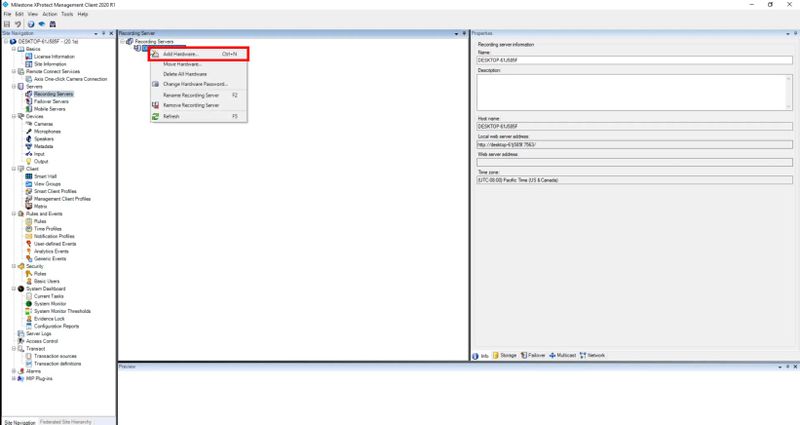
1. Click Recording Servers
Find the server in the list
Right click
Select Add Hardware
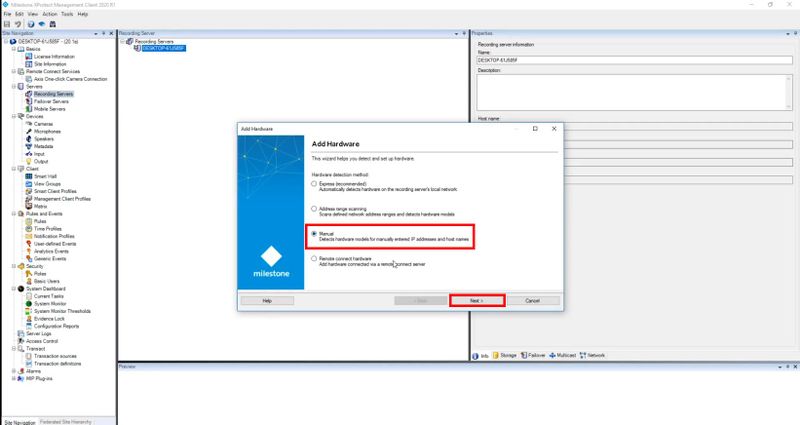
2. Select Manual
Click Next
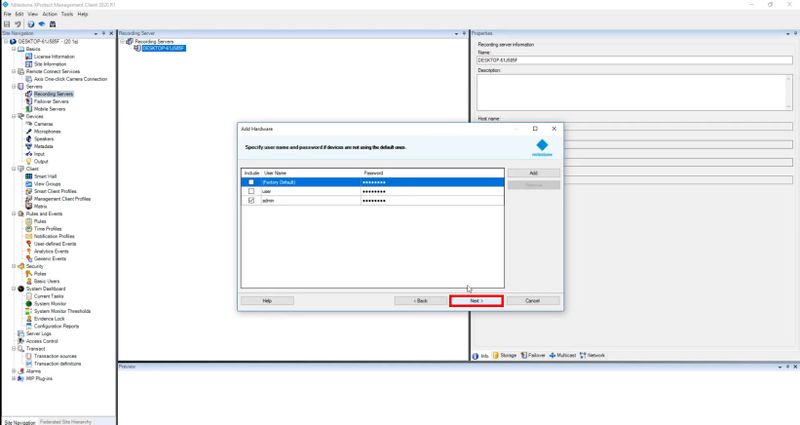
3. Click Next on this screen
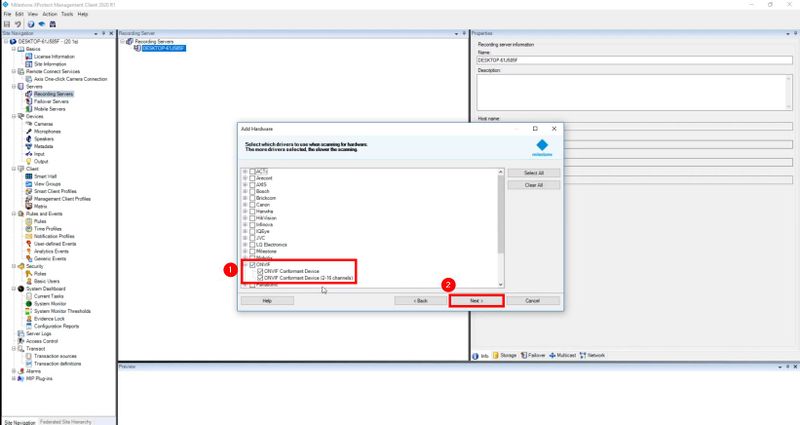
4. Select ONVIF drivers as shown
Click Next
5. Left click in the field under IP Address
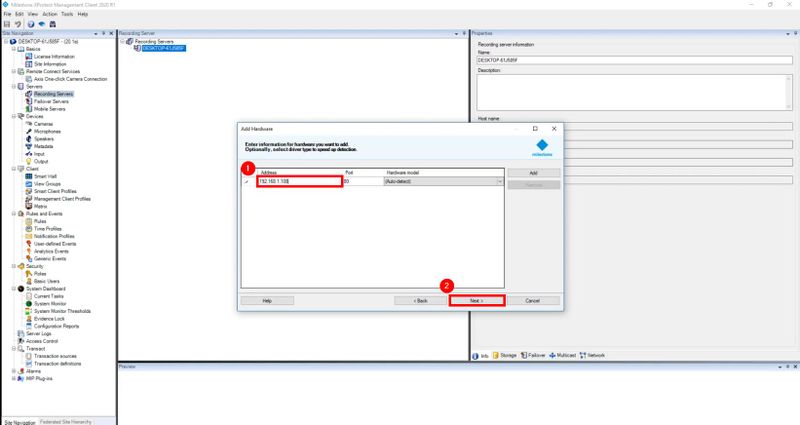
Enter the IP address of the DHI-ASI7213X-T1 and click Next
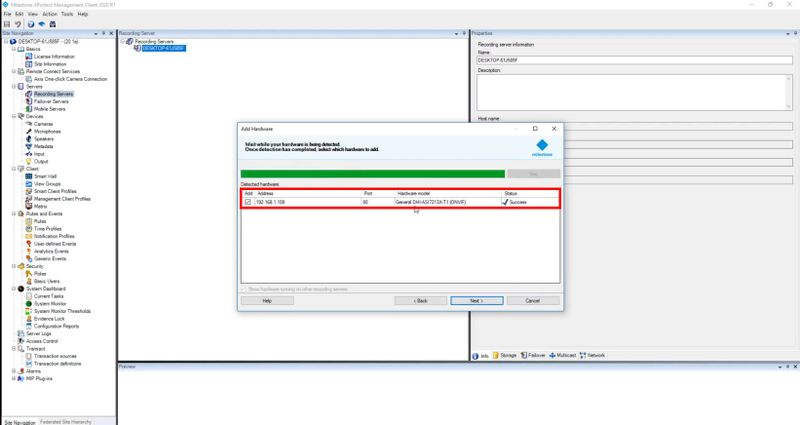
After a moment it will connect
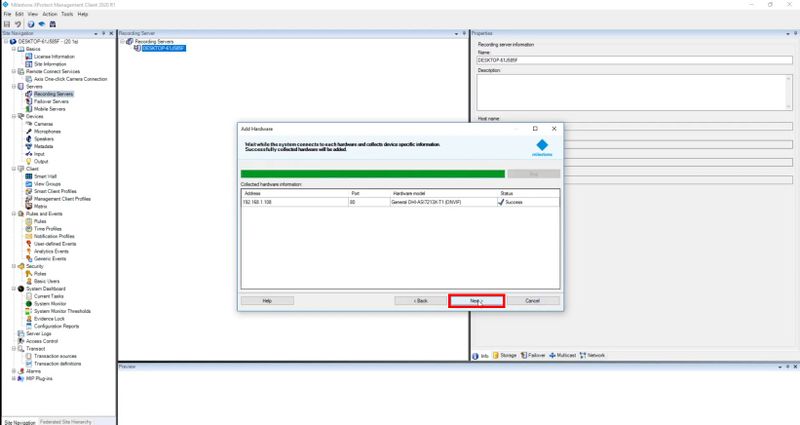
Click Next
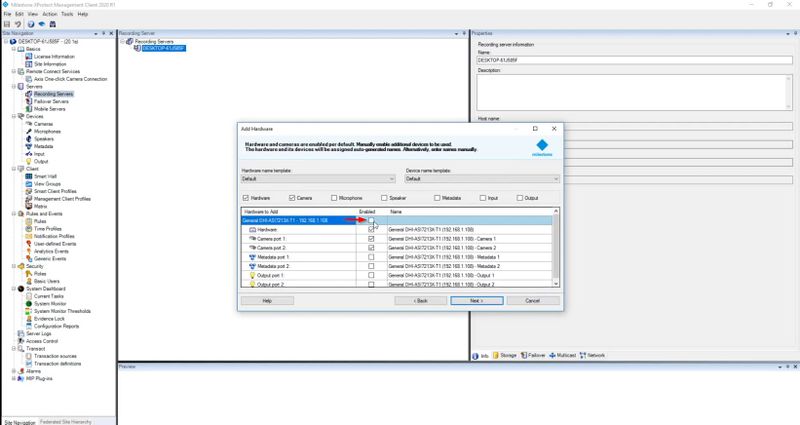
6. Check the box to enable all Hardware features
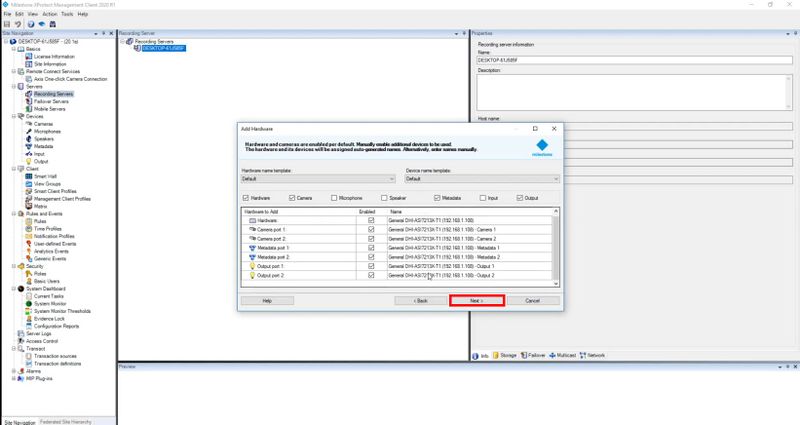
Click Next
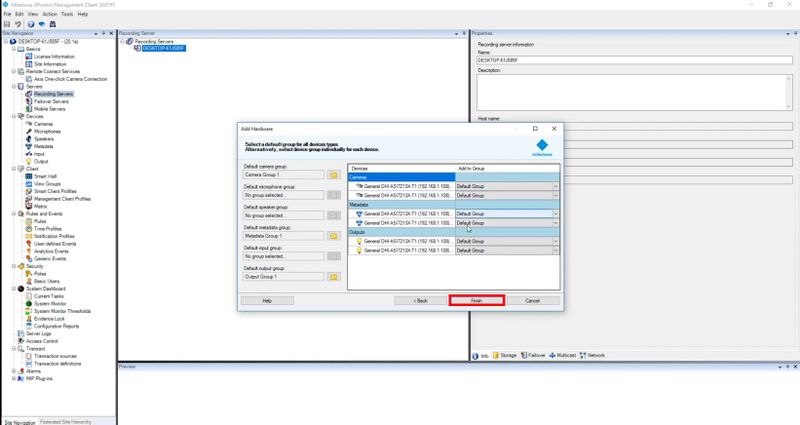
Click Finish
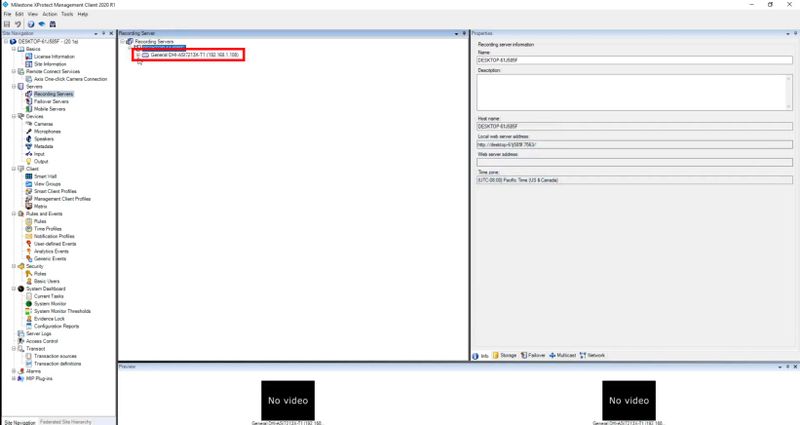
The device will now appear in the list
