Difference between revisions of "POS/Point of Sale Setup NVR608"
(→Step by Step Instructions) |
|||
| Line 13: | Line 13: | ||
1. [https://www.odrive.com/s/40de66d4-6284-4cfe-8a5a-8238de5696b7-5797aae0 Click this link] to download the software package. | 1. [https://www.odrive.com/s/40de66d4-6284-4cfe-8a5a-8238de5696b7-5797aae0 Click this link] to download the software package. | ||
| − | [[file:POSHowTo1.png]] | + | [[file:POSHowTo1.png|700px]] |
2. Once downloaded, create a folder and extract the contents of the zip file. You should end up with a folder like the below image: | 2. Once downloaded, create a folder and extract the contents of the zip file. You should end up with a folder like the below image: | ||
| − | [[file:POSHowTo2.png]] | + | [[file:POSHowTo2.png|700px]] |
3. Locate the NVR on the network and login to the NVR using Internet Explorer. Instructions for locating your NVR can be found [[Remote_Access/Locate_Device_via_ConfigTool|Here]] | 3. Locate the NVR on the network and login to the NVR using Internet Explorer. Instructions for locating your NVR can be found [[Remote_Access/Locate_Device_via_ConfigTool|Here]] | ||
| − | [[file:ConfigToolIPC.jpg]] | + | [[file:ConfigToolIPC.jpg|700px]] |
4. Update the firmware using the firmware located in the folder titled, "Flash This Firmware First." Alternatively, you can update the firmware using one of the below methods: | 4. Update the firmware using the firmware located in the folder titled, "Flash This Firmware First." Alternatively, you can update the firmware using one of the below methods: | ||
| Line 29: | Line 29: | ||
*https://dahuawiki.com/Firmware/Update_Firmware_via_USB | *https://dahuawiki.com/Firmware/Update_Firmware_via_USB | ||
| − | [[file:POSHowTo3.png]] | + | [[file:POSHowTo3.png|700px]] |
5. Once the update is complete, the system will reboot. Login to the NVR again, and apply the second firmware update to the system. The firmware is located in a folder called, "Flash This Firmware Second" | 5. Once the update is complete, the system will reboot. Login to the NVR again, and apply the second firmware update to the system. The firmware is located in a folder called, "Flash This Firmware Second" | ||
| − | [[file:POSHowTo4.png]] | + | [[file:POSHowTo4.png|700px]] |
6. Once the second firmware is applied, the system will reboot. Login to the system and navigate to, Setup->System->POS | 6. Once the second firmware is applied, the system will reboot. Login to the system and navigate to, Setup->System->POS | ||
| − | [[file:POSHowTo5.png]] | + | [[file:POSHowTo5.png|700px]] |
7. Click, "Add" | 7. Click, "Add" | ||
| − | [[file:POSHowTo6.png]] | + | [[file:POSHowTo6.png|700px]] |
8. Check the box to the left of, "Enable" | 8. Check the box to the left of, "Enable" | ||
| − | [[file:POSHowTo71.png]] | + | [[file:POSHowTo71.png|700px]] |
9. Click, "Set" to the right of "Connect Type" | 9. Click, "Set" to the right of "Connect Type" | ||
| − | [[file:POSHowTo7.png]] | + | [[file:POSHowTo7.png|700px]] |
10. Input your POS or PC's IP address. This is the IP address of the system running the "NetAssist.exe" application. | 10. Input your POS or PC's IP address. This is the IP address of the system running the "NetAssist.exe" application. | ||
| − | [[file:POSHowTo8.png]][[file:POSHowTo9.png]] | + | [[file:POSHowTo8.png|350px]][[file:POSHowTo9.png|350px]] |
11. Note the, "Destination IP" port, and click, "OK" | 11. Note the, "Destination IP" port, and click, "OK" | ||
| − | [[file:POSHowTo10.png]] | + | [[file:POSHowTo10.png|700px]] |
12. Click, "Channel" to assign the channel that will display the Point of Sale information. Click, "OK" twice and exit the NVR menus. | 12. Click, "Channel" to assign the channel that will display the Point of Sale information. Click, "OK" twice and exit the NVR menus. | ||
| − | [[file:POSHowTo11.png]] [[file:POSHowTo12.png]] | + | [[file:POSHowTo11.png|350px]] [[file:POSHowTo12.png|350px]] |
13. Launch, "NetAssist.exe" from your PC. | 13. Launch, "NetAssist.exe" from your PC. | ||
| − | [[file:POSHowTo13.png]] | + | [[file:POSHowTo13.png|700px]] |
14. On the left hand side, change the, "Protocol" to "TCP Client" | 14. On the left hand side, change the, "Protocol" to "TCP Client" | ||
| − | [[file:POSHowTo14.png]] | + | [[file:POSHowTo14.png|700px]] |
15. Set the, "Local host addr" to the local IP address of your computer. | 15. Set the, "Local host addr" to the local IP address of your computer. | ||
| − | [[file:POSHowTo15.png]] | + | [[file:POSHowTo15.png|700px]] |
16. Set the, "Remote host addr" to the IP address of your NVR, colon then the port we identified earlier in the NVR menus. | 16. Set the, "Remote host addr" to the IP address of your NVR, colon then the port we identified earlier in the NVR menus. | ||
| − | [[file:POSHowTo16.png]] | + | [[file:POSHowTo16.png|700px]] |
17. Click, "Connect" | 17. Click, "Connect" | ||
| − | [[file:POSHowTo17.png]] | + | [[file:POSHowTo17.png|700px]] |
18. Input some example text in the bottom box, and hit, "Send" | 18. Input some example text in the bottom box, and hit, "Send" | ||
| − | [[file:POSHowTo18.png]] | + | [[file:POSHowTo18.png|700px]] |
18. The text should appear on the video feed assigned in the NVR. | 18. The text should appear on the video feed assigned in the NVR. | ||
| − | [[file:POSHowTo19.png]] | + | [[file:POSHowTo19.png|700px]] |
19. The last step is to configure your Point of Sale to the PC's local IP address and port. This can be done with a serial connection or via IP. | 19. The last step is to configure your Point of Sale to the PC's local IP address and port. This can be done with a serial connection or via IP. | ||
Revision as of 19:30, 26 July 2016
Contents
How to Setup a Toshiba Point of Sale with a DHI-NVR6A08-32-4K
Description
In this article, we will go over how to setup a DHI-NVR6A08-32-4K with a Toshiba Point of Sale using the LAN and IP network to transmit receipt information to a video feed on the NVR.
Prerequisites
- DHI-NVR6A08-32-4K
- Toshiba Point of Sale System
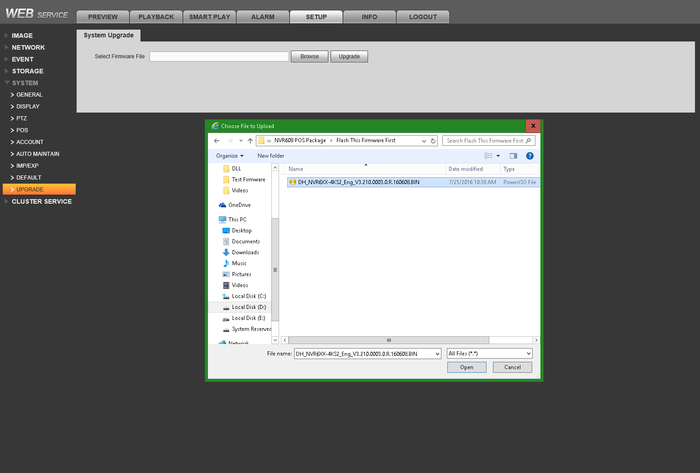
- Firmware 1: DH_NVR6XX-4KS2_Eng_V3.210.0003.0.R.160608
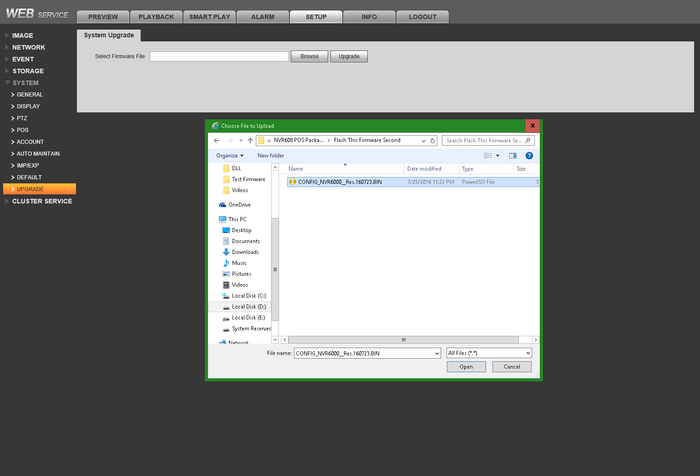
- Firmware 2: CONFIG_NVR6000__Res.160723
- NetAssist running on a Windows PC
Video Instructions
Step by Step Instructions
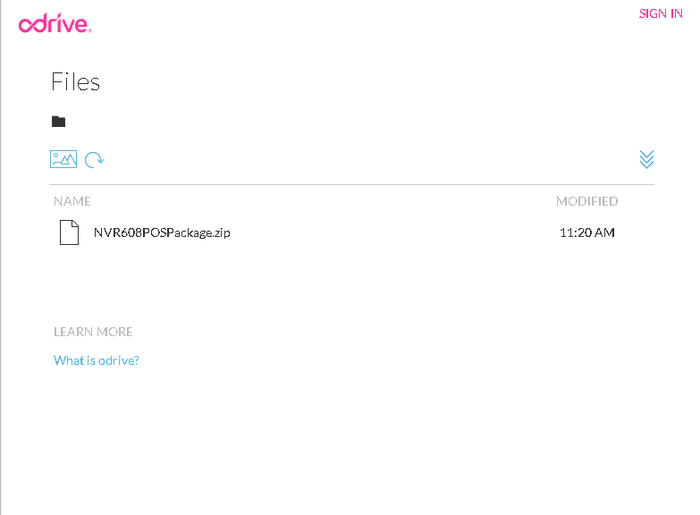
1. Click this link to download the software package.
2. Once downloaded, create a folder and extract the contents of the zip file. You should end up with a folder like the below image:
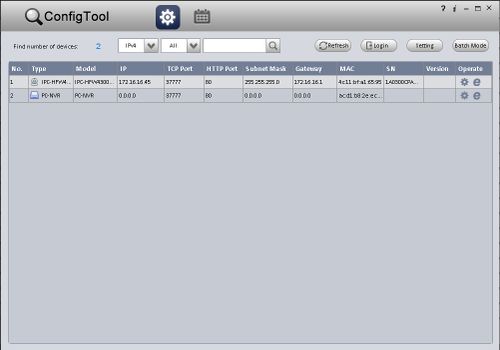
3. Locate the NVR on the network and login to the NVR using Internet Explorer. Instructions for locating your NVR can be found Here
4. Update the firmware using the firmware located in the folder titled, "Flash This Firmware First." Alternatively, you can update the firmware using one of the below methods:
- https://dahuawiki.com/Firmware/Update_Firmware_via_ConfigTool
- https://dahuawiki.com/Firmware/Update_Firmware_via_Web_Browser
- https://dahuawiki.com/Firmware/Update_Firmware_via_USB
5. Once the update is complete, the system will reboot. Login to the NVR again, and apply the second firmware update to the system. The firmware is located in a folder called, "Flash This Firmware Second"
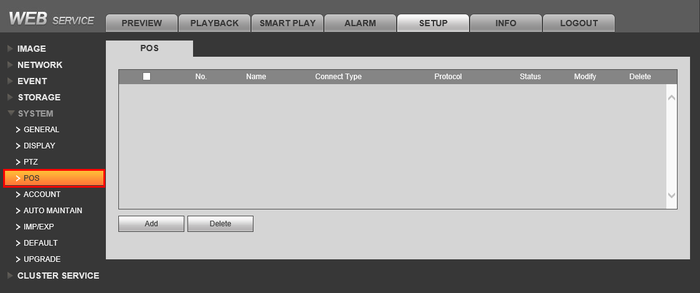
6. Once the second firmware is applied, the system will reboot. Login to the system and navigate to, Setup->System->POS
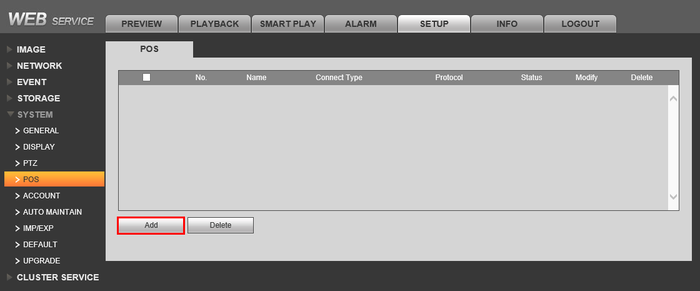
7. Click, "Add"
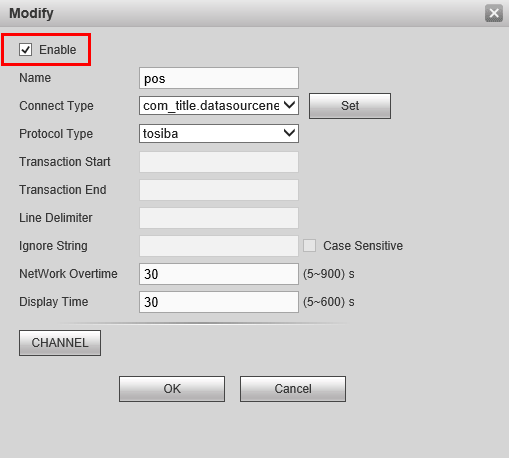
8. Check the box to the left of, "Enable"
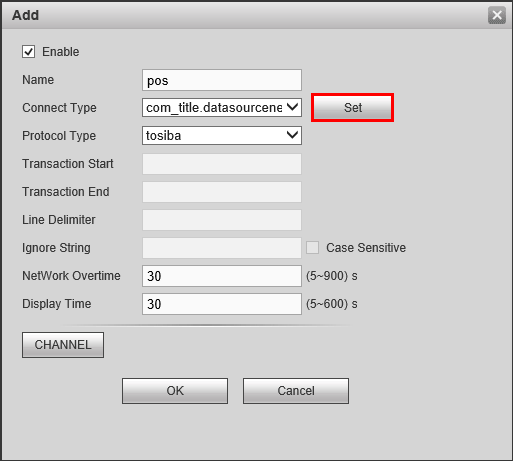
9. Click, "Set" to the right of "Connect Type"
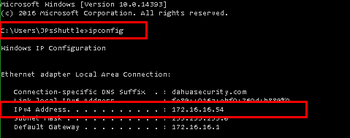
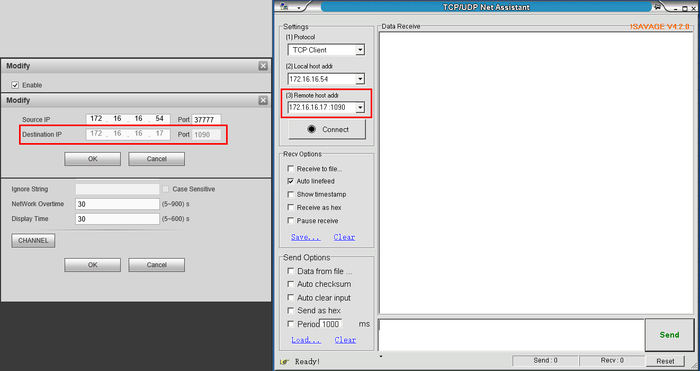
10. Input your POS or PC's IP address. This is the IP address of the system running the "NetAssist.exe" application.
11. Note the, "Destination IP" port, and click, "OK"
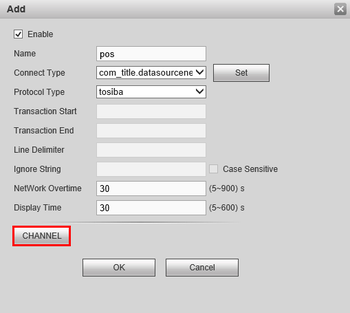
12. Click, "Channel" to assign the channel that will display the Point of Sale information. Click, "OK" twice and exit the NVR menus.
13. Launch, "NetAssist.exe" from your PC.
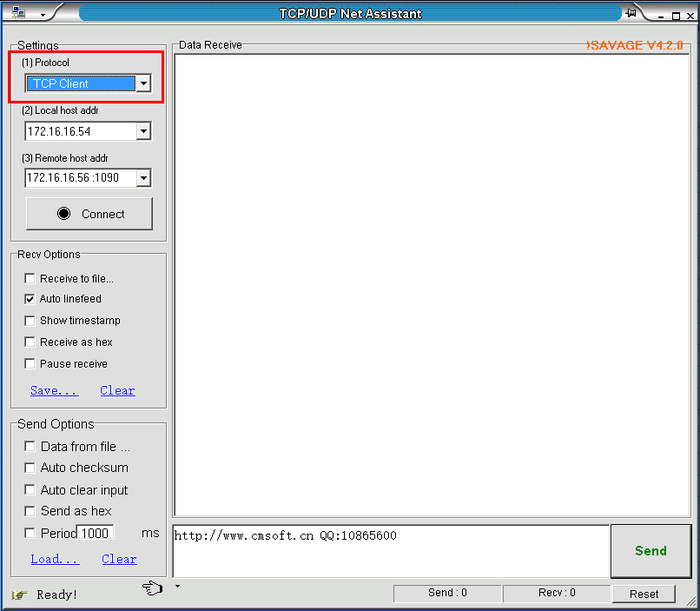
14. On the left hand side, change the, "Protocol" to "TCP Client"
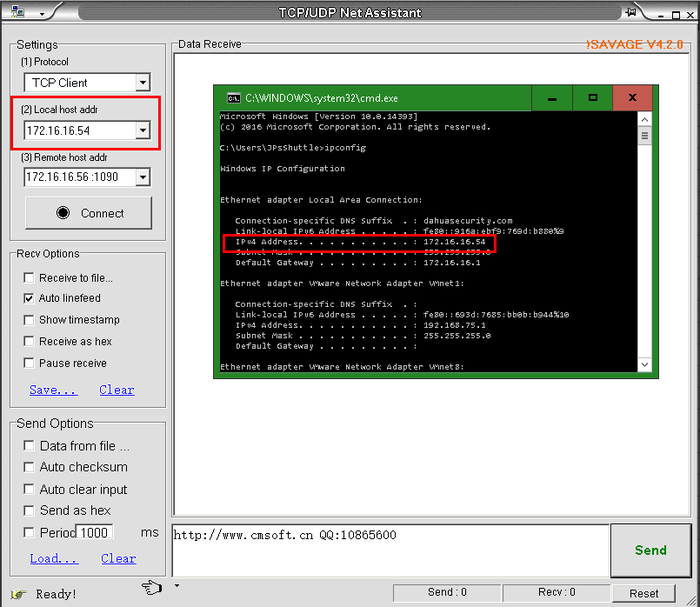
15. Set the, "Local host addr" to the local IP address of your computer.
16. Set the, "Remote host addr" to the IP address of your NVR, colon then the port we identified earlier in the NVR menus.
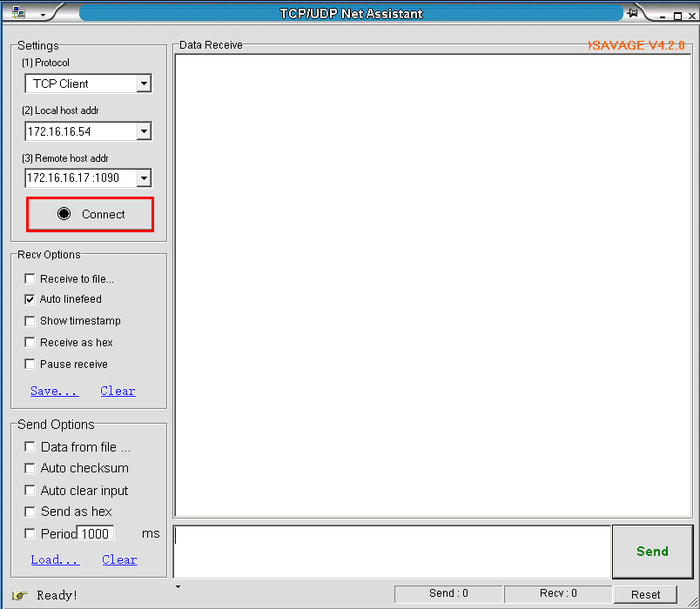
17. Click, "Connect"
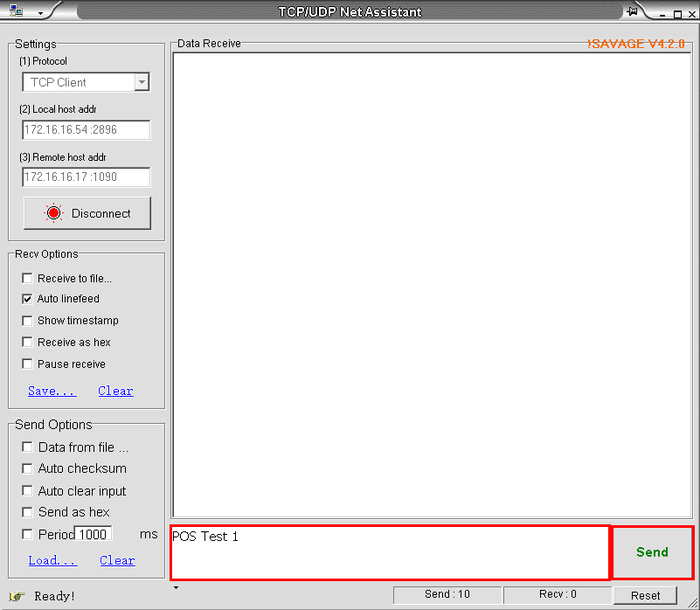
18. Input some example text in the bottom box, and hit, "Send"
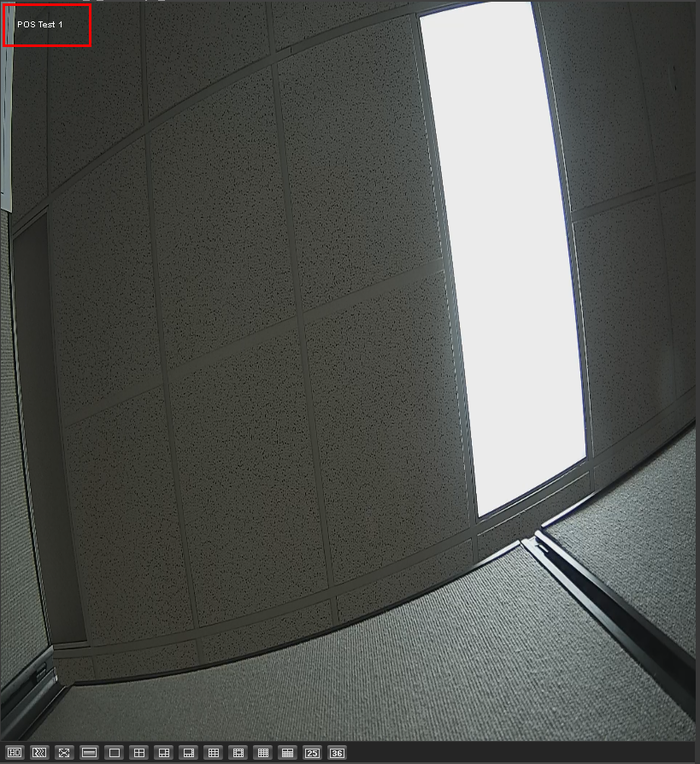
18. The text should appear on the video feed assigned in the NVR.
19. The last step is to configure your Point of Sale to the PC's local IP address and port. This can be done with a serial connection or via IP.
Example of Working Setup
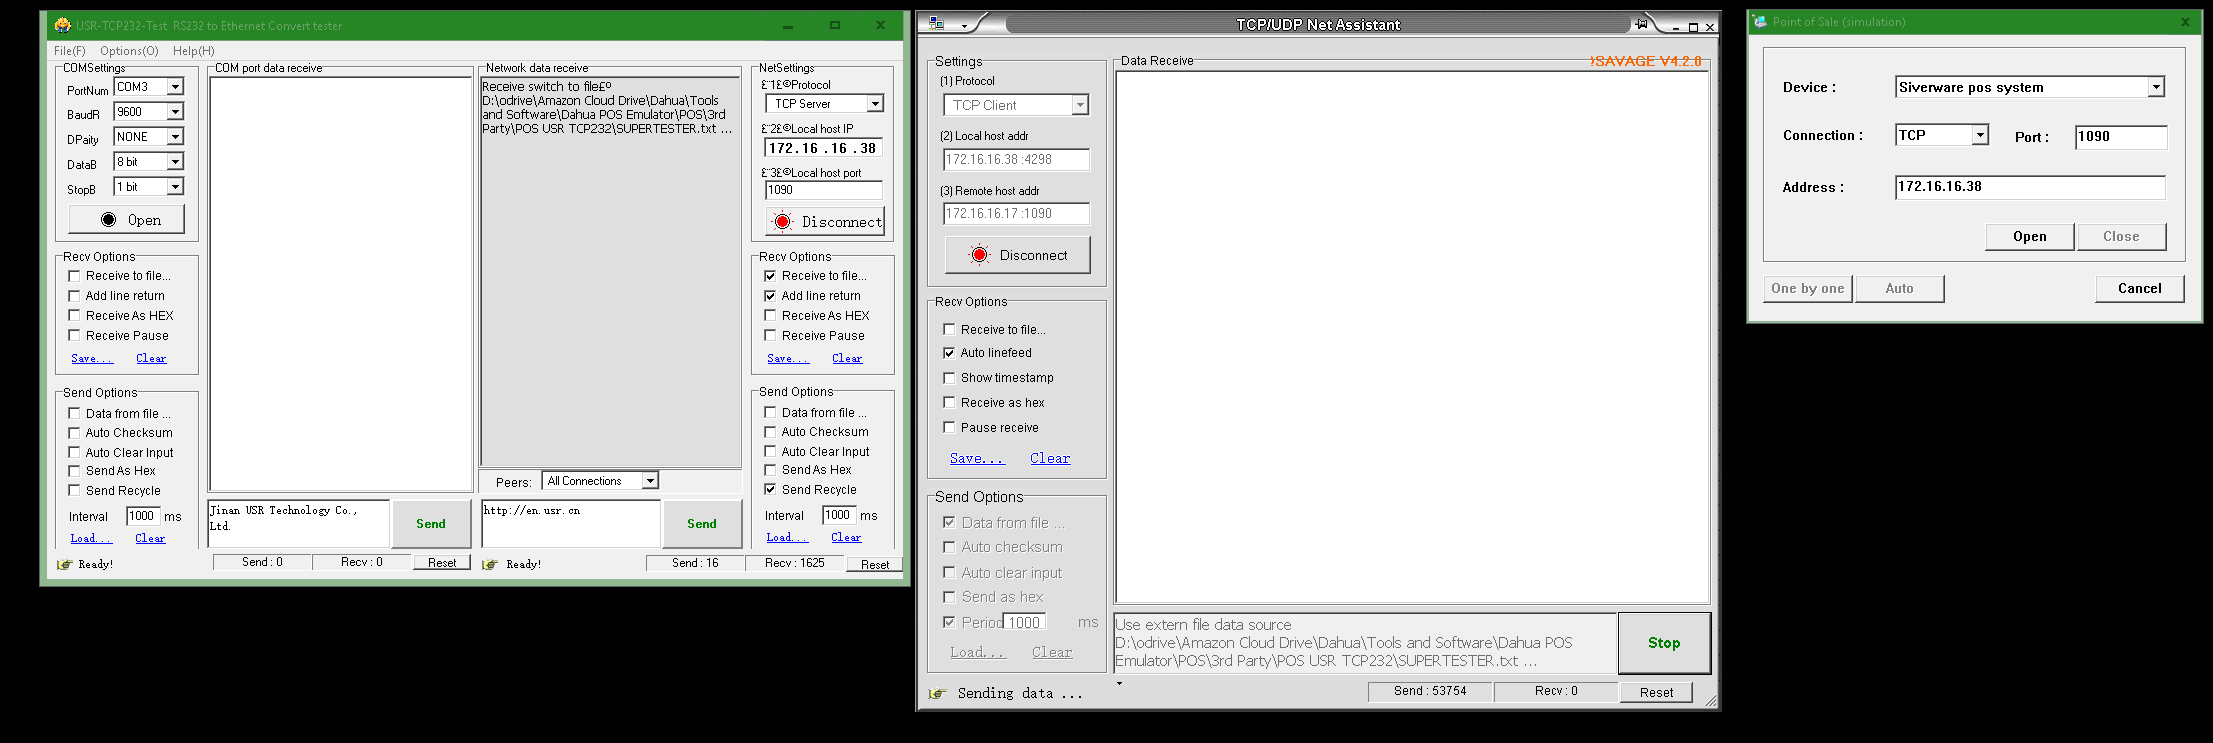
Below is an example image of a POS simulator, Net Assist operating as the client, and USR-TCP232-Test functioning as the TCP Server.
