Difference between revisions of "EVS/Date and Time"
| Line 11: | Line 11: | ||
==Step by Step Instructions== | ==Step by Step Instructions== | ||
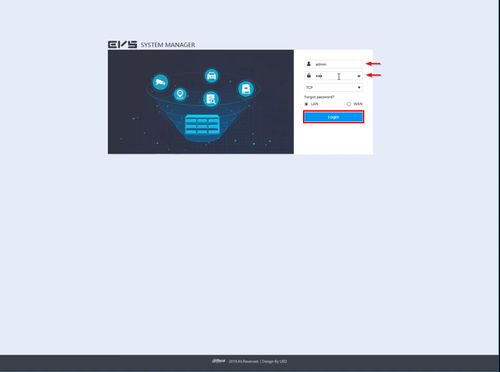
1. Log into the EVS System Manager by typing the IP in to a web browser | 1. Log into the EVS System Manager by typing the IP in to a web browser | ||
| + | |||
| + | [[File:EVS_-_Date_and_Time_-_1.jpg|500px]] | ||
| + | |||
| + | [[File:EVS_-_Date_and_Time_-_2.jpg|500px]] | ||
| + | |||
| + | [[File:EVS_-_Date_and_Time_-_3.jpg|500px]] | ||
| + | |||
| + | [[File:EVS_-_Date_and_Time_-_4.jpg|500px]] | ||
| + | |||
| + | [[File:EVS_-_Date_and_Time_-_5.jpg|500px]] | ||
| + | |||
| + | [[File:EVS_-_Date_and_Time_-_6.jpg|500px]] | ||
| + | |||
| + | [[File:EVS_-_Date_and_Time_-_7.jpg|500px]] | ||
| + | |||
| + | [[File:EVS_-_Date_and_Time_-_8.jpg|500px]] | ||
| + | |||
| + | [[File:EVS_-_Date_and_Time_-_9.jpg|500px]] | ||
| + | |||
| + | [[File:EVS_-_Date_and_Time_-_10.jpg|500px]] | ||
Revision as of 21:53, 13 November 2019
Contents
Date and Time
Description
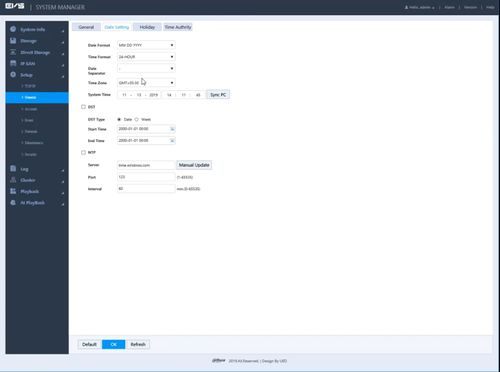
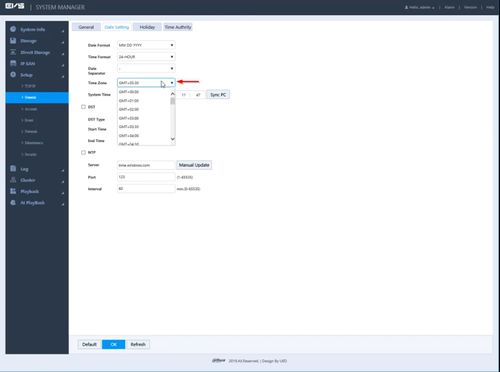
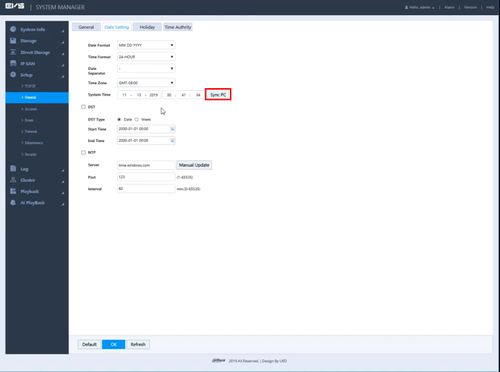
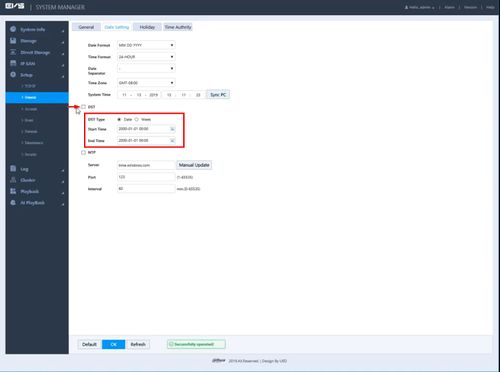
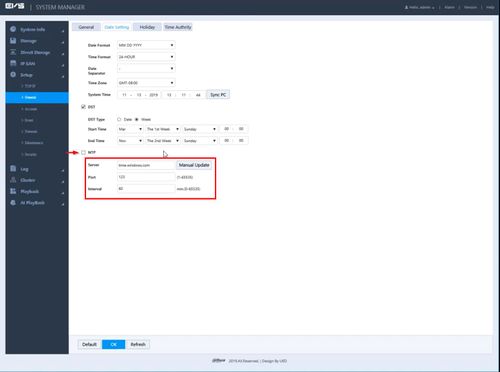
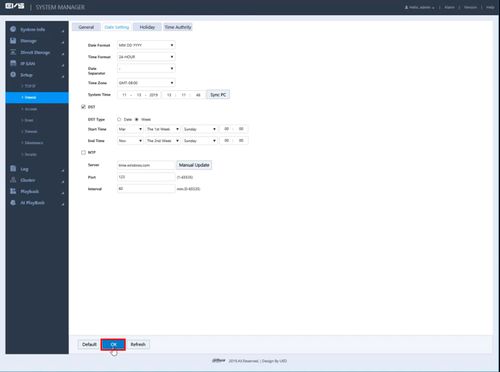
This guide will show how to adjust the Date and Time for a EVS device
Prerequisites
- EVS device powered on, set up and connected to the network
- Computer with network access
- IP address of EVS device
Video Instructions
Step by Step Instructions
1. Log into the EVS System Manager by typing the IP in to a web browser
