Difference between revisions of "Record/Basic/Snapshot"
(Created page with "=Snapshot= <div class="toccolours mw-collapsible mw-collapsed"> 250px<span style="font-size:180%;">'''SystemUI Old'''</span> <div clas...") |
|||
| Line 1: | Line 1: | ||
=Snapshot= | =Snapshot= | ||
| − | + | ==Description== | |
| + | ==Prerequisites== | ||
| + | ==Instructions== | ||
<div class="toccolours mw-collapsible mw-collapsed"> | <div class="toccolours mw-collapsible mw-collapsed"> | ||
[[File:Icon_for_type_SystemUI_Old.png|250px]]<span style="font-size:180%;">'''SystemUI Old'''</span> | [[File:Icon_for_type_SystemUI_Old.png|250px]]<span style="font-size:180%;">'''SystemUI Old'''</span> | ||
Revision as of 17:26, 3 February 2020
Contents
Snapshot
Description
Prerequisites
Instructions
How To Take Snapshots via Old SystemUI
Prerequisites
- HDMI output or VGA output
- Mouse
Video Instructions
Step by Step Instructions
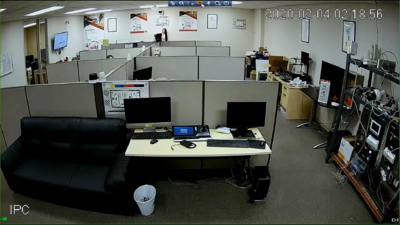
1. Hover the mouse near the top of the camera's screen and a menu bar will appear. Press the camera icon to take snapshot and the snapshot will be stored on the computer used.
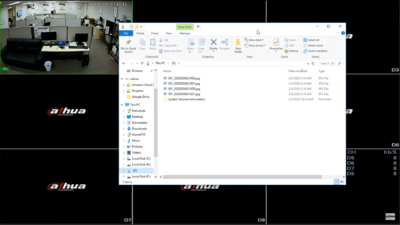
2. Open the folder where the snapshot were stored to view them.
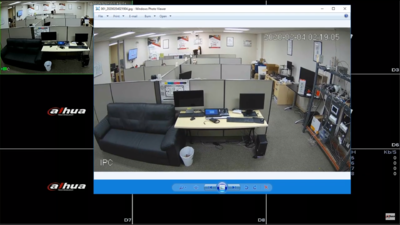
3. Viewing one of the snapshots take previously.
How To Take Snapshots via New SystemUI
Prerequisites
- HDMI or VGA output
- Mouse
Video Instructions
Step by Step Instructions
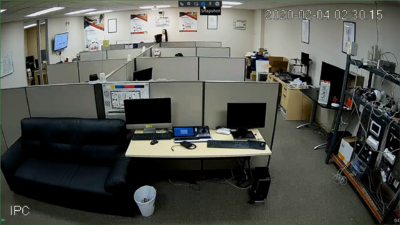
1. Hover the mouse near the top of the camera's screen and a menu bar will appear. Press the camera icon to take snapshot and the snapshot will be stored on the computer used.
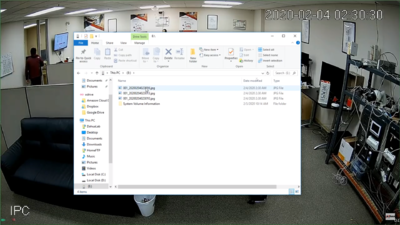
2. Open the folder where the snapshot were stored to view them.
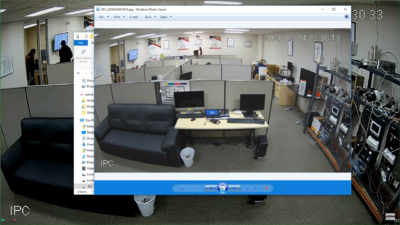
3. Viewing one of the snapshots take previously.
How To Take Snapshots via Old WebUI
Prerequisites
- Internet Explorer
Video Instructions
Step by Step Instructions
1. Before taking the snapshots, make sure the folder path set on the computer is correct. By default, the path will be set to "C:\PictureDownload"
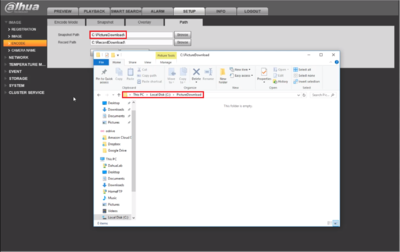
2. Select the camera to take snapshots and expand it into full screen. Press the camera icon located on the top right corner to take snapshots.
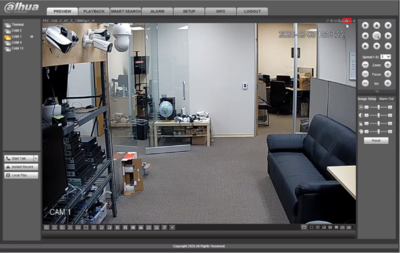
3. After snapshots have been taken, open the folder that contains them to view the snapshots again.
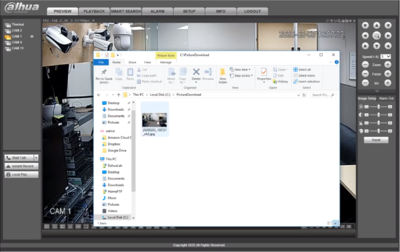
How to Take Snapshot via New WebUI
Prerequisites
- Internet Explorer
Video Instructions
Step by Step Instructions
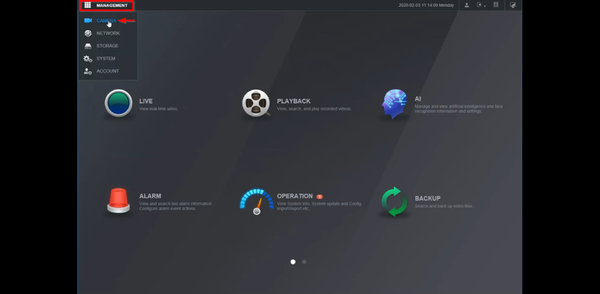
1. Expand "Management" and click on "Camera"
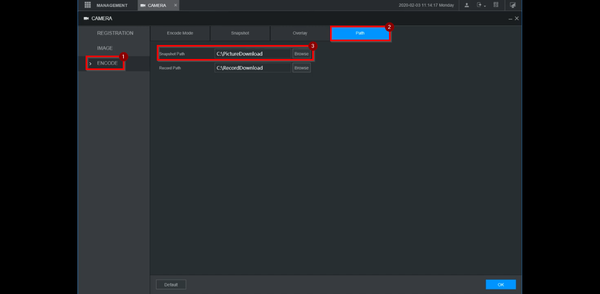
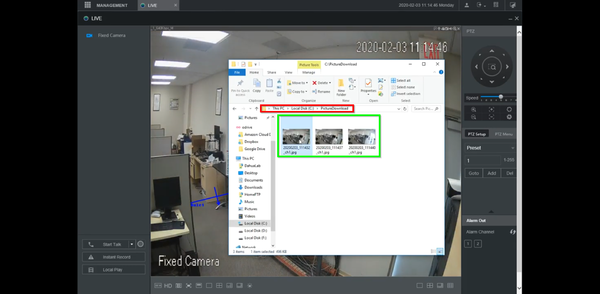
2. Select "Encode" => "Path" => Default path is C:\PictureDownload
3. Press the camera icon to take snapshot.
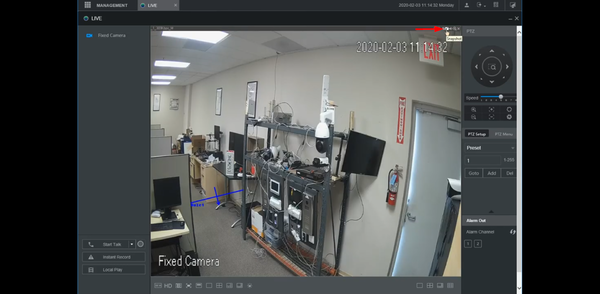
4. Open folder on computer to view the snapshots.
How to Take Snapshot via SmartPSS
Prerequisites
- SmartPSS
Video Instructions
Step by Step Instructions
1. Select the camera and expand it to full screen. Click the camera icon located on the top right corner.
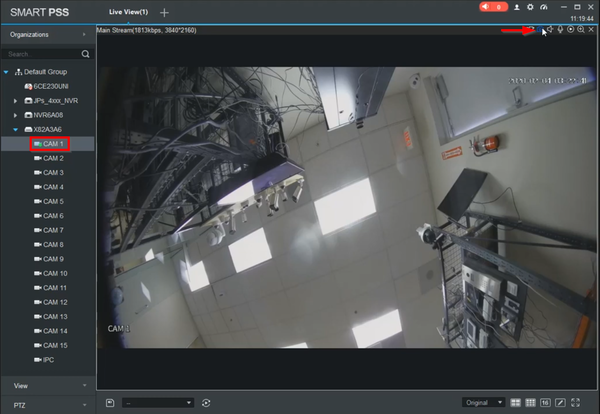
2. Snapshot confirmation will be disaplyed for each snapshot and clicking on the folder icon will open the folder that contains them.
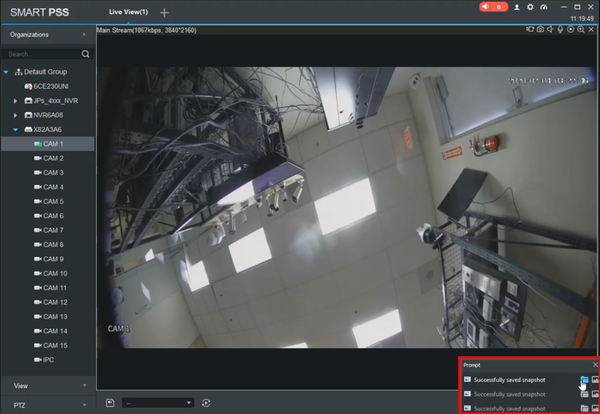
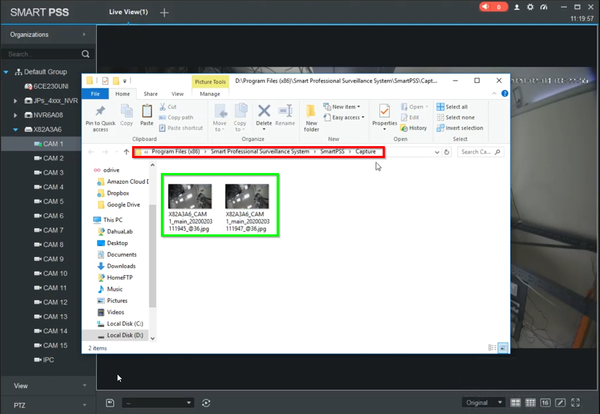
3. Snapshots can be viewed once the folder has opened.
