Notice: Firmware Links Under Maintenance We are currently undergoing maintenance on all firmware links. If any links are inaccessible, please email or contact Tech Support for the firmware. We appreciate your patience during the maintenance, thank you for your understanding.
Difference between revisions of "Template:DVR Change to HDCVI Analog and IP WebUI New"
(→Step-by-Step Instructions for XVR) |
|||
| Line 2: | Line 2: | ||
===Step-by-Step Instructions for XVR=== | ===Step-by-Step Instructions for XVR=== | ||
| − | 1. | + | 1. Enter the IP of the device into a browser (default 192.168.1.108) |
| + | |||
| + | At the Web Login | ||
| + | |||
| + | Enter the Username and Password | ||
| + | |||
| + | Click Login | ||
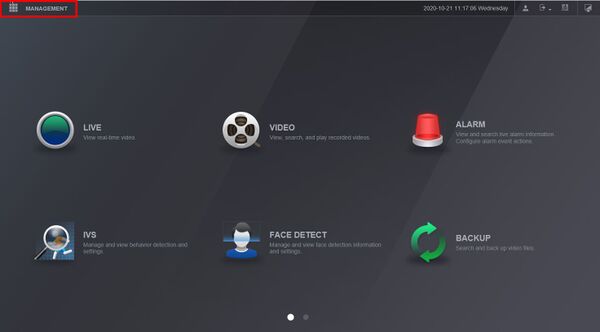
2. Click '''Management''' | 2. Click '''Management''' | ||
Latest revision as of 22:37, 21 October 2020
Step-by-Step Instructions for XVR
1. Enter the IP of the device into a browser (default 192.168.1.108)
At the Web Login
Enter the Username and Password
Click Login
2. Click Management
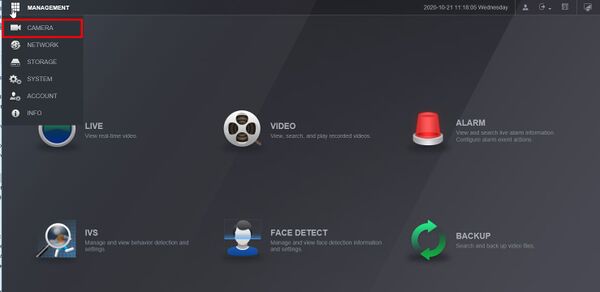
3. Click Camera
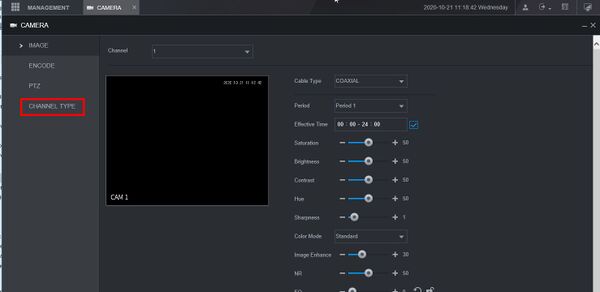
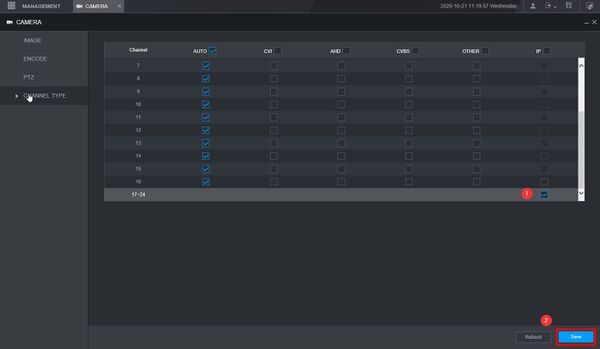
4. Click Channel Type
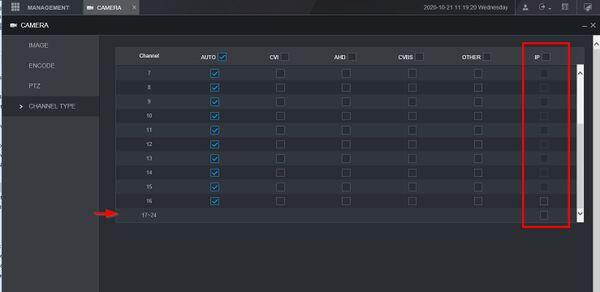
5. Check the box under the IP column next to the Channel to enable IP for
6. Click Save
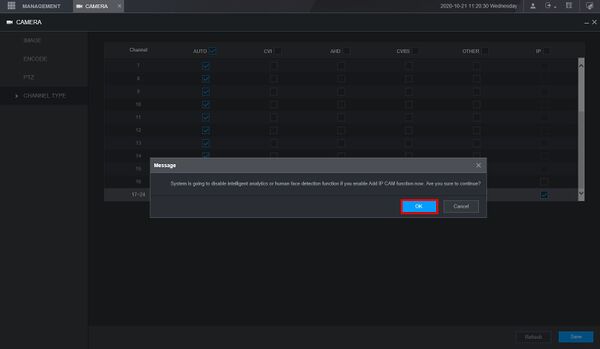
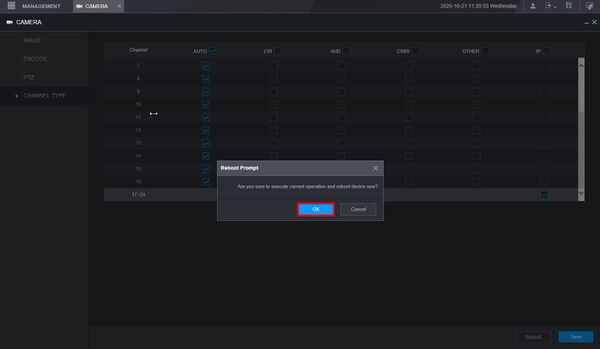
Confirm the prompts that appear by clicking OK
The system will reboot
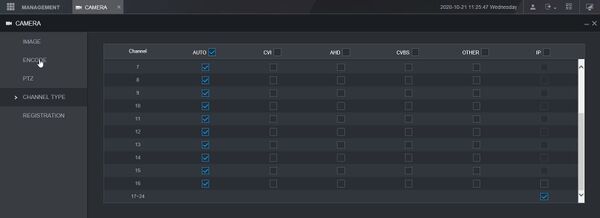
When the unit is back up the IP channels will be enabled
