Difference between revisions of "CMS/DSS/Add Encoder"
(→How to Add an Encoder) |
(→How to Add an Encoder) |
||
| Line 12: | Line 12: | ||
[[File:dss_encoder2.png|600px]] | [[File:dss_encoder2.png|600px]] | ||
| − | * '''To Manually Add''' Select Add ➞ Select Video Server ➞ Input IP address of device ➞ Enter port number ➞ Enter User name and Password ➞ | + | * '''To Manually Add''' Select Add ➞ Select Video Server ➞ Input IP address of device ➞ Enter port number ➞ Enter User name and Password ➞ Select Org encoder will belong to ➞ Select Getting Info which will automatically populate cameras attached to the device ➞ Input Device Name |
| − | [[File: | + | [[File:dss_encoder4.png|600px]] |
'''Step 3.''' | '''Step 3.''' | ||
Revision as of 20:19, 4 April 2016
How to Add an Encoder
Step 1. From the Main Menu Select the General Tab ➞ Device ➞ Device ➞ Encoder
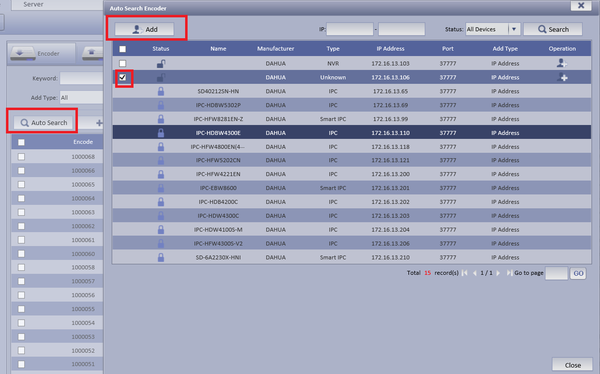
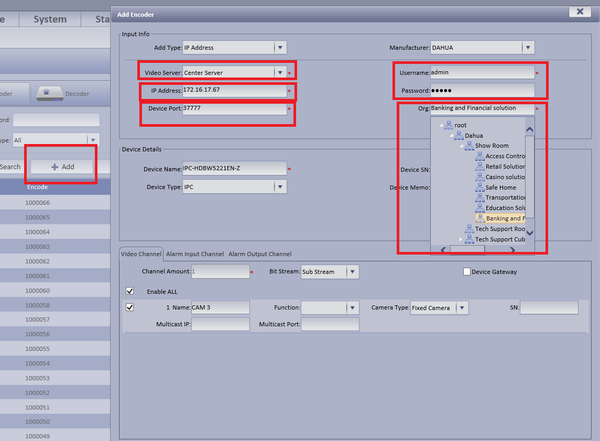
Step 2. You may select Auto search or Add to manually input info.
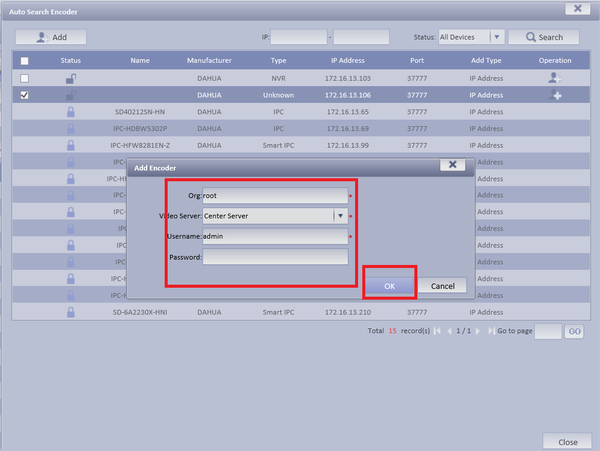
- For Auto Search Select Auto Search ➞ Select Device to be added ➞ Select Add
Input Org. ➞ Choose Video Server ➞ Input User name and Password ➞ Select OK
- To Manually Add Select Add ➞ Select Video Server ➞ Input IP address of device ➞ Enter port number ➞ Enter User name and Password ➞ Select Org encoder will belong to ➞ Select Getting Info which will automatically populate cameras attached to the device ➞ Input Device Name
Step 3.
Step 4.
Step 5 .


