Difference between revisions of "IPCamera/Setup HTTPS"
(→Step by Step Instructions) |
|||
| Line 45: | Line 45: | ||
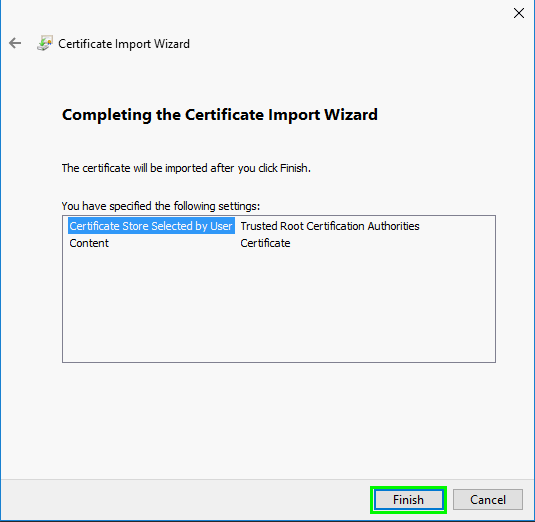
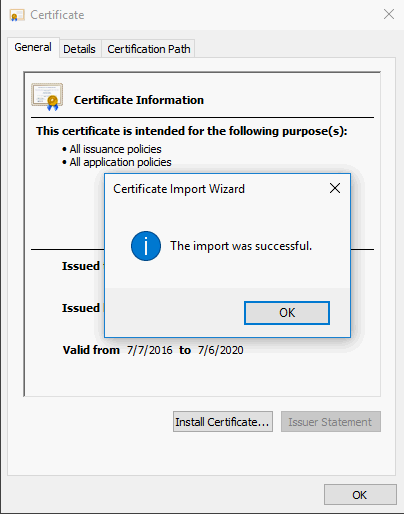
10. Click, "Finish" | 10. Click, "Finish" | ||
| − | [[File:HTTPS_Setup10.png|600px]] | + | [[File:HTTPS_Setup10.png|600px]] -> [[File:HTTPS_Setup11.png|600px]] |
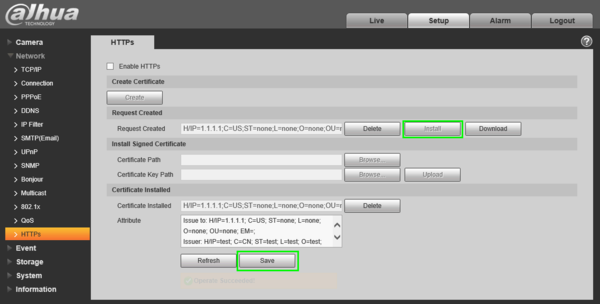
11. Back on the IP camera, click, "Install" and then, "Save" | 11. Back on the IP camera, click, "Install" and then, "Save" | ||
| − | [[File: | + | [[File:HTTPS_Setup12.png|600px]] |
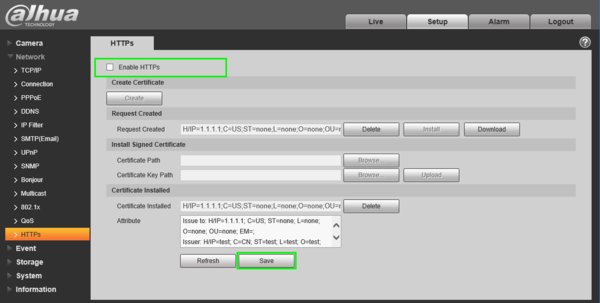
12. Check the box, to enable HTTPS, and click, "Save" | 12. Check the box, to enable HTTPS, and click, "Save" | ||
| − | [[File: | + | [[File:HTTPS_Setup13.png|600px]] |
13. HTTPS will be enabled once the camera has finished rebooting. | 13. HTTPS will be enabled once the camera has finished rebooting. | ||
| − | |||
| − | |||
[[File:HTTPS_Setup14.png|600px]] | [[File:HTTPS_Setup14.png|600px]] | ||
Note: Don't forget to forward port 443 to use this feature remotely. | Note: Don't forget to forward port 443 to use this feature remotely. | ||
Revision as of 21:45, 29 January 2018
Contents
How to Setup HTTPS (SSL)
Description
Before you create certificate or download certificate, from main window->Setup->Network->Connection, set HTTPS port value and then check the box to enable HTTPS function. In this interface, you can set to make sure the PC can successfully login via the HTTPS. It is to guarantee communication data security. The reliable and stable technology can secure the user information security and device safety.
Prerequisites
Video Instructions
Step by Step Instructions
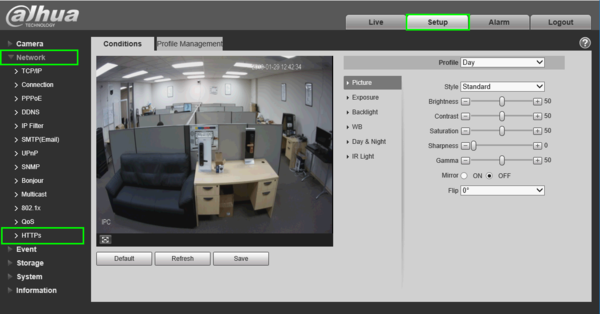
1. Login to the web interface of your IP Camera, then navigate to, Setup -> Network -> HTTPS
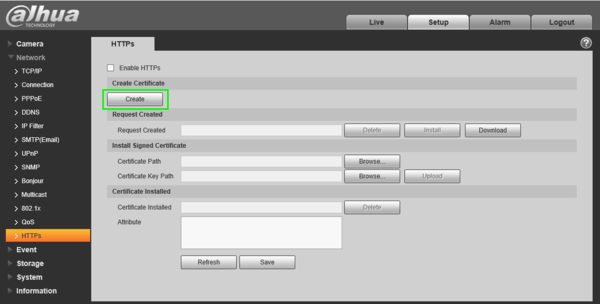
2. Click, "Create"
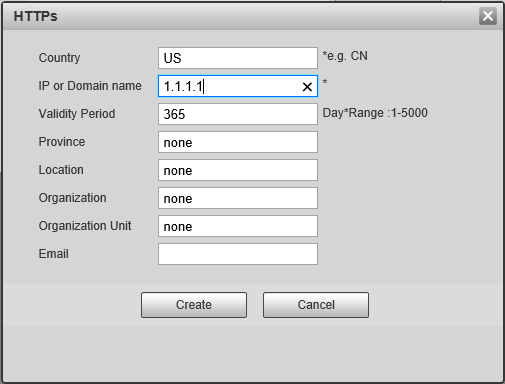
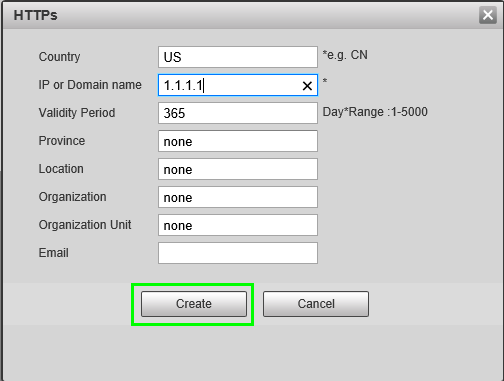
3. Input your networks WAN IP address, Country, and click, "Create"
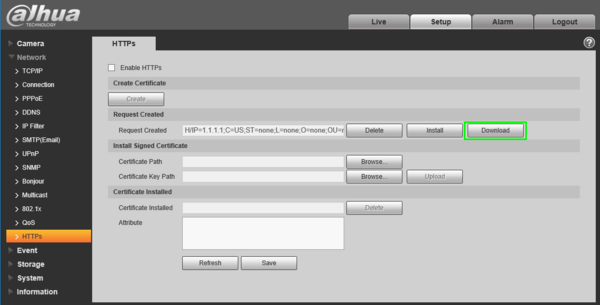
4. Click, "Download"
5. Choose where you wish to save the certificate, and click save.
6. Open file browser, and locate certificate. Double click on the certificate icon.
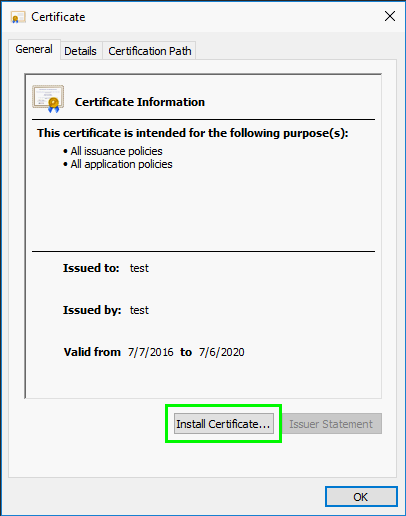
7. Click, "Install Certificate"
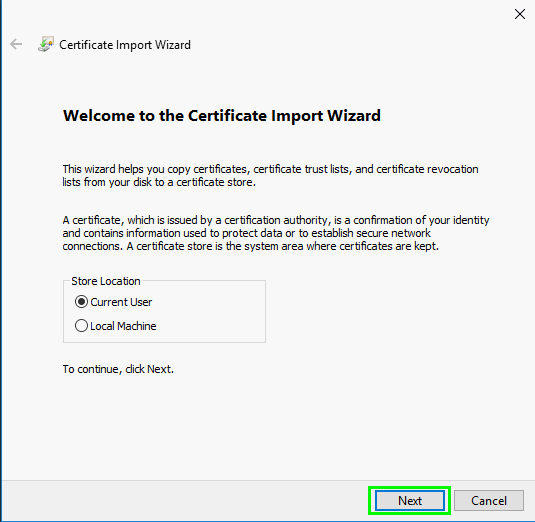
8. Click, "Next"
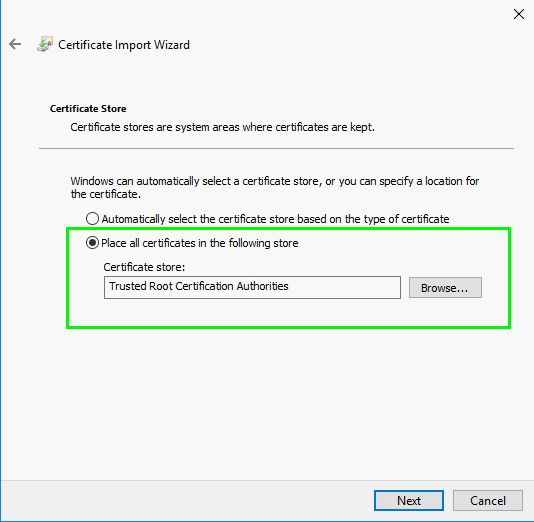
9. Select, "Place all certificates in the following store" and click, "Browse" then select, "Trusted Root Certification Authorities" and click, "Next"
10. Click, "Finish"
11. Back on the IP camera, click, "Install" and then, "Save"
12. Check the box, to enable HTTPS, and click, "Save"
13. HTTPS will be enabled once the camera has finished rebooting.
Note: Don't forget to forward port 443 to use this feature remotely.
