Difference between revisions of "NVR/Basic Setup/Connect WiFi Camera"
| Line 52: | Line 52: | ||
*TCP Port: 37777 | *TCP Port: 37777 | ||
| − | User Name: admin | + | *User Name: admin |
| − | Password: (Your IP Camera's password.) Default is, "admin" | + | *Password: (Your IP Camera's password.) Default is, "admin" |
| − | Remote Channel No. (Any) | + | *Remote Channel No. (Any) |
| − | Decode Buffer: Default | + | *Decode Buffer: Default |
[[file:WifiSetup9.png]] | [[file:WifiSetup9.png]] | ||
11. Hit, "Save" | 11. Hit, "Save" | ||
Revision as of 22:32, 14 December 2015
How to Connect a WiFi Camera to NVR
Note: These instructions only apply for WiFi NVRs and Cameras.
1. Connect the NVR and IP Camera directly to your router or modem with a CAT5 cable.
2. Open the ConfigTool and locate your NVR and IP Camera.
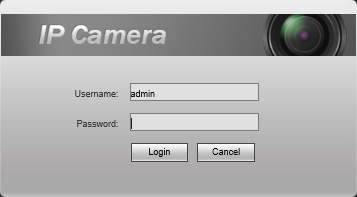
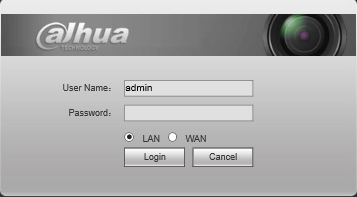
3. Login to both using Internet Explorer.
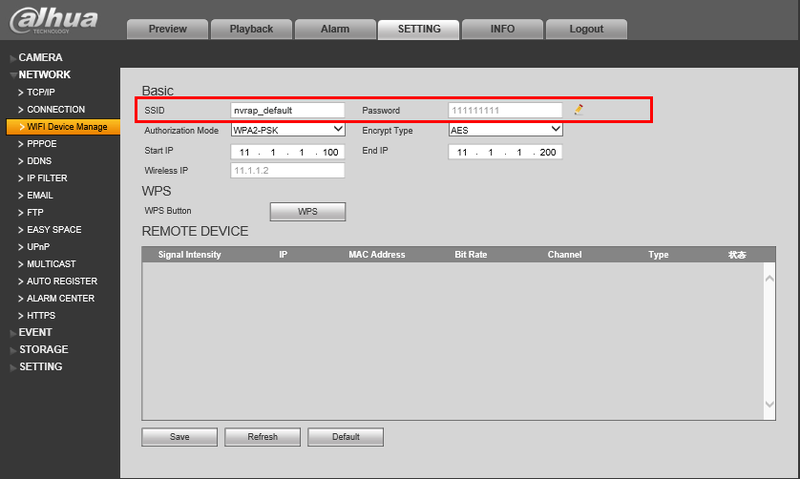
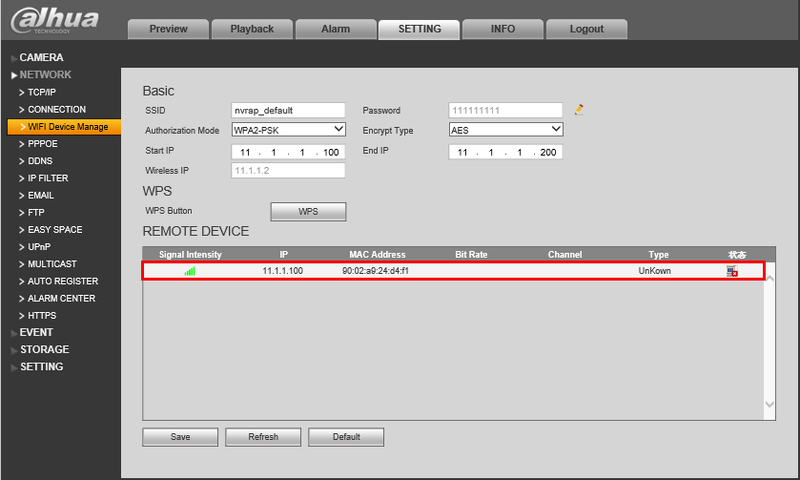
4. On the NVR, go to Settings->Network->WiFi Device Manage
Be sure to note the SSID and Password.
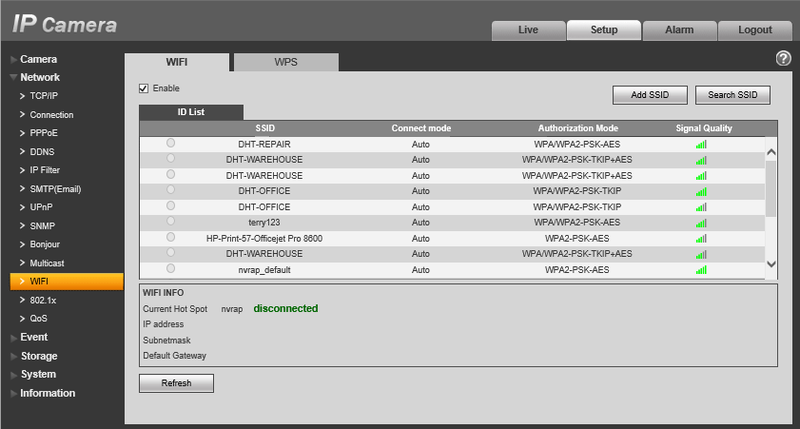
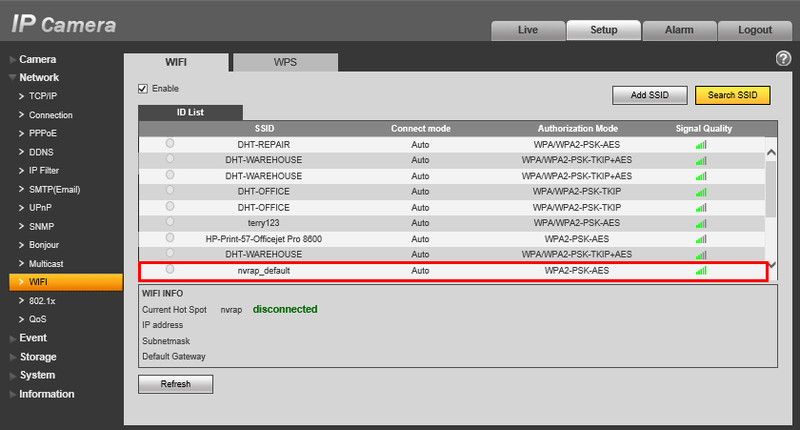
5. On the IP Camera, go to Setup->Network->WiFi
6. Locate your NVR's SSID, and click once.
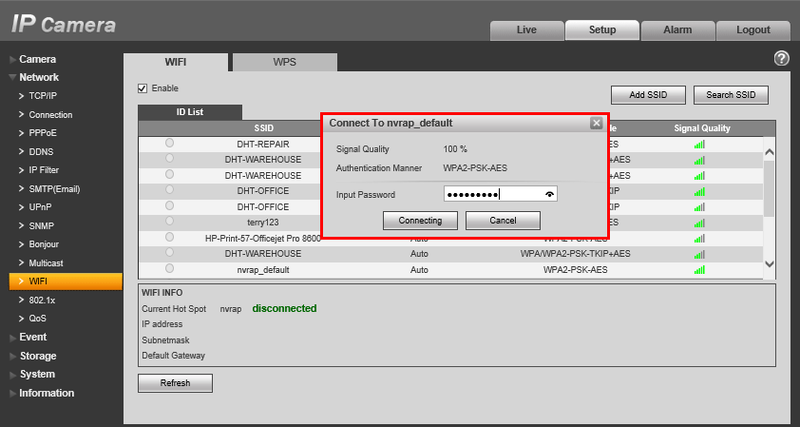
7. Input your NVR's SSID password, and click, "Connecting"
8. Go back to the NVR page, go to Settings->Network->WiFi Device Manage
Confirm that the camera is displaying on this page and note the IP address.
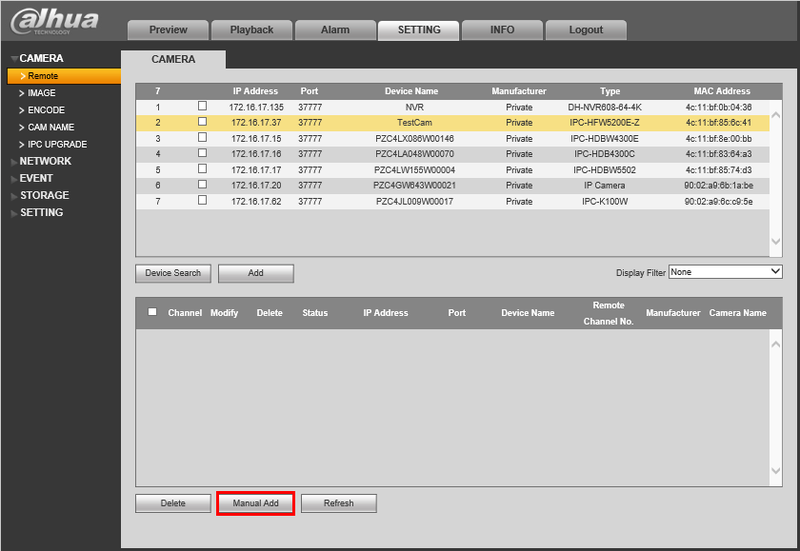
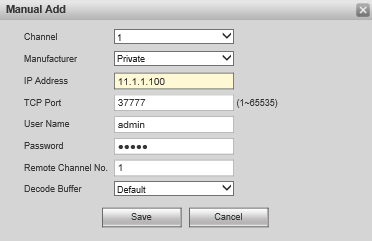
9. On the NVR page, go to Setting->Camera->Remote and click, "Manual Add"
10. Input the following:
- Channel: (Any)
- Manufacturer: Private
- IP Address: (Your IP Camera's IP Address)
- TCP Port: 37777
- User Name: admin
- Password: (Your IP Camera's password.) Default is, "admin"
- Remote Channel No. (Any)
- Decode Buffer: Default
11. Hit, "Save"
