Difference between revisions of "IVS2.0:SmartPSS1.16/PTZ IVS Auto Tracking"
(→Description) |
(→Step by Step Instructions) |
||
| Line 12: | Line 12: | ||
==Step by Step Instructions== | ==Step by Step Instructions== | ||
1. Launch SmartPSS, and click, "Live View" | 1. Launch SmartPSS, and click, "Live View" | ||
| + | |||
[[File:Auto_Track_SmartPSS-2_1.png|800x800px]] | [[File:Auto_Track_SmartPSS-2_1.png|800x800px]] | ||
Latest revision as of 23:41, 26 March 2019
Contents
How to Setup Auto-Tracking in SmartPSS
Description
This article will show you how to setup PTZ Auto-Tracking in SmartPSS 2.0
Prerequisites
- Dahua PTZ with Auto-Tracking
- SmartPSS
- Dahua PTZ with Auto-Tracking added to SmartPSS
Video Instructions
Step by Step Instructions
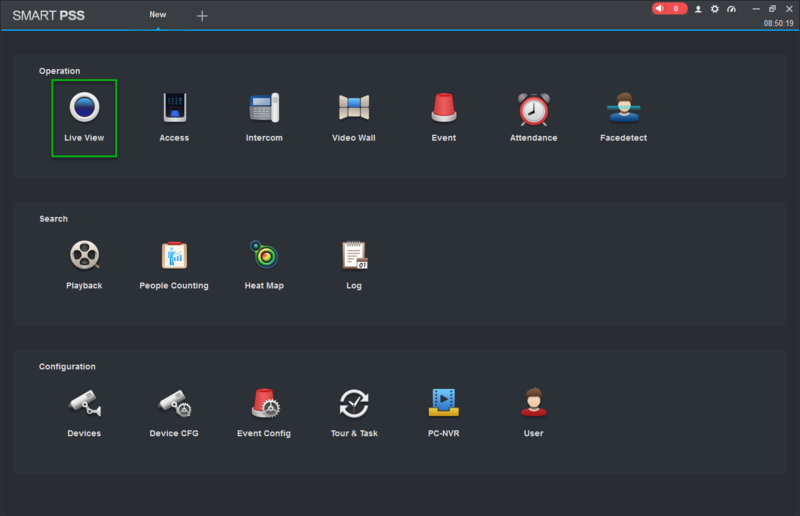
1. Launch SmartPSS, and click, "Live View"
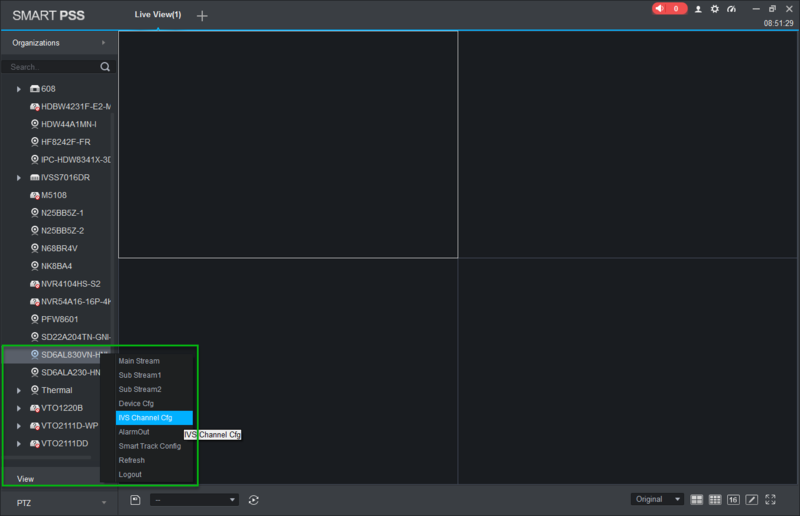
2. Locate the Dahua PTZ in the device tree, right click on the device, and click, "IVS Channel Cfg"
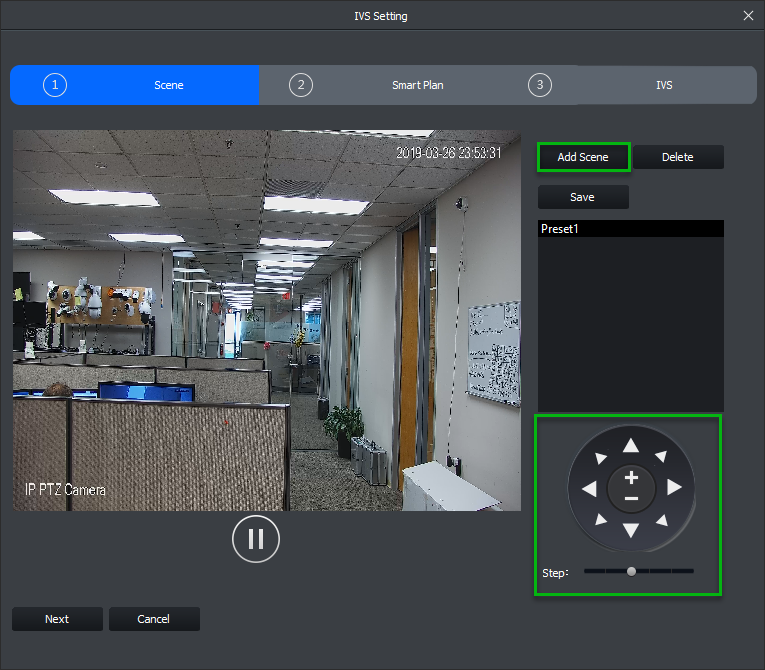
3. A window will pop up, from here you can move the PTZ around, and establish Pre-Sets. IVS rules are all based on established Pre-Sets first. Once you have the PTZ in the desired position click, "Add Scene"
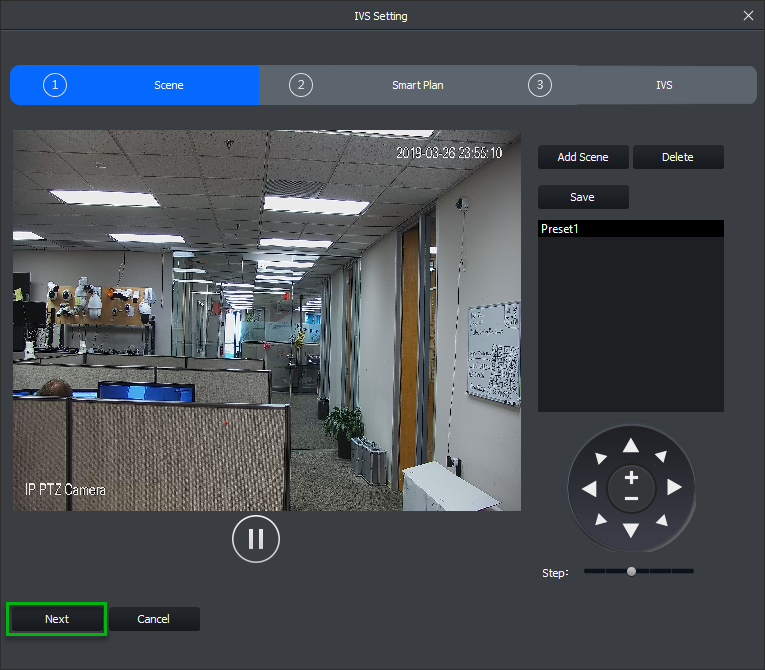
4. Click, "Next" to proceed to the next step.
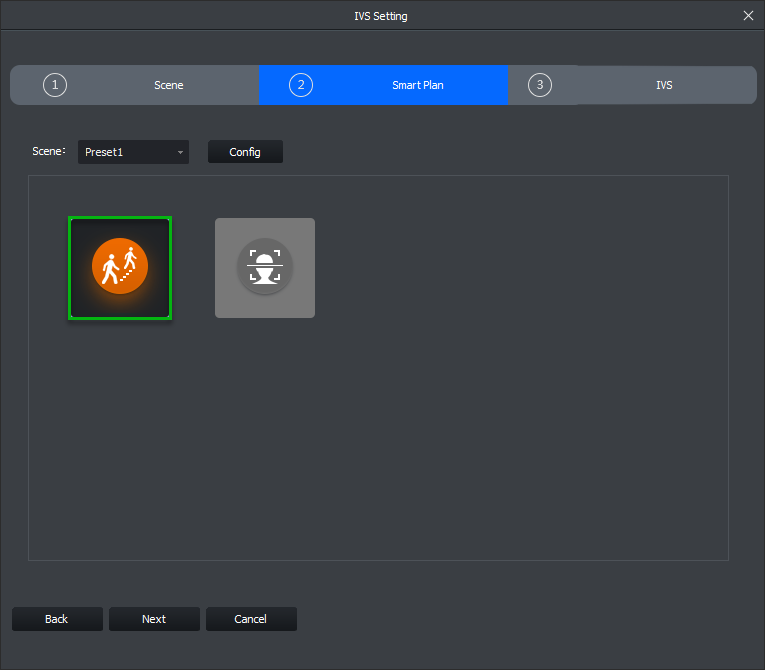
5. Select one of the IVS options. For these instructions we will select the first icon for, "IVS"
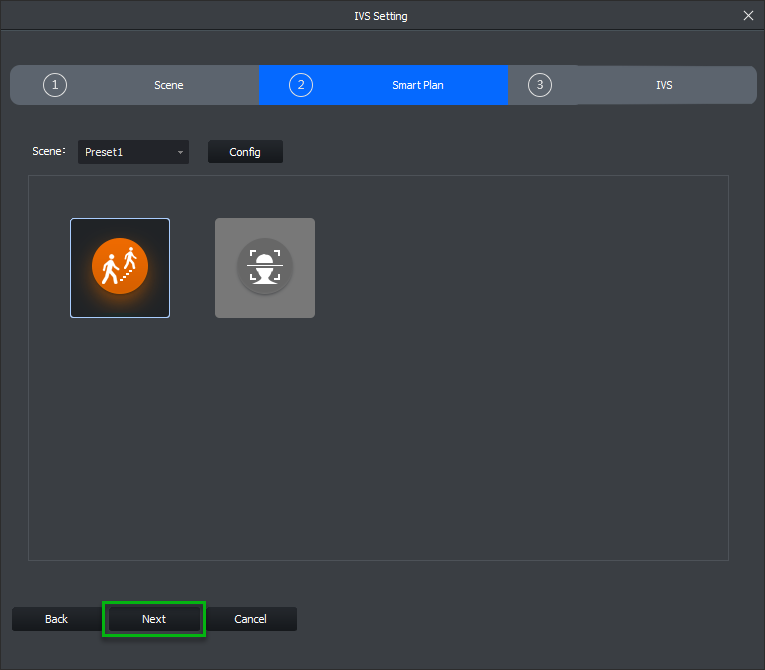
6. Click, "Next" to proceed to the next step.
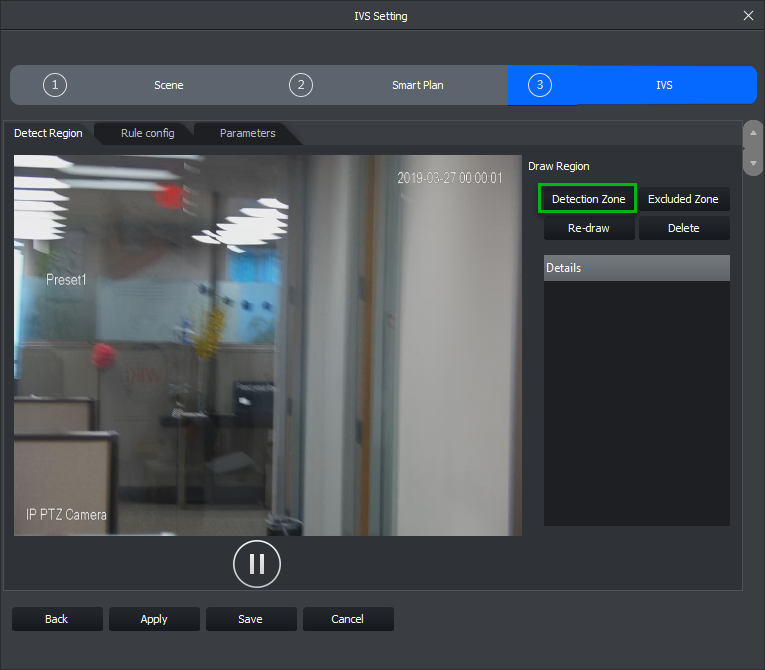
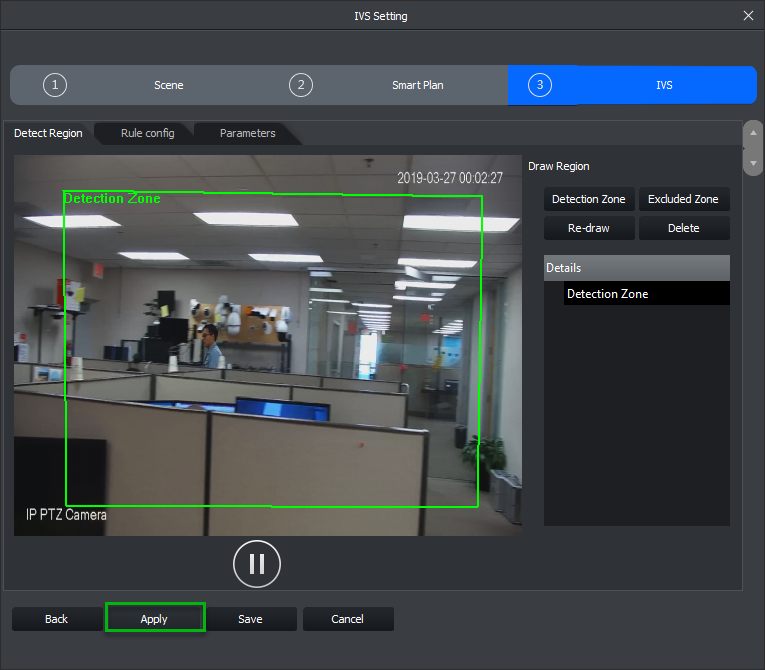
7. On this page you can configure the Detection zone for this IVS rule. Click, "Detection Zone"
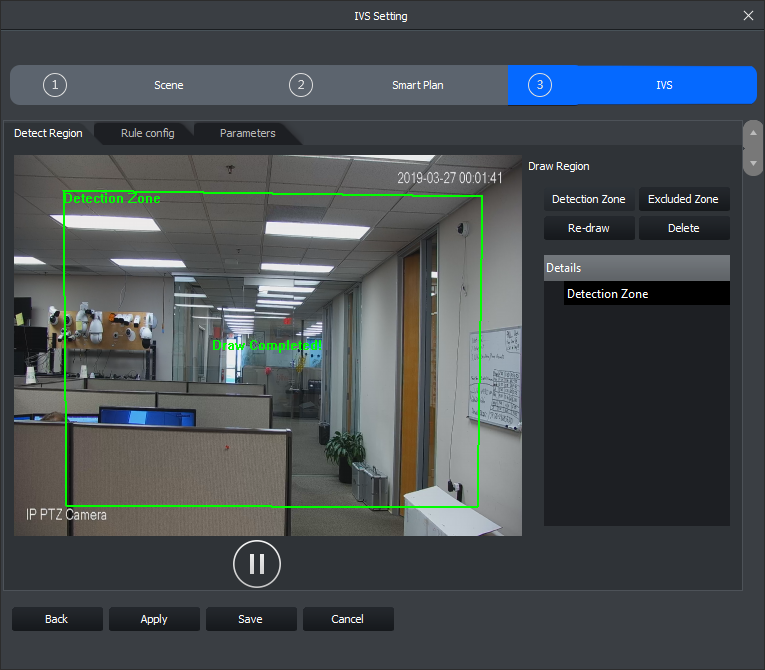
8. Draw a rectangle around the region you wish to establish as the Detection Zone. Add a new line with Left-Click, and complete drawing the region with Right-Click.
9. Click, "Apply" to save the Detection Region.
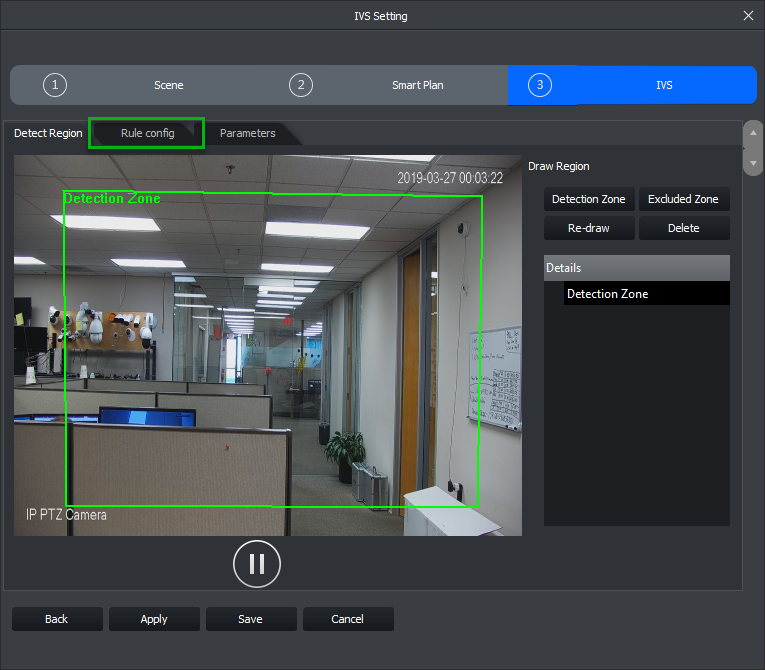
10. Next click, "Rule Config"
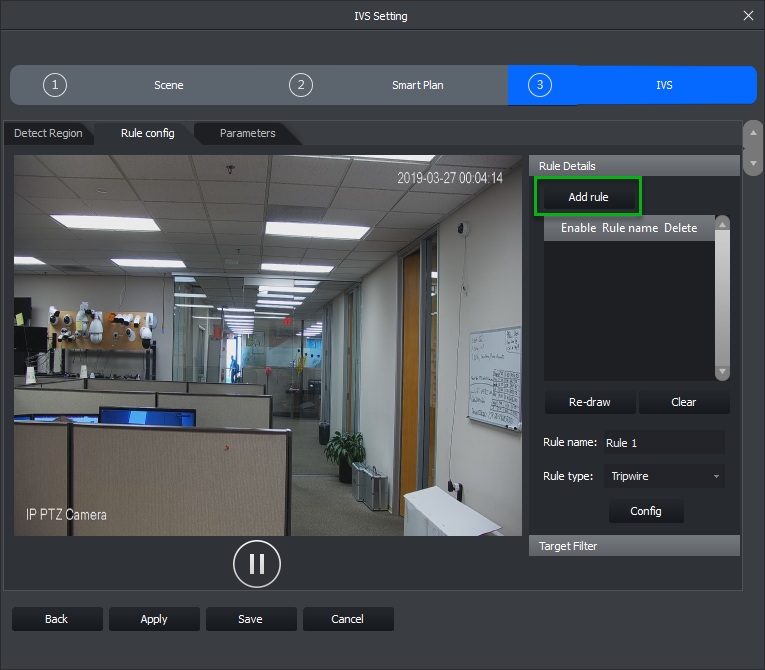
11. Click, "Add Rule"
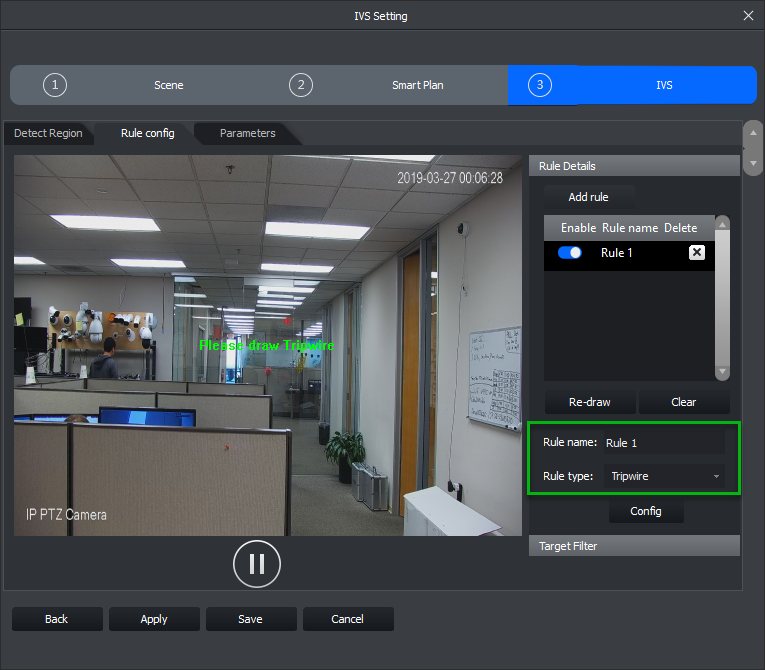
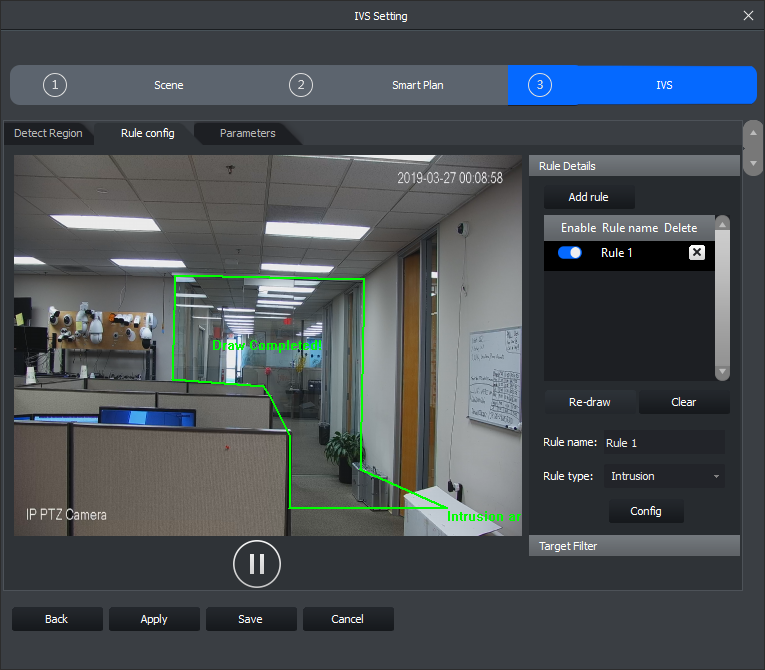
12. Select the IVS rule you wish to establish.
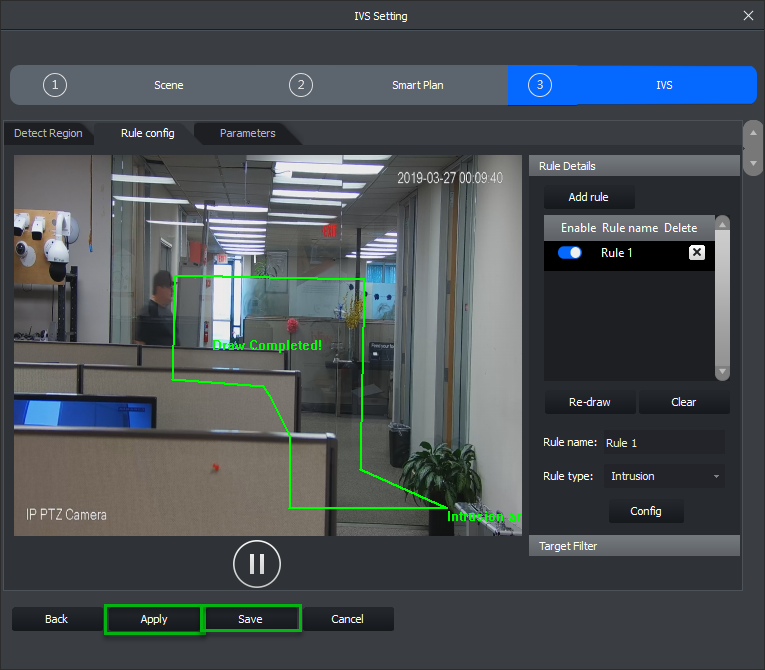
13. Draw a rectangle around the region you wish to establish as the zone for the IVS rule. Add a new line with Left-Click, and complete drawing the region with Right-Click.
14 Click, "Apply" then, "Save"
