Difference between revisions of "LincX2PRO/Setup Motion Detection"
(→Step by Step Instructions) |
|||
| Line 12: | Line 12: | ||
</div> | </div> | ||
<div class="toccolours mw-collapsible mw-collapsed"> | <div class="toccolours mw-collapsible mw-collapsed"> | ||
| − | [[File:iDMSS_Plus_Icon2.jpg| | + | [[File:iDMSS_Plus_Icon2.jpg|100px]]<span style="font-size:180%;">'''Mobile:iDMSS Plus & gDMSS Plus '''</span> |
<div class="mw-collapsible-content">{{Template:LincX2PRO_Motion_Detection_Setup_MobileUI_DMSS}}</div> | <div class="mw-collapsible-content">{{Template:LincX2PRO_Motion_Detection_Setup_MobileUI_DMSS}}</div> | ||
</div> | </div> | ||
| − | |||
| − | |||
| − | |||
==Video Instructions== | ==Video Instructions== | ||
Revision as of 22:48, 30 November 2020
Contents
Description
This article will how to setup and configure the Motion Detection settings of a LincX2PRO device using the DMSS mobile app
Prerequisites
Step by Step Instructions
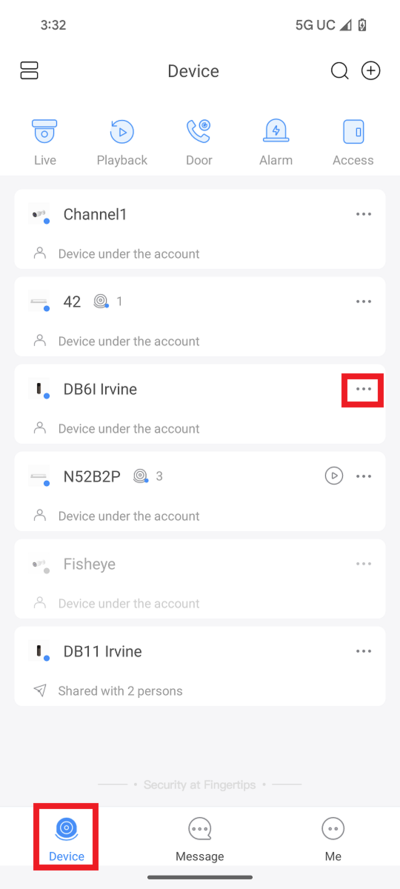
Select Device at the bottom.
Tap on the three dots "..." to the right of the LincX2Pro device
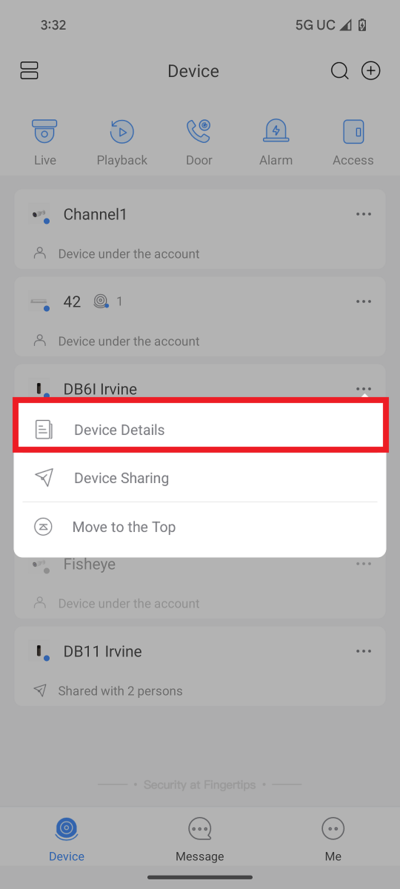
2. Select Device Details
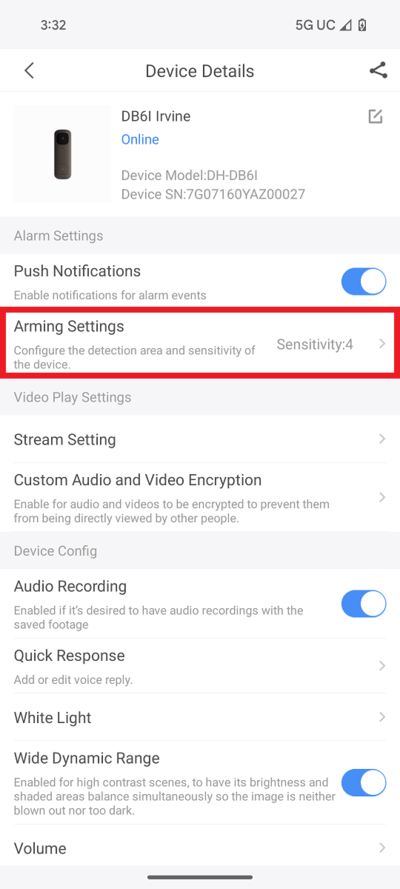
3. Select Arming Settings
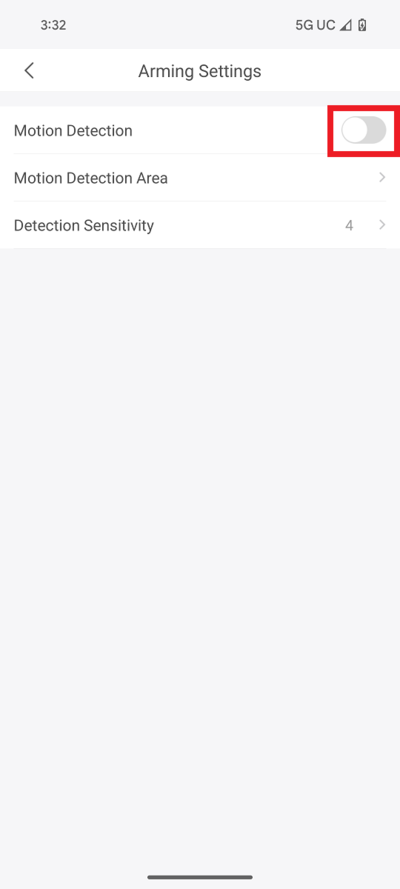
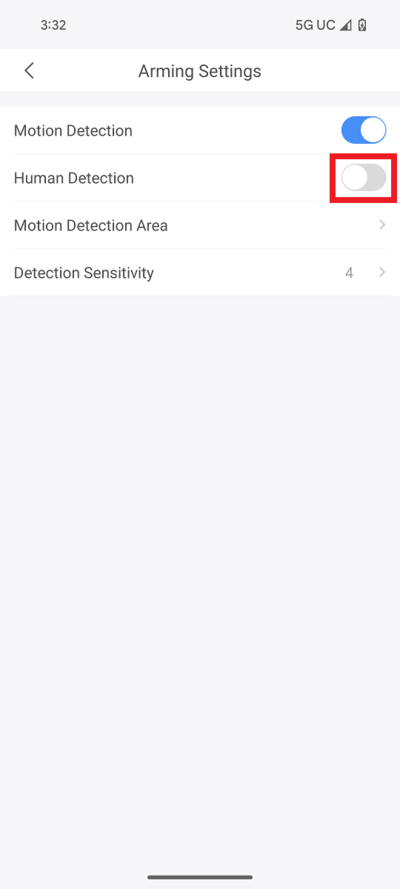
4. Tap on the slider next to Motion Detection to enable it
5. If you also want to detect Humans specifically, tap on the slider next to Human Detection to enable it
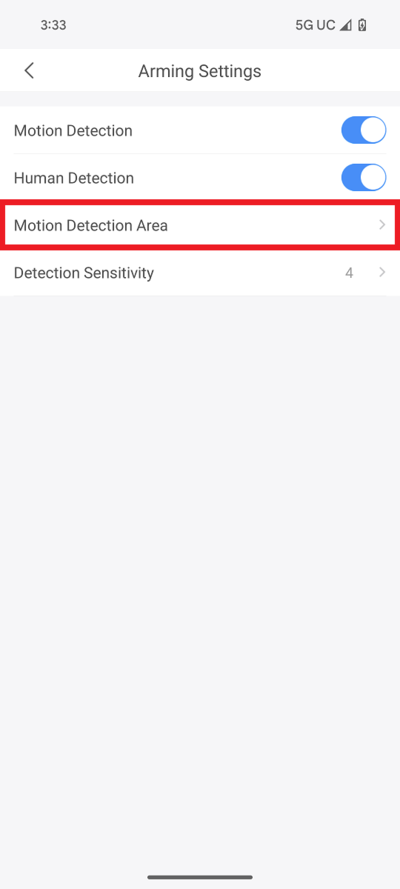
6. Tap on Motion Detection Area
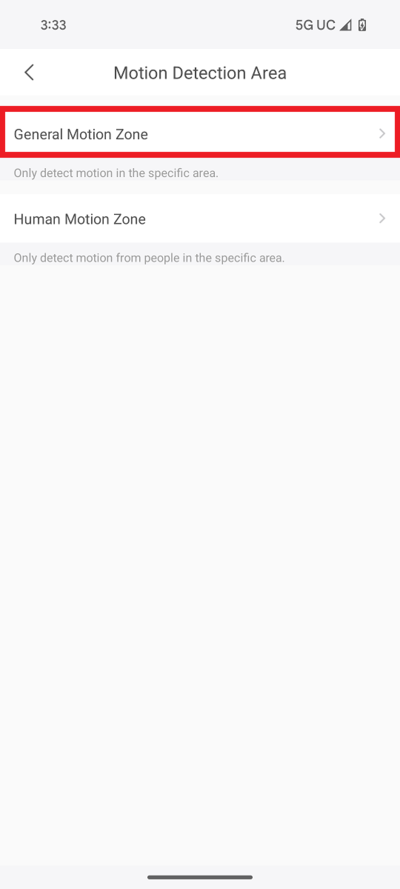
7. Tap on Genereal Motion Zone
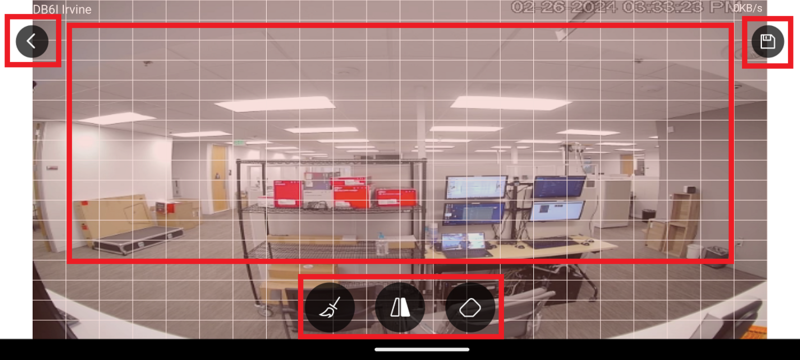
8. Adjust the areas that the camera will look for motion by keeping areas in red highlighted for motion detection or clear to not detect for motion.
Tap on the broom icon on the left to clear everything highlighted on the screen.
Tap on the center icon to swap between areas that are highlighted and not highlighted.
Tap on the eraser icon on the right to switch between adding or removing highlighted areas.
When you are done, tap on the floppy disk save icon at the top right.
Then tap on the back arrow at the top left
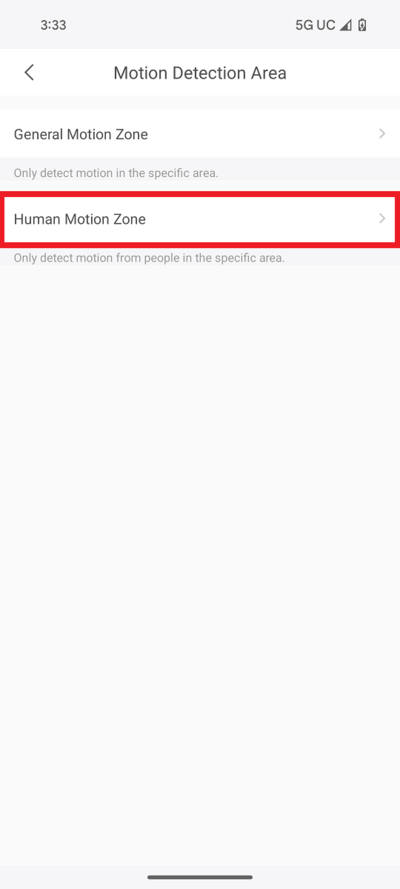
9. Tap on Human Motion Zone
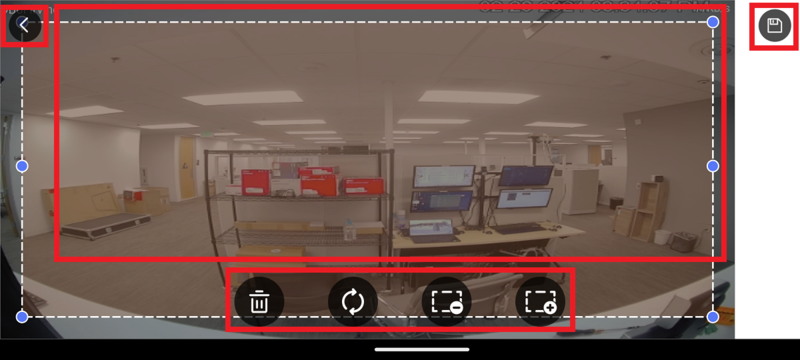
10. Adjust the areas the camera will look for human motion by moving around and resizing the box(es) on the screen.
To remove all detection boxes, tap on the trash can icon.
To rotate a selected box, tap on the circular arrows icon.
To remove a selected box, tap on the box with a minus icon.
To add an additional box, tap on the box with a plus icon.
When you are done, tap on the floppy disk save icon at the top right.
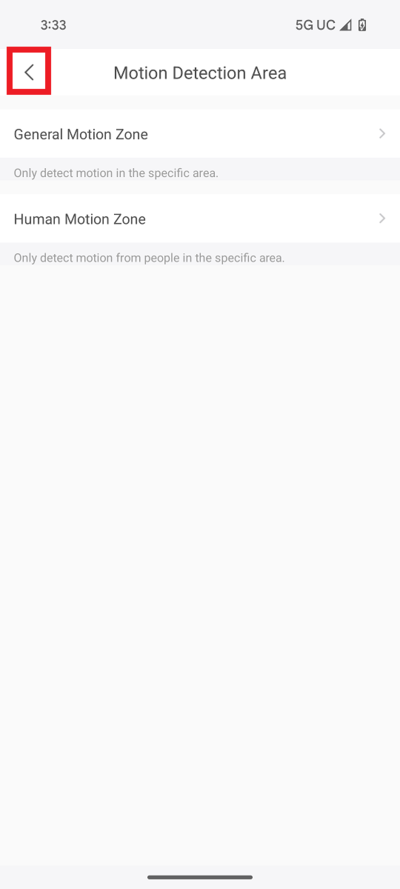
Then tap on the back arrow at the top left
11. Tap on the back button at the top left
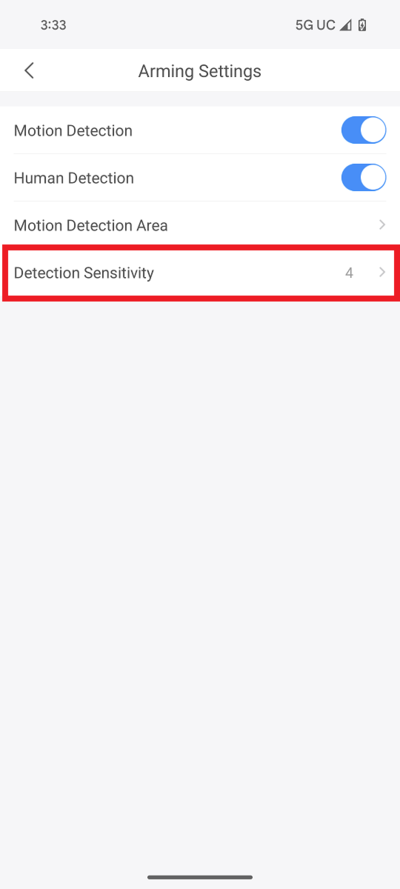
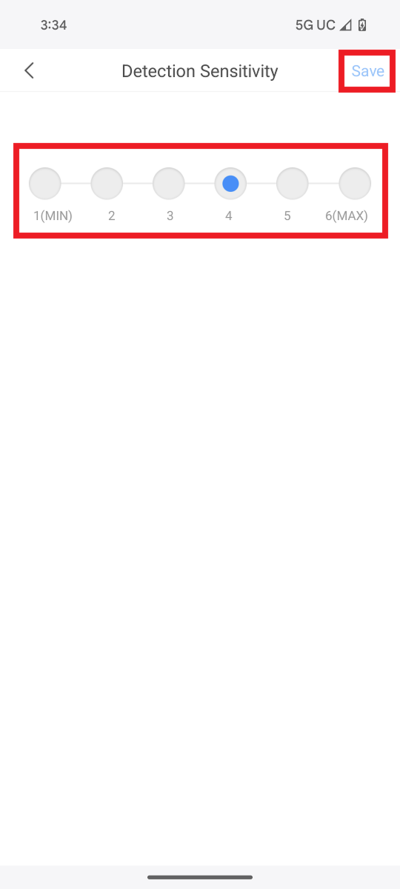
12. Tap on Detection Sensitivity
13. Tap on the number for the amount of sensitivity for Motion Detection.
Then tap on Save at the top
![]() Mobile:iDMSS Plus & gDMSS Plus
Mobile:iDMSS Plus & gDMSS Plus
Video Instructions
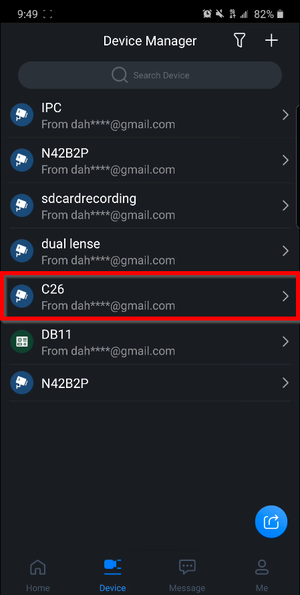
1. Select your LincX2PRO unit under the "Device" tab
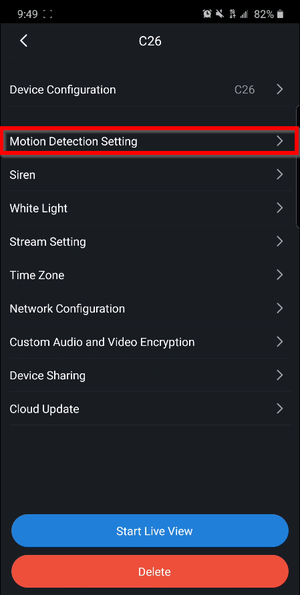
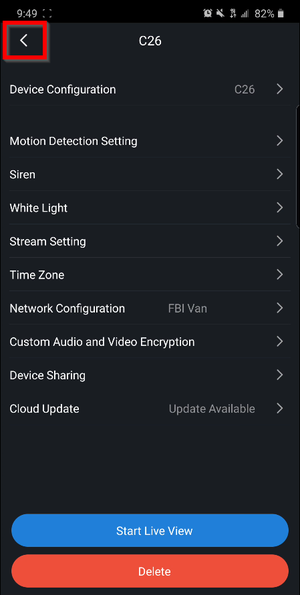
2. Tap on Motion Detection Setting
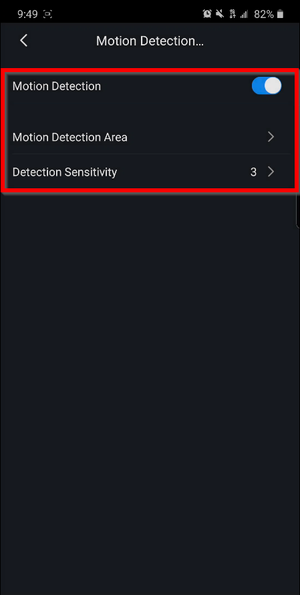
3. Assure that the switch is enabled and select the Detection Sensitivity to configure the sensitivity
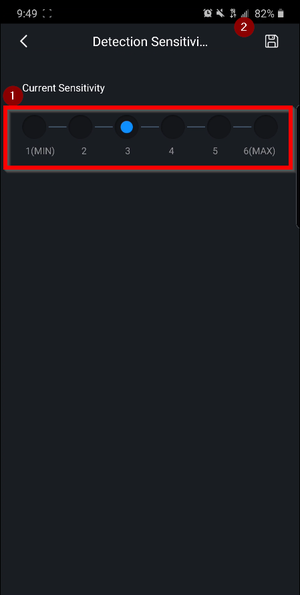
4. Save the desired settings and go back
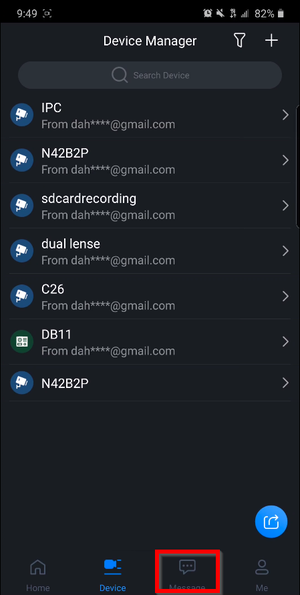
5. Go back
6. Tap on Message
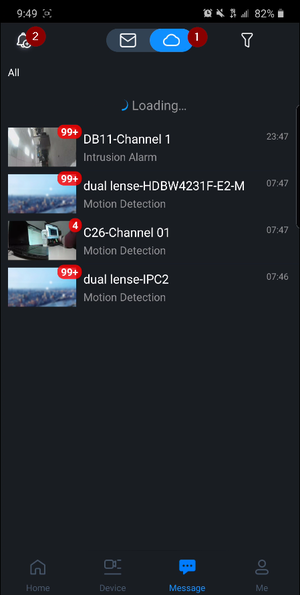
7. Select the Cloud icon to view the devices linked to your DMSS account and tap on the bell icon
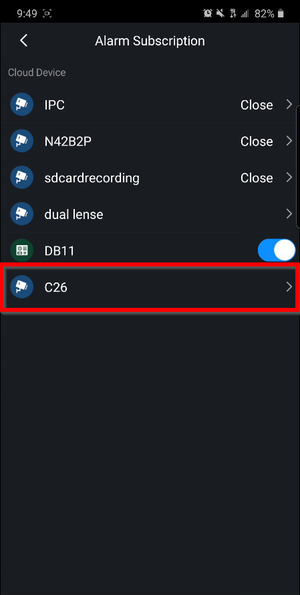
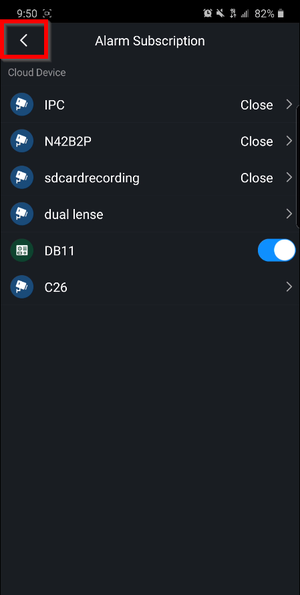
8. Tap on your LincX2PRO device
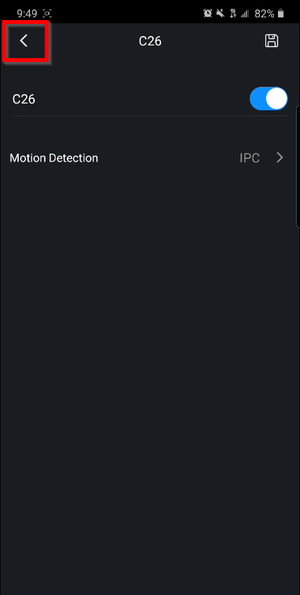
9. Ensure that the switch is enabled and click on the Floppy Disk icon to save, go back
10. Go back again
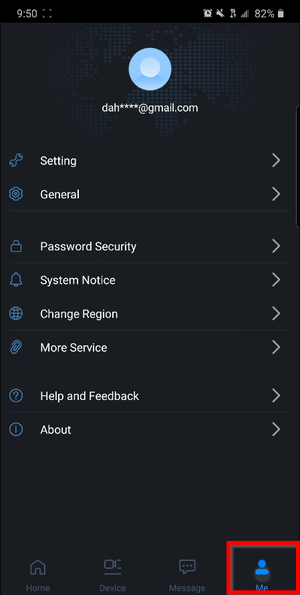
11. Go to "Me"
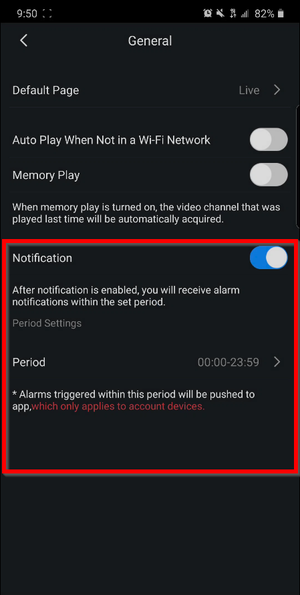
12. Make sure that the Notification Switch is enabled and now you should receive Motion Detection notifications
