Difference between revisions of "Record/Basic/Schedule Record"
(Created page with "=Schedule Record= ==Description== ==Prerequisites== ==Instructions== <div class="toccolours mw-collapsible mw-collapsed"> 250px<span st...") |
|||
| Line 29: | Line 29: | ||
<div class="toccolours mw-collapsible mw-collapsed"> | <div class="toccolours mw-collapsible mw-collapsed"> | ||
| − | [[File:Icon_for_type_DSS_Express_S.png|250px]]<span style="font-size:180%;">'''DSS Express | + | [[File:Icon_for_type_DSS_Express_S.png|250px]]<span style="font-size:180%;">'''DSS Express'''</span> |
<div class="mw-collapsible-content">{{Template:Schedule_Record_DSS_Express}}</div> | <div class="mw-collapsible-content">{{Template:Schedule_Record_DSS_Express}}</div> | ||
</div> | </div> | ||
Latest revision as of 22:41, 1 April 2021
Contents
- 1 Schedule Record
- 1.1 Description
- 1.2 Prerequisites
- 1.3 Instructions
- 1.4 Description
- 1.5 Prerequisites
- 1.6 Video Instructions
- 1.7 Step by Step Instructions
- 1.8 Description
- 1.9 Prerequisites
- 1.10 Video Instructions
- 1.11 Step by Step Instructions
- 1.12 Description
- 1.13 Prerequisites
- 1.14 Video Instructions
- 1.15 Step by Step Instructions
- 1.16 NOTICE
- 1.17 Description
- 1.18 Prerequisites
- 1.19 Video Instructions
- 1.20 Step by Step Instructions
Schedule Record
Description
Prerequisites
Instructions
Description
Dahua NVRs and DVRs offer a variety of recording options. You can configure recording schedules based on the following methods:
- Regular
- Motion Detection
- Alarm Based
- Motion Detection + Alarm
- IVS if the feature is available depending on the model.
These schedules can be set individually for each camera or copied to all cameras.
Prerequisites
- Dahua NVR or DVR
- Internal HDD
Video Instructions
Step by Step Instructions
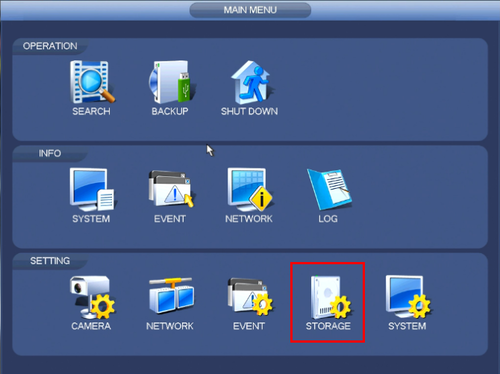
1. From the Main Menu click, "Storage" under, "Settings"
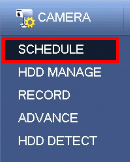
2. Click, "Schedule" on the left hand side.
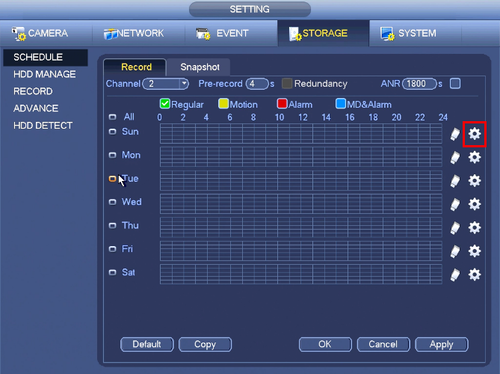
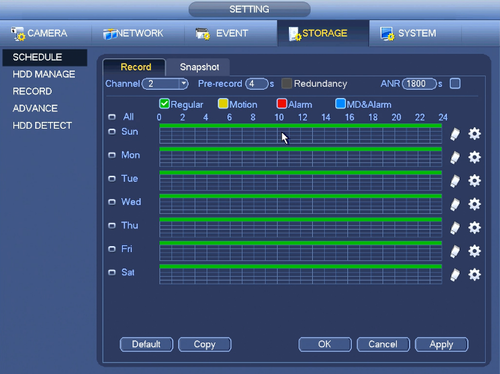
3. Click the Gear icon to the right of any of the graphs.
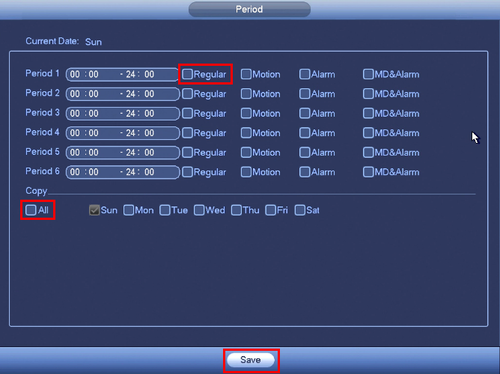
4. Check the box for, "Regular" then click the, "All" box below, "Copy"
5. Click, "Save" This will return you to the previous screen which should look like this.
6. Click, "Apply" and then, "OK"Description
The tutorial shows how to schedule recordings via New GUI SystemUI.
Prerequisites
- Dahua NVR or DVR
- Internal HDD
Video Instructions
Step by Step Instructions
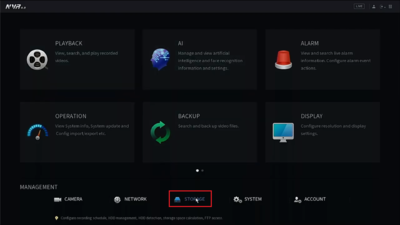
1. Click "STORAGE" to open the recording schedule option.
2. Click "SCHEDULE" => select the first gear icon as highlighted.
Please note this setup is for one camera only. If there are multiple cameras installed, each channel will need to be selected appropriately under "Channel". Ex: D1 means this is the first camera and it is selected.
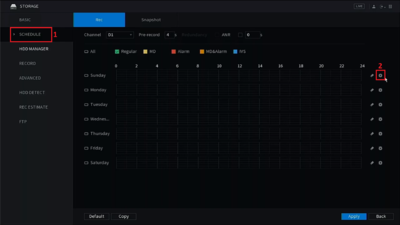
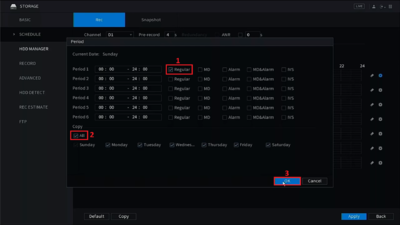
3. Check the option "Regular" for continuous recording => Select "All" to apply this setting to all dates => Click "OK" to apply the changes.
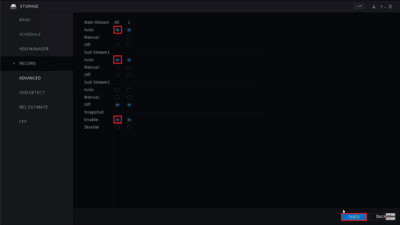
4. Click "RECORD" => Enable "Auto" on "Main Stream", "Sub Stream 1", and "Snapshot".
Prerequisites
- WEB access to IE (Internet Explorer)
- User Name and Password of device.
- Internal HDD
Video Instructions
Step By Step Instructions
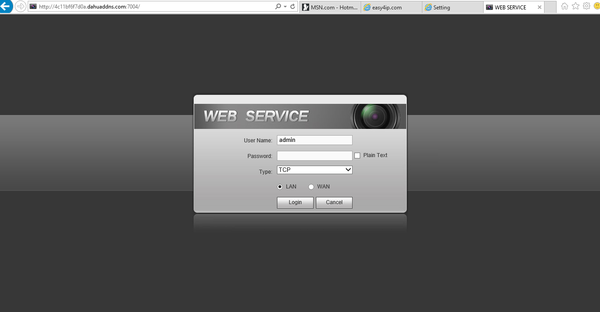
1. Log into the device through the web service using Internet Explorer.
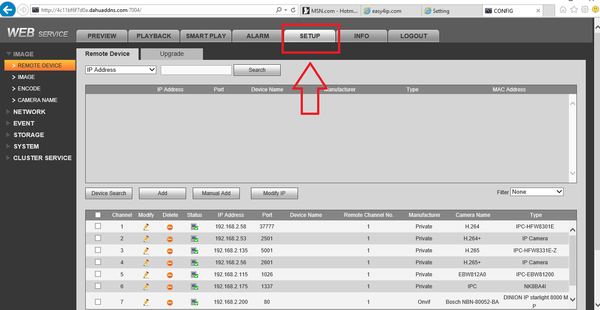
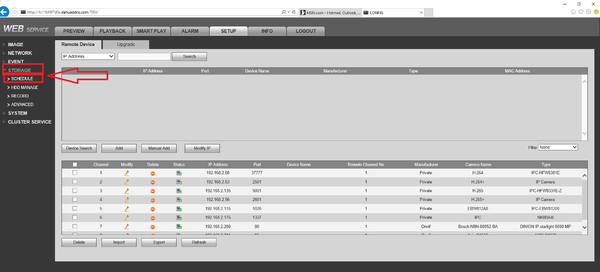
2. Select the "Setup" tab.
3. From the left hand side select Storage -> Schedule
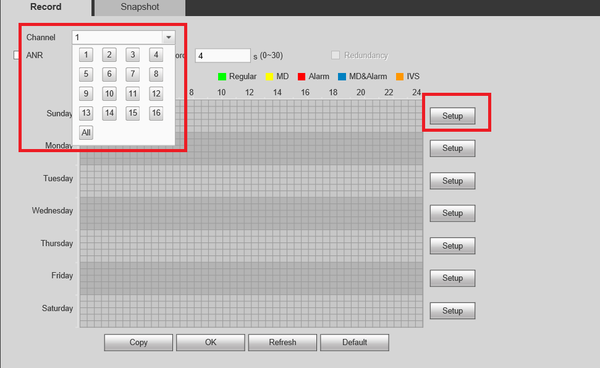
4. Select the channel/camera recordings are to be scheduled for -> Select Setup .
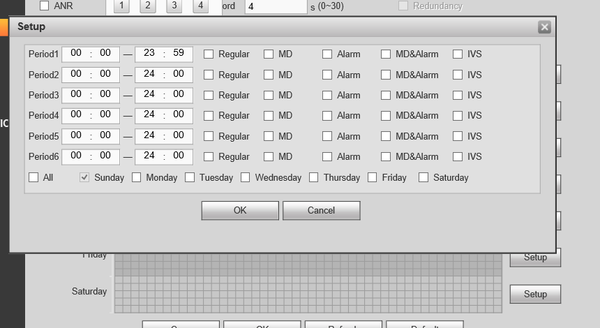
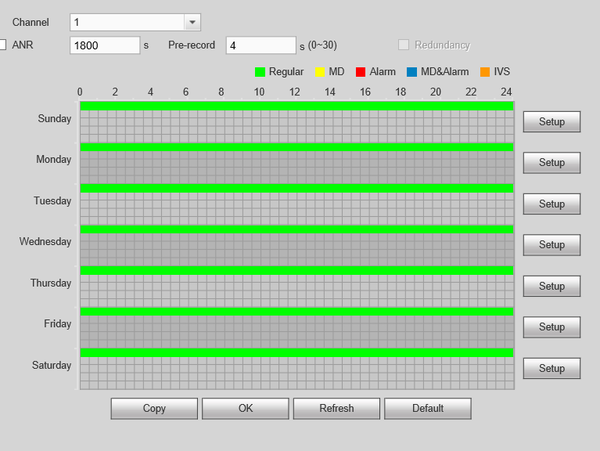
5. You will have the options to set for Regular Recordings, MD (Motion Detection) , Alarm , MD & Alarm. For this tutorial we are using Regular Recordings.
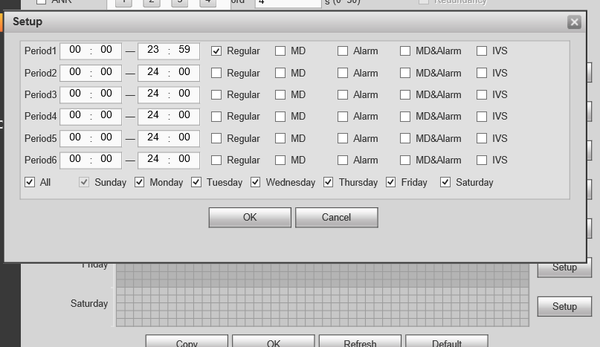
- Here you can see that you are able to set multiple periods. For this tutorial we will only be setting one period. Check off Regular -> Select the day or days to set scheduled recordings -> select ok to save
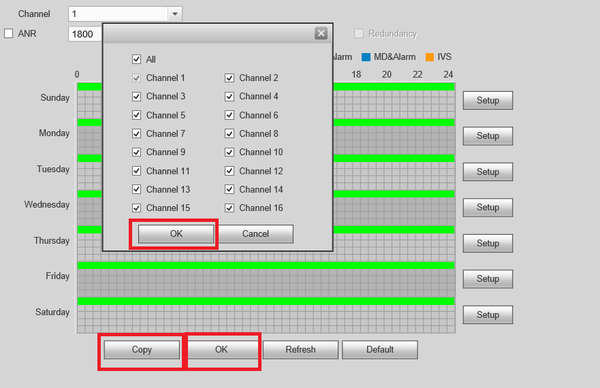
7. Depending on the days selected from the previous step you will see green colored bars which represents regular recording.
8. You can select the copy button to mirror the same schedule to another channel/camera -> Select OK -> Select OK to save all settings.
Description
Dahua NVRs and DVRs offer a variety of recording options. You can configure recording schedules based on the following methods:
- General
- Motion Detection
- Alarm Based
- Motion Detection + Alarm
- IVS if the feature is available depending on the model.
These schedules can be set individually for each camera or copied to all cameras.
Prerequisites
- Dahua NVR or DVR with 2018 firmware
- Internal HDD
Video Instructions
Step by Step Instructions
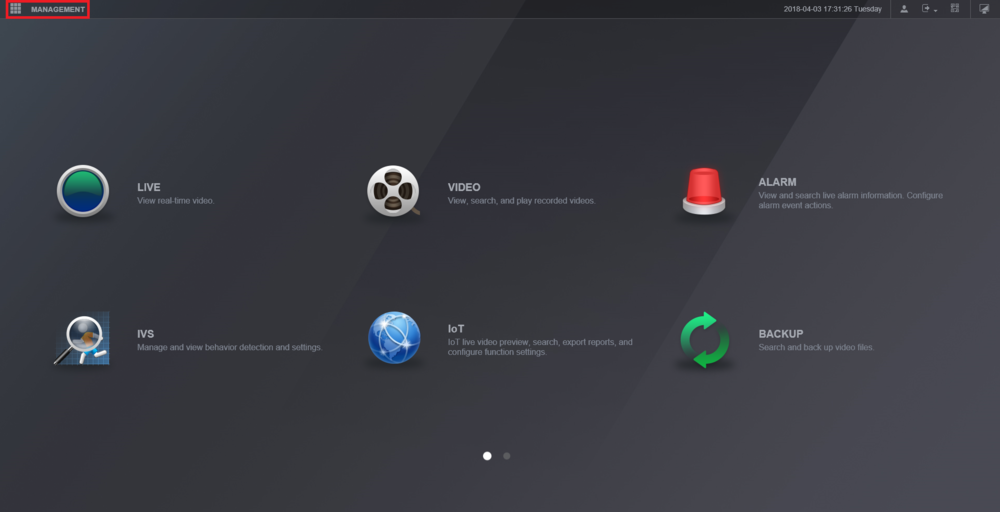
1. From the Main Menu select "Management".
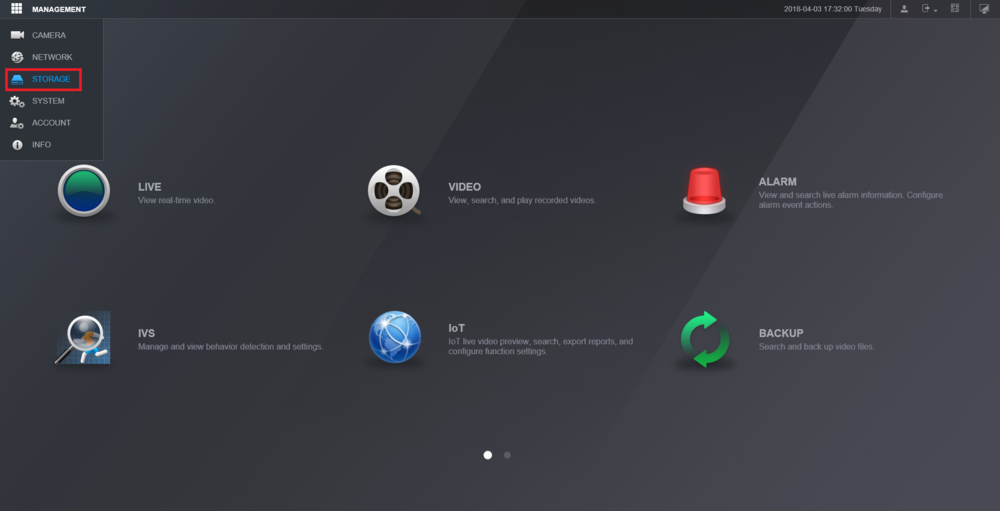
2. Select the "Storage" option from the drop-down menu.
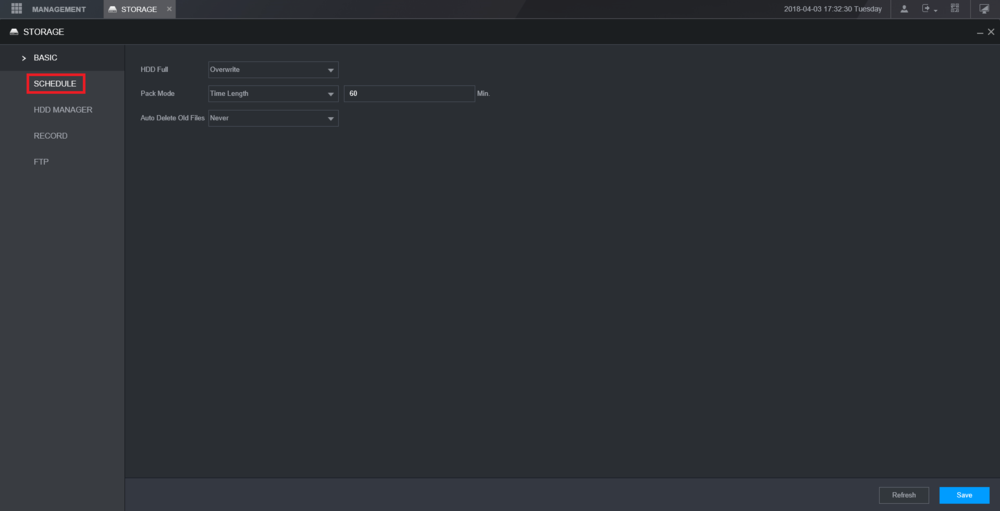
3. From the left hand side, select "Schedule".
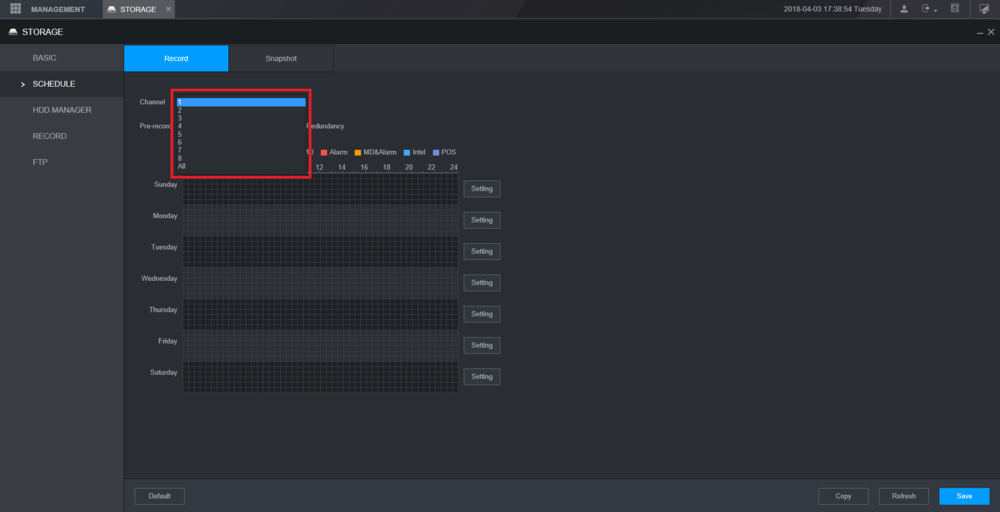
4. Select the channel drop-down menu to choose the channel that you want to adjust the recording schedule for.
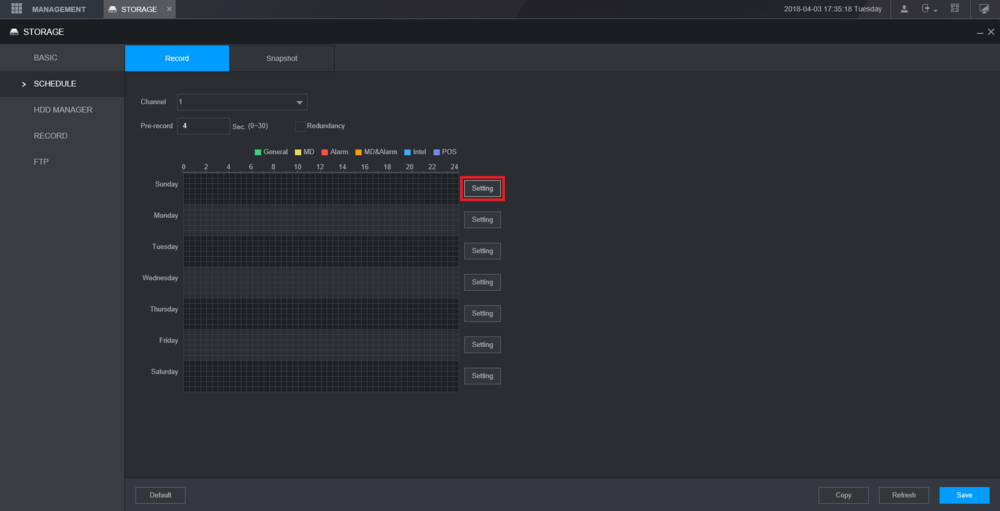
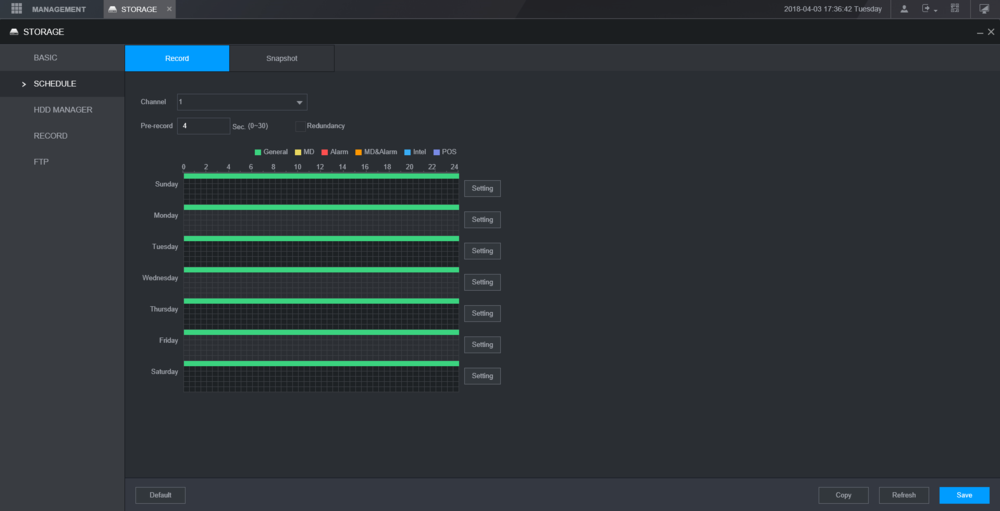
5. Select "Setting" next to any day of the week.
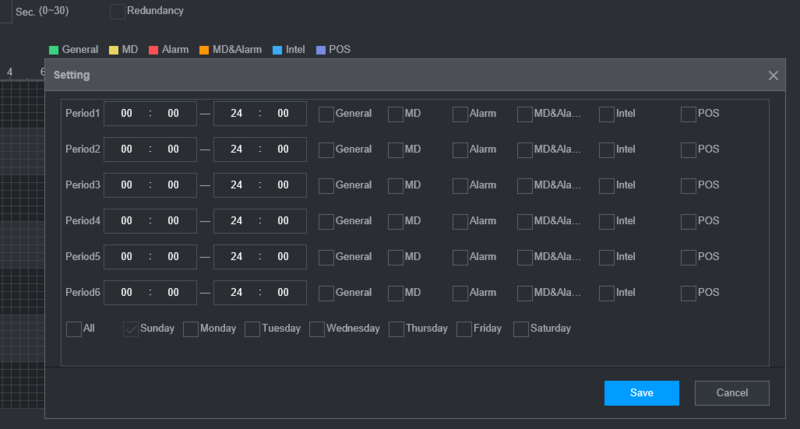
6. You will have options to set a schedule for General Recording, MD (Motion Detection), Alarm, MD & Alarm, Intel, and POS (Point of Sale). For this tutorial we are using General Recording.
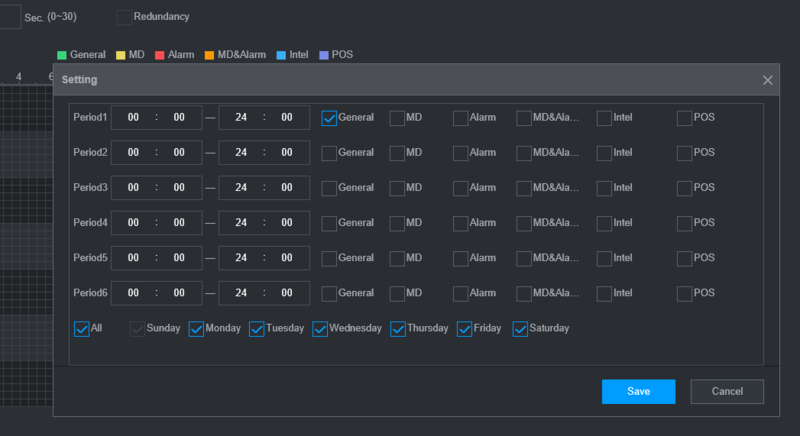
7. Here you can see that you are able to set multiple periods. For this tutorial we will only be setting one period. Check the "General" box, then select the day or days you want to scheduled recordings for, and then select "Save".
8. Depending on the days selected from the previous step, you will see green colored bars which represents general recording.
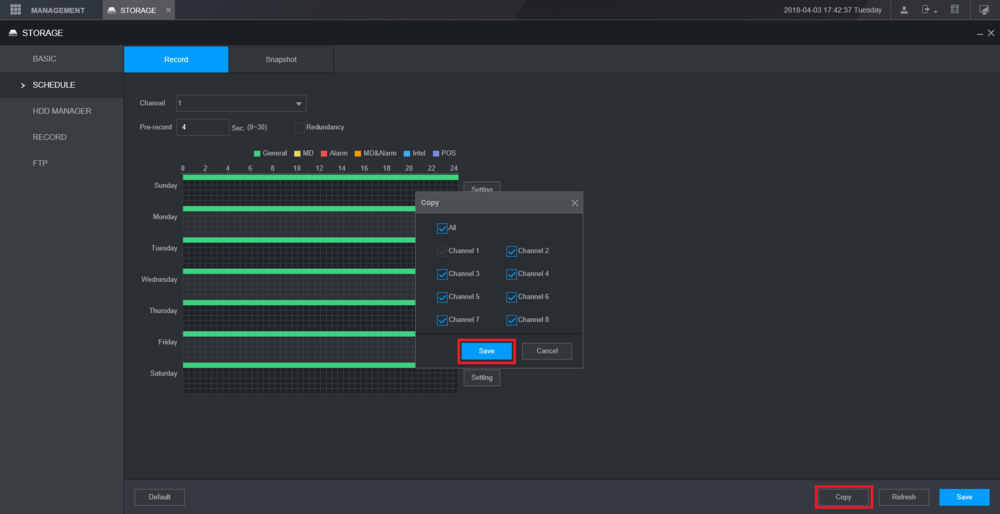
9. You can select "Copy" to mirror the same schedule to another channel/camera. Select "Save" in the Copy menu.
10. Select "Save" at the bottom to save all settings. If your changes were successfully saved, a pop-up will appear at the top notifying you as such.Description
Set up regular recordings for SmartPSS 2.0
Prerequisites
- Dahua NVR or DVR
- Internal HDD
Video Instructions
Step By Step Instructions
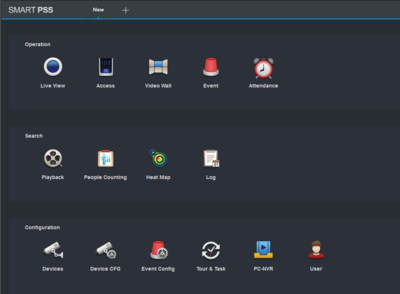
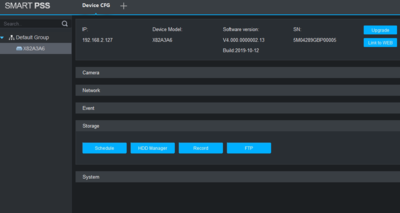
1. From the Main Menu Select "Device CFG" (Device Configuration).
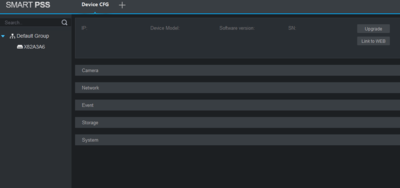
2. From the left hand side select the device the scheduled recording is to be set for.
3. Select "Storage" -> Select "Schedule".
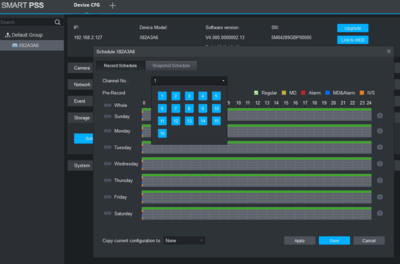
4. From the channel drop down menu select the channel for recording.
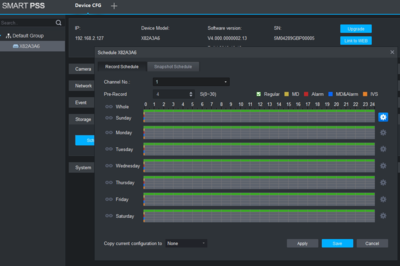
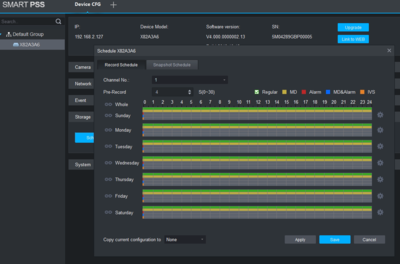
5. Click on the settings icon. Here you will see a menu for the days and hours for the scheduled recordings.
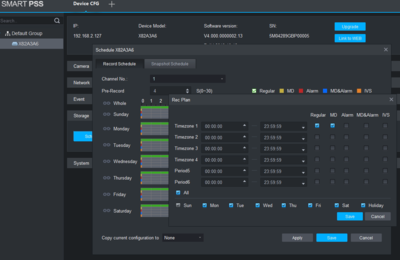
6. By default Regular will be selected, for this tutorial Motion Detect (MD) will be added. Check MD -> Check mark the day or days recordings are to be set for -> select save.
7. Here you can see green across for the days you set schedule recordings for in the previous step. You can copy the configuration set in the previous step to other channels -> Select "Apply" and "Save" to save configuration.
Description
Setting up record schedule in DSS Express S
Prerequisites
- Dahua NVR or DVR
- Internal HDD
- DSS Express Server and Client software
Step By Step Instructions
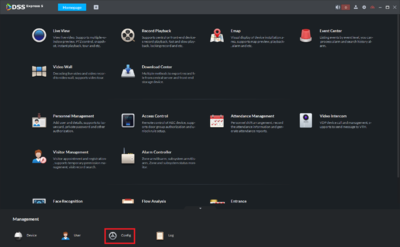
1. From the main menu select Config
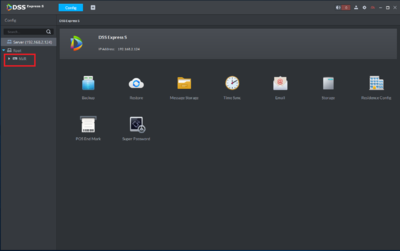
2. Under Config under the left-hand side menu expand the NVR to show all cameras.
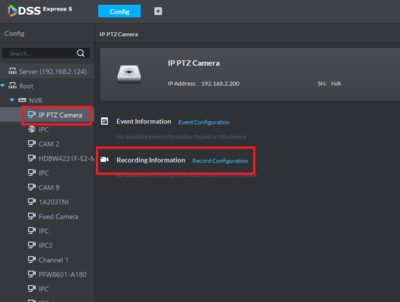
3. Once the cameras are shown, left click to select one and choose Recording Configuration
4. From the highlighted drop down menu select Manage time template to open a new window
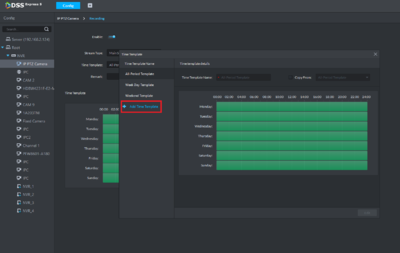
5. In the new window on the left side menu select Add time template to create a new template.
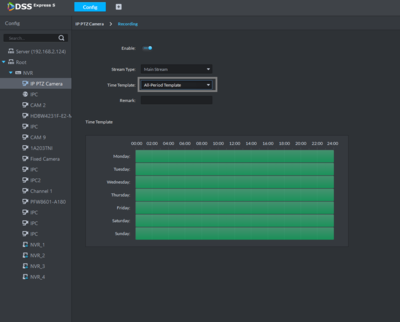
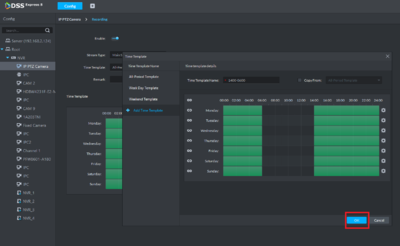
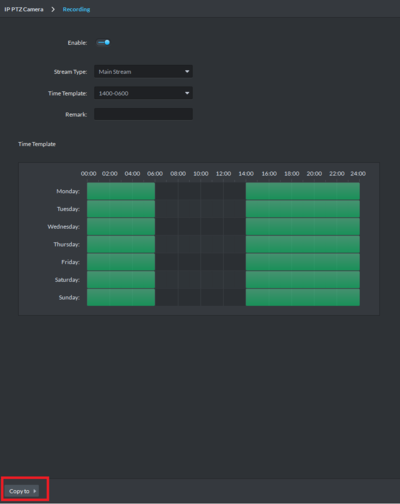
6. Left click with the mouse and hold to erase or add time to the schedule, once complete assign a name and hit Ok.
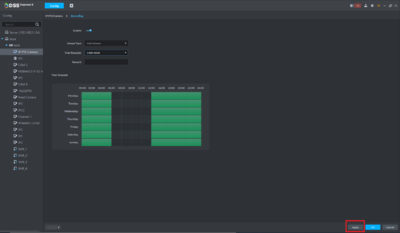
7. From the Schedule menu select the new Time Template from the Time Template drop down and click apply.
8. Once applied the schedule can now be copied to other devices.
![]() Mobile:iDMSS Plus & gDMSS Plus
Mobile:iDMSS Plus & gDMSS Plus
NOTICE
Notice of Discontinuation of iDMSS and gDMSS
Description
The tutorial shows how to schedule recordings via iDMSS or gDMSS.
Prerequisites
- iDMSS or gDMSS Plus
Video Instructions
Step by Step Instructions
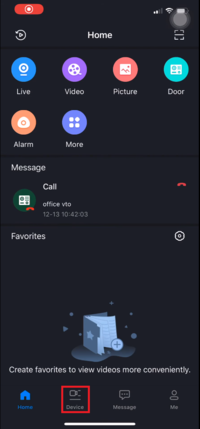
1. Select "Device" to go to the device list.
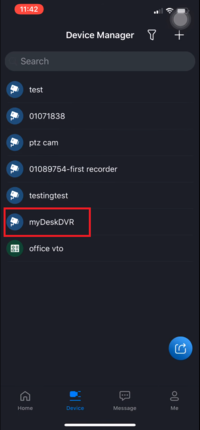
2. Select the recorder from the added device list.
3. Select "Remote Configuration".
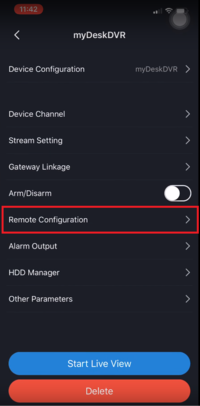
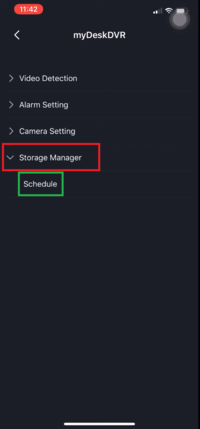
4. Expand "Storage Manager" => Select "Schedule".
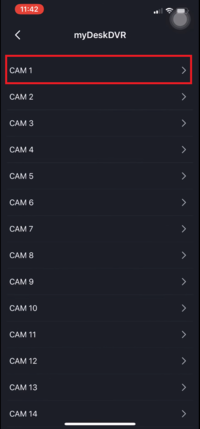
5. Choose the cameras that are going to be configured for schedule recordings.
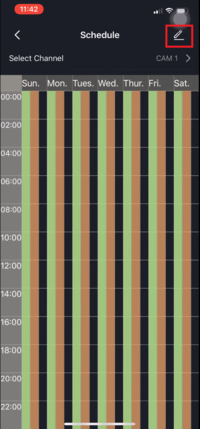
6. Select the "Pencil" to modify the recording options and date.
7. Enable "Normal" for continuous recordings. Select "Date" to configure which date to be recorded.
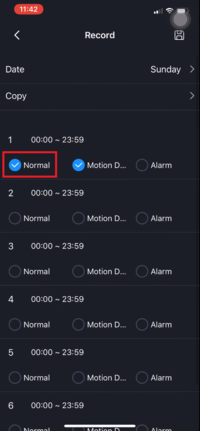
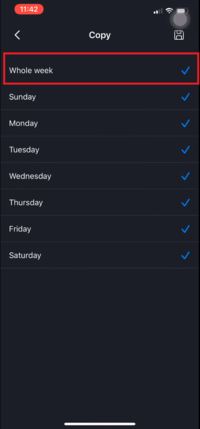
8. Select "Whole week" for 24/7 recordings. If not, choose the corresponding dates for recordings.
