|
|
| Line 9: |
Line 9: |
| | !|Software | | !|Software |
| | |- | | |- |
| − | |{{Template:DH-TPC-HT2201_Specification_Template}} | + | |{{Template:DH_TPC_HT2201_Specification_Template}} |
| | |<!--{{Template:DH-TPC-HT2201_QSG_Template}}--> | | |<!--{{Template:DH-TPC-HT2201_QSG_Template}}--> |
| | |<!--{{Template:Product_Manual_Template}}--> | | |<!--{{Template:Product_Manual_Template}}--> |
| Line 17: |
Line 17: |
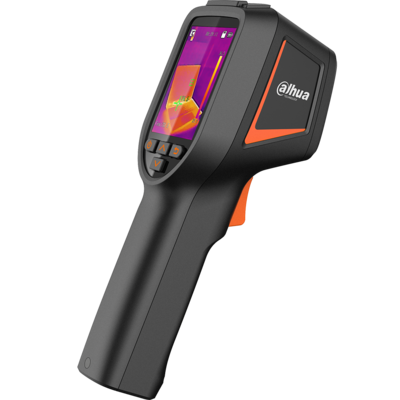
| | [[File:DH TPC HT2201 image web.png|right|400px]] | | [[File:DH TPC HT2201 image web.png|right|400px]] |
| | | | |
| − | ===Features===
| |
| − | * 256 x 192 Uncooled VOx Thermal Sensor Technology
| |
| − | * 3.5 mm Fixed Athermalized Lens, Focus-free
| |
| − | * ±0.5° C (±0.9° F) Temperature Accuracy
| |
| − | * ≤ 50 mK Thermal Sensitivity
| |
| − | * Contactless Temperature Measurement
| |
| − | * Connect Handheld Device to a Computer and Monitor via USB
| |
| − | * Rechargeable Lithium-Ion Battery
| |
| − | * IP54 Ingress Protection
| |
| − | * Three-year Warranty*
| |
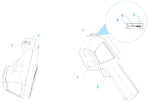
| | ===Interface=== | | ===Interface=== |
| | ====Front Panel==== | | ====Front Panel==== |
| No.
|
Component
|
Description
|

|
| 1.
|
Wrist rope hole
|
Used for threading wrist rope.
|
| 2.
|
Tripod port
|
Used for installing a tripod.
|
| 3.
|
Silicon plug
|
|
| 4.
|
Charging indicator light
|
Charging: Red light on.
- Full charging: Green light on. The battery can be recharged repeatedly, but it is a wearable product. If the standby time of the Camera has been greatly reduced, please contact the after-sales support to replace the battery.
|
| 5.
|
USB port
|
Used for connecting the USB cable.
|
| 6.
|
SD card slot
|
Used for installing a SD card.
|
| 7.
|
Thermal lens
|
Used for monitoring.
|
| 8.
|
Trigger button
|
On the live interface, press the button twice to capture images.
- On the live interface, press the button 3 times to start recording, and then press 3 times to stop recording.
- On the menu interface, press the button to return to the live interface.
- Under standby state, press the button to wake up the Camera.
|


