LincX2PRO/Setup Flood Light
Contents
Setup Flood Light
Description
This article will cover the basic set up and configuration of the Floodlights of the IPC-L26.
Prerequisites
- An Android or iOS Smartphone
- the GDMSS app for Android or iDMSS for iOS
- A WiFi network to connect the IPC-L26 to.
Instructions
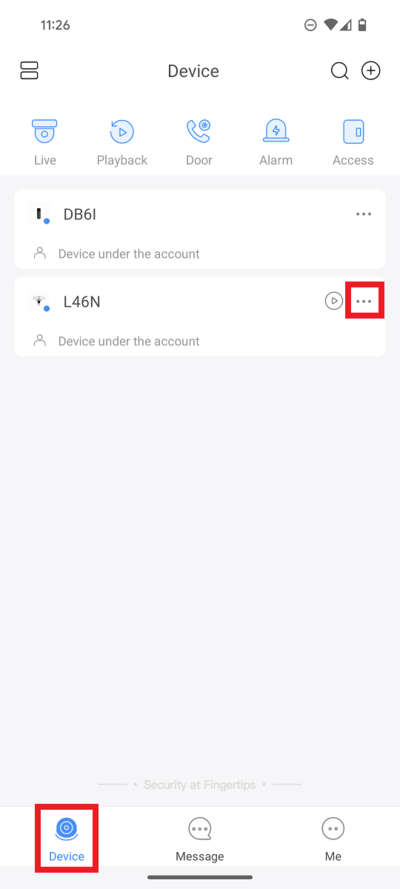
Tap on Device at the bottom to access your added device list.
Select one of your added devices that you wish to setup/modify Floodlight Settings for. Tap on ... .
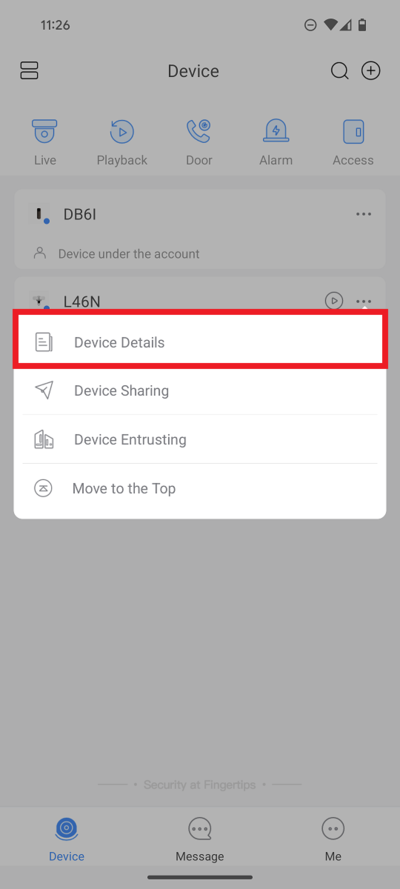
2. Select Device Details
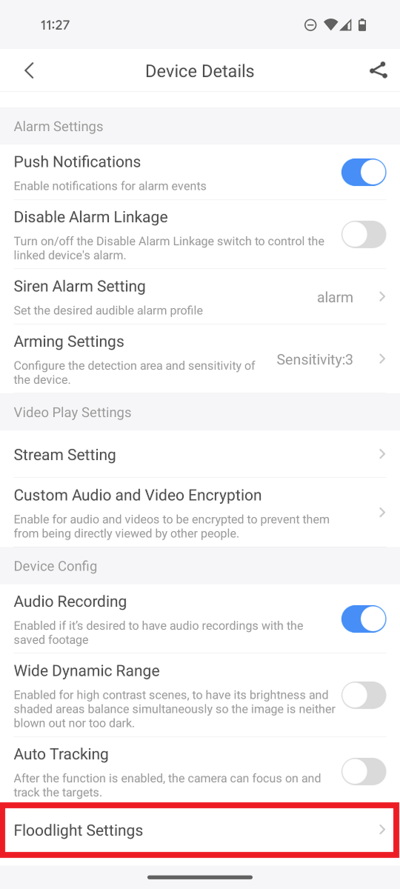
3. Scroll down and select Floodlight Settings
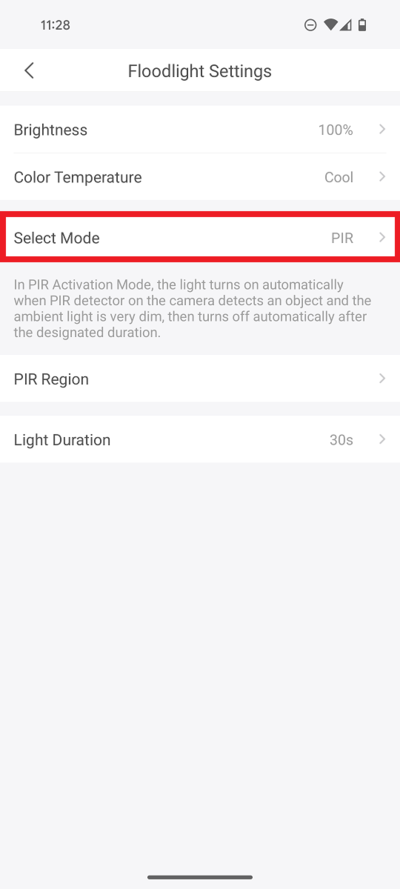
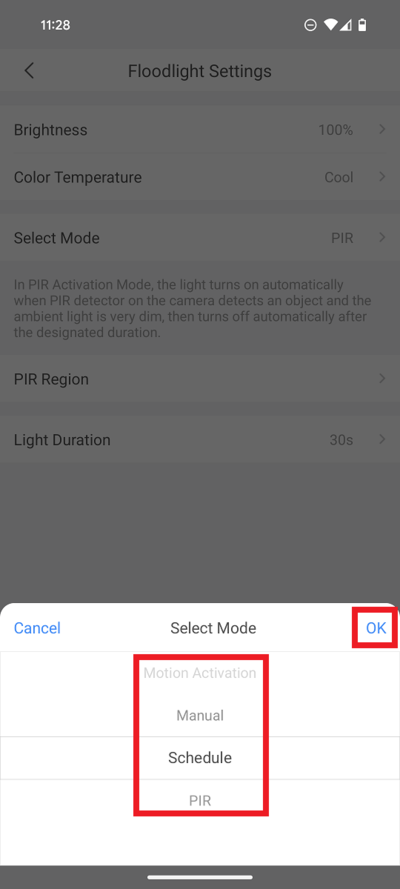
4. Tap on Select Mode
5. Select which mode you want the floodlight to follow: Motion Activation, Manual, Schedule, or PIR
Tap on OK
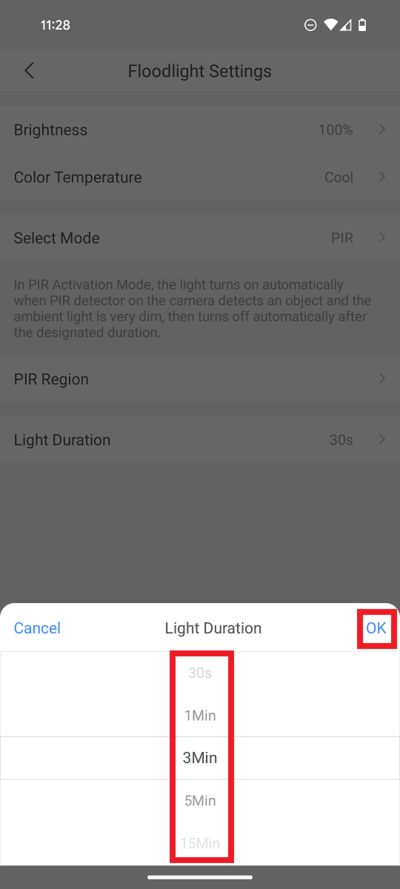
PIR Mode
1. Set the Select Mode to PIR
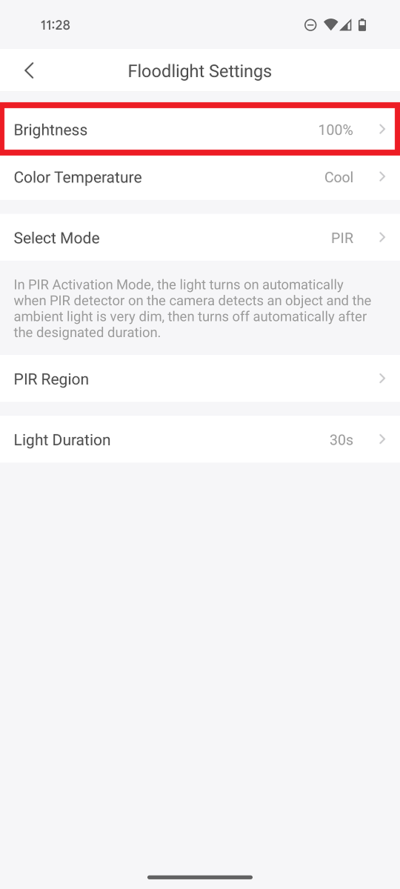
2. Select Brightness
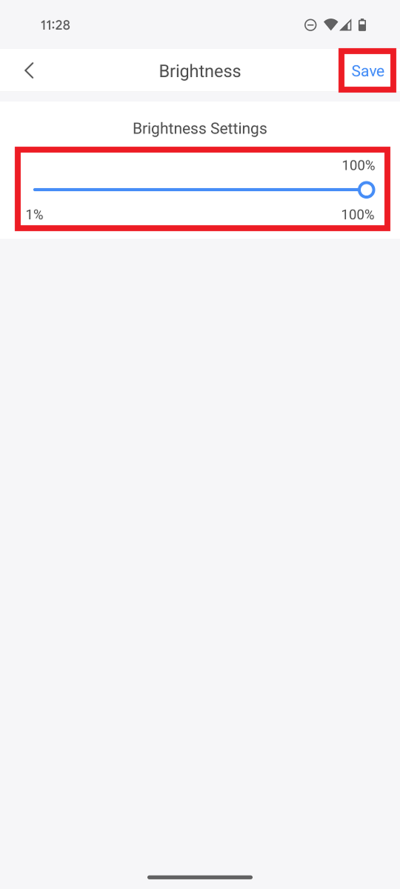
3. Adjust the slider under Brightness Settings to the desired brightness level for the floodlight.
When you are done, select Save at the top
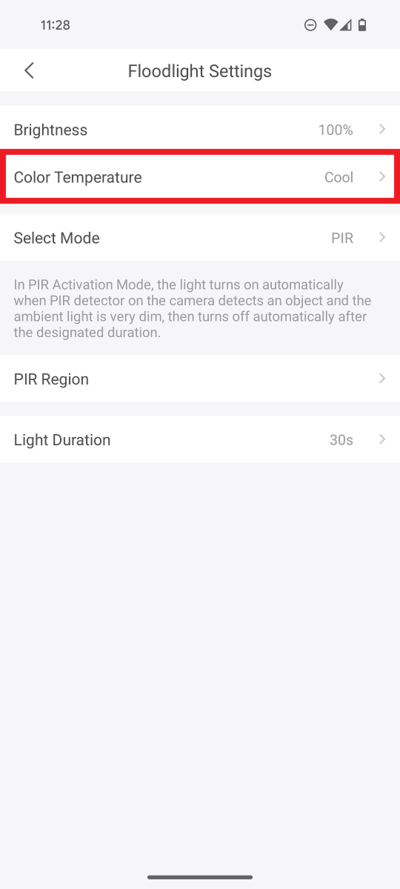
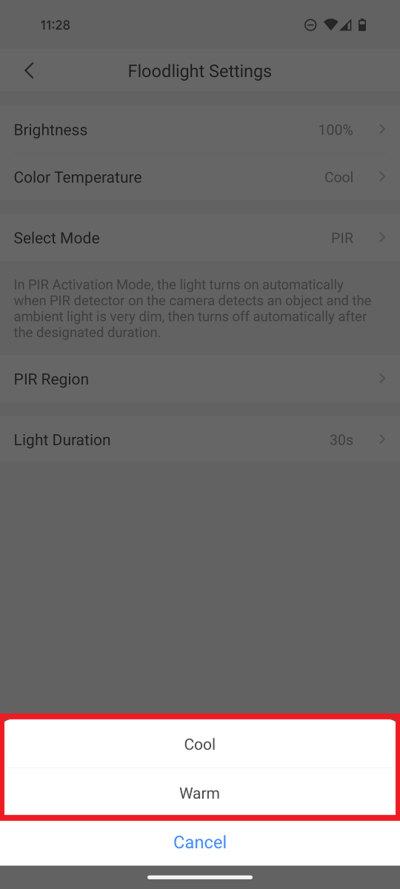
4. Select Color Temperature
5. Select Cool if you want a blue-ish color for the light or select Warm if you want a yellow-ish color for the light
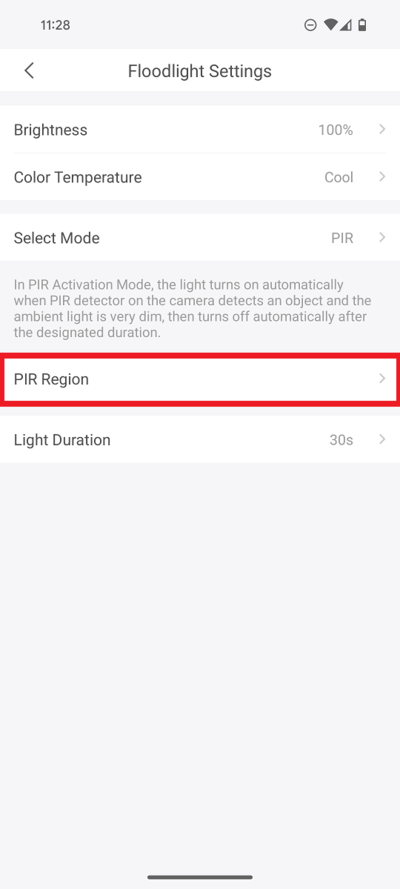
6. Select PIR Region
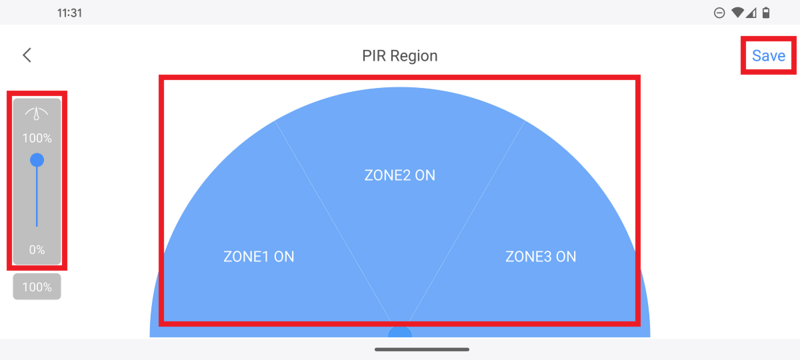
7. Drag the slider on the right for the amount of distance you want the PIR to monitor. (100% = 10m [32.81 ft])
Tap the 3 zones either ON or OFF.
Select Save at the top
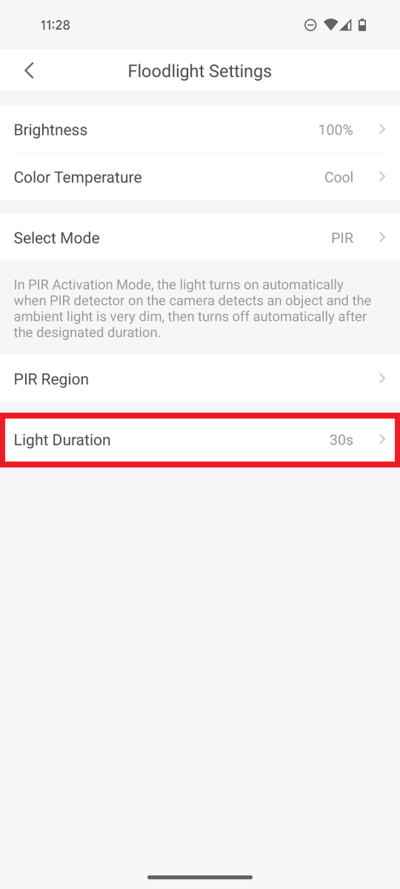
8. Select Light Duration
9. Select the duration the light will stay on once activated.
Tap on OK
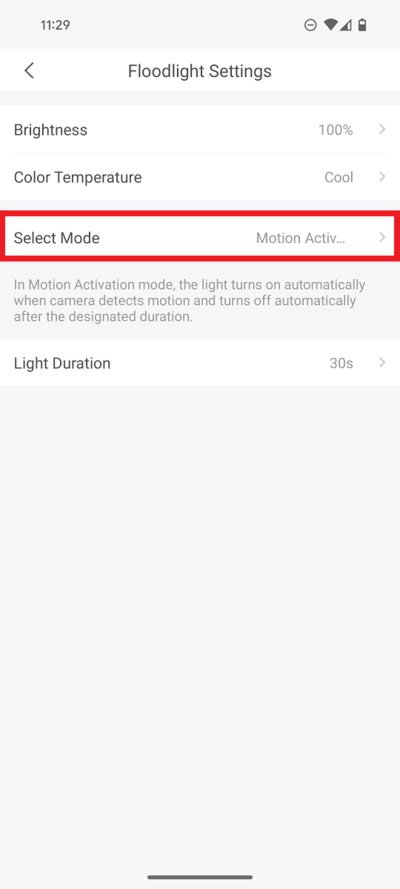
Motion Activation
1. Set the Select Mode to Motion Activation
2. Select Brightness
3. Adjust the slider under Brightness Settings to the desired brightness level for the floodlight.
When you are done, select Save at the top
4. Select Color Temperature
5. Select Cool if you want a blue-ish color for the light or select Warm if you want a yellow-ish color for the light
6. Select Light Duration
7. Select the duration the light will stay on once activated.
Tap on OK
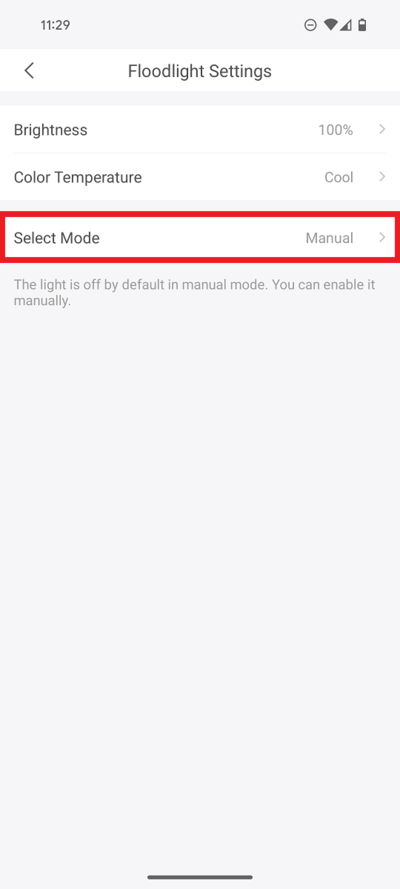
Manual Mode
1. Set the Select Mode to Manual
2. Select Brightness
3. Adjust the slider under Brightness Settings to the desired brightness level for the floodlight.
When you are done, select Save at the top
4. Select Color Temperature
5. Select Cool if you want a blue-ish color for the light or select Warm if you want a yellow-ish color for the light
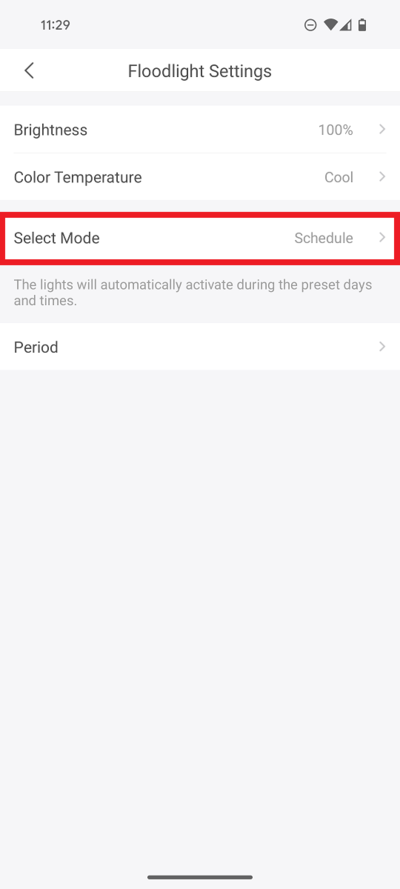
Schedule Mode
1. Set the Select Mode to Schedule
2. Select Brightness
3. Adjust the slider under Brightness Settings to the desired brightness level for the floodlight.
When you are done, select Save at the top
4. Select Color Temperature
5. Select Cool if you want a blue-ish color for the light or select Warm if you want a yellow-ish color for the light
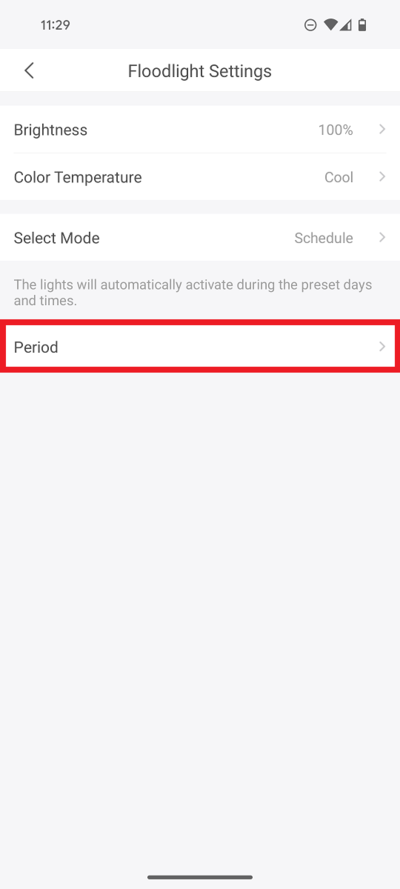
6. Select Period
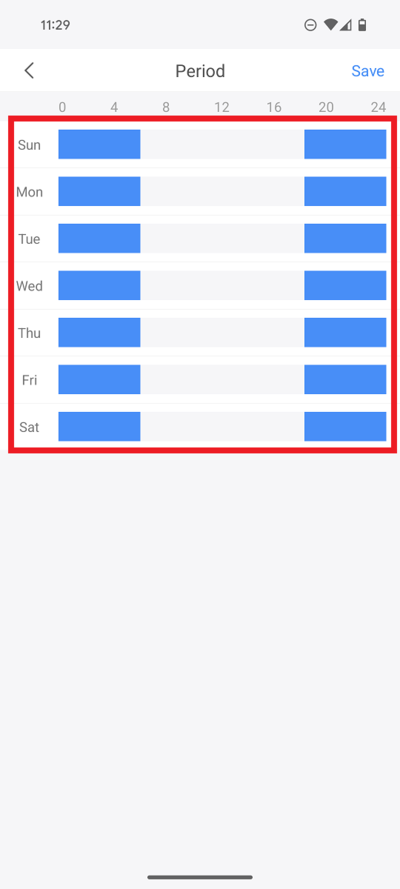
7. Select any day of the week to modify the schedule for that day
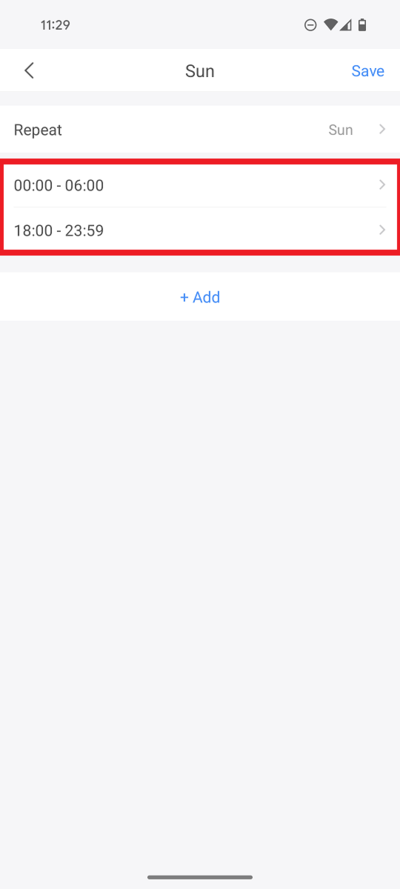
8. Select the time period you want to modify or tap on + Add if you want to add an additional time period
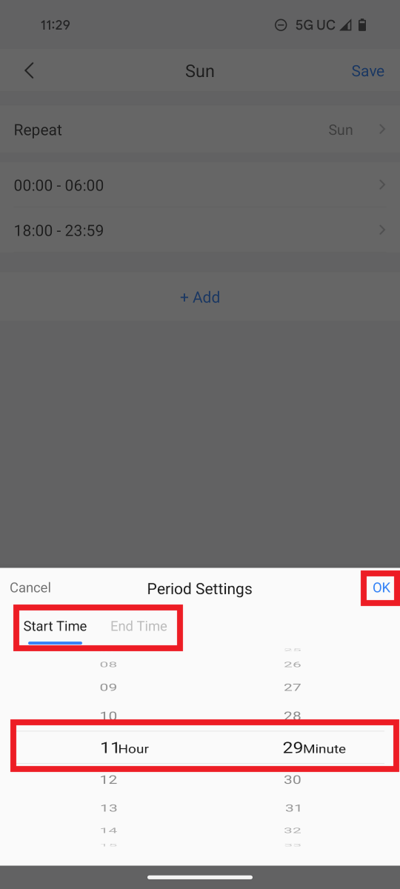
9. Adjust the start time and end time to when you want the floodlight to be active.
When you are done making changes, select OK
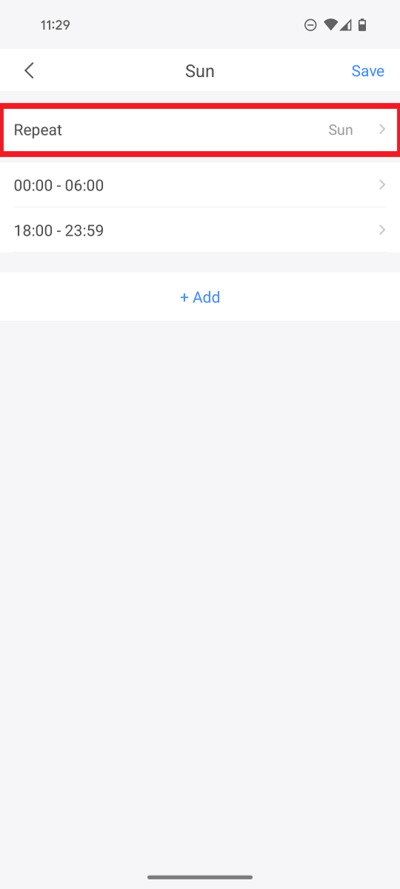
10. Select Repeat
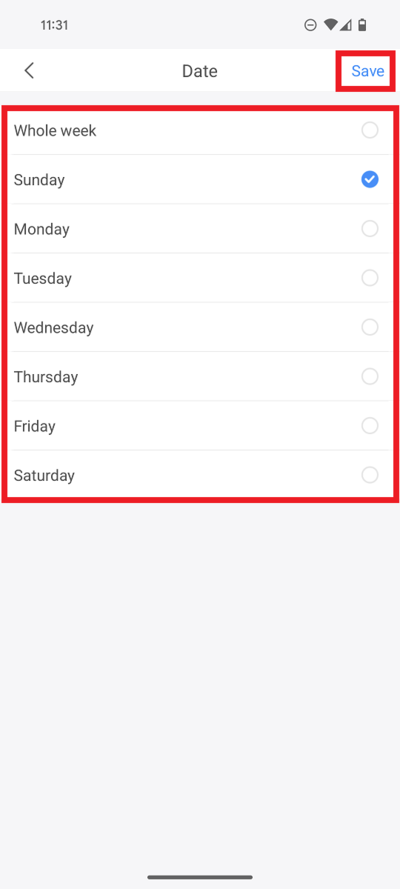
11. Select either Whole Week or a specific day for which day(s) this schedule will apply to, in addition to the day you already selected.
Then select Save
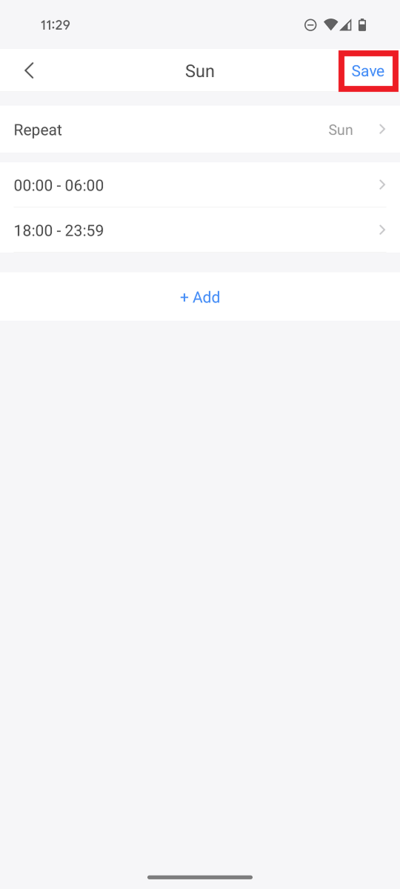
12. When you are done making changes, select Save
![]() Mobile:iDMSS Plus & gDMSS Plus
Mobile:iDMSS Plus & gDMSS Plus
This guide will assume that the device has been added to the DMSS app already. If you require assistance with the app set up and initialization process of the L26 please see [enter link here] for more info.
1. From the Home section of the DMSS app, select Device to open the Device Manager, from here select the L26.
2. From the Device Configuration menu select FloodLight.
3. Under this section there will be three settings that can be configured:
Mode: Manual/Motion Activation/Dusk to Dawn
PIR Region: Setting the range of the motion sensor
Light on Time: The time frame the lights will be active after motion is triggered.
4. To finalize the setup, set the PIR range and the duration of the light when motion is detected.
