System UI Old
Contents
System UI Old
Initial Setup
Recording
Advanced Recording
Playback
Basic Playback
Prerequisites
- Dahua Recorder: NVR, DVR, or XVR
- HDD installed
Video Instructions
Step by Step Instructions
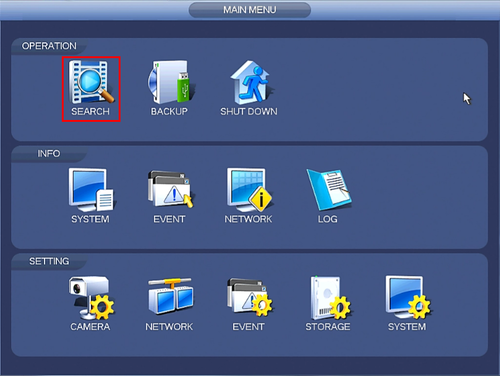
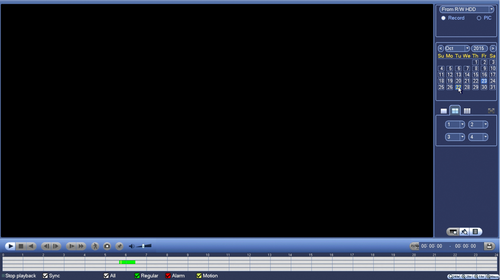
1. From the Main Menu click, "Search"
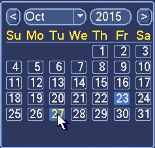
2. On the right hand side, there will be a calendar. Click on the day that you wish to play back video.
- Days that are shaded a lighter color blue have recordings.
- Days that are dark blue do not have recordings.
3. Double click on the graph below to begin playing back video.
Advanced Playback
Backup
Remote Access
Email Notifications
Description
Prerequisites
- a new throw-away sender email account that can be replaced
- a recipient email account
- an event set up to trigger the email alert
- NVR or HCVR with an internet connection
- You must have the device recorder connected to the internet in order for the DDNS account to be registered.
Video Instructions
Step by Step Instructions
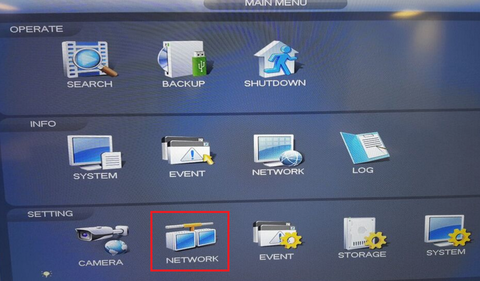
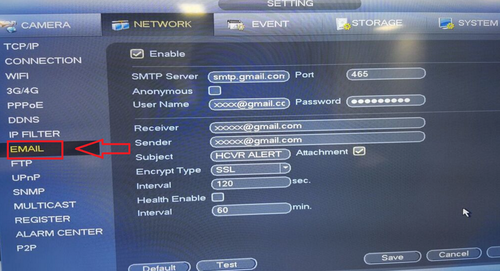
1. Right click from Live View to access the Main Menu
Click Network under Setting
Click Email
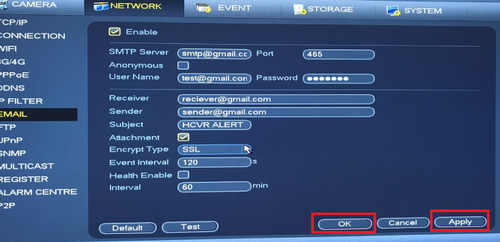
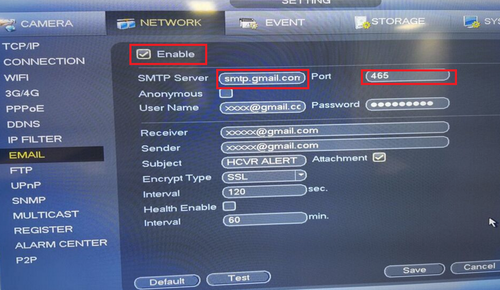
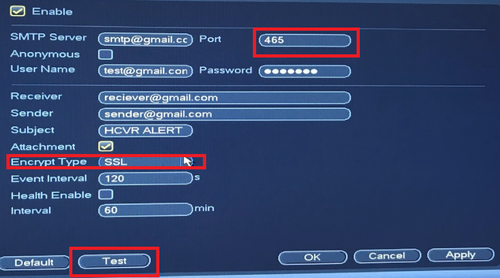
2. Check Enable → Input SMTP Server → and required port number. In this case Gmail (stmp.gmail.com) is being used; the required port number for SSL gmail encryption is 465. Please note depending on the email you are using the SMTP and port will be different. You may use this link to reference the SMTP for your email along with what ports can be used. If a company email is being used you will need to contact your IT department for the SMTP information.
https://www.arclab.com/en/kb/email/list-of-smtp-and-pop3-servers-mailserver-list.html
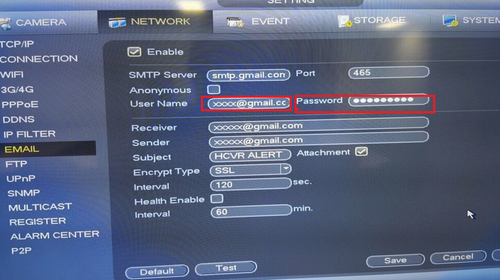
3. Input User, which is the email you are using. e.g. xxxx@xmail.com → input password of email you are using.
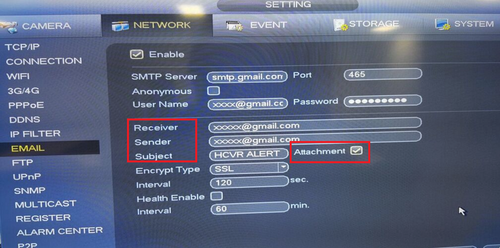
4. Input Reciever e.g. xxxx@xmail.com → Sender e.g. xxxx@xmail.com. Input a different email for receiver and sender (Must not be the same email) → Input Subject for the email header when you receive the email notification → Check "Attachment" for attachments such as motion detect snapshots.
5. Input Encrypt type that corresponds to the port number that is provided in the link above → input interval → select test to verify it works. It will prompt if test has succeeded or failed. You should see a "Mail Test" notification in your email.
6. Before the next steps, ensure "Enable" is check marked. Click "Apply" → "Save" to save settings.
