Difference between revisions of "Video Intercom/SIP 2.0/Multiple VTH and VTO One-Key Config Setup"
(Created page with "=How to Setup One Key Config= ==Description== This article will go over the new One Key Config setup. ==Prerequisites== - VTH with the One Key Config feature - VTOs with SI...") |
|||
| Line 5: | Line 5: | ||
==Prerequisites== | ==Prerequisites== | ||
| − | + | * VTH with the One Key Config feature | |
| − | + | * VTOs with SIP 2.0 Firmware | |
==Video Instructions== | ==Video Instructions== | ||
| Line 12: | Line 12: | ||
==Step by Step Instructions== | ==Step by Step Instructions== | ||
| + | 1. Select the Language and tap on OK | ||
| + | |||
| + | [[File:VDP One Key Config Setup-1.png|900px]] | ||
| + | |||
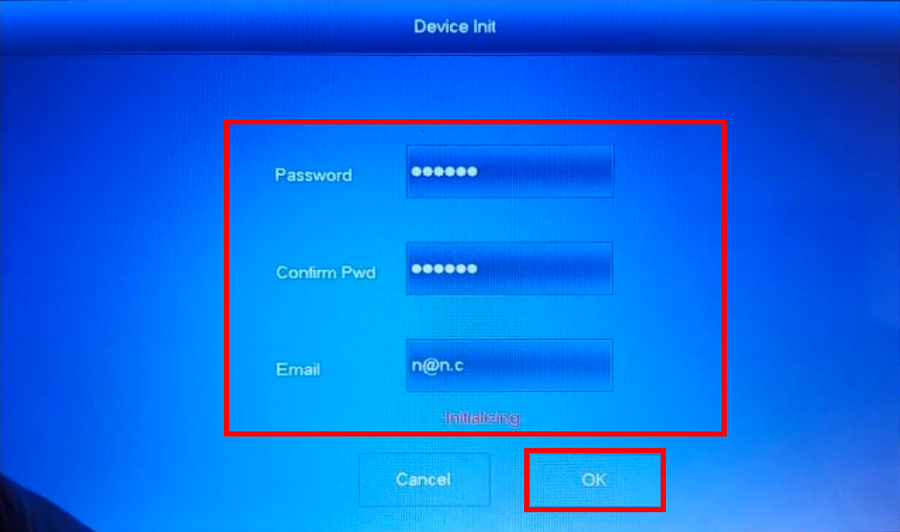
| + | 2. Initialize the VTH, we will be using as the Main. Enter the password and E-mail | ||
| + | |||
| + | [[File:VDP One Key Config Setup-2.png|900px]] | ||
| + | |||
| + | 3. Proceed with the One Key Config by tapping on OK | ||
| + | |||
| + | [[File:VDP One Key Config Setup-3.png|900px]] | ||
| + | |||
| + | 4. Initialize all the VDP devices by tapping on Initialize | ||
| + | |||
| + | [[File:VDP One Key Config Setup-4.png|900px]] | ||
| + | |||
| + | 5. Enter the password for the VTHs and VTOs. | ||
| + | Note: VTOs will require an 8 numerical/digit password combination | ||
| + | |||
| + | [[File:VDP One Key Config Setup-5.png|900px]] | ||
| + | |||
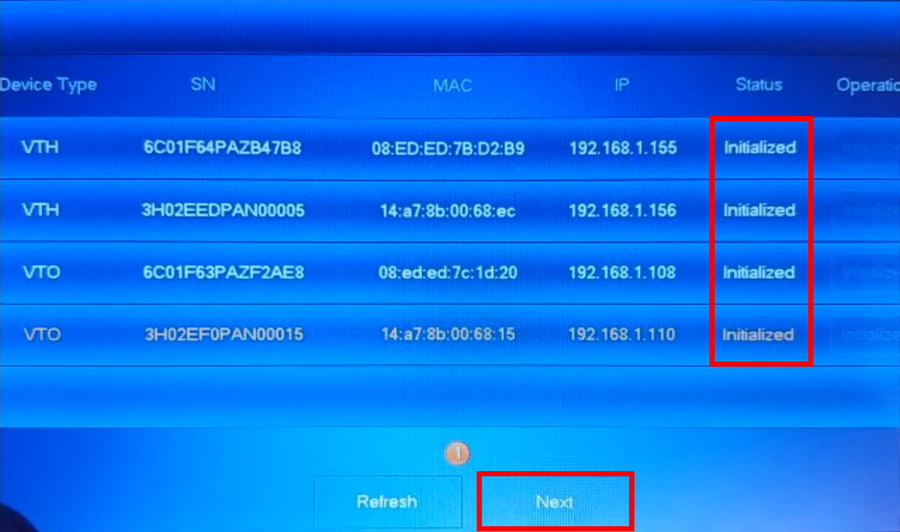
| + | 6. Tap on Next after all units are initialized | ||
| + | |||
| + | [[File:VDP One Key Config Setup-6.png|900px]] | ||
| + | |||
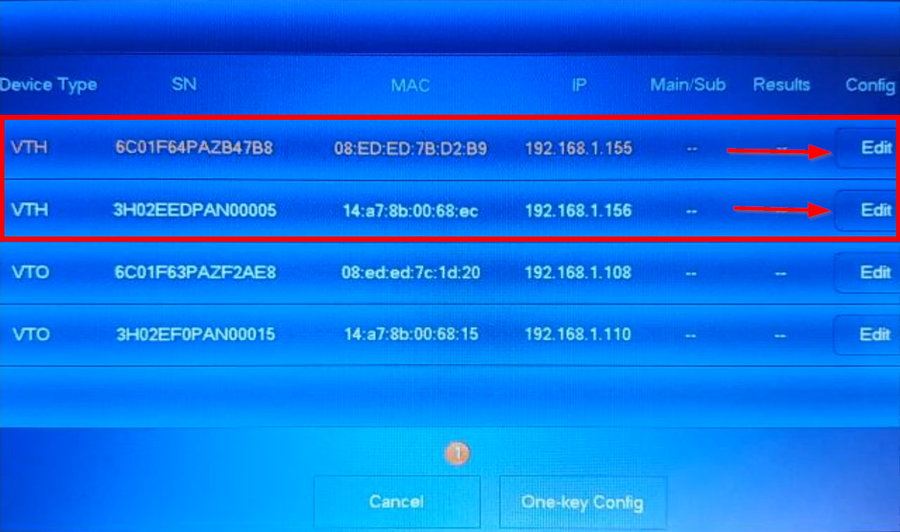
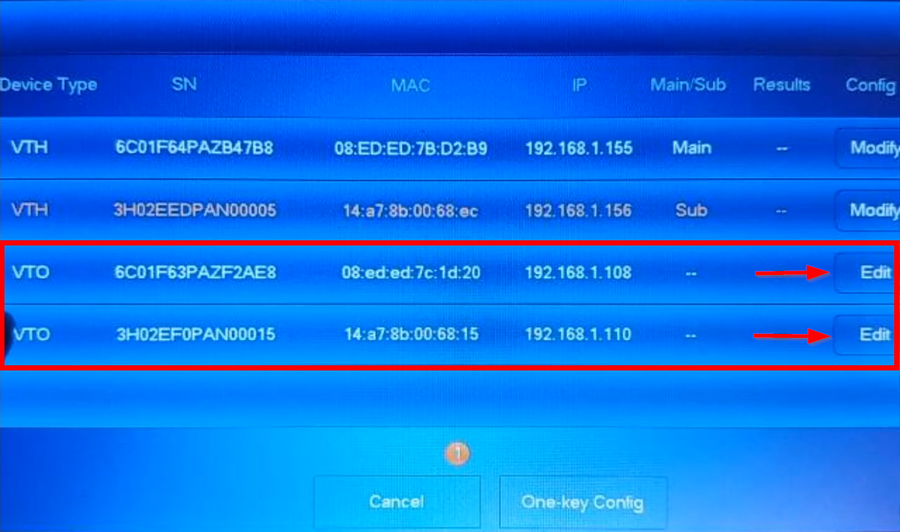
| + | 7. Tap on edit to assign Main and Subs, we can also edit IP Addresses to avoid IP conflicts | ||
| + | |||
| + | [[File:VDP One Key Config Setup-7.png|900px]] | ||
| + | |||
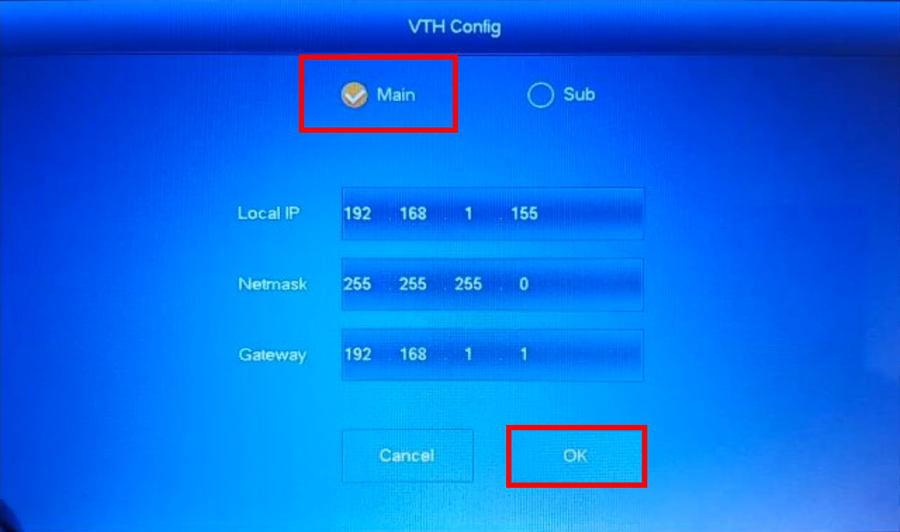
| + | 8. Select Main for the first VTH and modify the IP if needed | ||
| + | |||
| + | [[File:VDP One Key Config Setup-8.png|900px]] | ||
| + | |||
| + | 9. For the Second VTH assign it as a Sub and modify the IP if needed | ||
| + | |||
| + | [[File:VDP One Key Config Setup-8.png|900px]] | ||
| + | |||
| + | 10. VTOs are next, choose a VTO that will be the main and tap on edit | ||
| + | |||
| + | [[File:VDP One Key Config Setup-10.png|900px]] | ||
| + | |||
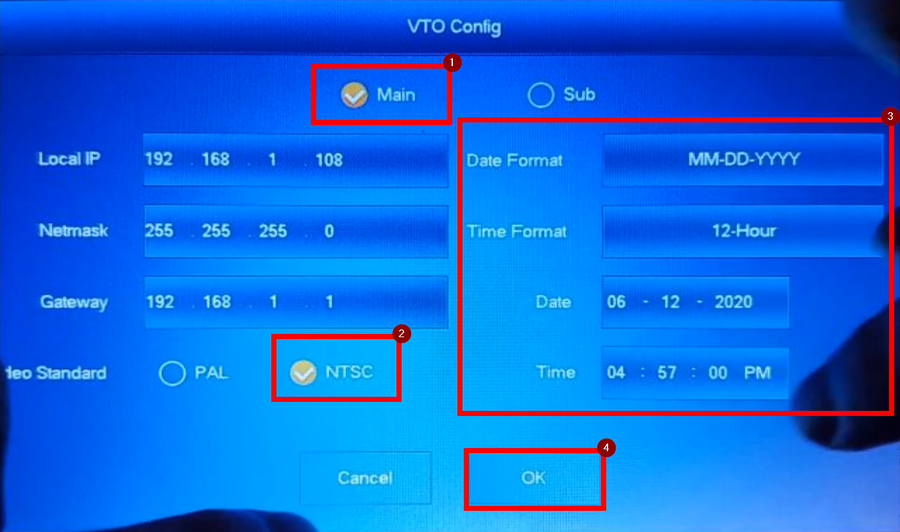
| + | 11. The Main VTO will require you to enter Date and Time. Do '''NOT''' skip this step. Modify IP Address if needed | ||
| + | |||
| + | [[File:VDP One Key Config Setup-11.png|900px]] | ||
| + | |||
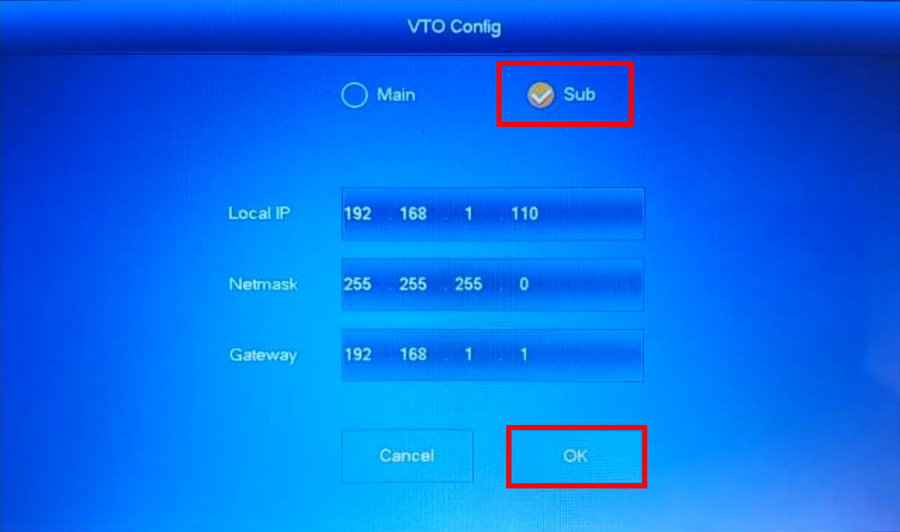
| + | 12. Assign the second VTO as a Sub. Modify IP Address if needed | ||
| + | |||
| + | [[File:VDP One Key Config Setup-12.png|900px]] | ||
| + | |||
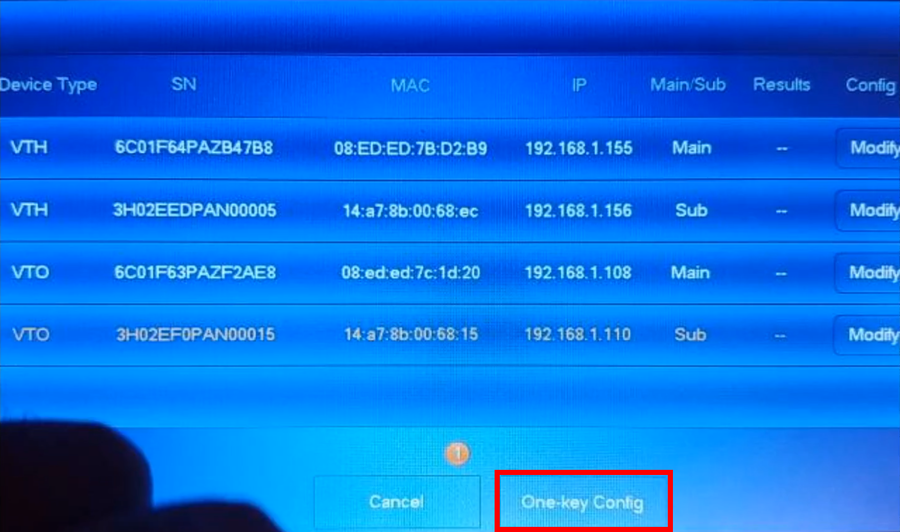
| + | 13. Tap on One-Key Config send the configuration to the units | ||
| + | |||
| + | [[File:VDP One Key Config Setup-13.png|900px]] | ||
| + | |||
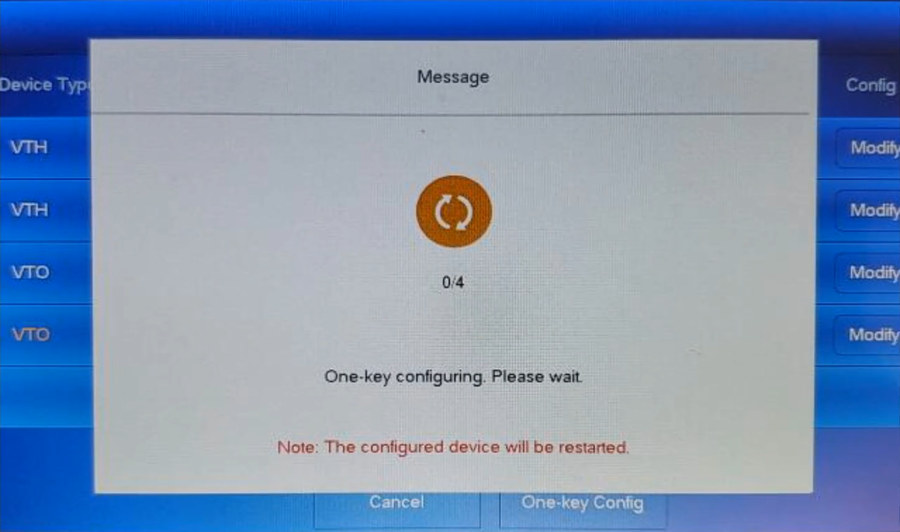
| + | 14. The VTH will handle the SIP programming | ||
| + | |||
| + | [[File:VDP One Key Config Setup-14.png|900px]] | ||
| + | |||
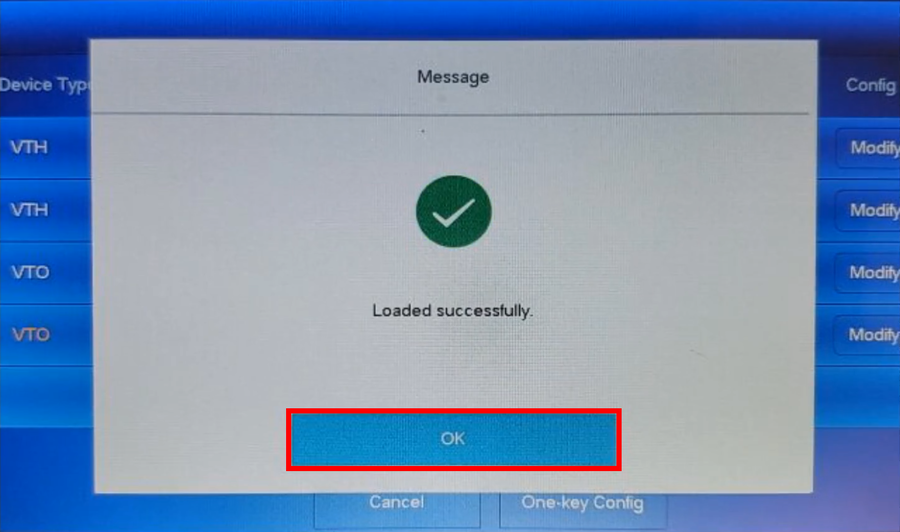
| + | 15. Tap on OK once completed | ||
| + | |||
| + | [[File:VDP One Key Config Setup-15.png|900px]] | ||
| + | |||
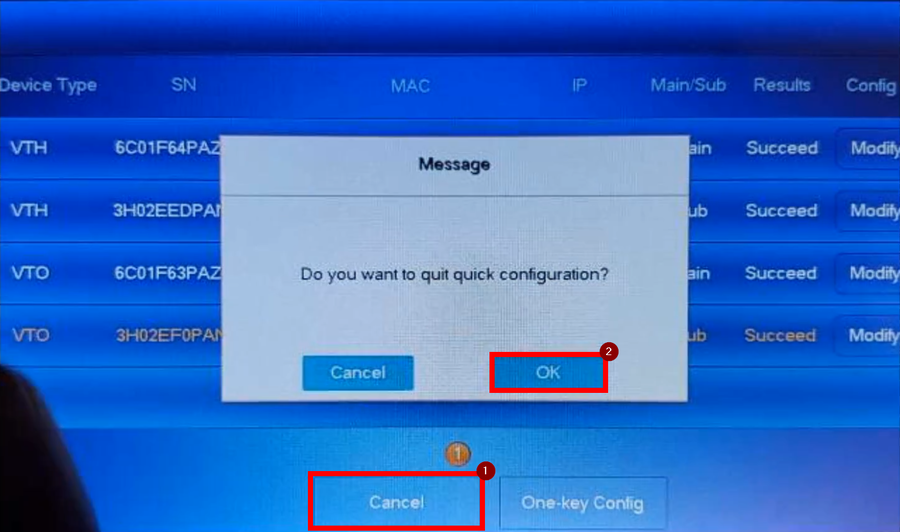
| + | 16. Cancel and tap on OK | ||
| + | |||
| + | [[File:VDP One Key Config Setup-16.png|900px]] | ||
| + | |||
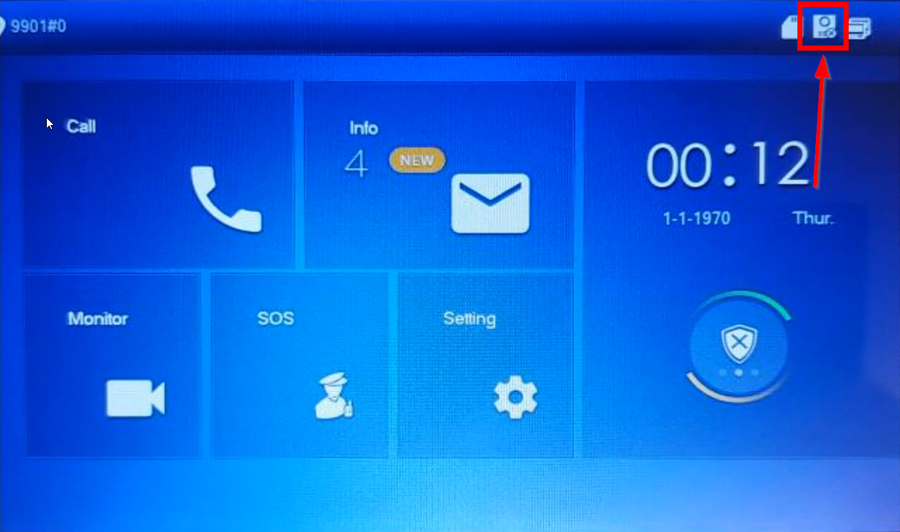
| + | 17. Wait for all the units to reboot and the Video Intercom Icon will disappear | ||
| + | |||
| + | [[File:VDP One Key Config Setup-17.png|900px]] | ||
| + | |||
| + | 18. The configuration is now complete | ||
| + | |||
| + | [[File:VDP One Key Config Setup-18.png|900px]] | ||
Revision as of 19:14, 3 June 2020
Contents
How to Setup One Key Config
Description
This article will go over the new One Key Config setup.
Prerequisites
- VTH with the One Key Config feature
- VTOs with SIP 2.0 Firmware
Video Instructions
Step by Step Instructions
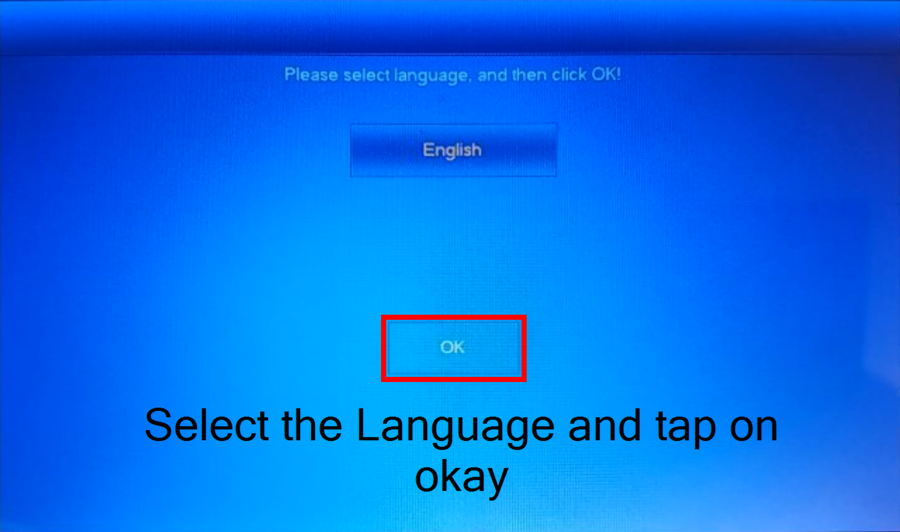
1. Select the Language and tap on OK
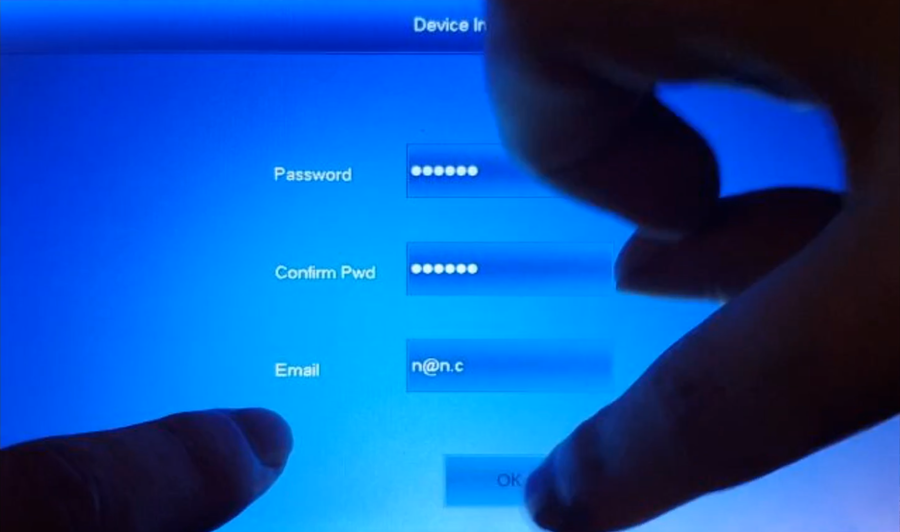
2. Initialize the VTH, we will be using as the Main. Enter the password and E-mail
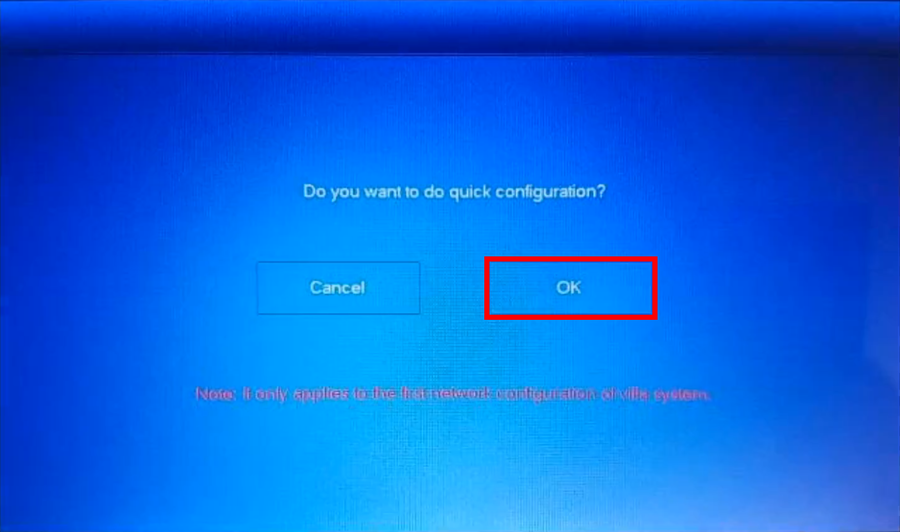
3. Proceed with the One Key Config by tapping on OK
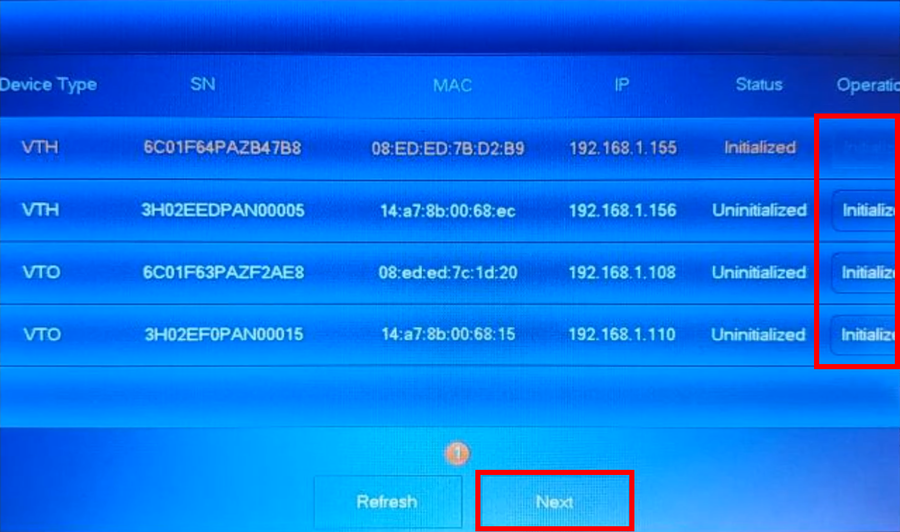
4. Initialize all the VDP devices by tapping on Initialize
5. Enter the password for the VTHs and VTOs.
Note: VTOs will require an 8 numerical/digit password combination
6. Tap on Next after all units are initialized
7. Tap on edit to assign Main and Subs, we can also edit IP Addresses to avoid IP conflicts
8. Select Main for the first VTH and modify the IP if needed
9. For the Second VTH assign it as a Sub and modify the IP if needed
10. VTOs are next, choose a VTO that will be the main and tap on edit
11. The Main VTO will require you to enter Date and Time. Do NOT skip this step. Modify IP Address if needed
12. Assign the second VTO as a Sub. Modify IP Address if needed
13. Tap on One-Key Config send the configuration to the units
14. The VTH will handle the SIP programming
15. Tap on OK once completed
16. Cancel and tap on OK
17. Wait for all the units to reboot and the Video Intercom Icon will disappear
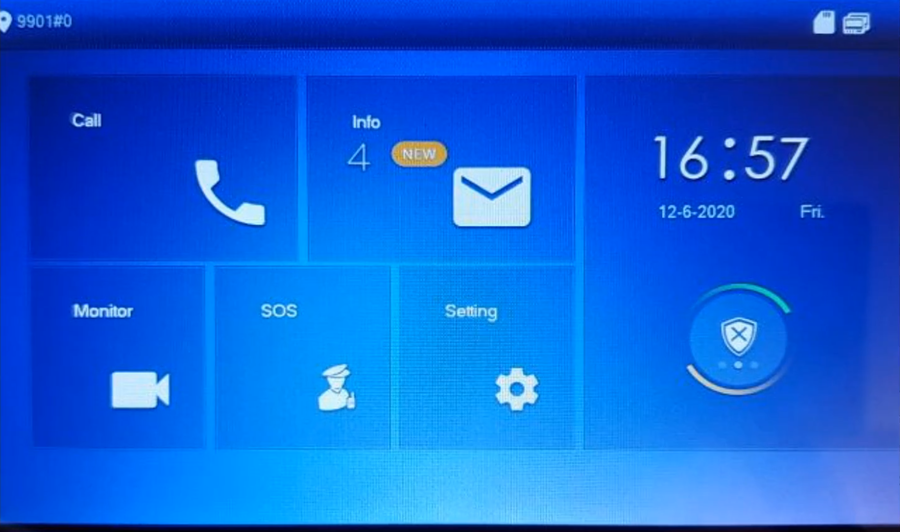
18. The configuration is now complete
