3rd Party VMS/Control4/Add Dahua Recorder to Control4
Contents
How to Add Dahua Recorder to Control4
Description
This guide will cover how to add a supported Dahua Recorder to the Control4 System.
A specialized driver allows a Control4 dealer to add an Security icon in the watch menu. This will enable the Control4 System to use the Monitor-Out/HDMI/VGA connector to integrate Dahua devices.
Prerequisites
- Control4 Composer
- Control4 Driver for Dahua Recorders
- https://my.control4.com/ Account
- Dahua Device configured for Static IP or DHCP Reservation
- Control4 Firmware for Dahua Device
- Dahua specific drivers installed in Control 4
Instructions for installing Dahua drivers on Control4 Composer
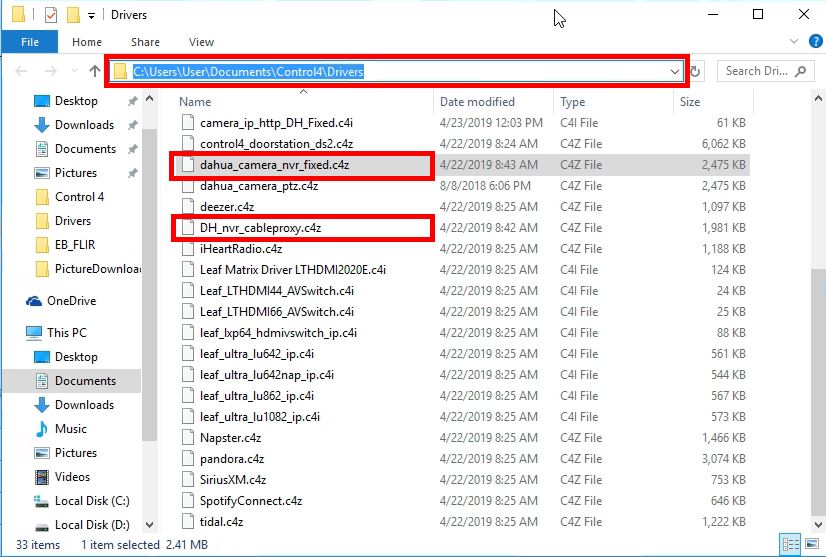
After installing Composer, navigate to the default directory that contains the drivers:
C:\Users\User\Documents\Control4\Drivers
Download the Dahua drivers:
Copy/paste or drag the files into the directory C:\Users\User\Documents\Control4\Drivers
Dahua Firmware to Enable Control4 Integration
| Model | Firmware |
|---|---|
| X72A2A | |
| X51A3E | |
| X52A3A | |
| X52A3N | |
| X51A1E | |
| X51A2E | |
| X72A3A | |
| X54A5L | |
| X58A5S |
Video Instructions
Coming Soon
Step by Step Instructions
1. Make sure the Recorder has been updated to the correct supported firmware:
The full list of supported firmware can be found at 3rd Party VMS/Control4
Firmware version used for this guide: V3.216.10BE000.0Build Date:2019-04-18
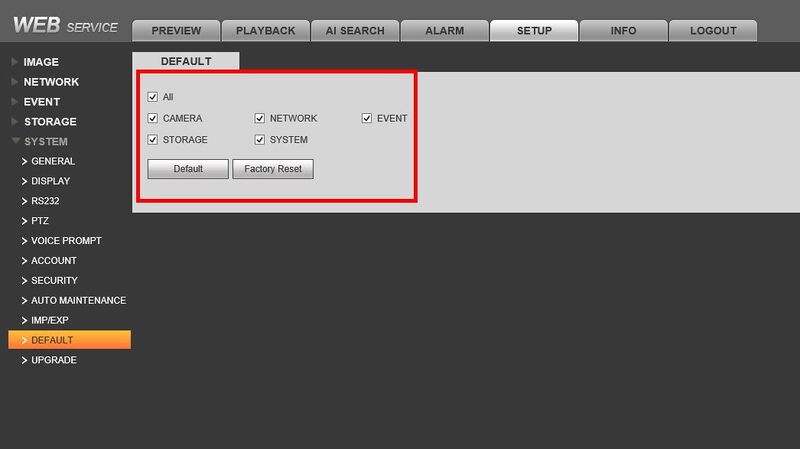
Also make sure the recorder is factory defaulted before beginning setup by going into Setup>System>Default>Factory Reset
1.b. Make sure the monitor has been connected to the same local network as the devices. For wifi setup:
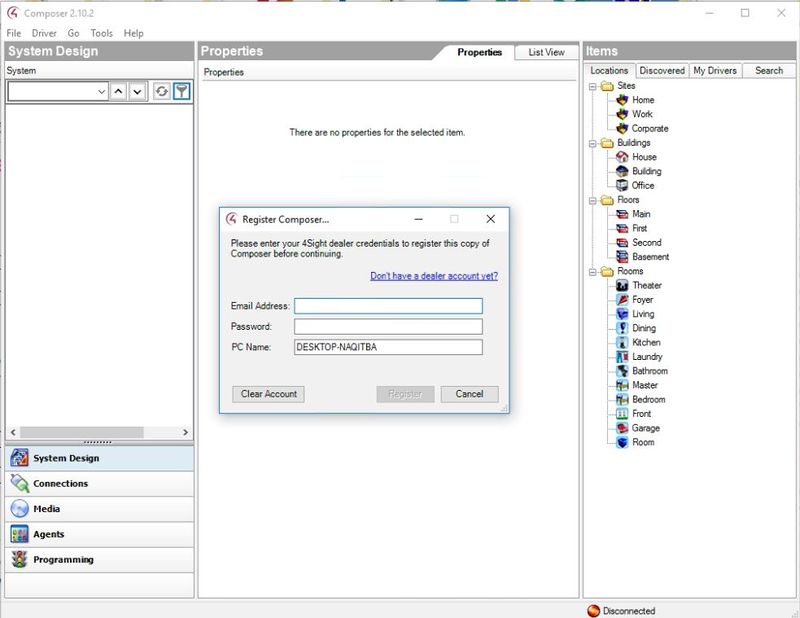
2. Open Control4 Composer. If this is the first time loading the program, you will be prompted to enter your Control4 account credentials:
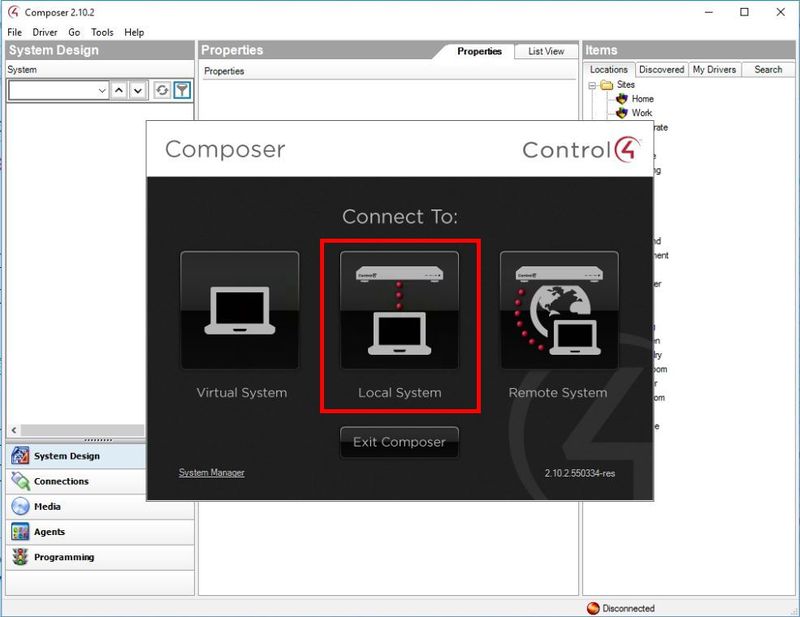
3. After logging in a prompt will appear. Select the type of connection the computer has to the Control4 Controller. Make sure the controller is powered on and connected to the network. In this case the computer is on the same network as the EA1 Controller, so Local System is selected
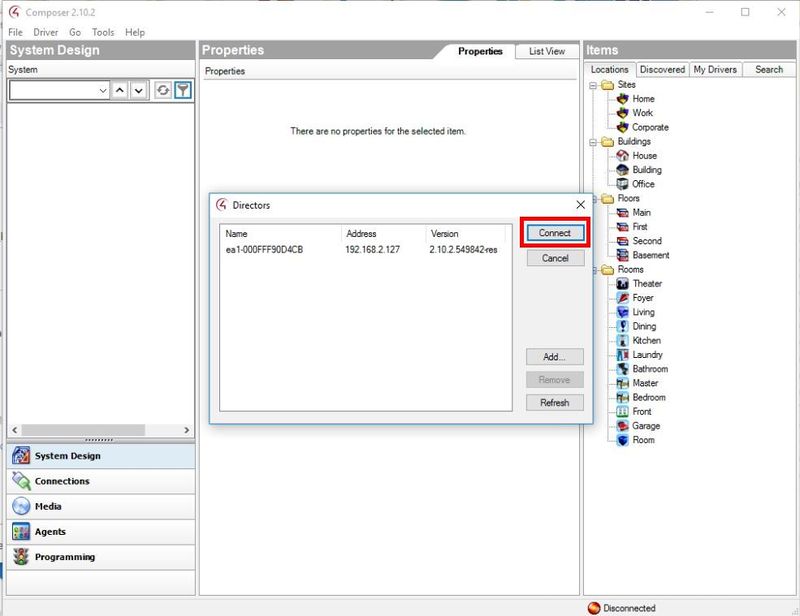
4. The software will scan the local network and give a prompt with any discovered devices. Select the controller then click Connect
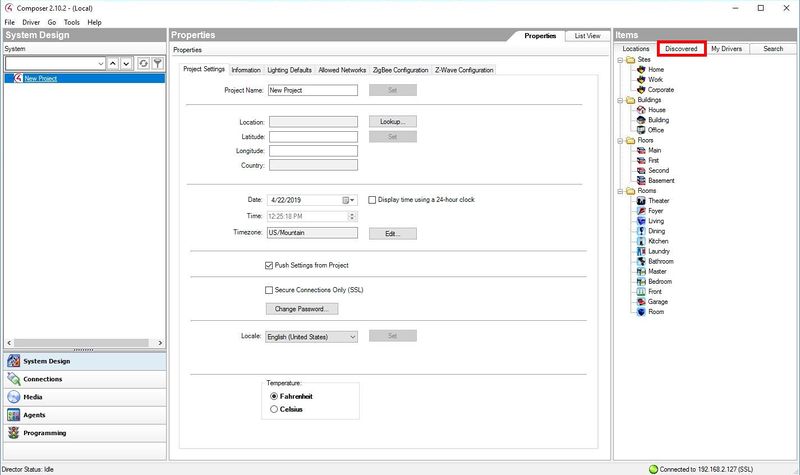
5.To begin adding devices, select the 'Discovered' tab in the System Design interface to pull up devices on the local network that have been automatically detected by the software
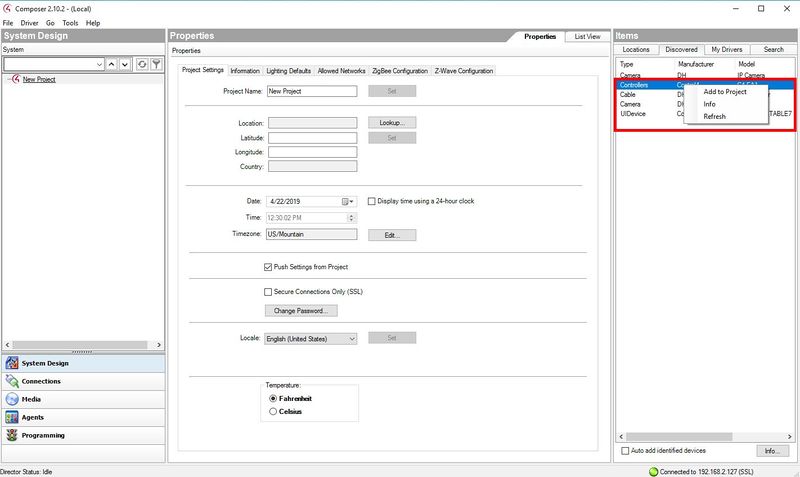
6. Begin by adding the Control4 devices on the network, such as the C4-EA1 Controller and Wireless Monitor. You can double click the item in the list to add or Right Click>Add to Project
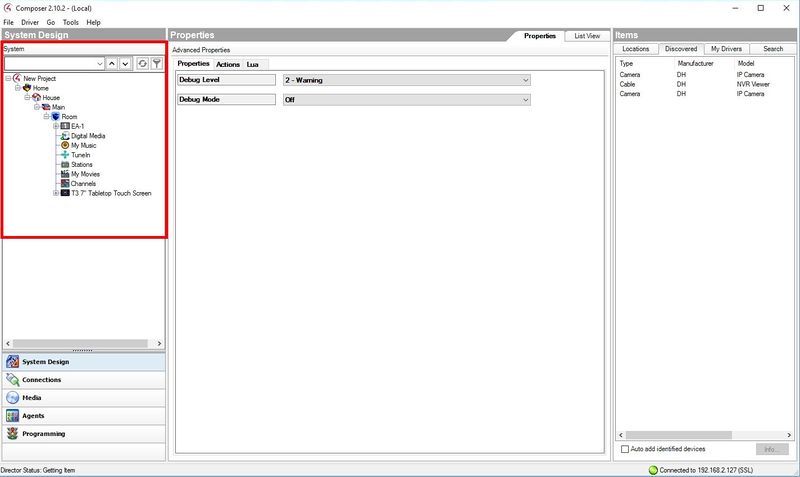
7. Added devices will auto populate the device tree on the left side of the screen
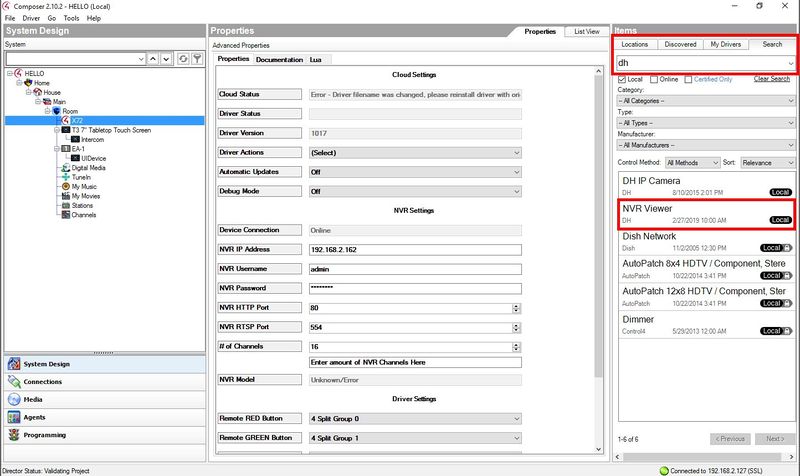
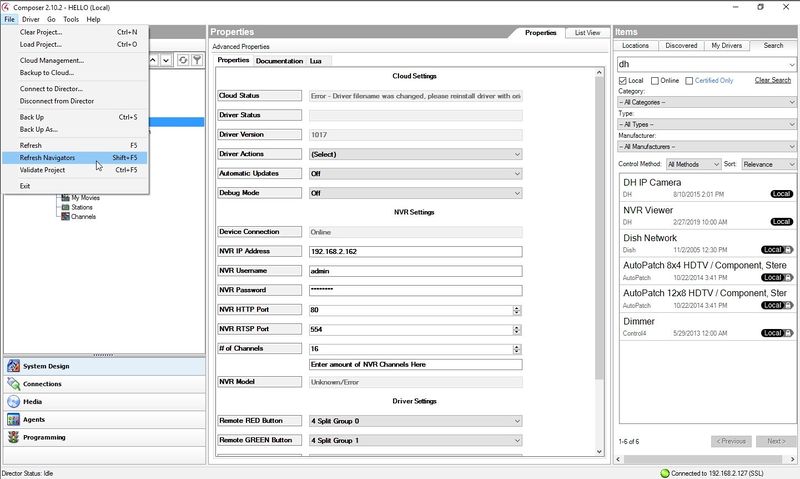
8. On the right side of the screen click the Search tab, then enter 'dh' and press Enter.
Double Click NVR Viewer in the list
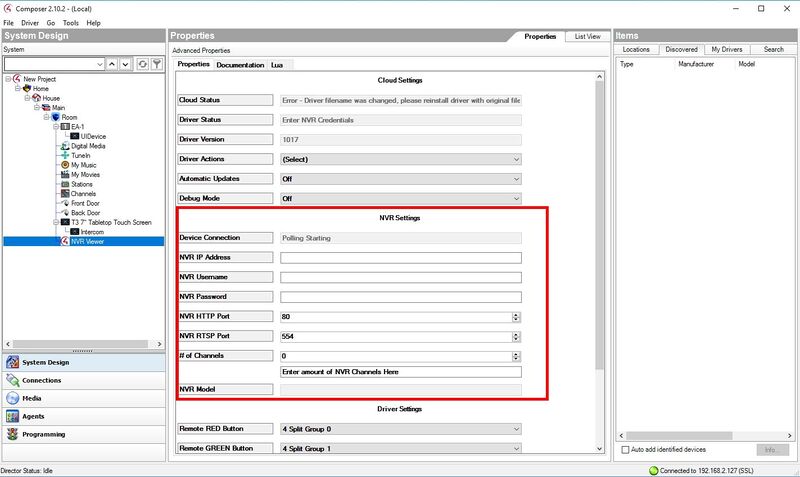
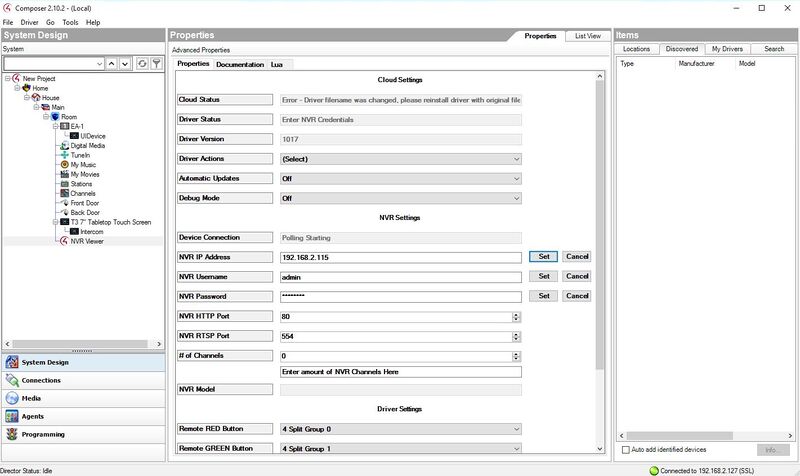
9. The recorder will be added to the device tree on the left. Enter the NVR settings in the center of the page, such as local IP and username/password, and # of Channels should be the number of video streams added to the recorder.
10. After entering each field, click Set next to each field to save each setting
The NVR setup is complete, now the video streams must be defined through the Composer software
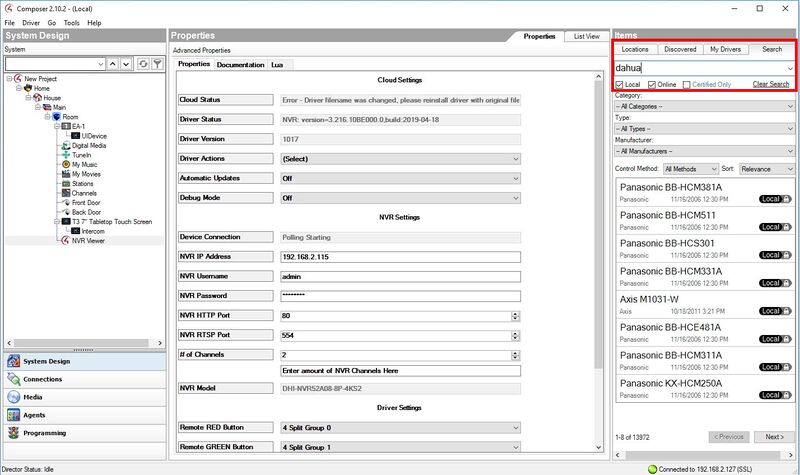
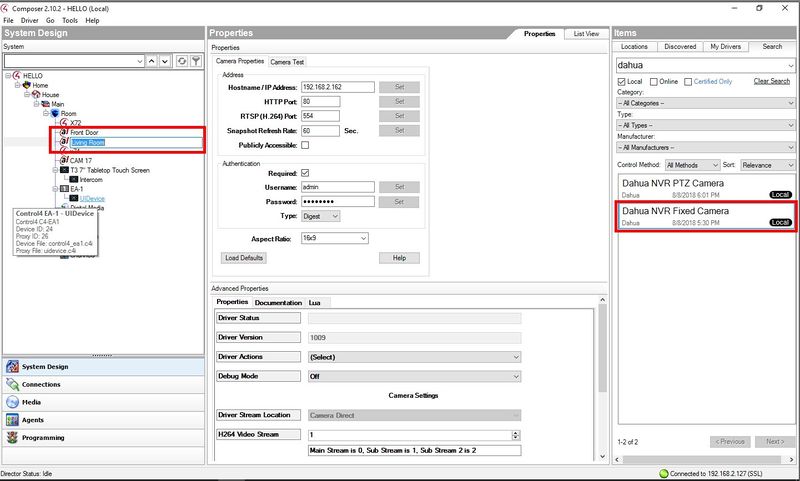
11. To integrate the video streams from the IP cameras added to the recorder, click on the Search tab in the top right of the page, then enter "dahua" to filter the device types and press Enter
12. Right click the search result that is listed as 'Dahua NVR Fixed Camera' and select 'Add to Project' OR double click the Dahua NVR Fixed Camera - repeat this process for as many cameras you wish to connect form the NVR.
Once added the camera will be lsited in the device tree as "Fixed Camera". You can click to highlight the device then press F2 to enter a new name for the camera
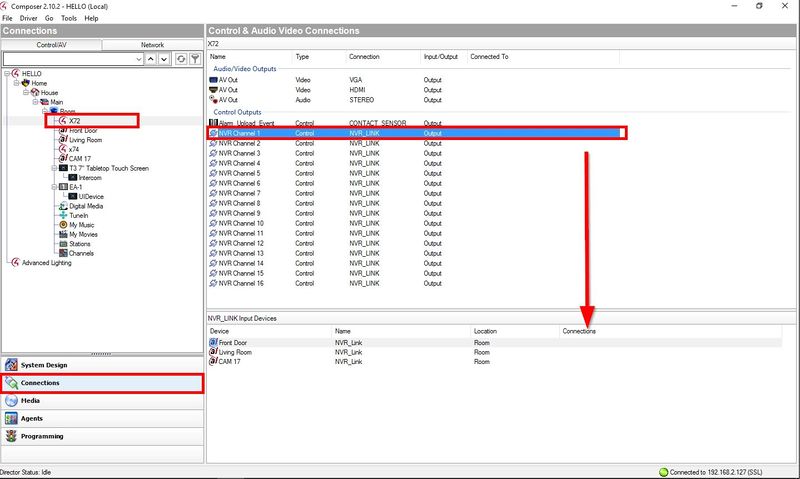
13. Select Connections on the left. Then select the NVR in the device tree.
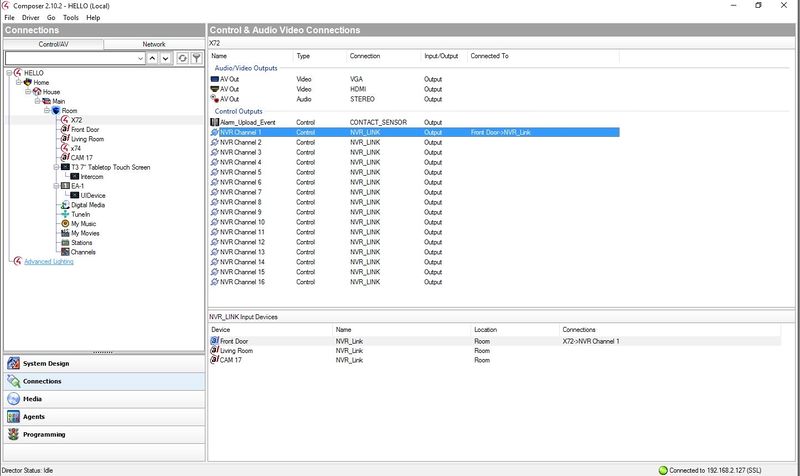
14. To associate the IPC from the NVR to this channel, drag and drop 'NVR_Link from the top window to one of the already created devices that appear in the bottom window.
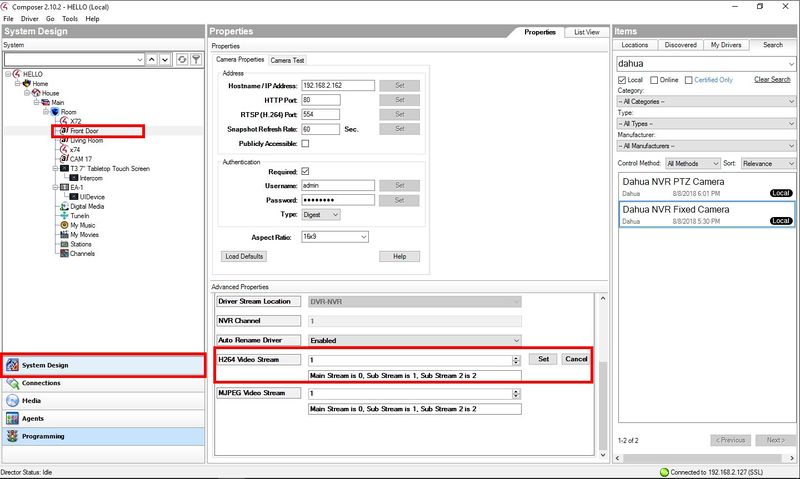
15. The sub stream must be adjusted
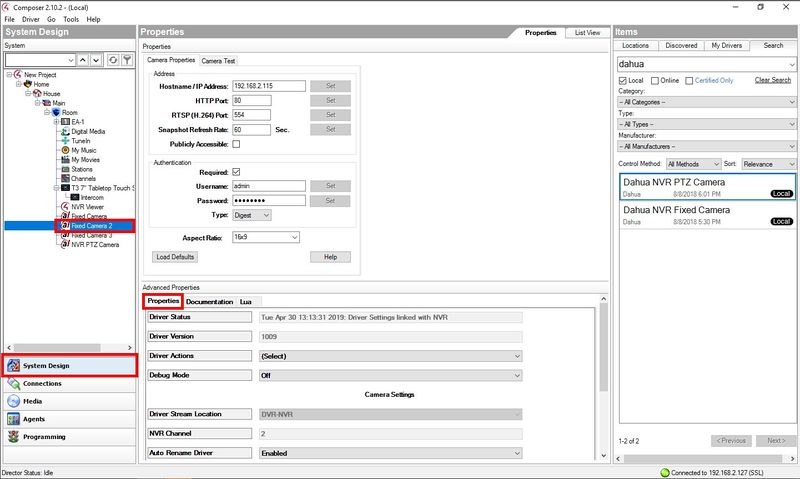
Go to System Design on the left Select the camera form the device tree
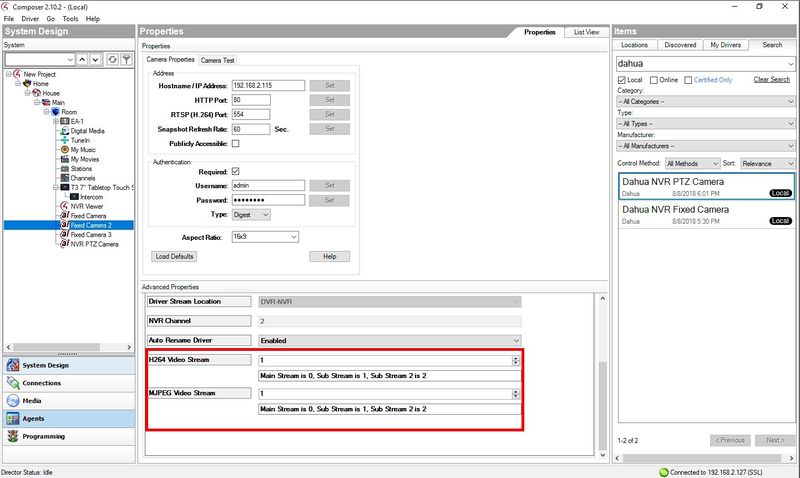
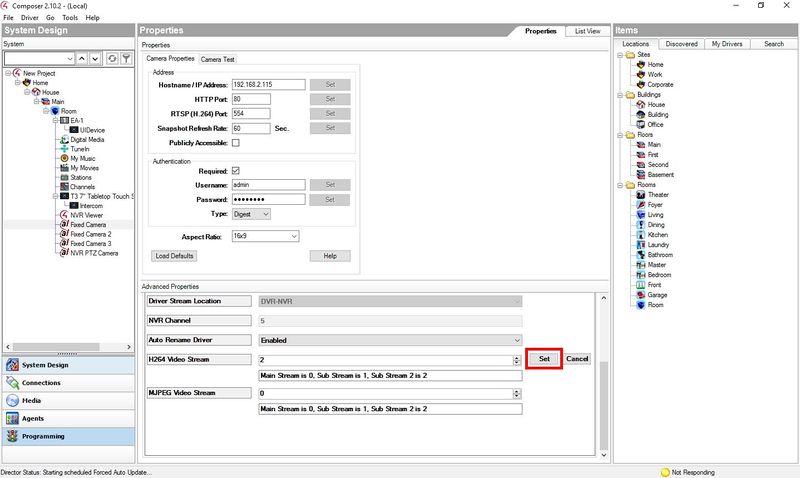
Under Advanced Properties change the H264 Video Stream value to 1 then click Set
16. To update the project to other Control4 devices, in Composer go to File>Refresh Navigators
Note - Setting Stream Type
It is necessary to configure the Control4 interface to pull the substream video from the Dahua device rather than the main stream. Pulling the main stream can cause delays in streaming video which can result in slow video streaming on the Control4 Panel.
Under the Advanced Properties of the selected device:
Change H264 or MJPEG Video Stream to 1
Click Set to save the setting
