3rd Party VMS/Control4/Setup Video Feeds
How to Setup Video Feeds on Dahua IP Camera or Recorder
Description
This article will show you how to configure a video stream from a Dahua device for integration with Control 4
Prerequisites
- Control4 Composer
- Control4 Driver for Dahua Recorders
- https://my.control4.com/ Account
- Dahua Device configured for Static IP or DHCP Reservation
- Control4 Firmware for Dahua Device
Video Instructions
Step by Step Instructions to Use Main Stream
Note: Certain older Control4 equipment require MJPEG for video stream (HC800, HC250, Infinity Touchscreens etc..). If these older devices are used at property, the dealer MUST enable Sub Stream and set to MJPEG. If dealer is using T3 and EA controllers, MJPEG does not need to be used
- Log into NVR or use GUI and go to Setup
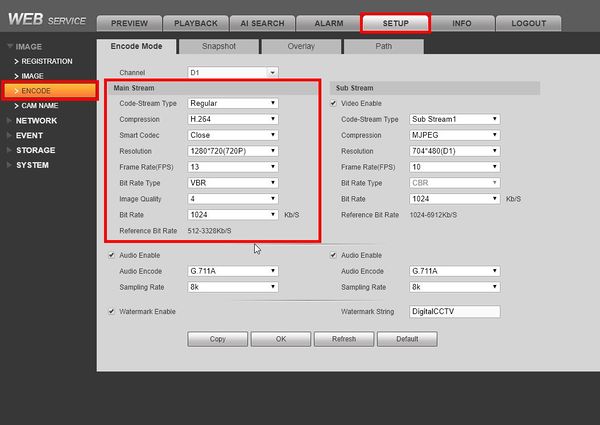
- Select IMAGE, ENCODE
- Choose Proper Channel (repeat for each channel)
- Change Main Stream Settings to the following (note: these settings are best practices; individual systems may require modification of these settings for certain applications)
1. Code-Stream Type: Continuous
2. Compression: H.264
3. Resolution: 1280*720(720P)
4. Frame Rate(FPS): 13
5. Bit Rate Type: VBR
6. Bit Rate: 1024
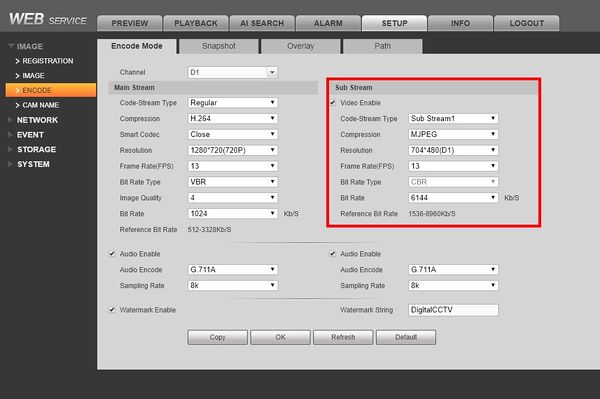
IF MJPEG is required do the following:
1. Enable Sub Stream on Channel
2. Compression: MJPEG
3. Resolution: 704*480(D1)
4. Frame Rate(FPS): 13
5. Bit Rate: 1024
Step by Step Instructions to Use Sub Stream
NVR Instructions
1. Make sure the Recorder has been updated to the correct supported firmware:
The full list of supported firmware can be found at 3rd Party VMS/Control4
Firmware version used for this guide: V3.216.10BE000.0Build Date:2019-04-18
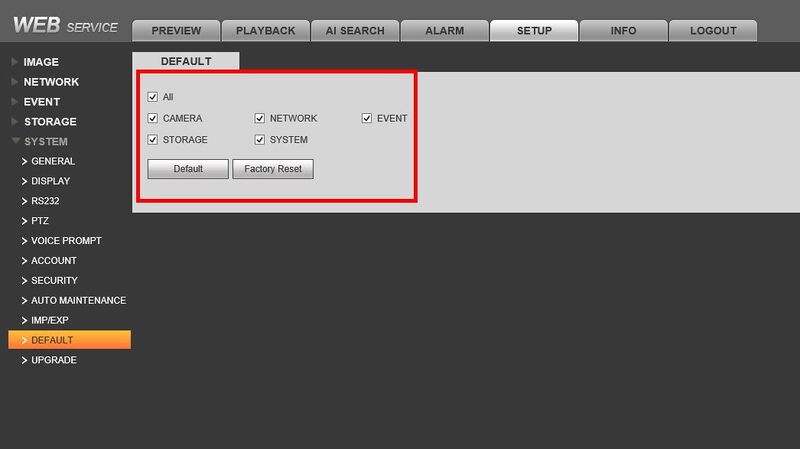
Also make sure the recorder is factory defaulted before beginning setup by going into Setup>System>Default>Factory Reset
1.b. Make sure the monitor has been connected to the same local network as the devices. For wifi setup:
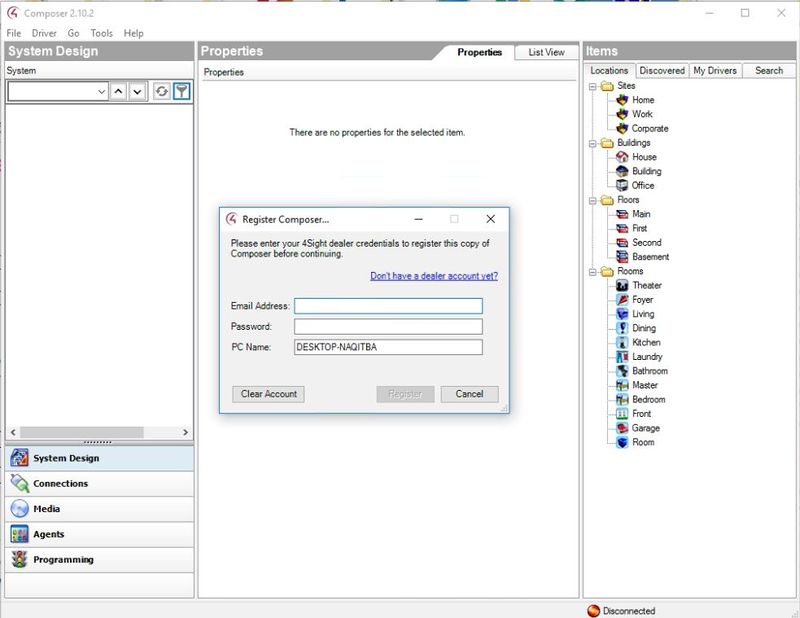
2. Open Control4 Composer. If this is the first time loading the program, you will be prompted to enter your Control4 account credentials:
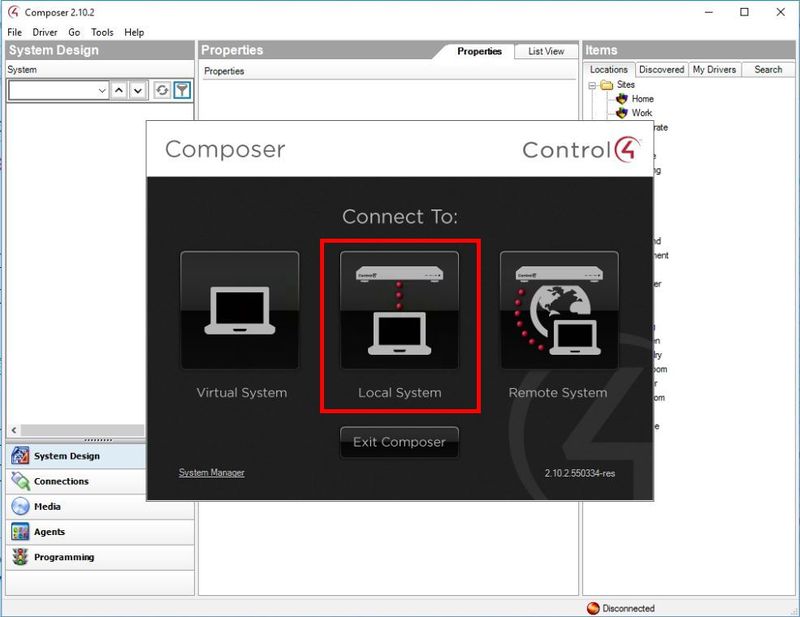
3. After logging in a prompt will appear. Select the type of connection the computer has to the Control4 Controller. Make sure the controller is powered on and connected to the network. In this case the computer is on the same network as the EA1 Controller, so Local System is selected
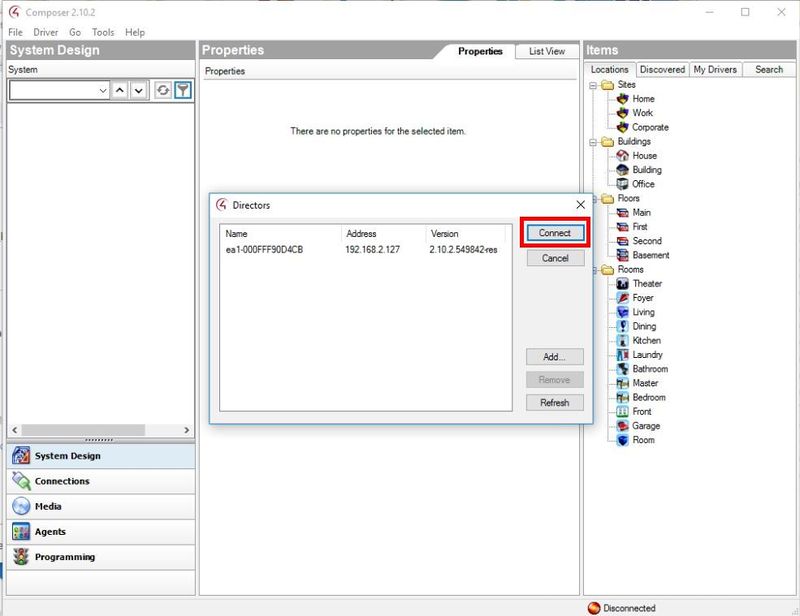
4. The software will scan the local network and give a prompt with any discovered devices. Select the controller then click Connect
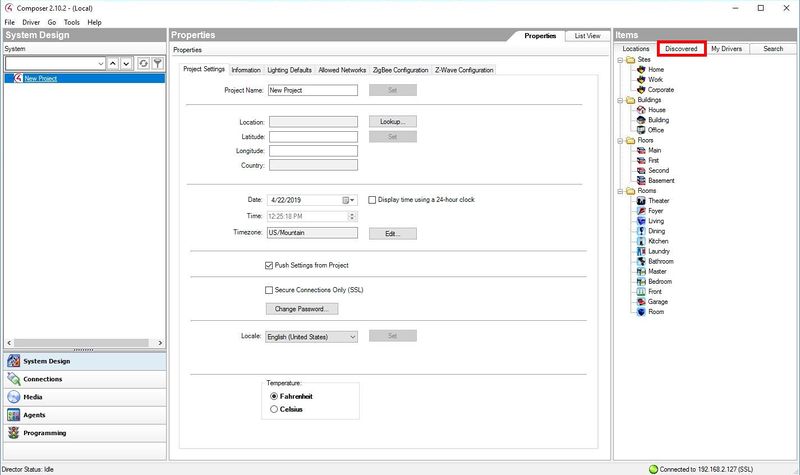
5.To begin adding devices, select the 'Discovered' tab in the System Design interface to pull up devices on the local network that have been automatically detected by the software
6. Begin by adding the Control4 devices on the network, such as the C4-EA1 Controller and Wireless Monitor. You can double click the item in the list to add or Right Click>Add to Project
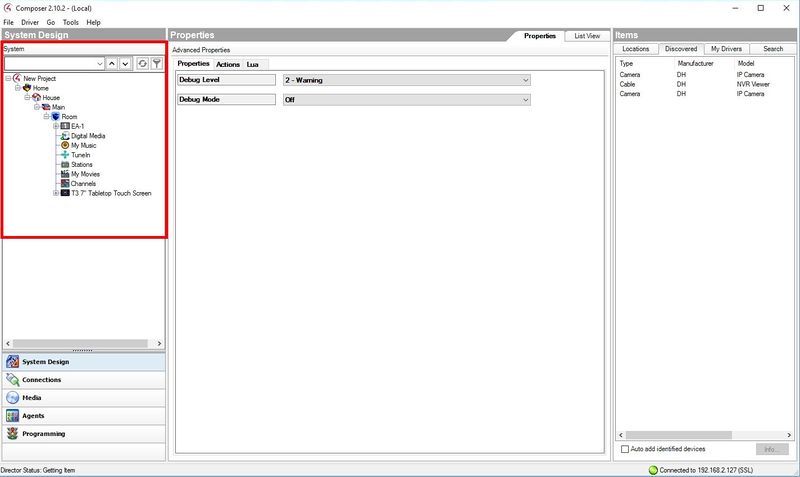
7. Added devices will auto populate the device tree on the left side of the screen
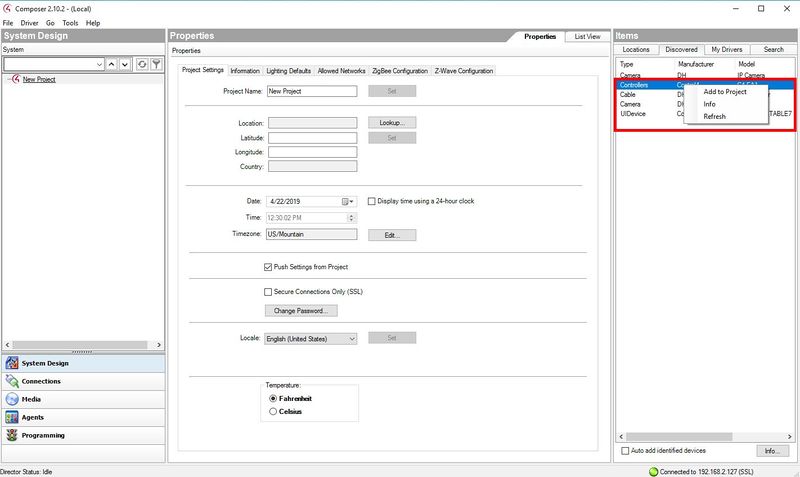
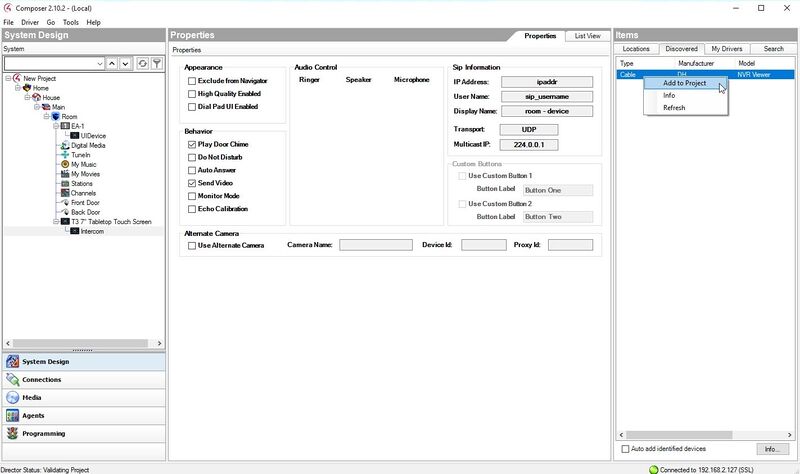
8. Right click the Dahua Recorder from the Discovered devices list and select Add to Project
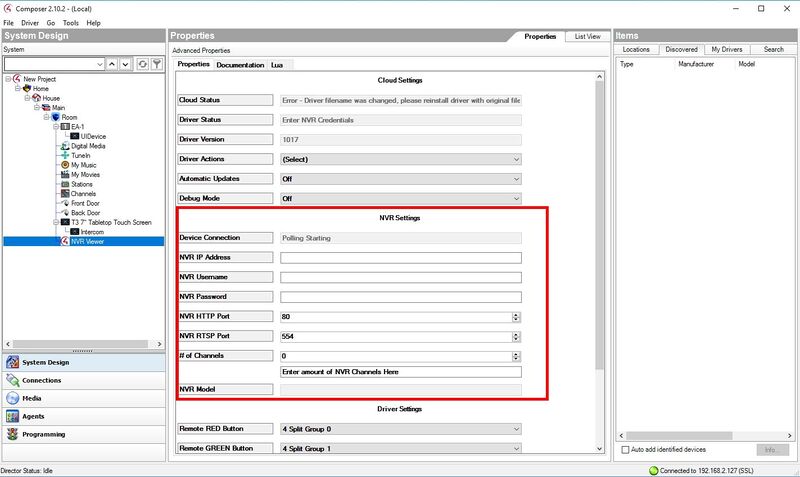
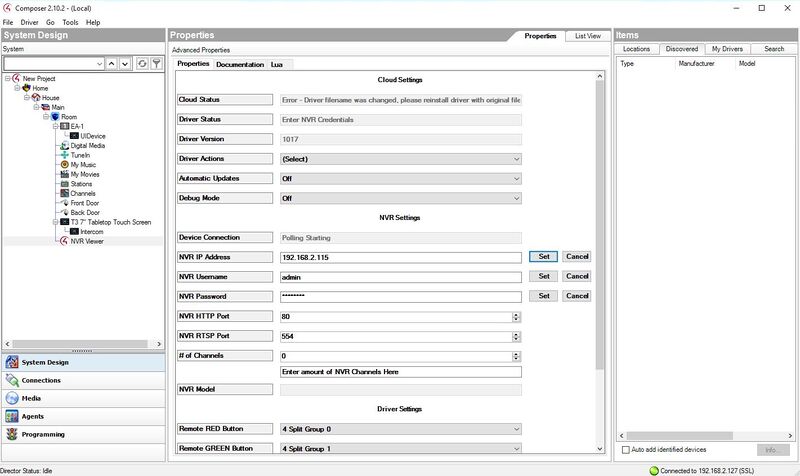
9. The recorder will be added to the device tree on the left. Enter the NVR settings in the center of the page, such as local IP and username/password, and # of Channels should be the number of video streams added to the recorder.
10. After entering each field, click Set next to each field to save each setting
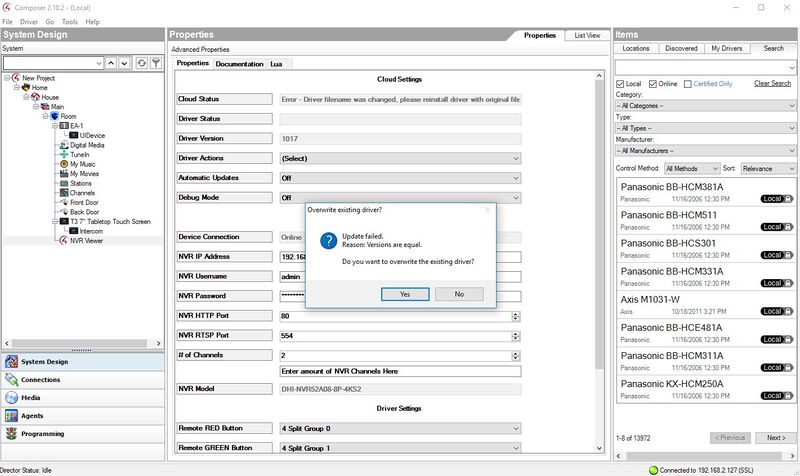
11. To update the driver, right click the device in the list, 'NVR Viewer' by default, and select Update Driver. Locate the directory where the dahua_camera_nvr_fixed.c4z driver was downloaded to and Select Open.
If you receive a prompt asking to overwrite the current file, make sure you select Yes
The NVR setup is complete, now the video streams must be defined through the Composer software
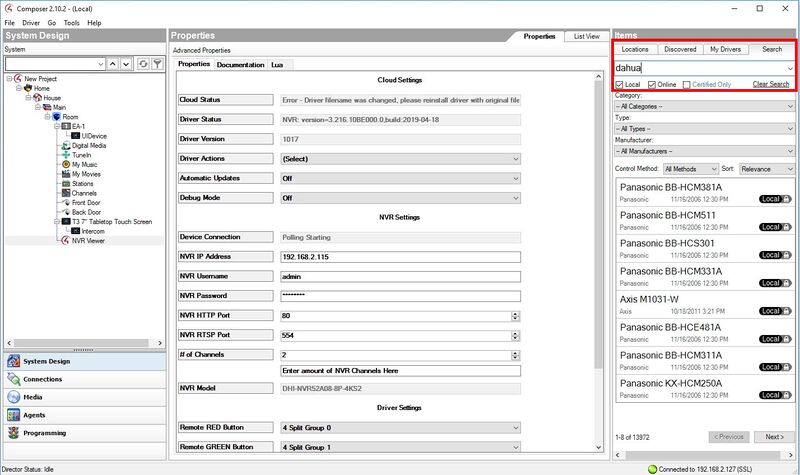
12. To integrate the video streams from the IP cameras added to the recorder, click on the Search tab in the top right of the page, then enter "dahua" to filter the device types and press Enter
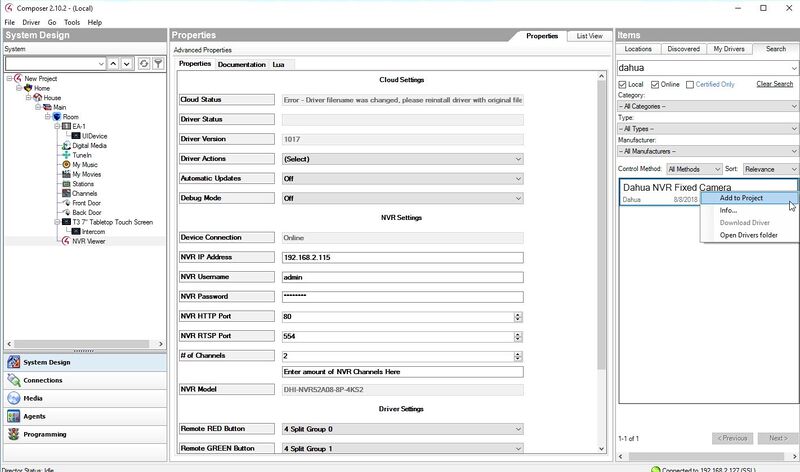
13. Right click the search result that is listed as 'Dahua NVR Fixed Camera' and select 'Add to Project' - this is the correct driver to add a video stream from an IP Camera that is already added to a Dahua NVR.
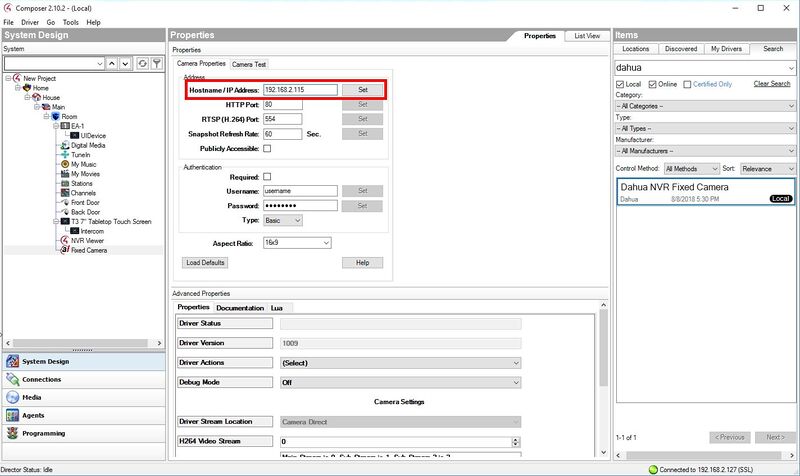
14. A device entry will appear in the tree as "Fixed Camera".
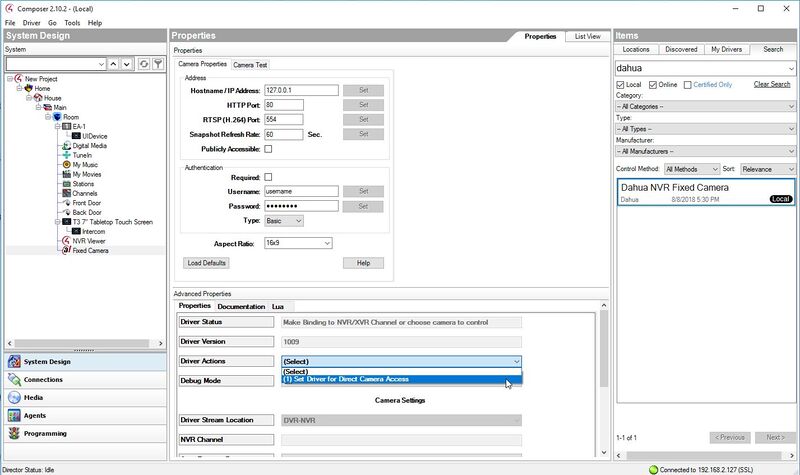
With Fixed Camera selected, under Advanced Properties in the center of the screen:
- Change the Hostname/ IP Address field to be the local IP of the NVR then click 'Set'
- Change the dropdown box next to 'Driver Actions' to 'Set Driver for Direct Camera Access'
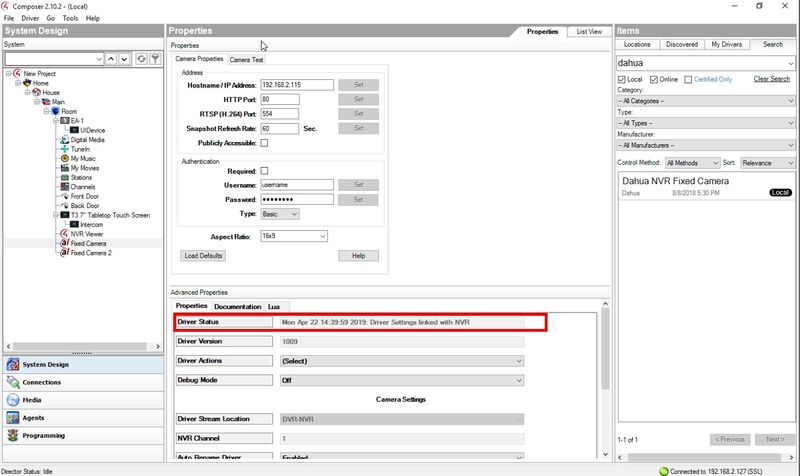
After a moment, the Driver Status will update if the connection to the NVR was successful:
Repeat the process for however many additional streams from the NVR are being integrated, in this guide 2 channels from the NVR are being added, so 2 devices were created in the same way.
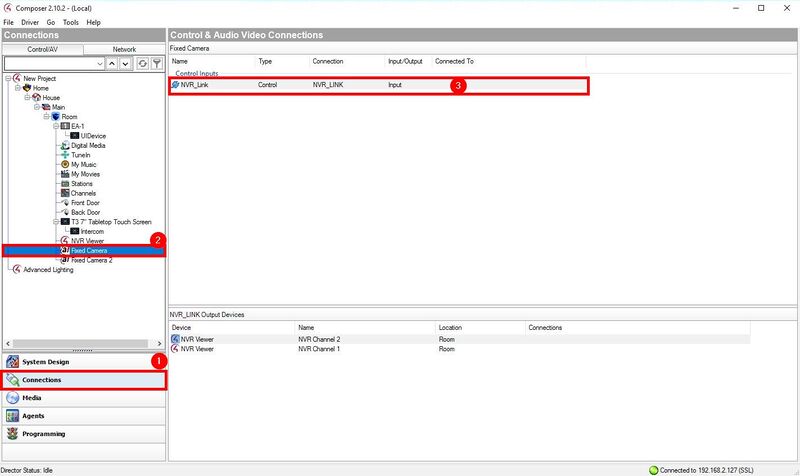
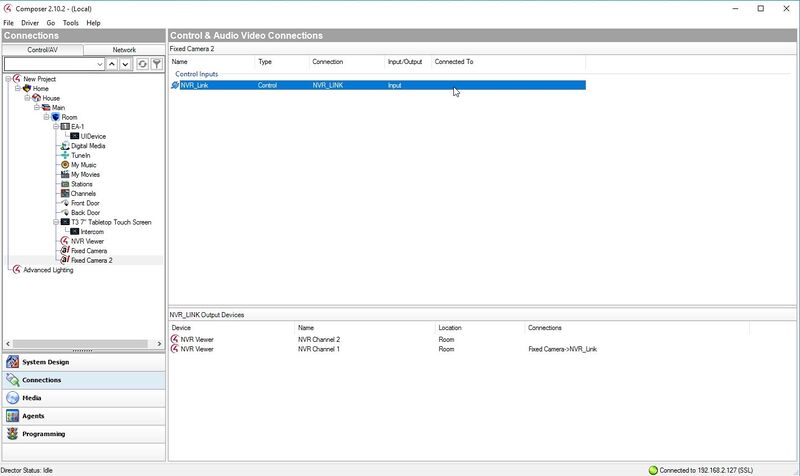
15. Once any additional Devices have been added to the tree, select Connections, then select the Devices just created in the Device Tree, then in the center of the screen under 'Control Inputs' select the 'NVR_Link' driver to configure the input.
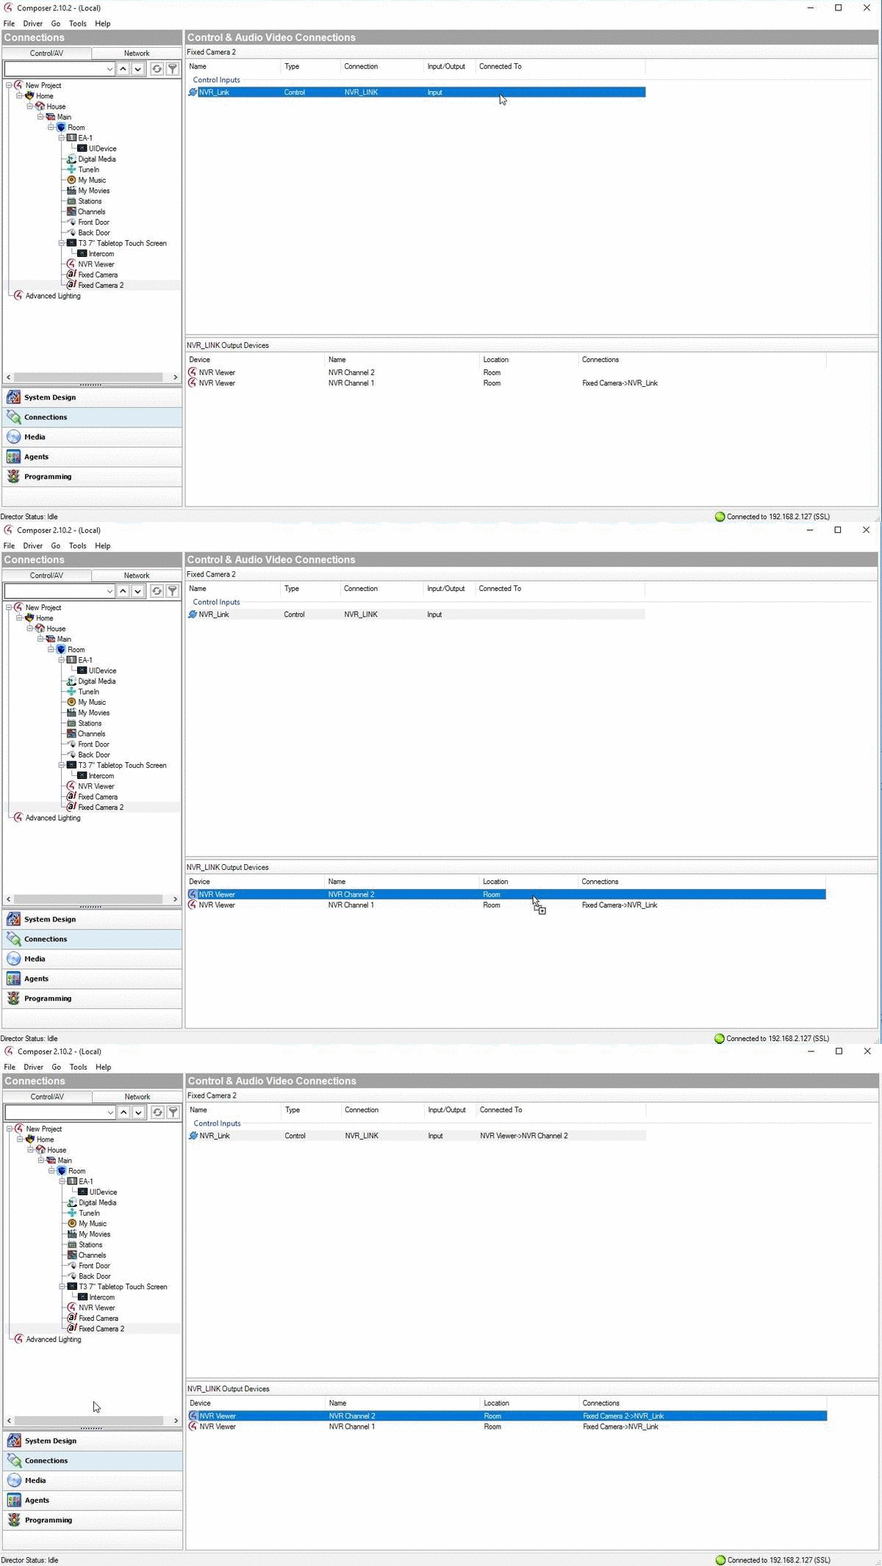
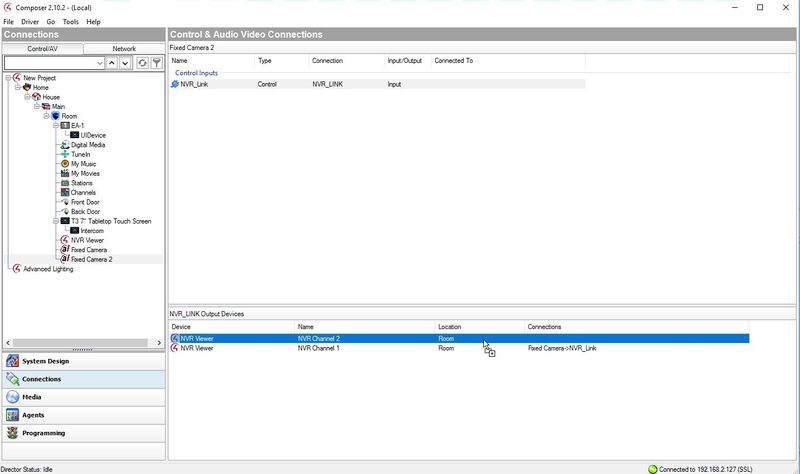
16. To associate the IPC from the NVR to this channel, drag and drop 'NVR_Link' from the top window and drop it on one of the Output Devices that appears in the bottom window.
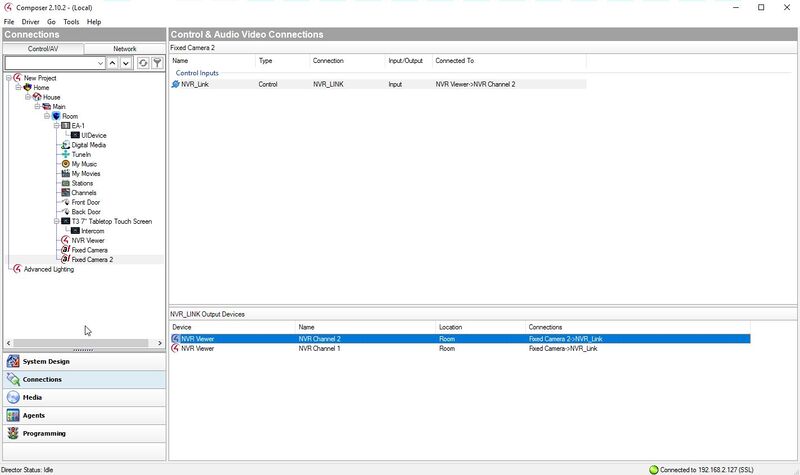
Under 'Connections' the channel will update with the connected stream
Once the device has been added - the stream type can be modified to pull either the Main or Sub Stream from the camera
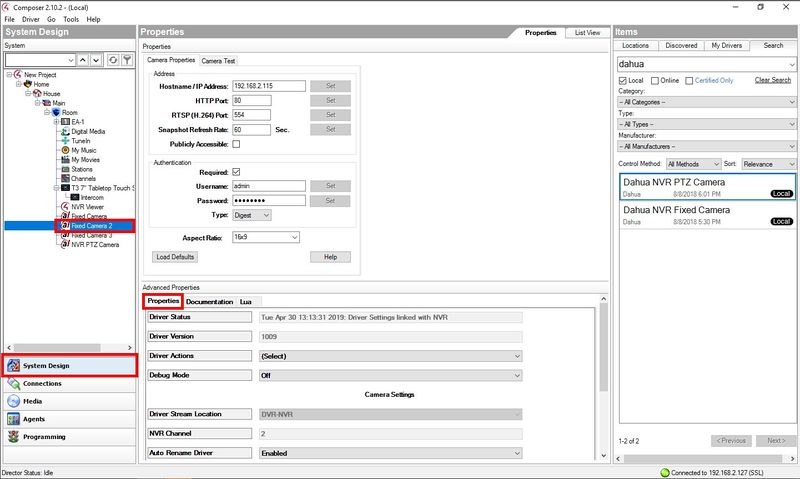
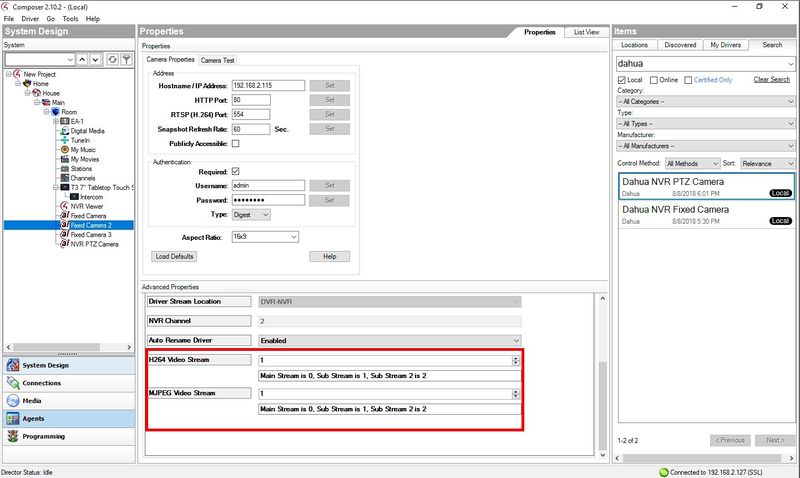
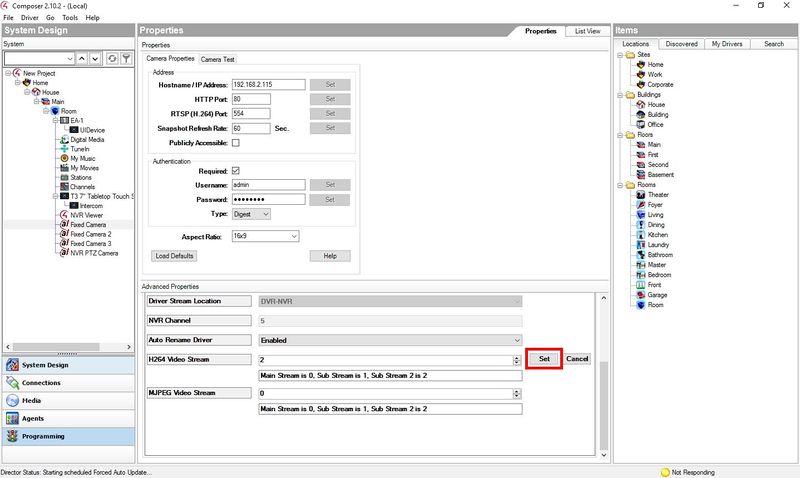
17. Select the device in the device tree, select System Design on the left, then under Properties you can modify Advanced Properties for the device
18. Scroll down until you see the H264 / MJPEG Video Stream dropdown windows.
Main Stream is 0
Sub Stream is 1
Sub Stream 2 is 2
Click Set once you make any changes to save
IP Camera Instructions
1. Make sure the camera has been updated to the correct supported firmware:
The full list of supported firmware can be found at 3rd Party VMS/Control4
Firmware version used for this guide: V2.800.10SA000.0.T, Build Date: 2019-03-14
Also make sure the camera is factory defaulted before beginning setup by going into System>Default>Factory Default
2. Open Control4 Composer. If this is the first time loading the program, you will be prompted to enter your Control4 account credentials:
3. After logging in a prompt will appear. Select the type of connection the computer has to the Control4 Controller. Make sure the controller is powered on and connected to the network. In this case the computer is on the same network as the EA1 Controller, so Local System is selected
4. The software will scan the local network and give a prompt with any discovered devices. Select the controller then click Connect
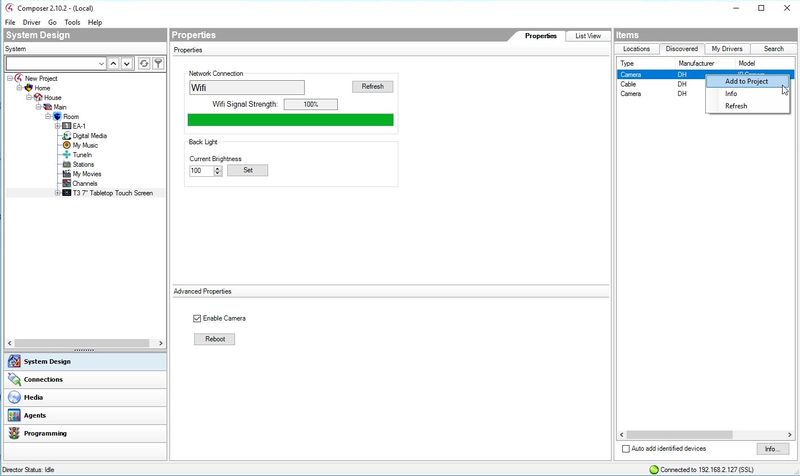
5.To begin adding devices, select the 'Discovered' tab in the System Design interface to pull up devices on the local network that have been automatically detected by the software
6. Begin by adding the Control4 devices on the network, such as the C4-EA1 Controller and Wireless Monitor. You can double click the item in the list to add or Right Click>Add to Project
7. Added devices will auto populate the device tree on the left side of the screen
8. Right click the Dahua IPC from the Discovered devices list and select Add to Project
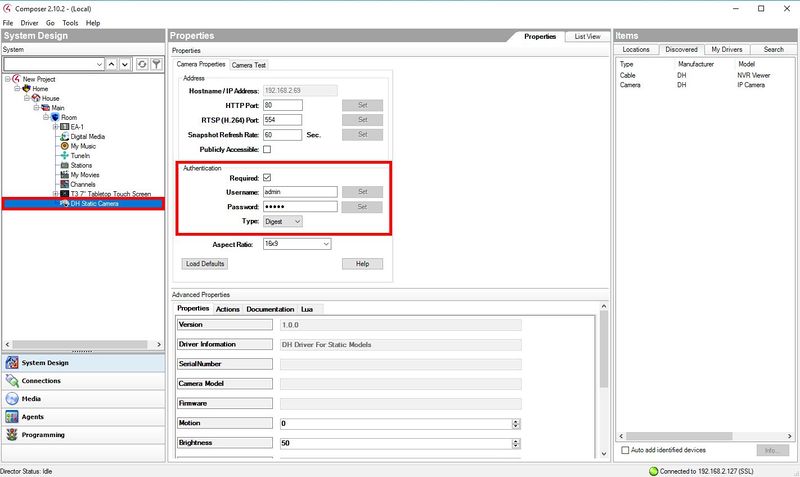
9 The camera will appear in the device tree list on the left. In the device Properties window in the center, enter the authentication information for the camera.
Enter the username/password for the camera (click 'Set' after making any adjustments) and make sure Authentication Type is set to 'Digest'
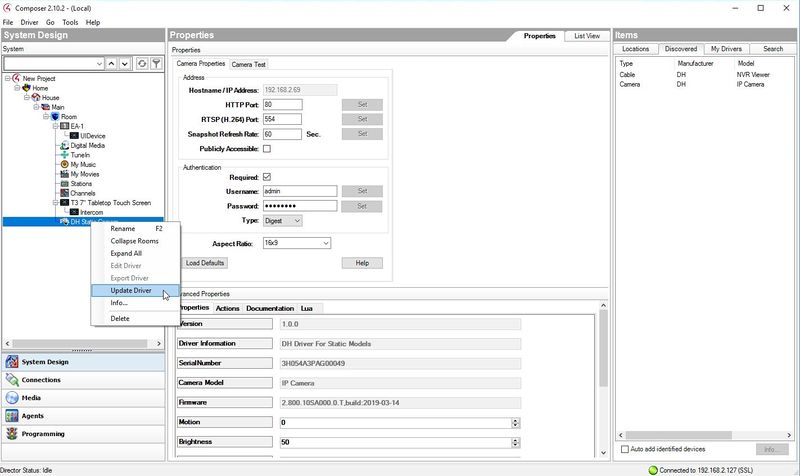
10. Right click the camera in the list and select 'Update Driver'
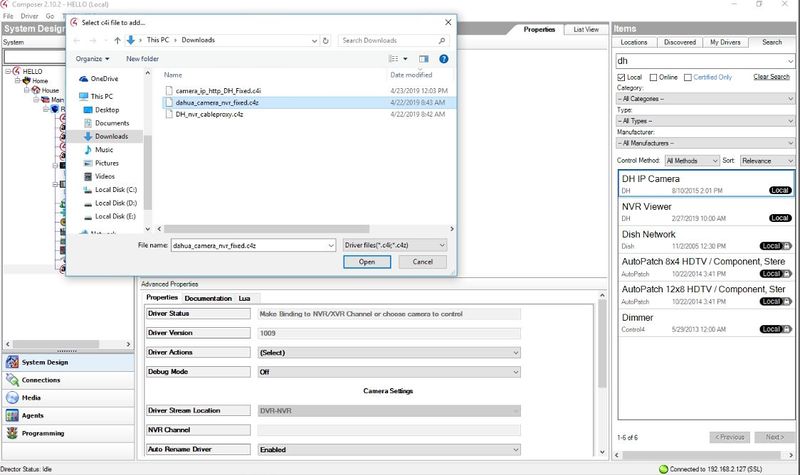
11. Navigate to the directory where the Dahua driver was downloaded to and select Open
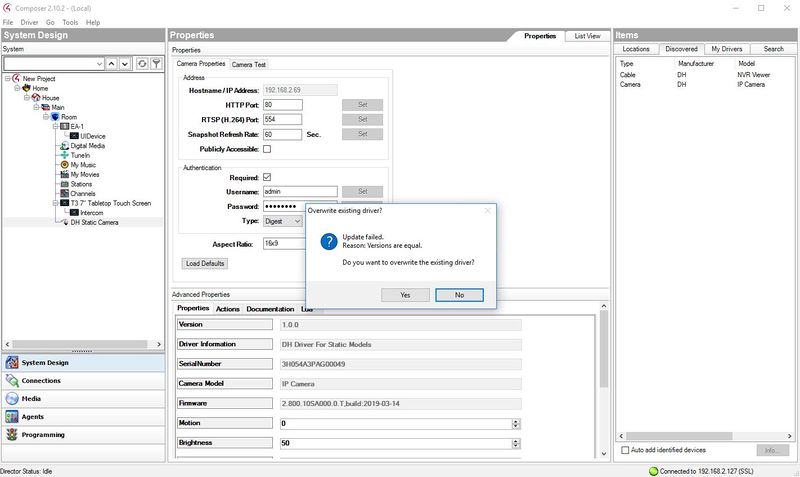
12. If you receive a prompt asking to overwrite, confirm the driver overwrite
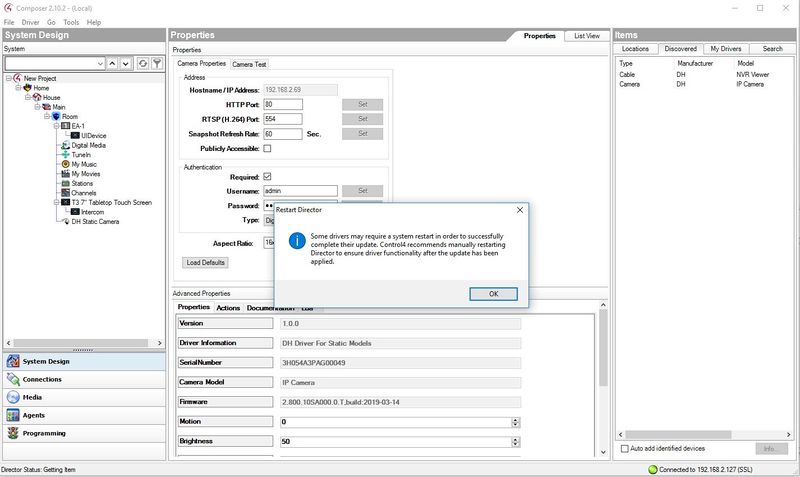
A prompt will also appear that recommends a restart after a driver update.
You can hold the ID button the on the controller for 5 seconds to restart the device, or power cycle the Control4 Controller to restart the director service. When the unit powers back on you can open Composer to make any further settings changes to the system.
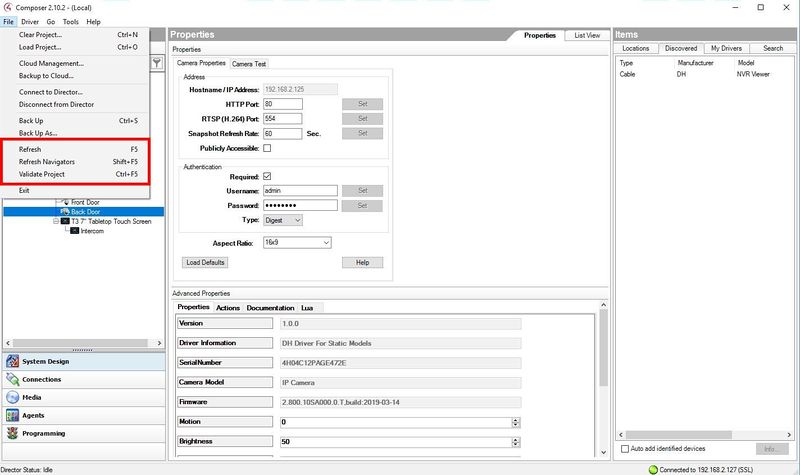
To manually update the Composer information from the computer to the controller, under File select Refresh Navigators
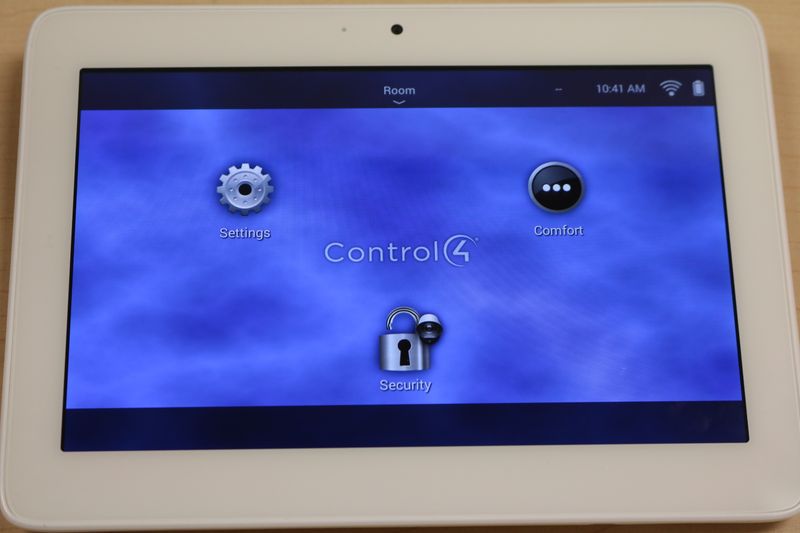
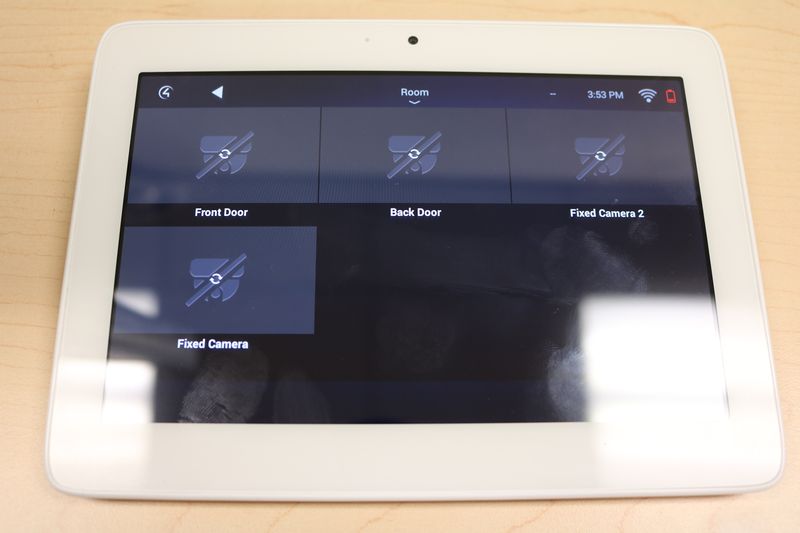
14. The camera stream will now appear under the 'Security' option in the Control4 interface, such as the Control4 Tabletop Touch Screen, which will be used for this guide.
Note Regarding Sub Stream Integration
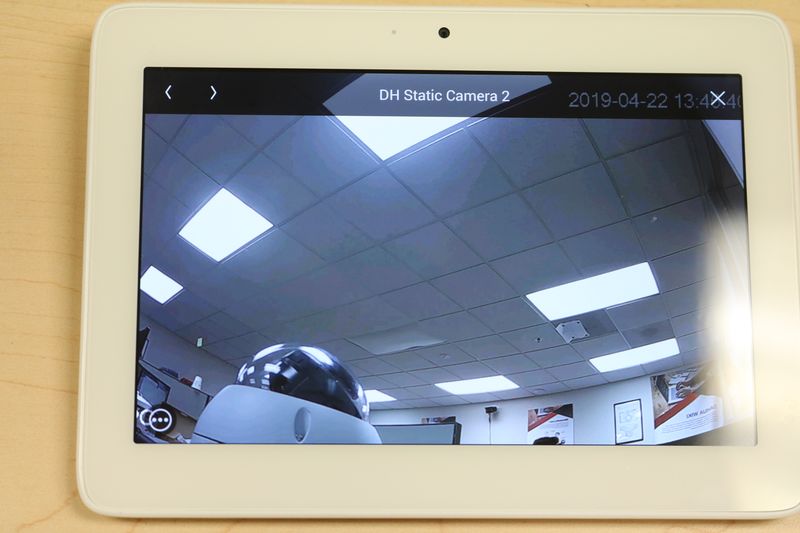
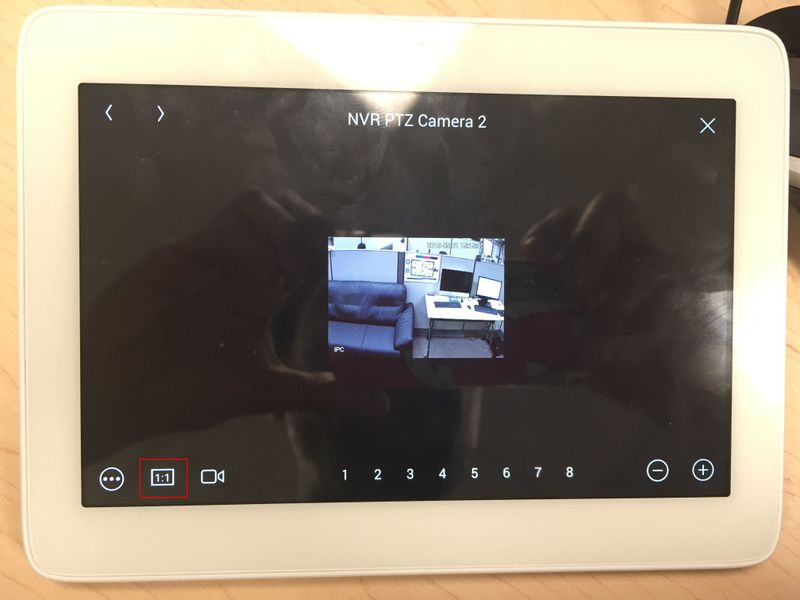
Please note if you switch the settings to access the lower resolution substream, then it may appear at it's resolution in any Control 4 interface, such as the wireless monitor:
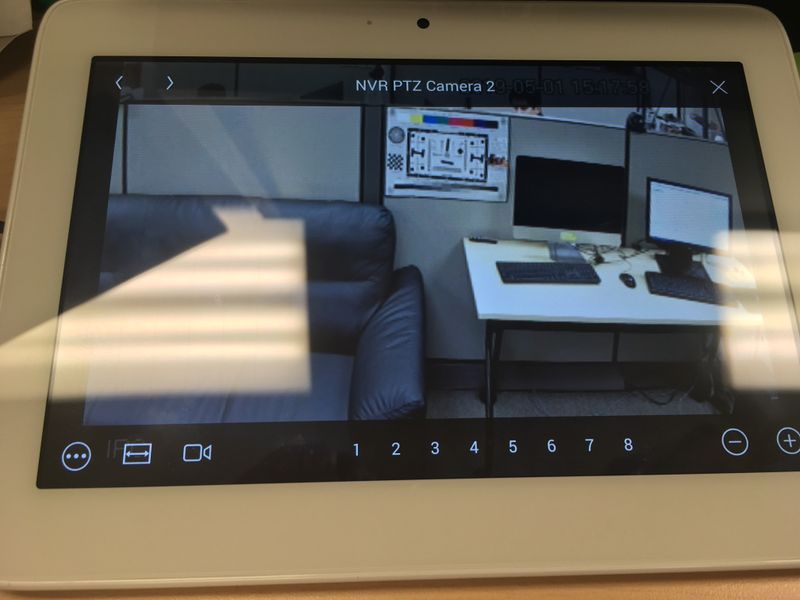
If that happens you can press the 1:1 icon below the video to make the stream go full screen:
