Thermal/Temperature Monitoring/3rd Party VMS/Milestone/Full Installation
Contents
Dahua Temperature Monitoring with Milestone Full Installation
Description
This guide will cover the full installation of Thermal Temperature Monitoring Solution with Milestone - XProtect Smart Client 2020 R1
Prerequisites
- Dahua thermal camera, Setup , Configured for Temperature Monitoring
- XProtect Smart Client 2020 R1
Video Instructions
Step by Step Instructions
Install Dahua Plugin
Description
This guide will show how to install the Dahua Thermal Plugin for Milestone
Prerequisites
Click to download the Dahua Thermal Plugin
- Dahua Thermal Plugin
- Milestone Corporate 2019 R3, device pack 10.8a
Video Instructions
Step by Step Instructions
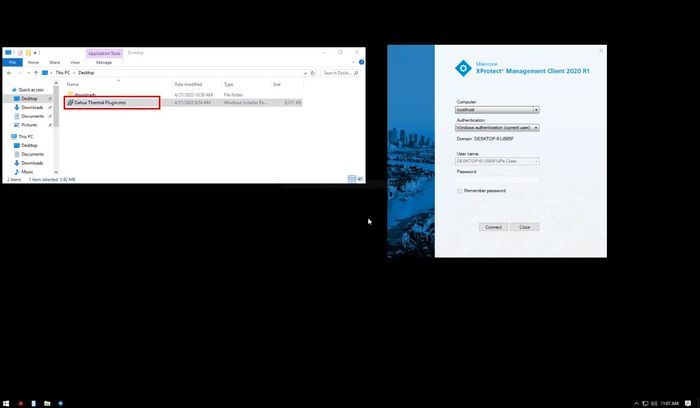
1. Double click Dahua Thermal Plugin.msi - Dahua Thermal Plugin to run the installer
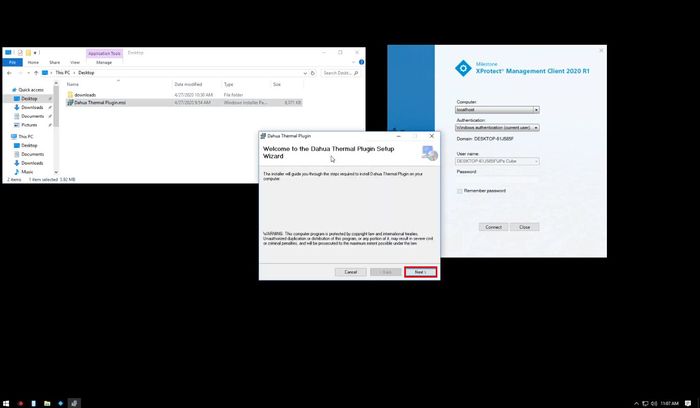
2. Click Next
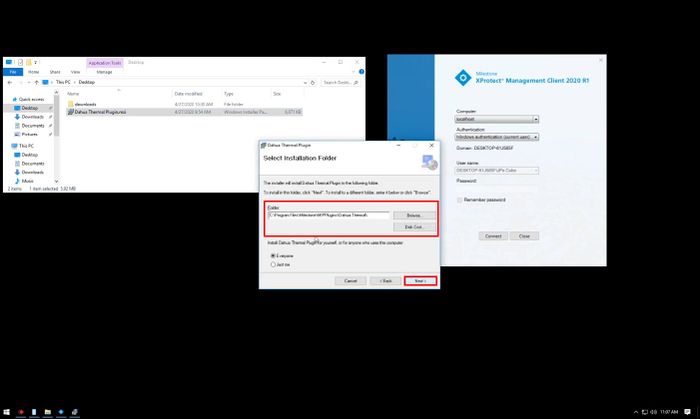
3. Select the installation path.
This should be chosen under the "MIPPlugins" folder which is inside the directory of the Milestone installation folder.
4. Proceed through the installer by clicking Next
Click Close once the installation is complete
 Configure Thermal Camera For Use With Milestone
Setup and Configure Camera
Description
This guide will show how to initialize and configure the Dahua Thermal camera in preparation for use with Milestone
Prerequisites
- Dahua Thermal camera powered on and connected to network
Step by Step Instructions
Initialize Camera
Please reference this guide for initial setup of the Thermal camera:
Stand Alone Thermal Camera Initial Setup
Configure Camera
1. Log into the Web interface of the camera
Click Setting
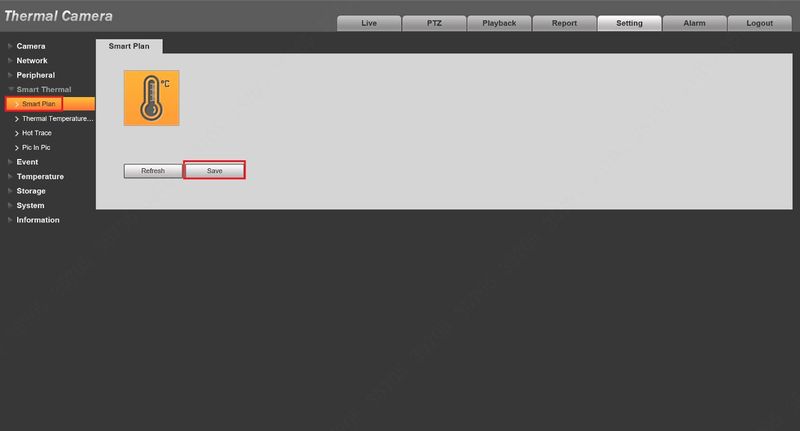
2. Click Smart Thermal > Smart Plan
Click to enable the Thermal Temperature Monitoring and click Save
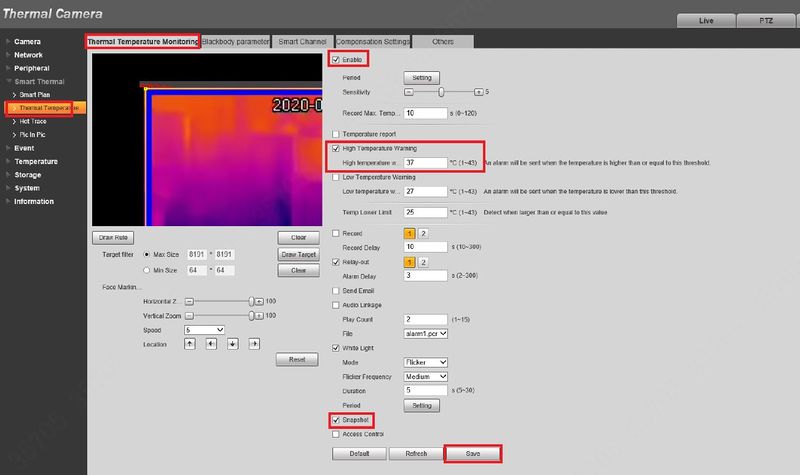
3. Click Thermal Temperature > Thermal Temperature Monitoring
- Check the box to enable
- Check the box to enable High Temperature Warning
Note: If you select 'Temperature report' , we will get all alarm notifications when camera detects any body temperature, no matter if it's higher or lower
- Check Snapshot
- Click Save
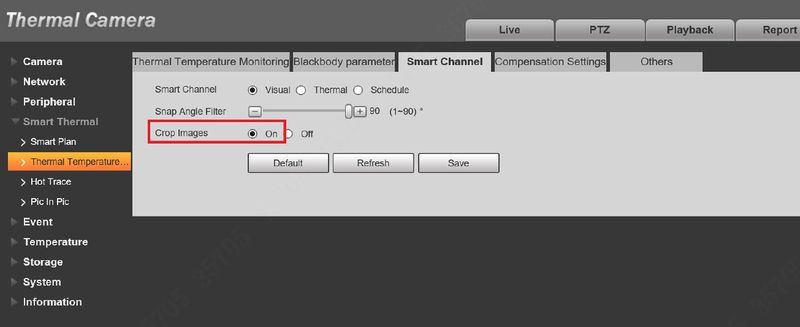
4. Click Smart Thermal > Smart Channel
Click to enable Crop Images
Click Save
 Add Thermal Camera and Configure Milestone Temperature Detection Alarm Event
Add Camera To Milestone and Configure Alarm Event
Description
This guide will show how to add the camera to the Milestone server and configure the alarm event for Temperature Monitoring
Prerequisites
- Milestone Corporate 2019 R3, device pack 10.8a
Step by Step Instructions
Add device in Milestone XProtect Management Client
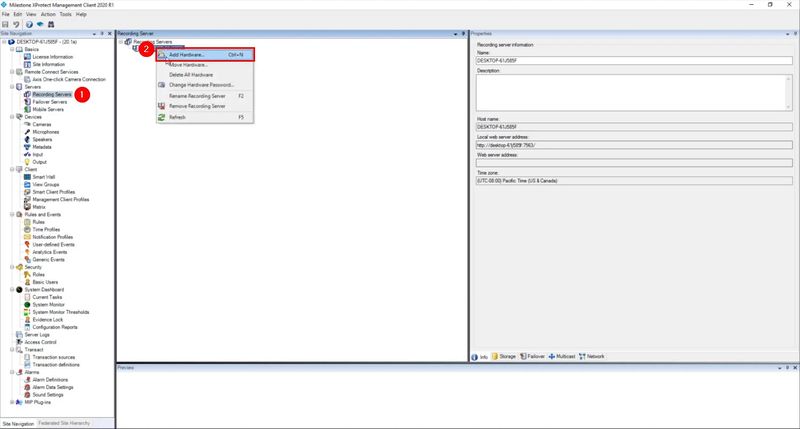
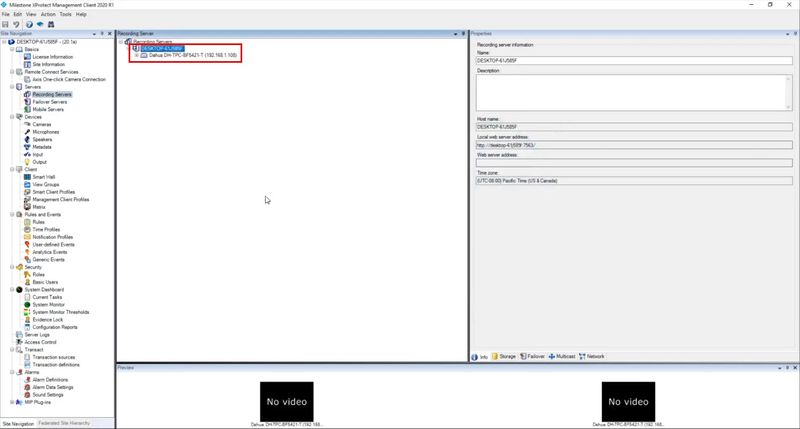
1. Add Device to Recording Server by left clicking Recording Servers
Right click the server
Select Add Hardware
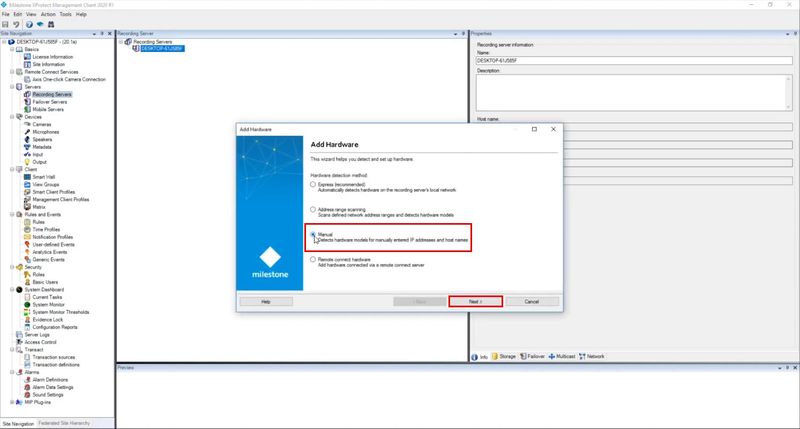
2. Select Manual Add
Click Next
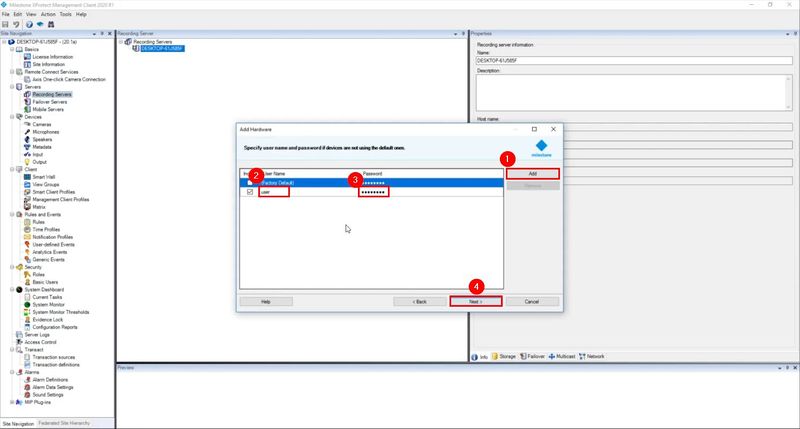
3. Click Add
Enter the username and password for the camera
Click Next
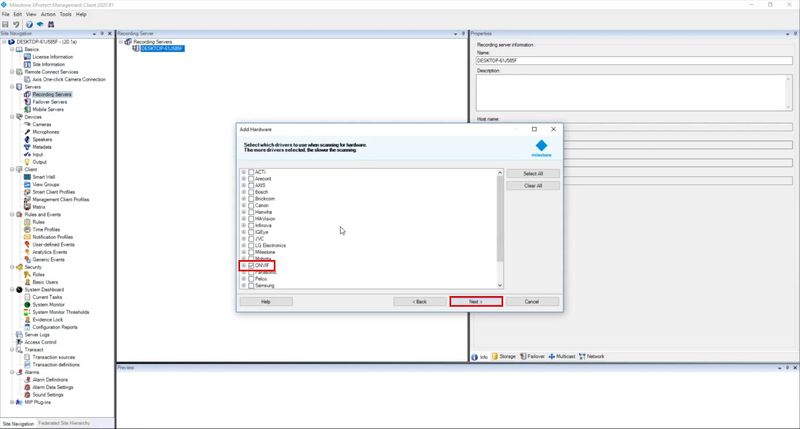
4. Select ONVIF for device driver
Click Next
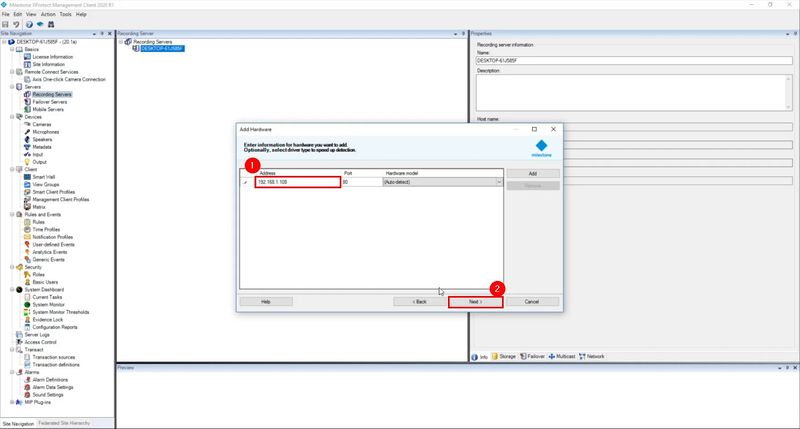
5. Enter the IP address of the camera
Select (Auto-detect)
Click Next
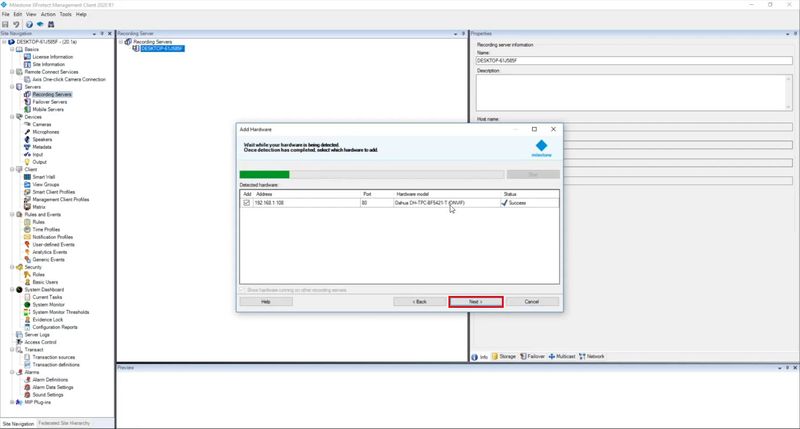
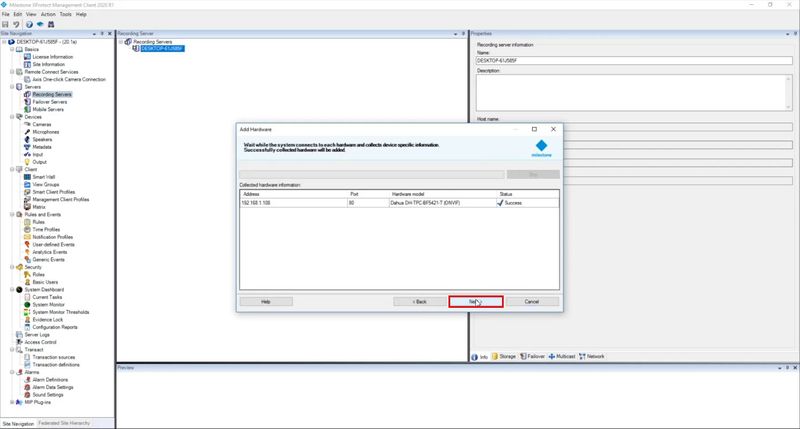
The software will automatically detect the camera
Click Next
Click Next
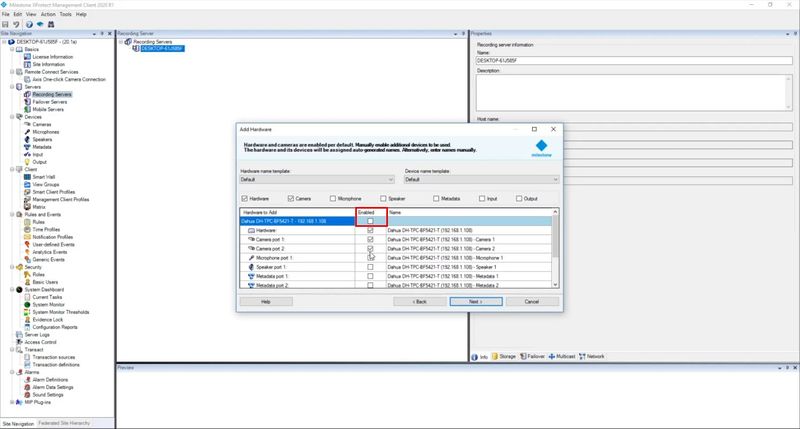
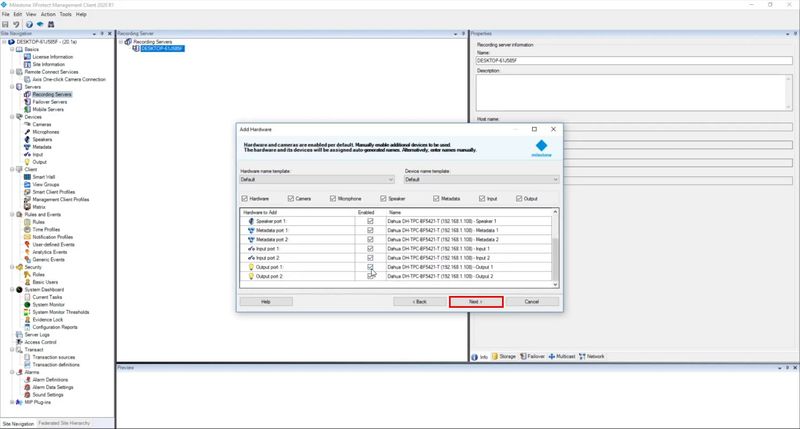
6. Check the box to enable all Hardware for the camera
Click Next
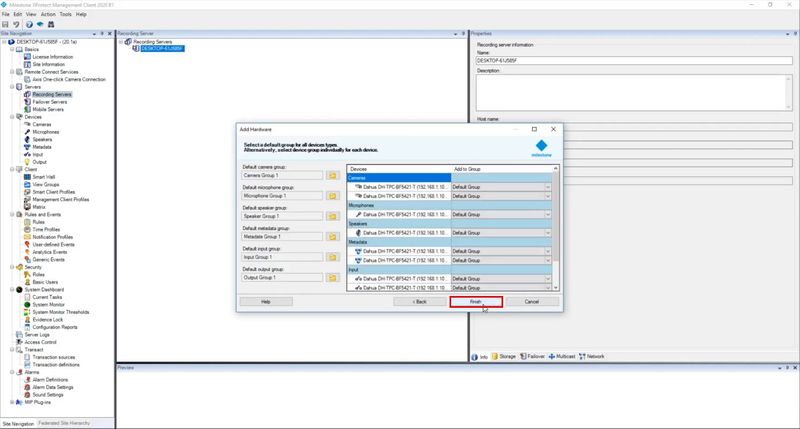
Click Finish
The camera will appear in the list
Add event in Milestone XProtect Management Client
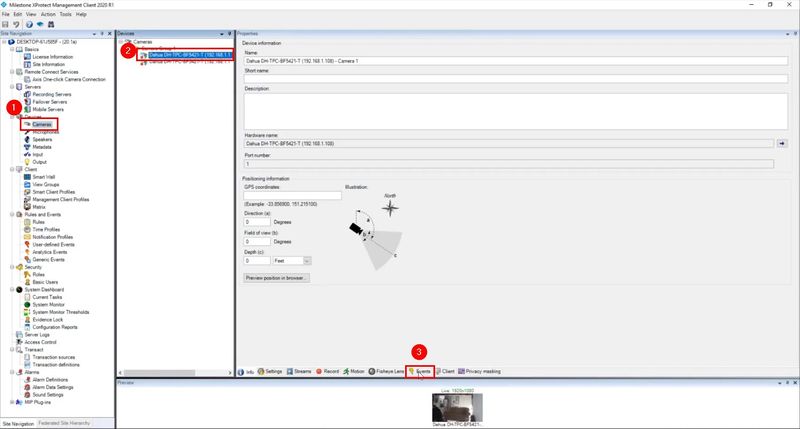
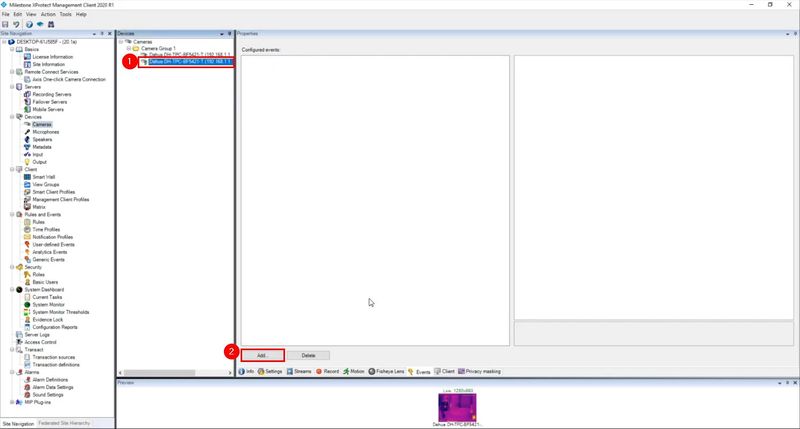
1. Select Cameras
Then left click to select the Thermal camera in the list
Click the Events tab
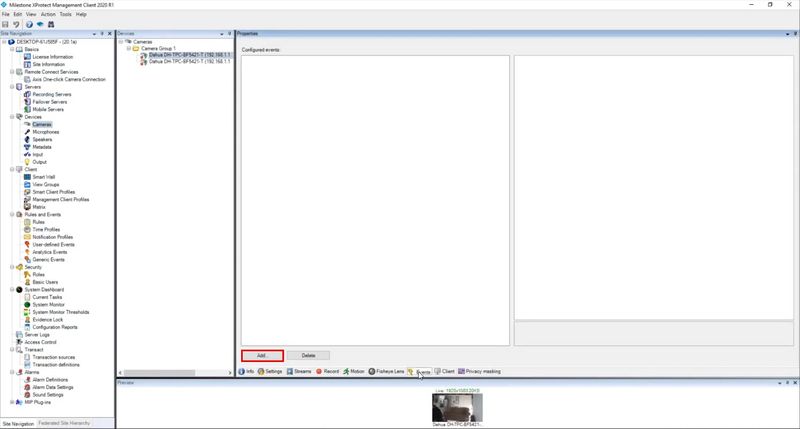
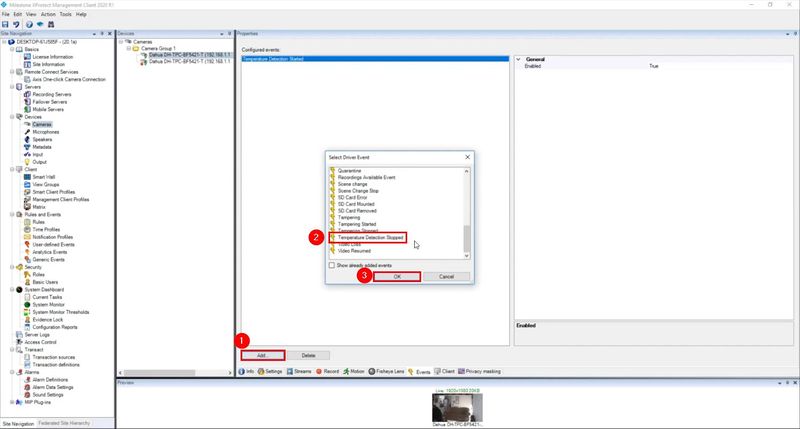
2. Click Add to create a new Event
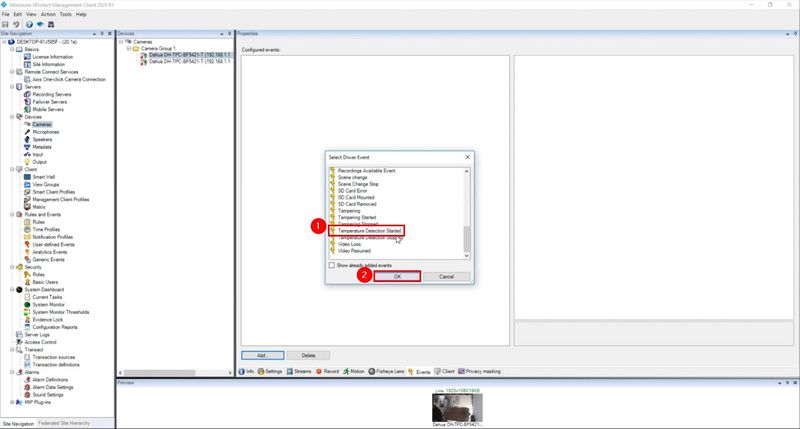
3. Find and select Temperature Detection Started in the list
Click OK
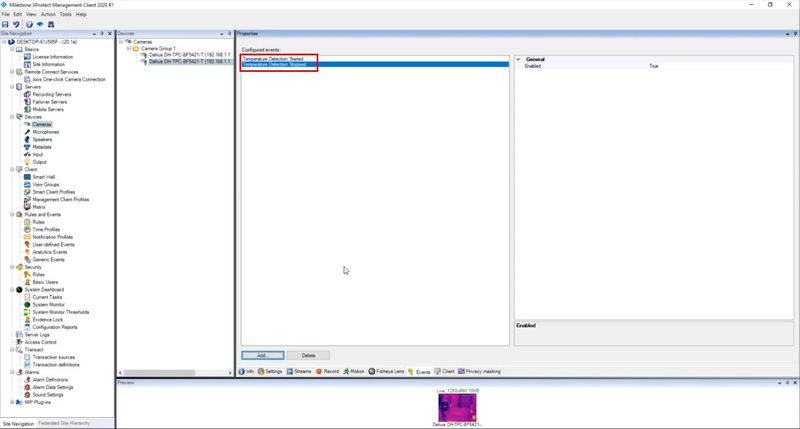
4. Repeat the process again to create a new Event
- Click Add
- Select Temperature Detection Stopped
- Click OK
5. Left click to select the 2nd channel of the Thermal camera
Repeat the previous steps on the 2nd channel to configure both events
Temperature Detection Started / Temperature Detection Stopped Event configured on 2nd channel:
Add rules for event
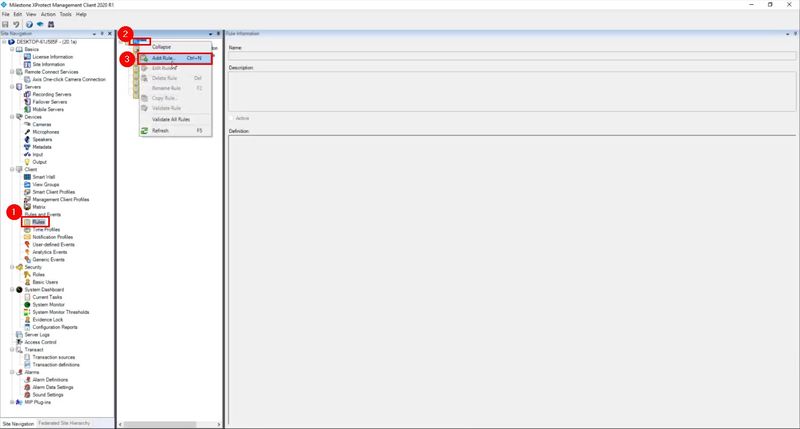
1. Select Rules
Right click Rules
Select Add Rule
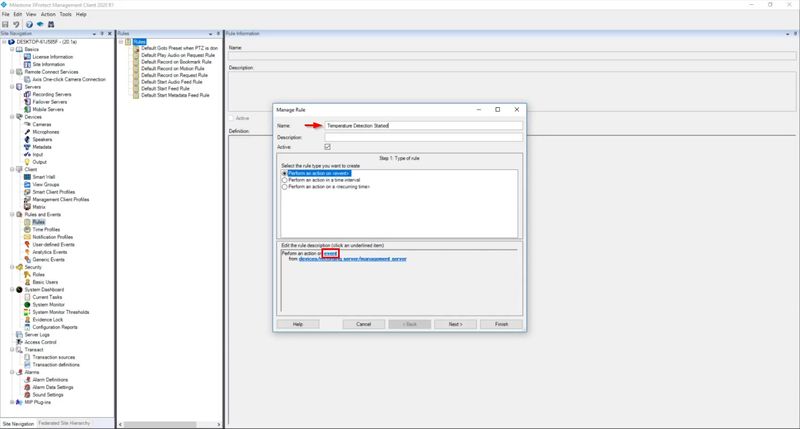
2. Enter a name for the Rule
Click event
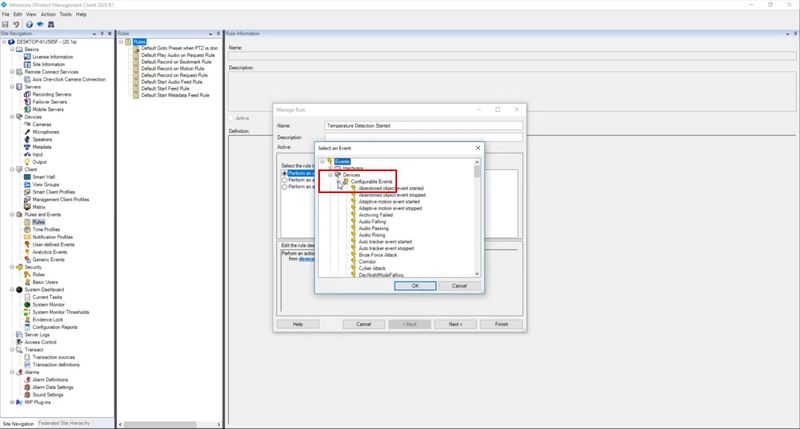
3. Select Devices > Configurable Events
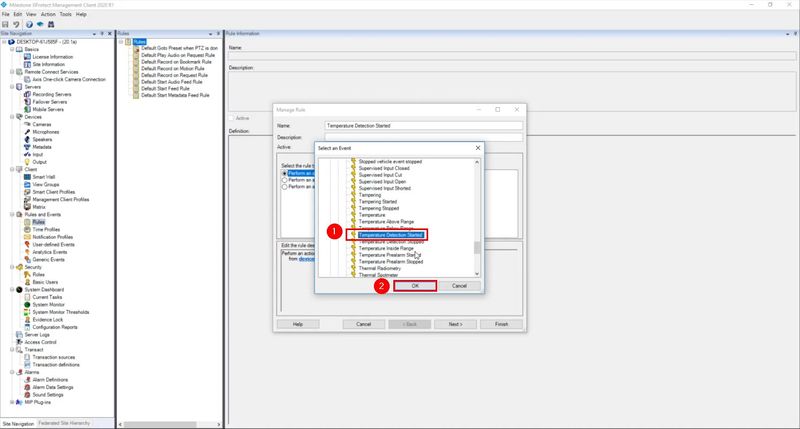
Find Temperature Detection Started in the list and click to select
Click OK
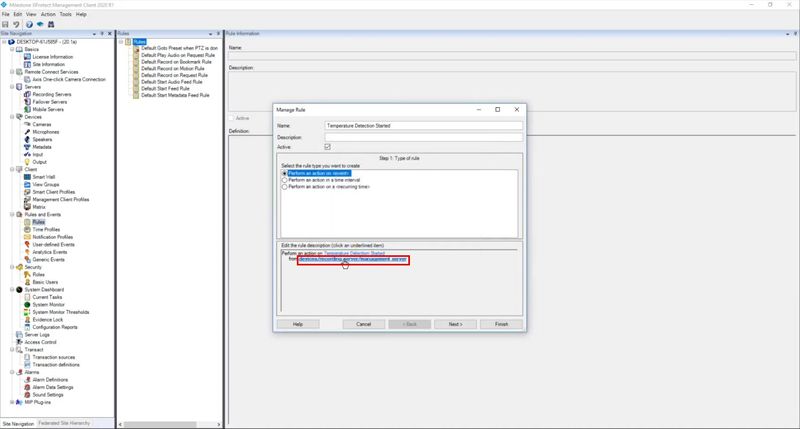
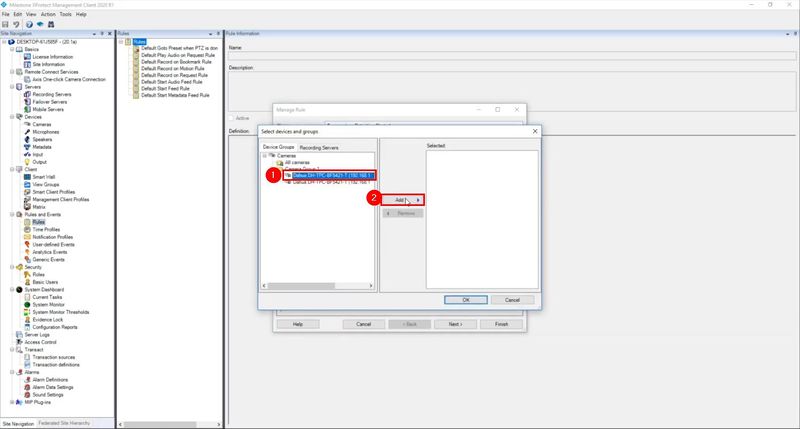
4. Click devices/recording/server/managementserver
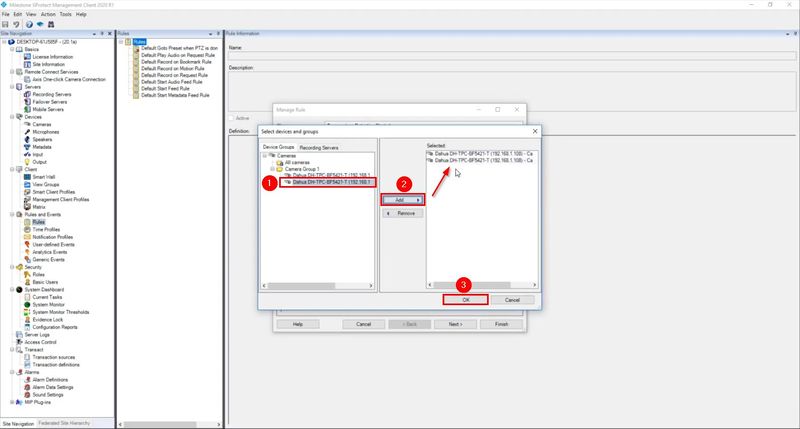
5. Left click to select the Thermal camera in the list
Click Add
6. Repeat the process for the 2nd channel
Click OK
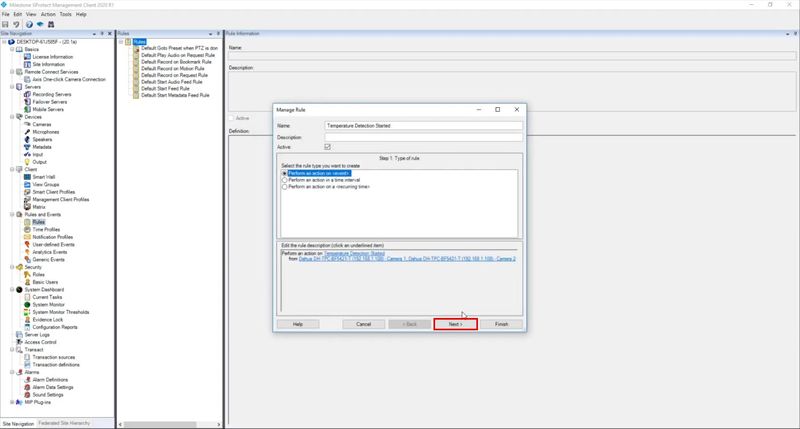
7. Click Next
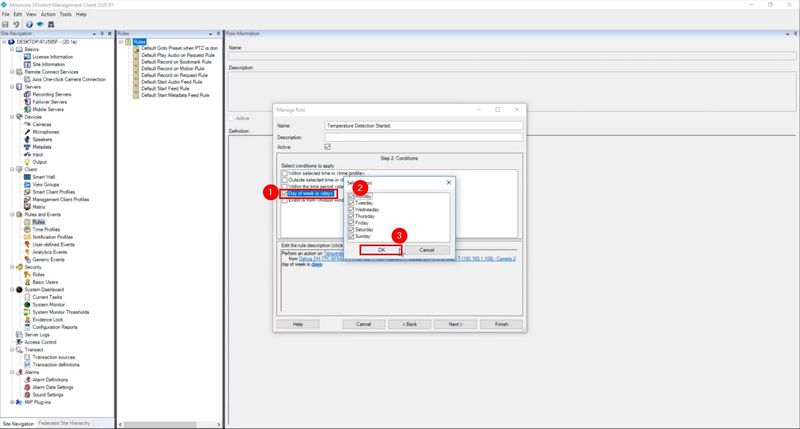
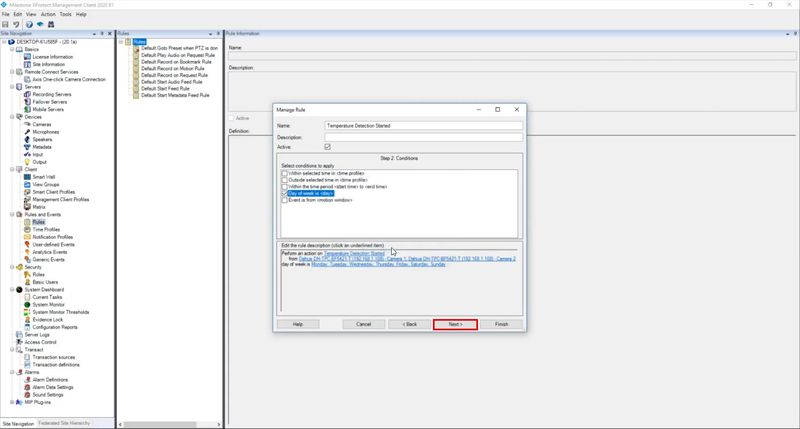
8. Configure the schedule for the event
In this example we select All days by clicking Day of week is then selecting all Days
9. Click Next
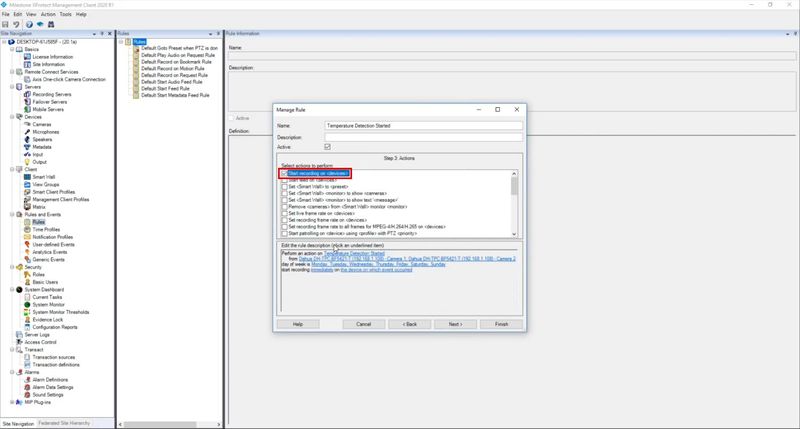
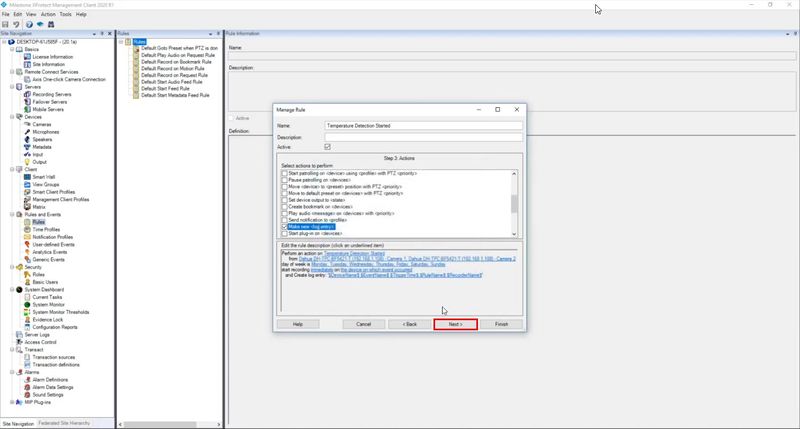
10. Select action to perform when the event is triggered
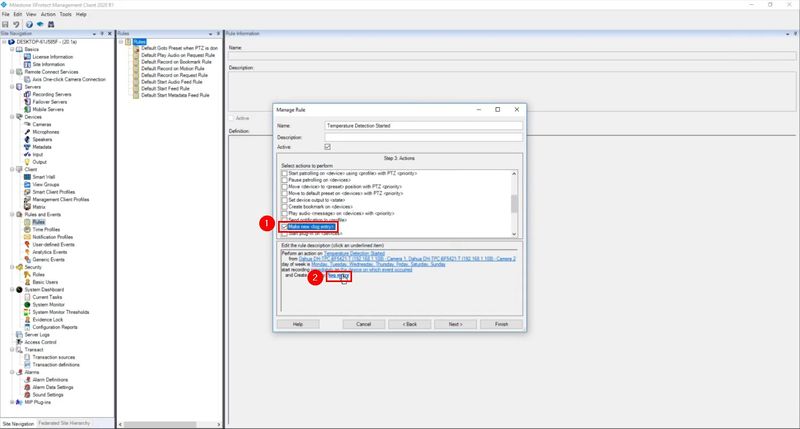
In this example we select
- Record - Start recording on <devices>
- Log - Make new <log entry>
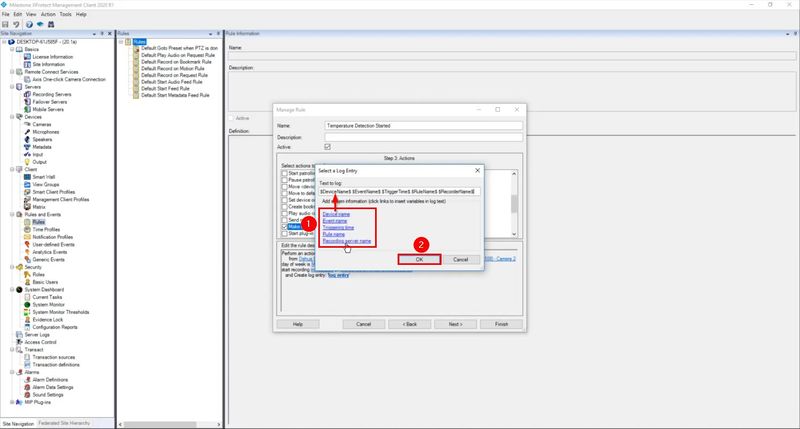
Click logentry
11. Click to add each type of System Information to the log template
Click OK
Click Next
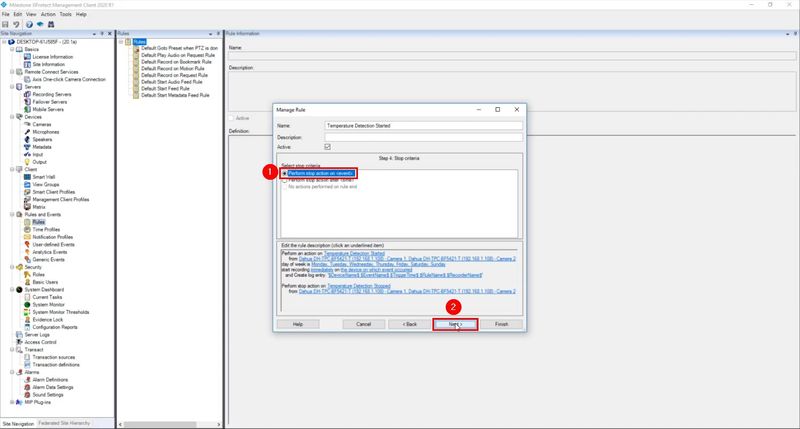
12. Select Perform stop action on <event>
Click Next
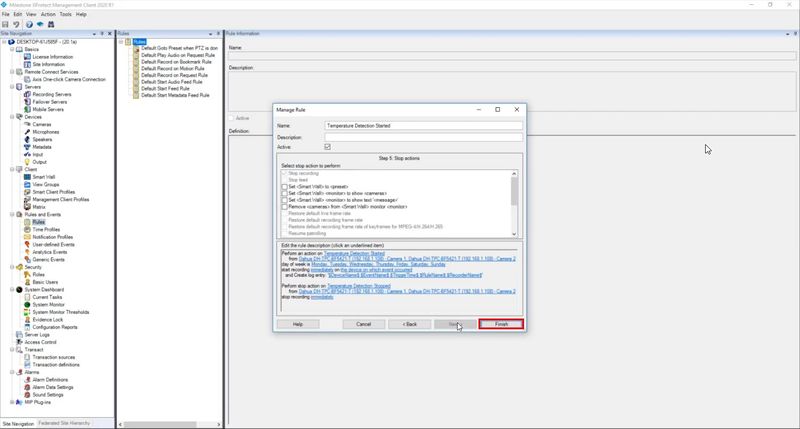
13. Click Finish
Alarm configuration
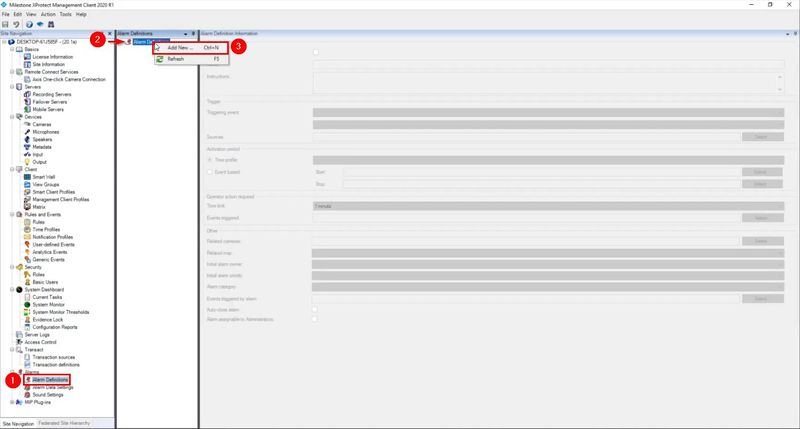
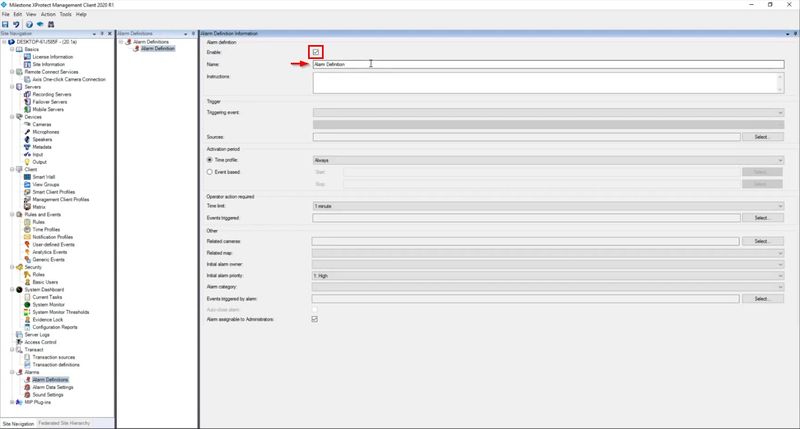
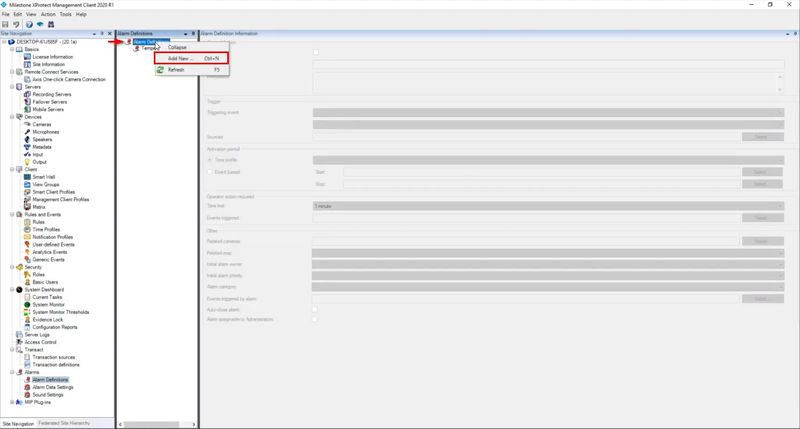
1. Select Alarm Definitions
Right click Alarm Definitions
Select Add New
2. Check to Enable
Enter a name - Temperature Detection Start
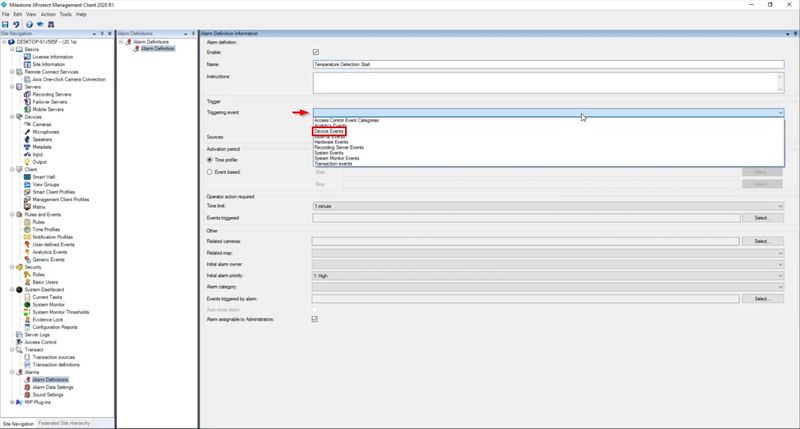
3. Use the dropdown box next to Triggering event to select Device Events
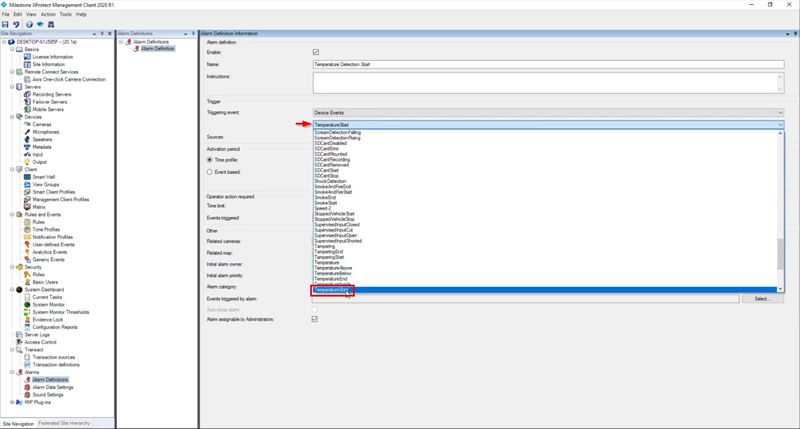
Use the dropdown box to select TemperatureStart
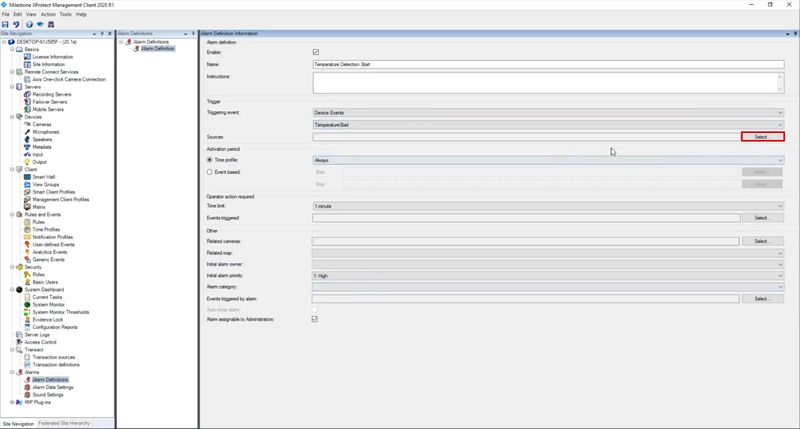
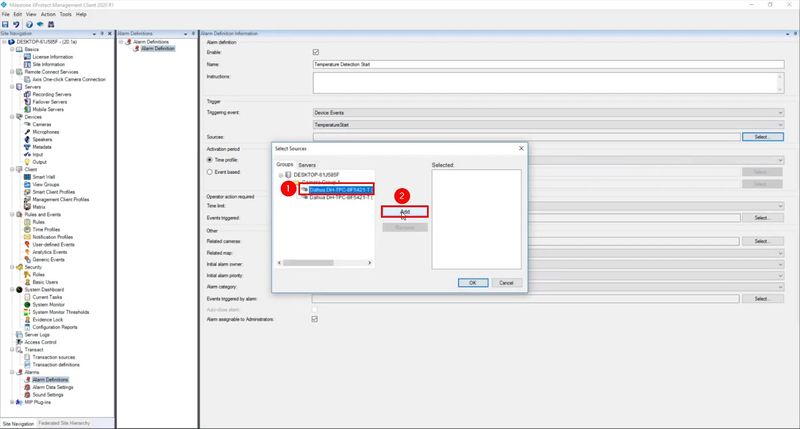
4. Click Select to select which devices for use with the alarm
5. Select the Thermal camera in the list, click Add
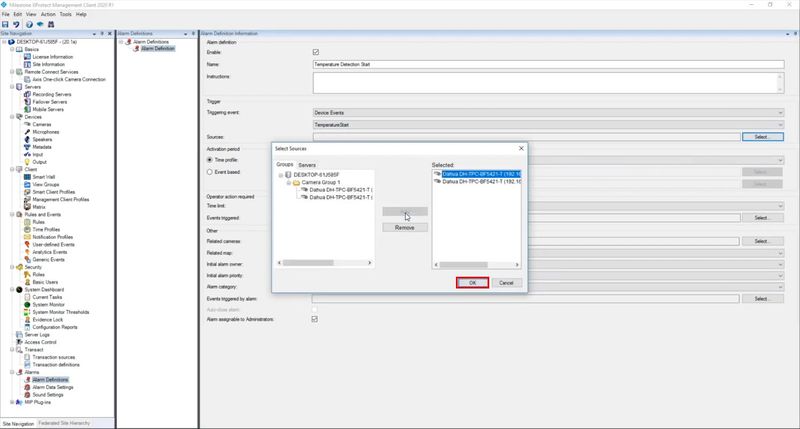
6. Repeat the process for the 2nd channel of the camera
Click OK
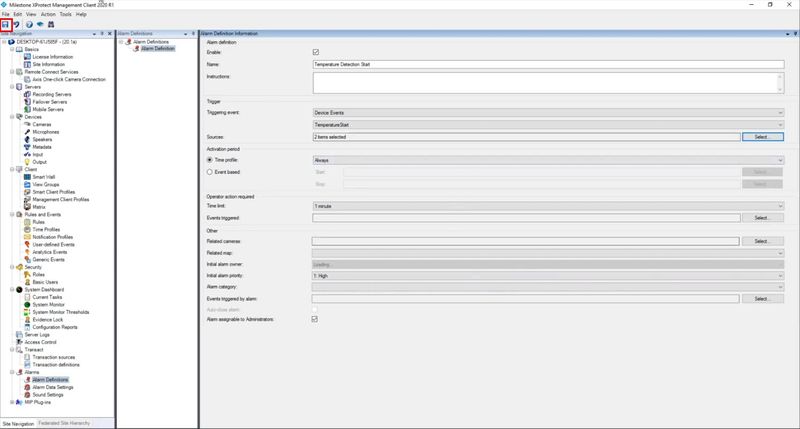
7. Click Save
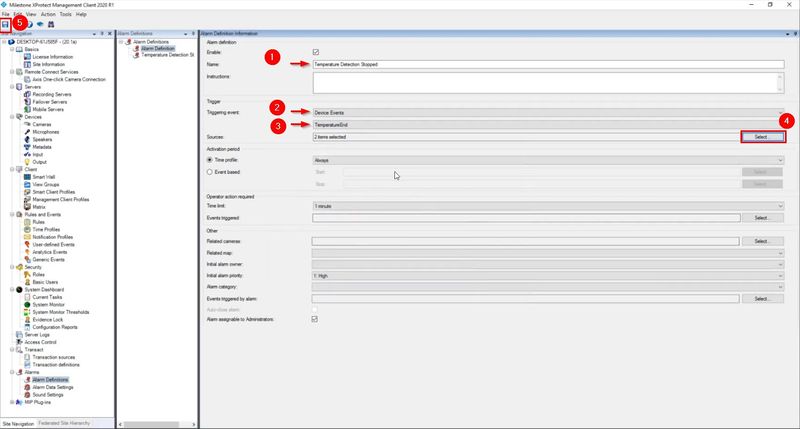
8. Another rule must be created for the event end
Right click Alarm Definitions
Select Add New
9. Click to Enable
- Enter a name - Temperature Detection Stopped
- Use the dropdown box next to Triggering event to select Device Events
- Use the dropdown box to select TemperatureEnd
- Click Select to select which devices for use with the alarm
- Select the Thermal camera in the list, click Add
- Repeat the process for the 2nd channel of the camera
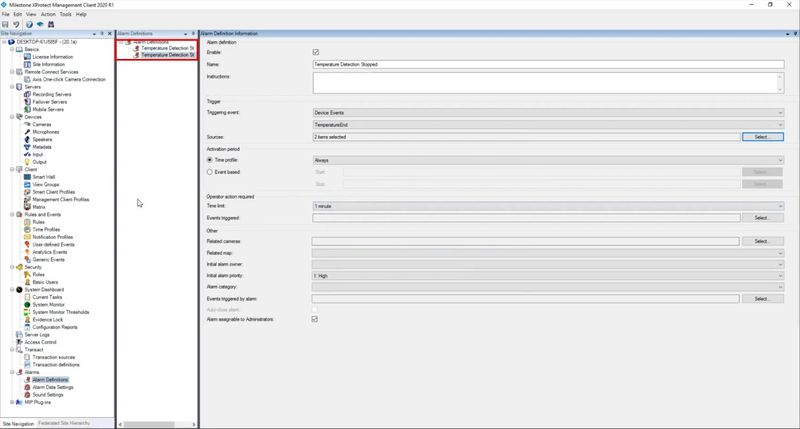
Both Alarms created
Temperature Detection Started Temperature Detection Stopped
