Video Intercom/VTH and VTO Setup on DSS Express V8
Contents
Description
This article will go over the setup of Video Intercom with DSS Express V8 using Configtool.
DSS Express V8 will be acting as our SIP Server. Intercom devices will need to point to the system user on DSS Express V8.
With the introduction of DSS Express V8, system user is mainly used for server maintenance. For live monitoring you will want to create a new user. In this tutorial we will be using a new user named intercom
Prerequisites
- Latest Configtool
- DSS Express V8
- Dahua Video Intercom
Device Information
Step by Step Instructions
Initializing Video Intercom Devices
We first need to initialize the intercom units
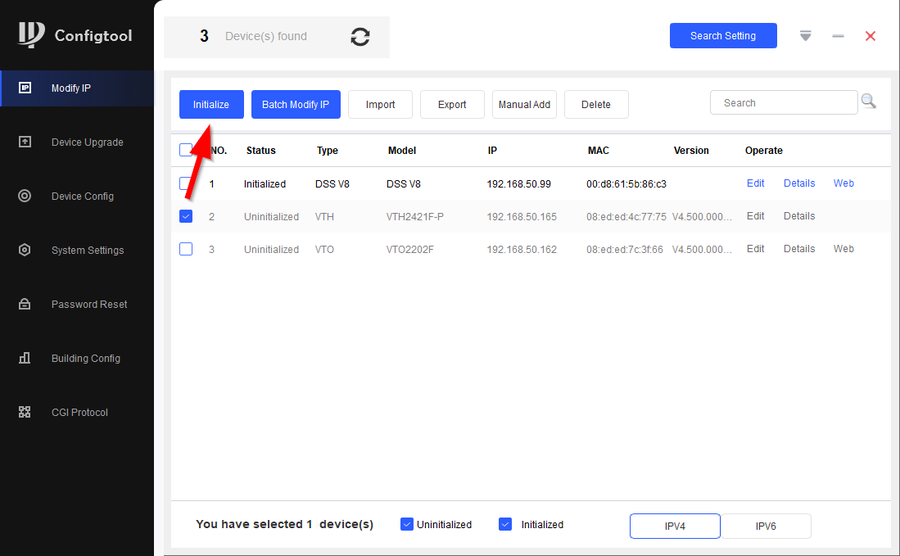
1. We'll start by initializing the VTH. Select the VTH and click on Initialize
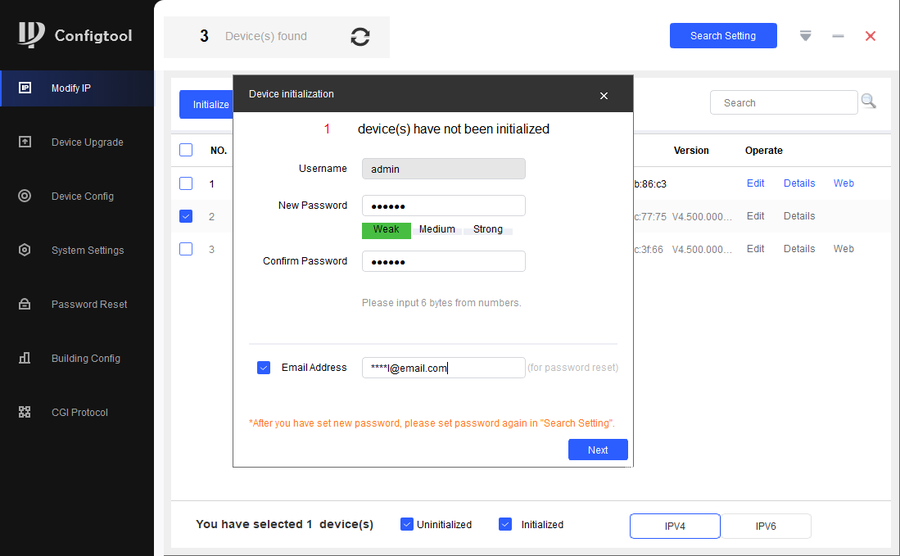
2. Enter the password you would like to use. In this tutorial we are using 123456. Click Next
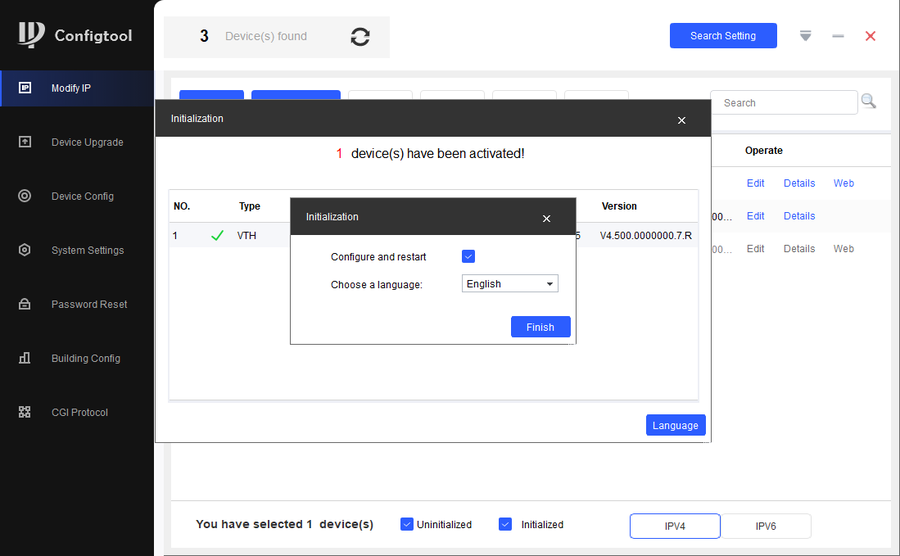
3. Select the language and click on Finish
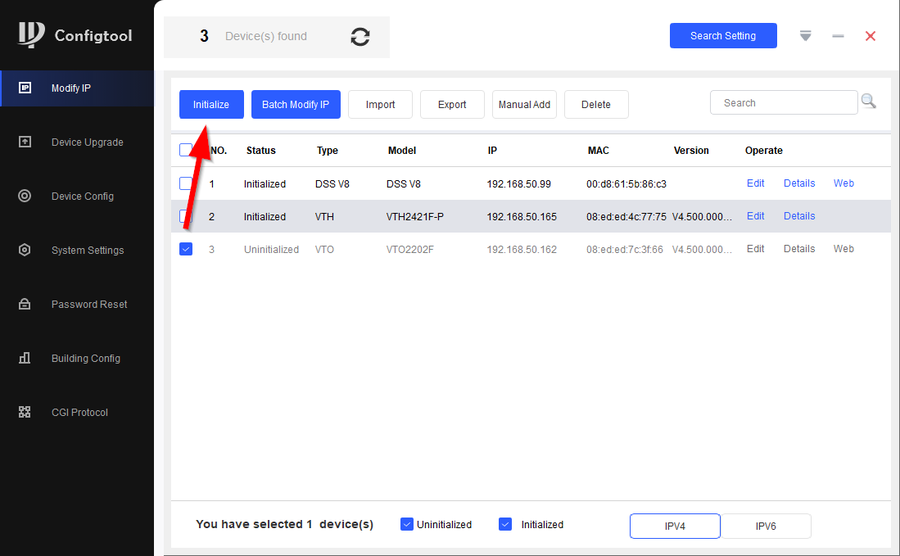
4. Now initialize the VTO, check the VTO and click on Initialize
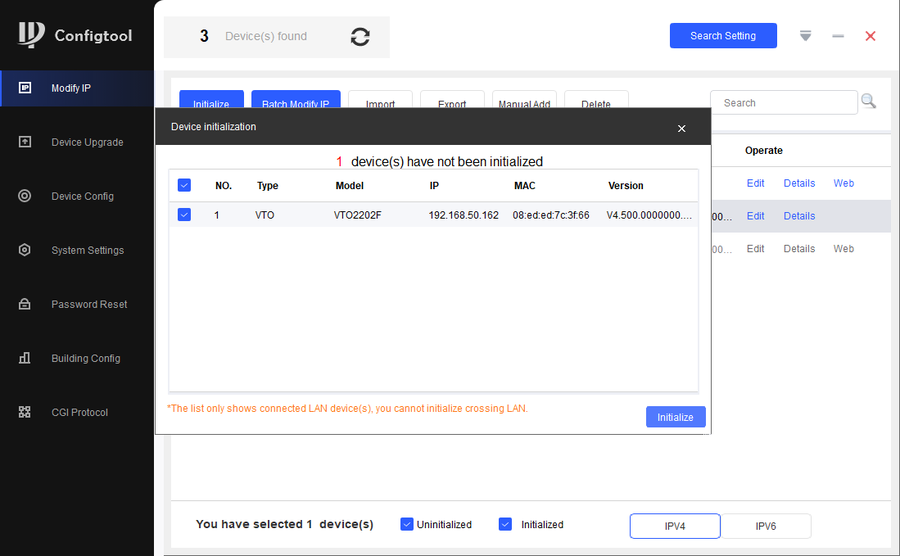
5. Click on Initialize
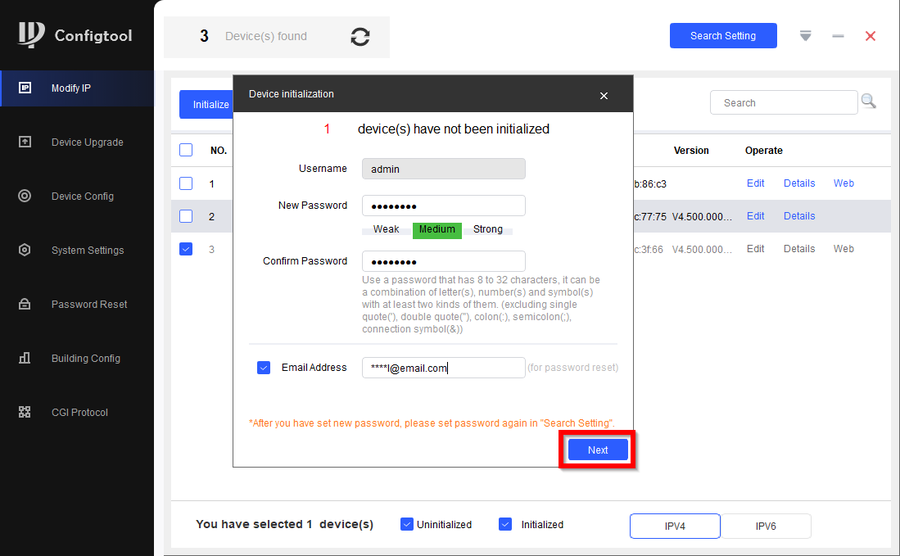
6. Enter the password you would like to use. We'll be using admin123. Then click on Next
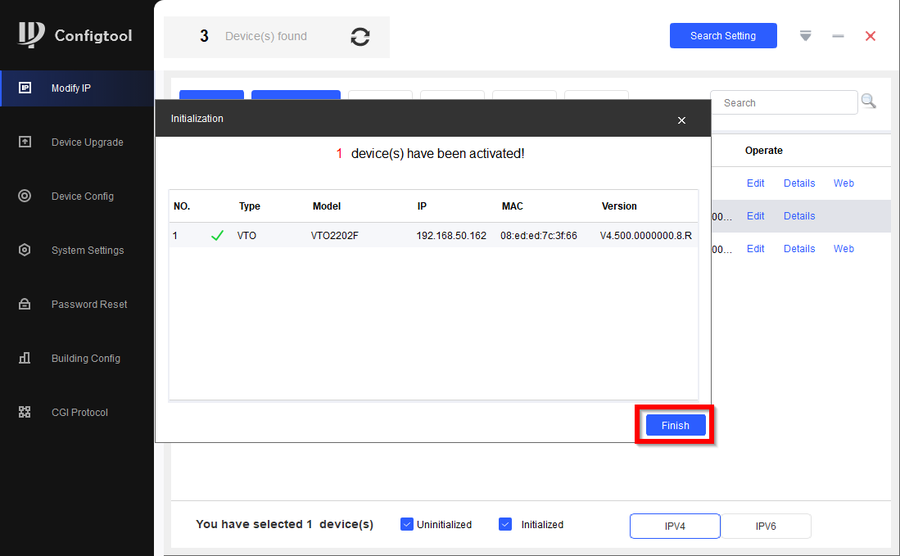
7. Click on Finish
Setting up Video Intercom with Configtool
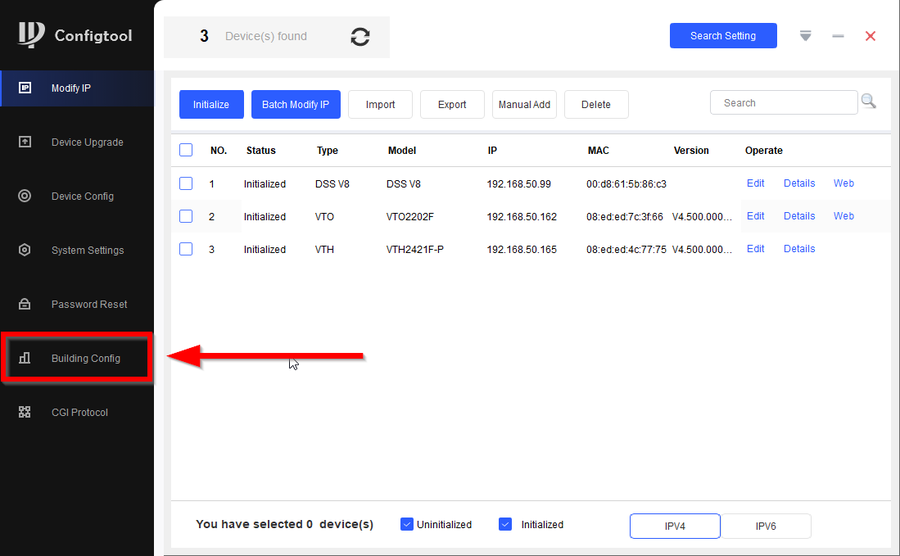
1. We now need to setup the Video Intercom Devices. Go to Building Config
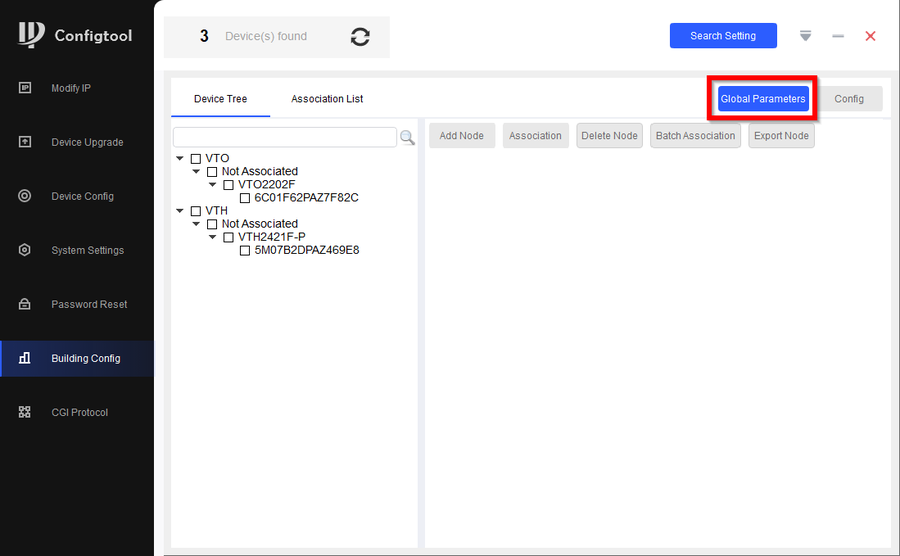
2. Click on Global Parameters
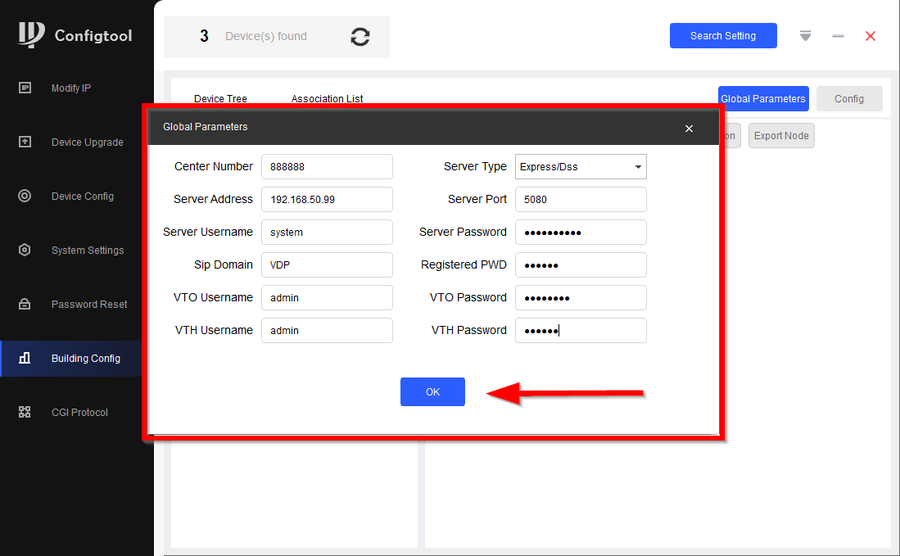
3. Entering the correct information to global parameters will ensure that everything will be configured properly. The SIP information will be sent to all VDP devices to ensure they all speak to the SIP Server. The Login Information for VTO and VTH will ensure that Configtool has permission to login and assign it the SIP information
| Global Parameter | |
|---|---|
| Center Number = Leave Default | Server Type = Express/DSS |
| Sever Address = IP Address for the DSS Server | Server Port = 5080 |
| Sever Username = system | Sever Password = Enter password for system |
| Sip Domain = VDP | Register PWD = Leave Default |
| VTO Username = Enter VTO username | VTO Password = Enter VTO password |
| VTH Username = Enter VTH username | VTH Password = Enter VTH Password |
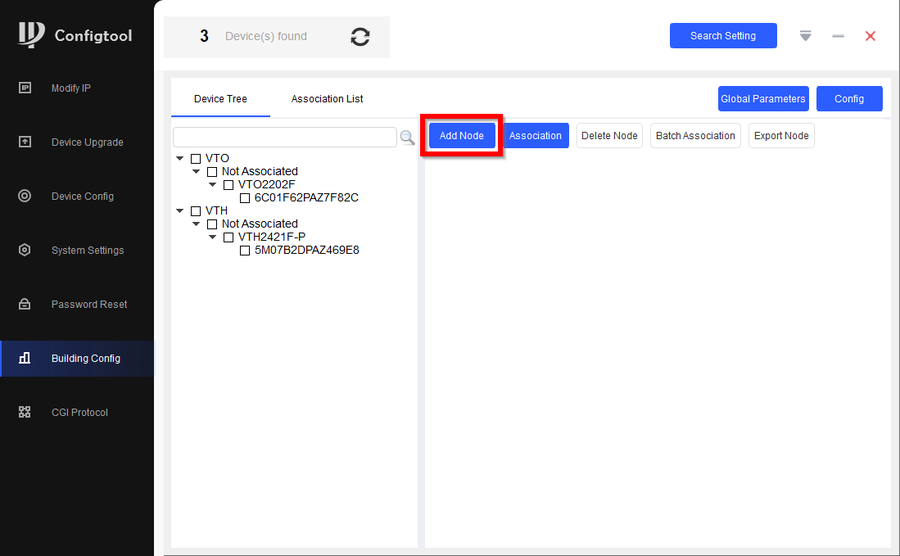
4. Once the Global Parameters settings is entered the Add Node will go blue and we can now setup a node to create our project
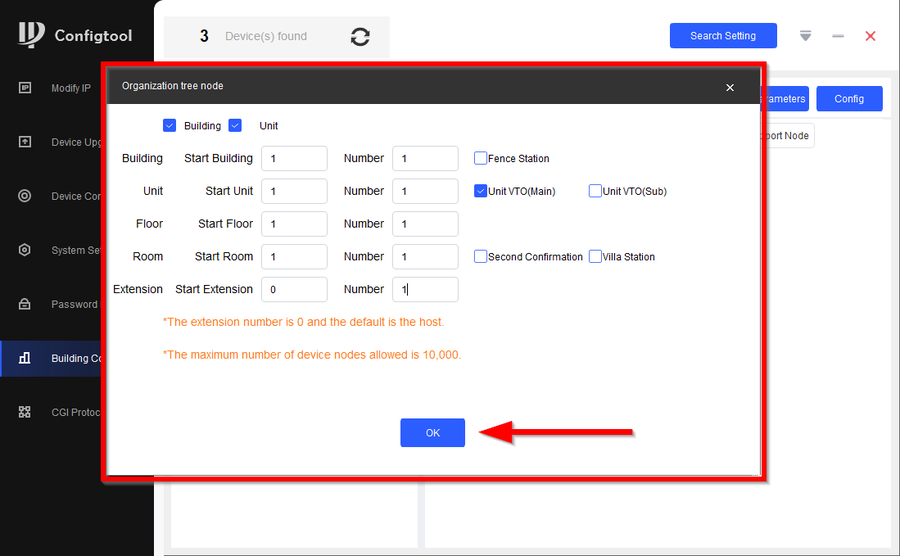
5. Be sure to enable Building and Unit if it's enabled since this will enable the call function for the user. In this tutorial we only have 1 VTO so we'll enable Main VTO and 1 VTH so we'll enter 1 floor/1 Room/1 Extension. Then click on OK
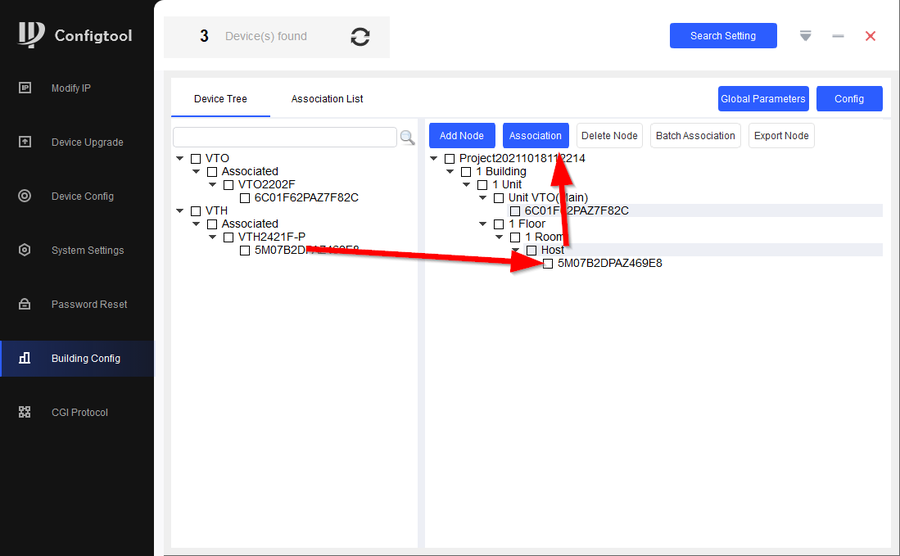
6. This will create the node for us. We now need to associate the device to each entry. For VTO we'll associate the Serial Number of the VTO to the VTO entry then click on Association. The VTO will then populate under it.
7. We will now do the same with the VTH
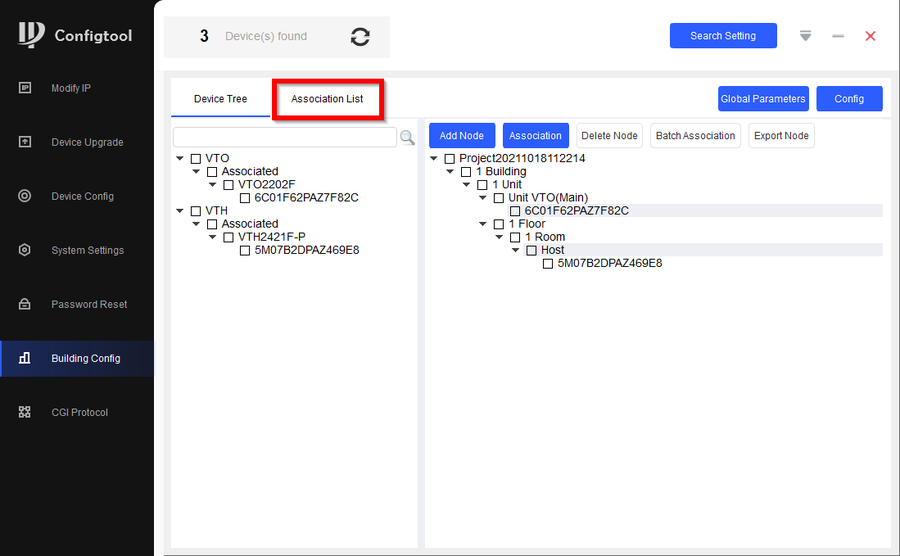
8. After both entries populate go to Association List
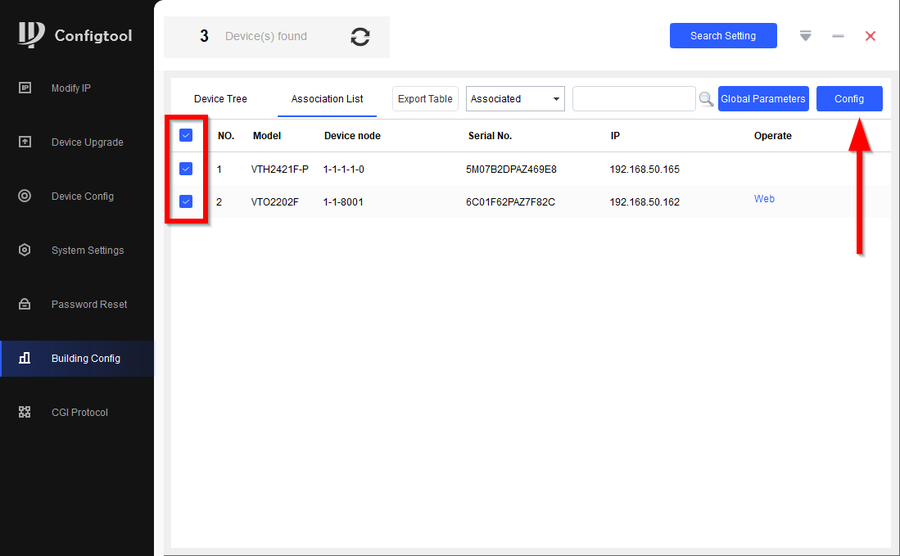
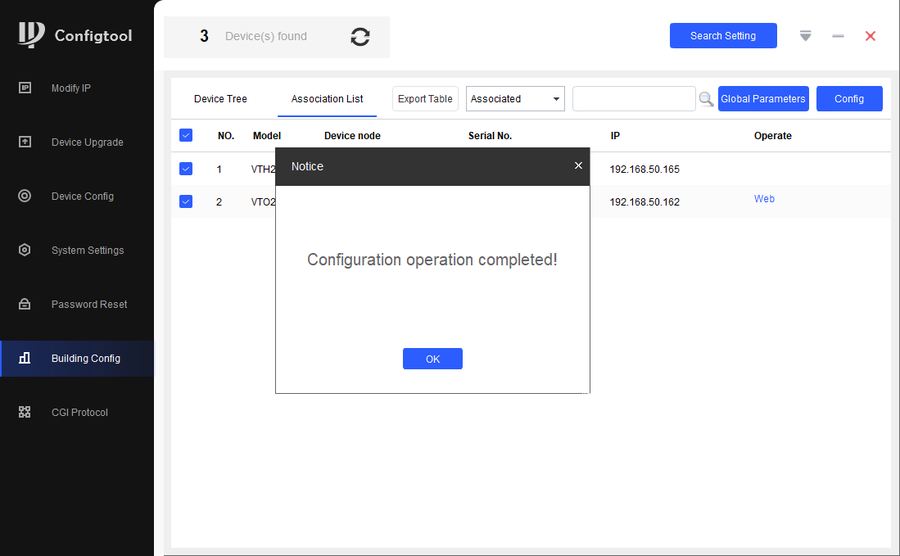
9. Check the two devices we just associated and the click on Config to start the configuration changes.
10. The devices will then reboot.
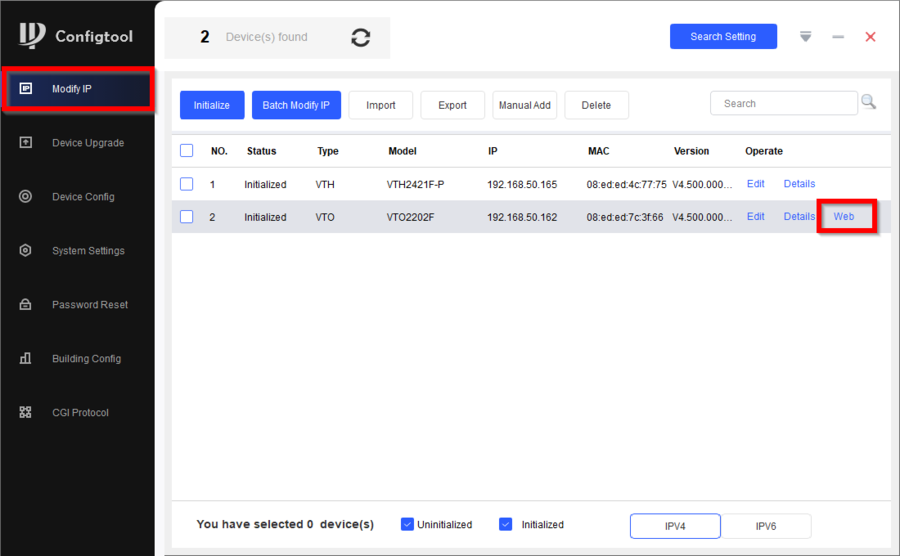
11. We now need to change the Room Call Number since this is a villa station video intercom. Open the web interface of the VTO
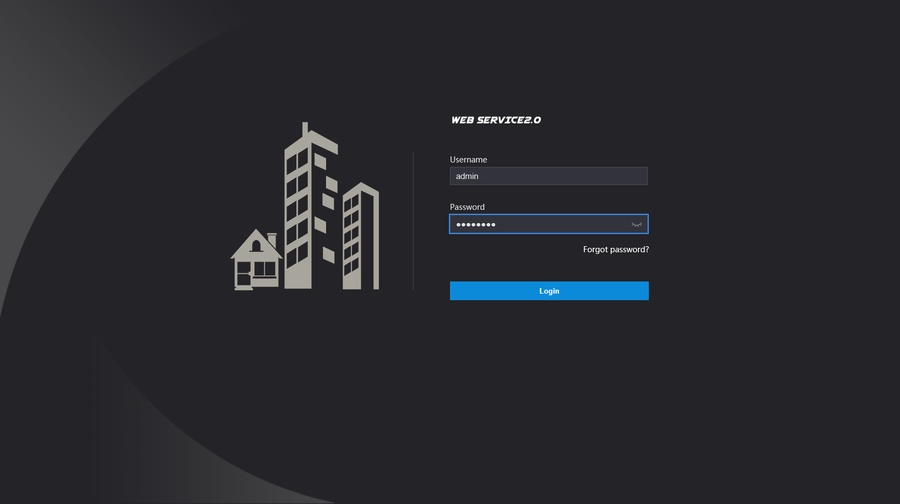
12. Login to the VTO
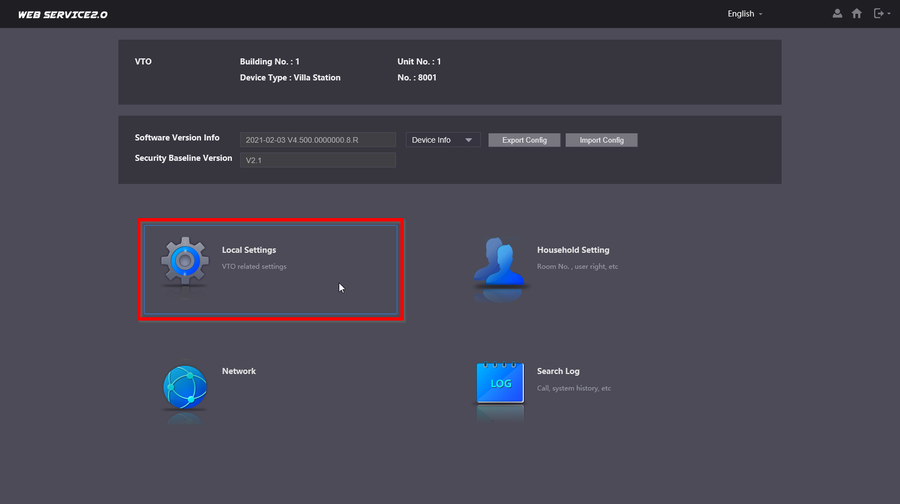
13. Go to Local Settings
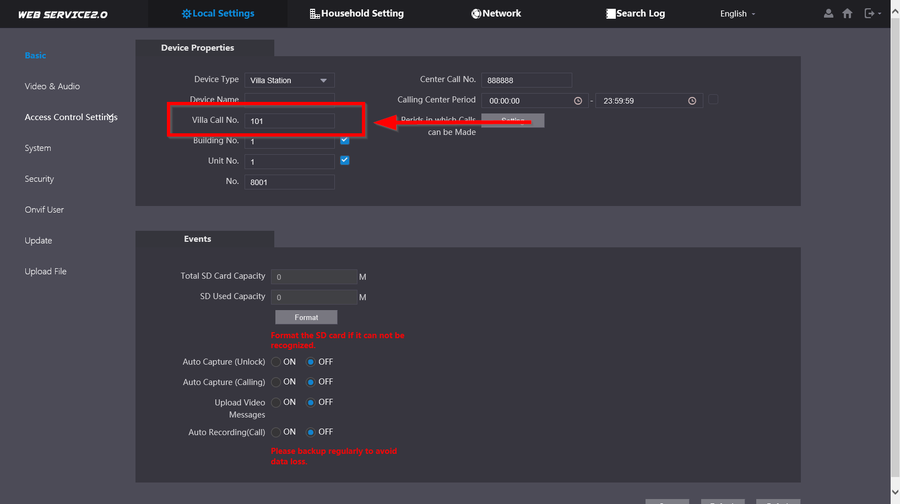
14. Change the Villa Call No. from 9901 to 101 because our VTH will now have the 101 room number given from Configtool.
DSS Express V8 Setup
With the introduction to DSS V8 you now need to create a user that will be dedicated to the intercom. In this tutorial we'll make a new user called "intercom"
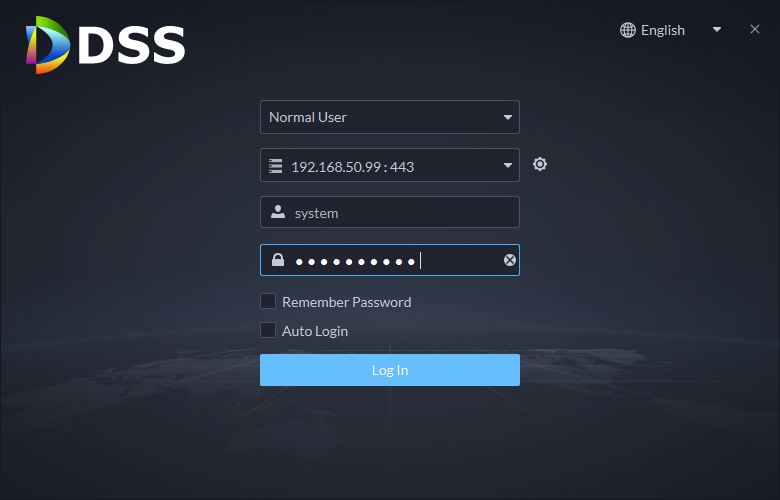
1. Open DSS Client and login to the system account
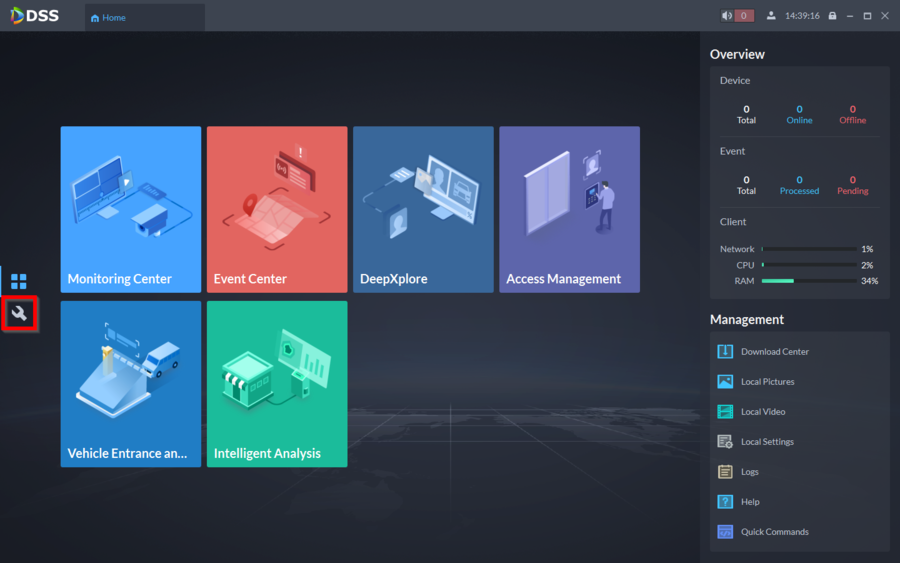
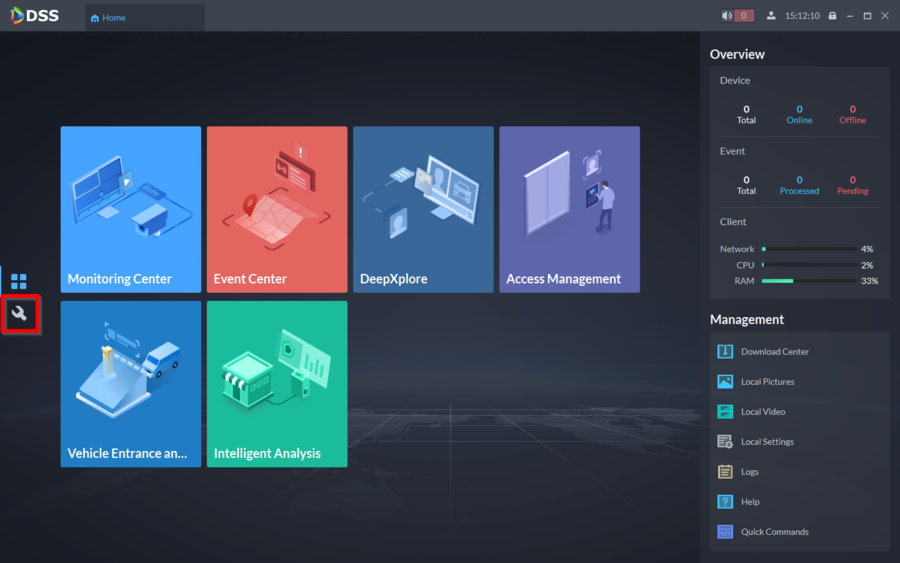
2. Go to configuration
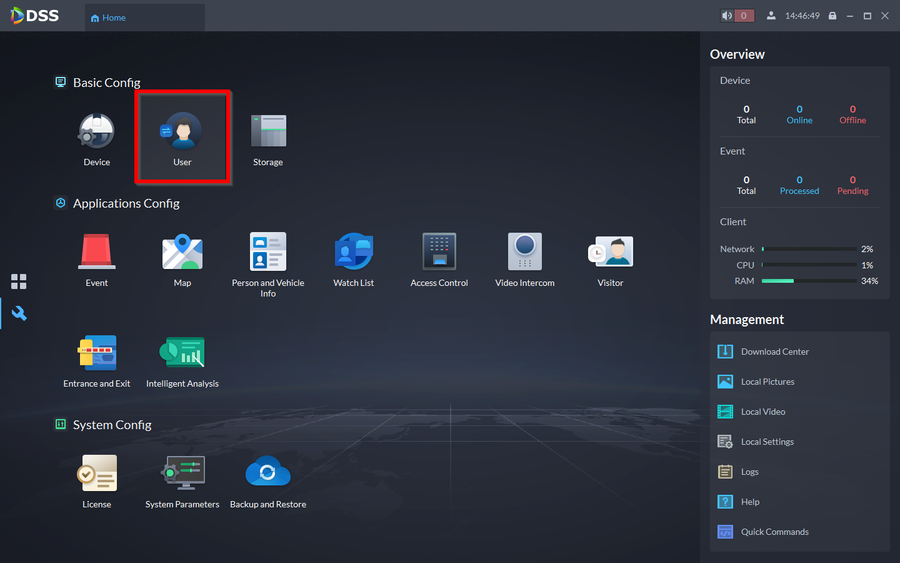
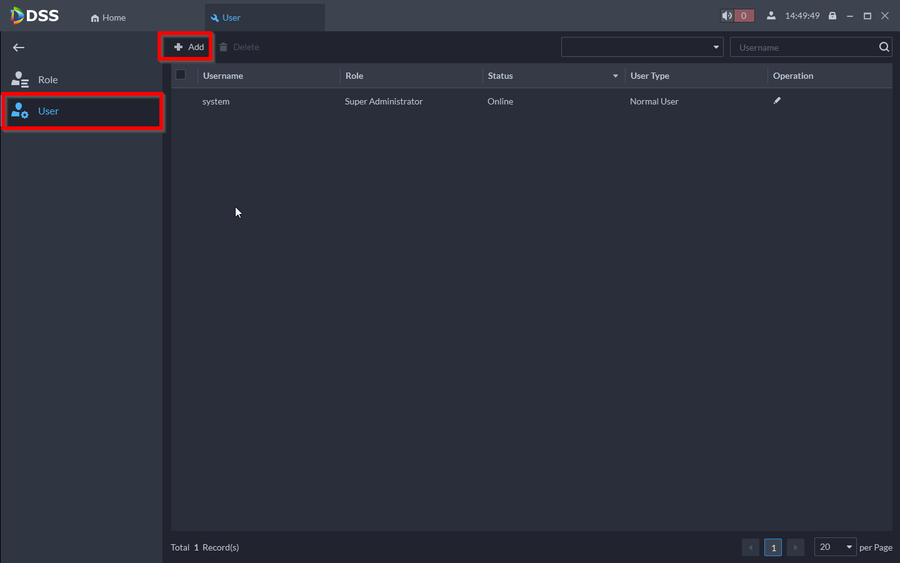
3. Click on User
4. Go to User then click on Add
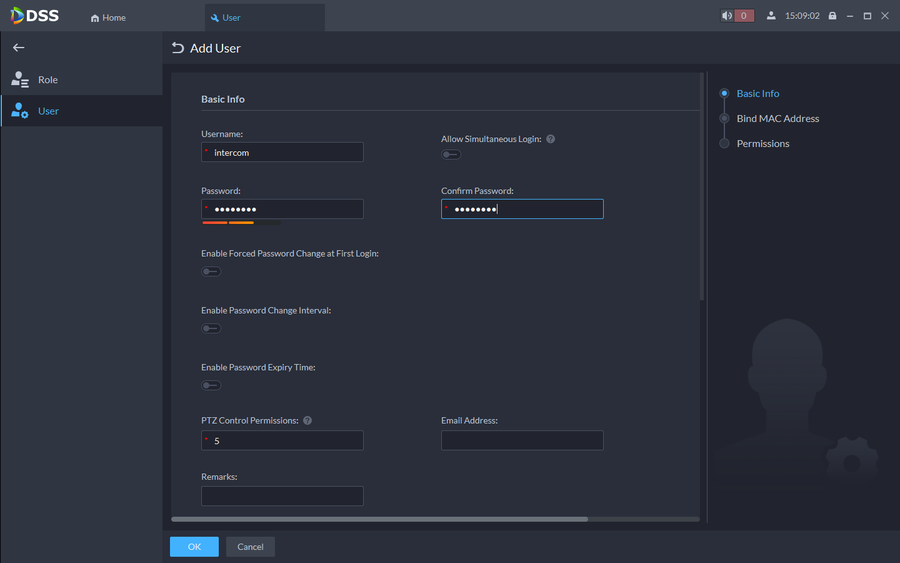
5. Enter a username and a strong password
NOTE: Make sure that "Allow Simultaneous Login" is toggled off. The call function will not work if it's on.
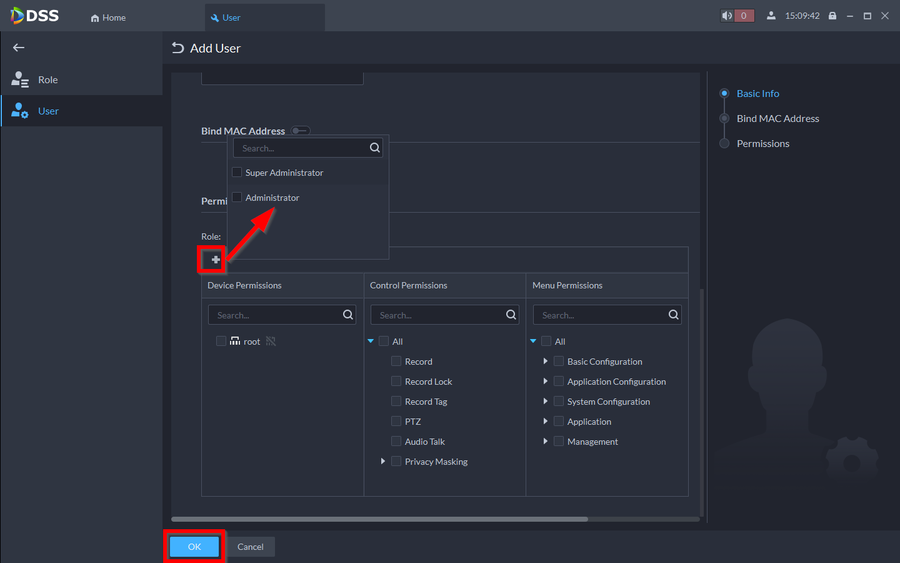
6. Scroll down and select a role, Then click on OK
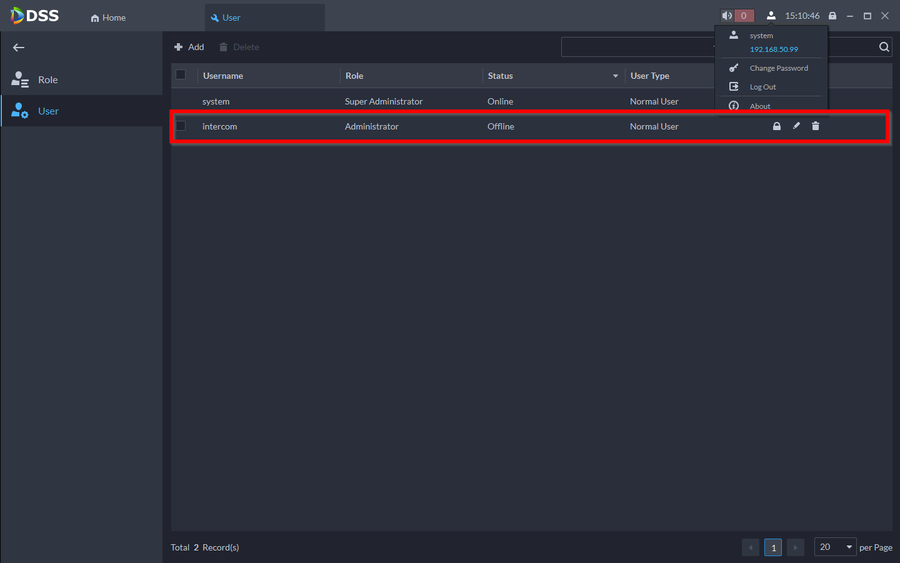
7. The user is now created, lets logout
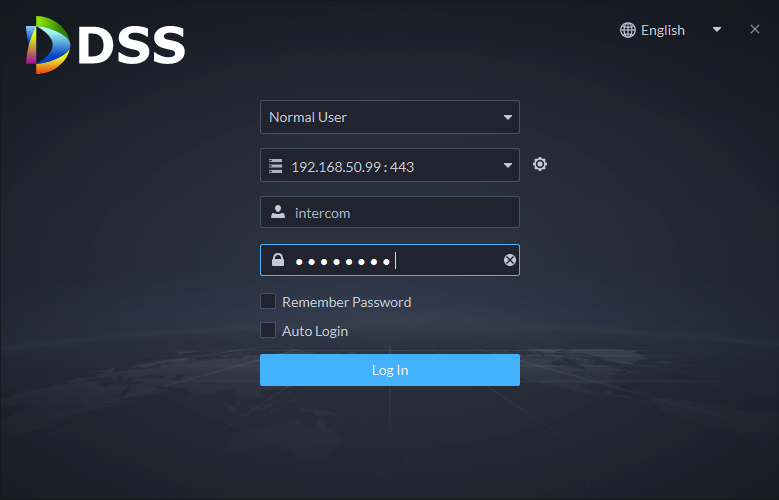
8. Log back in using the intercom user
9. Go back to configuration
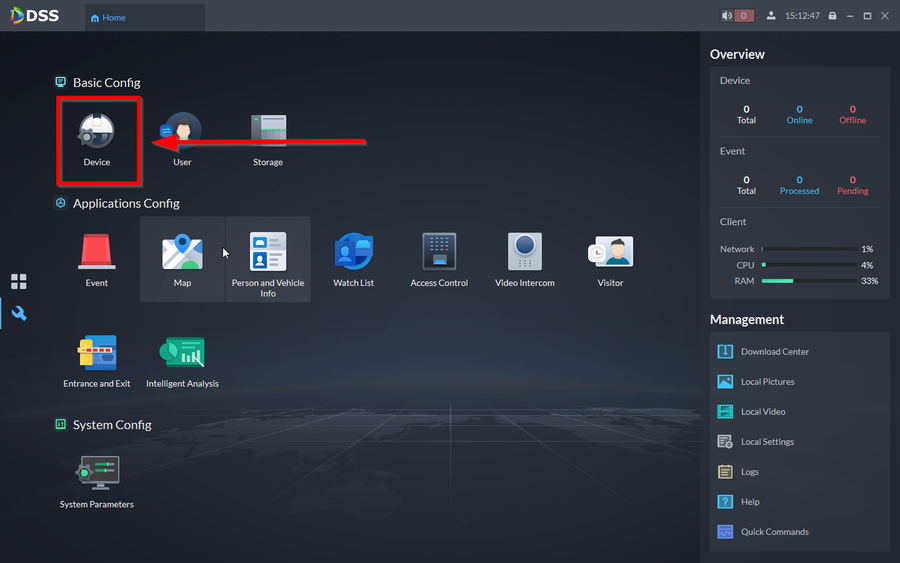
10. Click on Device
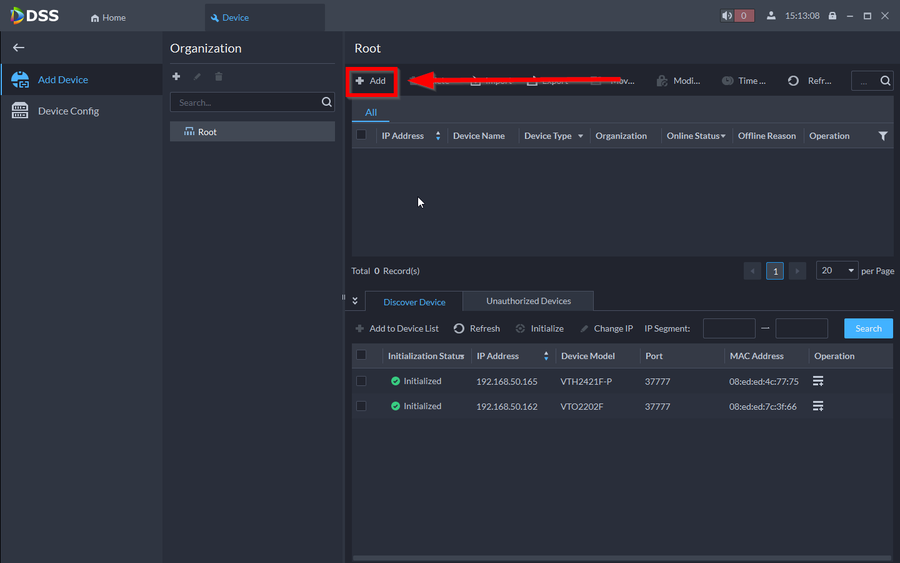
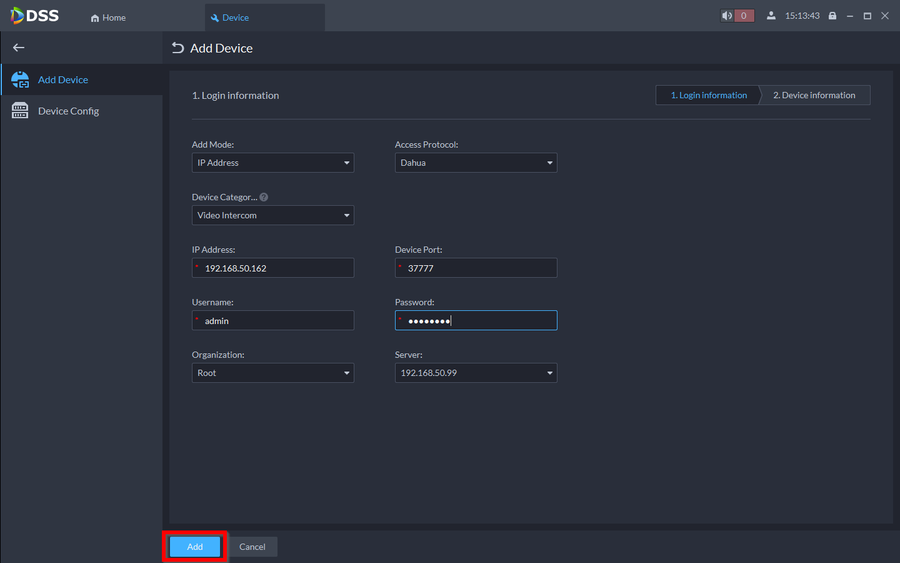
11. We now need to add both the intercom devices. Click on Add
12. Type in the IP and Password, Make sure to also select Video Intercom on device category.
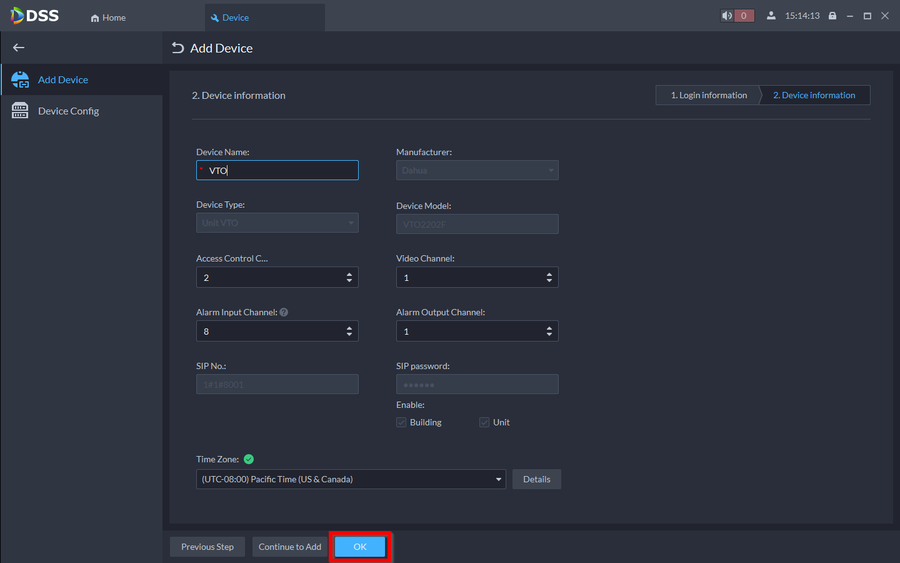
13. DSS will then login and will ask you to give the device entry a name and select the time and date. Click on OK when done
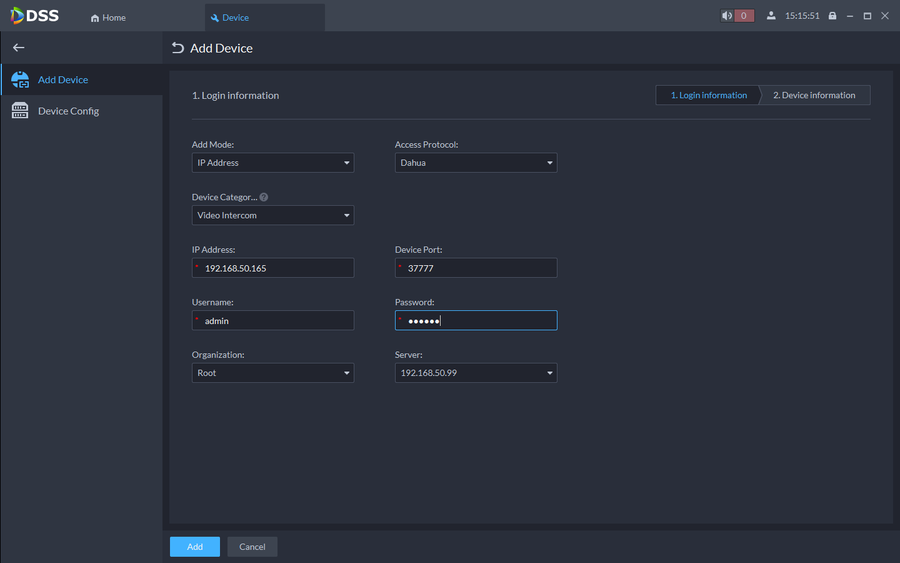
14. Do the same with the VTH enter the IP and password and select Video Intercom for device category
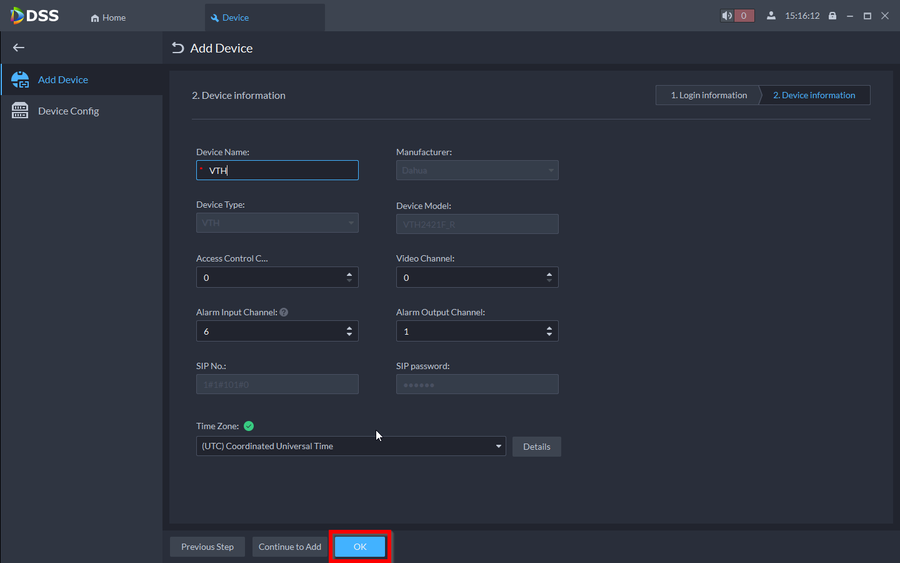
15. Give it a nickname and select the time and date
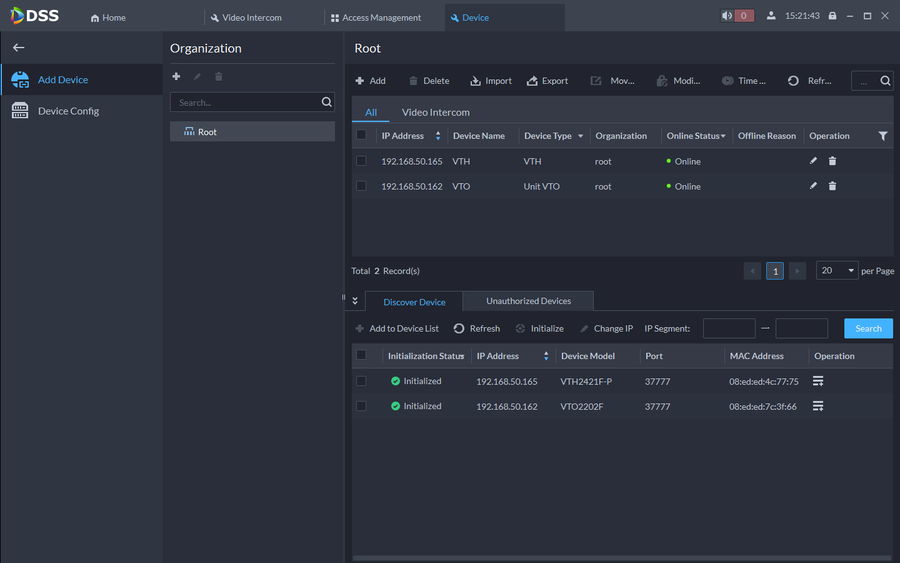
16. The devices should now be online
Sending Calls to DSS Client Via VTH Forward Function
The calls will first go to the room number associated to the call. The VTH will then have to forward the call to DSS Client
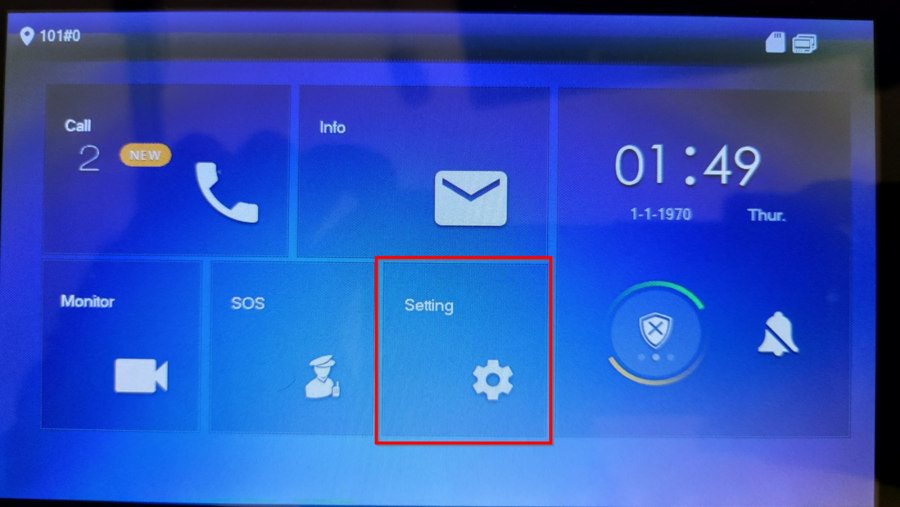
1. Go to the general settings by tapping on Settings
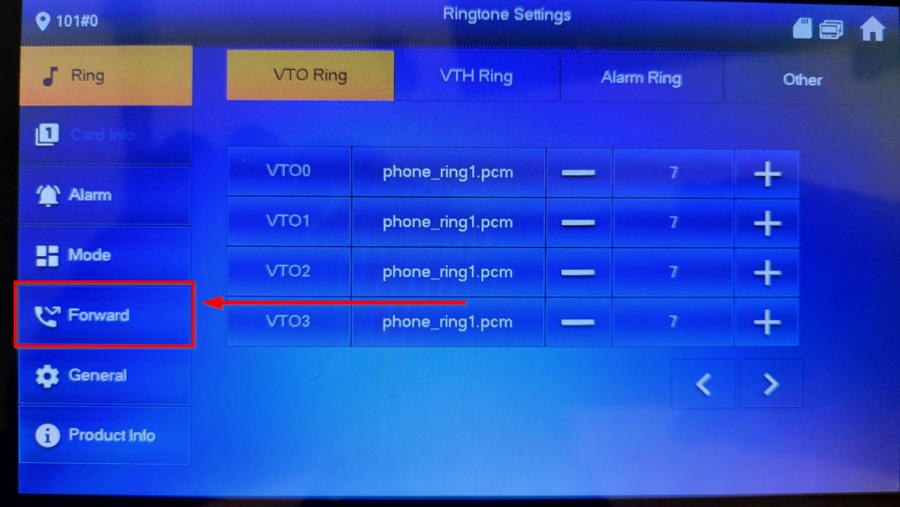
2. Go to Forward
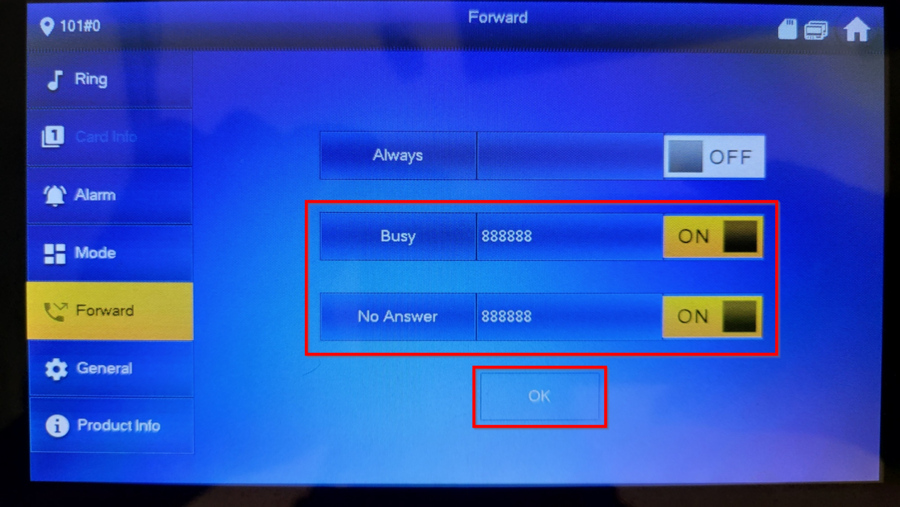
3. Enter 888888 for both Busy and No Answer. Then turn the status to ON
The call will now be sent to DSS Client if the call is ended or if the call is missed by the VTH

