Difference between revisions of "Heatmap"
(Created page with "<center> 500px </center> {| class="wikitable" style="background-color:#ffffff;" |- ! file:IVSIconHeatMap.png ! Heat Map is used t...") |
(No difference)
|
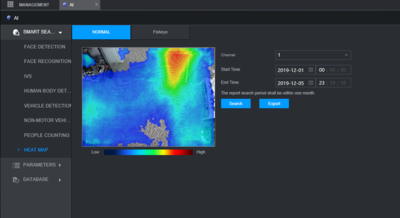
Revision as of 23:36, 3 November 2020
| Heat Map | ||
|---|---|---|
| Set Up | Search Heat Map Data | Export Heat Map Data |
| Set Up Heat Map on your device using various interfaces. > How To Set Up Intrusion Alarm |
Search for Heat Map data by a time range > Configure Alarm Response |
Export the generated Heat Map data from the device > Set Up Notifications |
Contents
- 1 Instructions
- 1.1 Description
- 1.2 Prerequisites
- 1.3 Video Instructions
- 1.4 Step By Step Instructions
- 1.5 Prerequisites
- 1.6 Video Instructions
- 1.7 Step By Step Instructions
- 1.8 Description
- 1.9 Prerequisites
- 1.10 Video Instructions
- 1.11 Step By Step Instructions
- 1.12 Description
- 1.13 Prerequisites
- 1.14 Video Instructions
- 1.15 Step By Step Instructions
Instructions
Description
This article will cover ow to set up Heat Mapping on the older Dahua NVR interface.
Prerequisites
- A Dahua NVR & Camera with Heat Mapping capabilities
Video Instructions
Step By Step Instructions
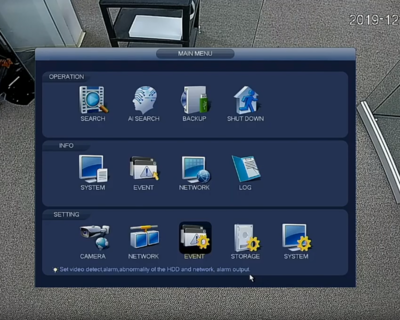
1. From the Main Menu of the recorder, select Event under Setting
2. Under Event select Smart Plan and then Heat Map for your SmartPlan. Click Apply to save.
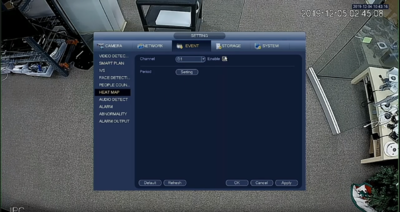
3. Next while still under Event select Heat Map from the left-side menu and for the correct channel click the Enable checkbox and set the schedule using Period if needed. Hit Apply to save.
Prerequisites
- Dahua device with Heat Map
Video Instructions
Step By Step Instructions
1. From the Main Menu
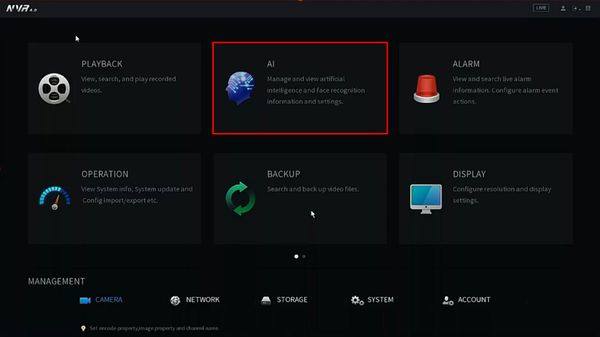
Click AI
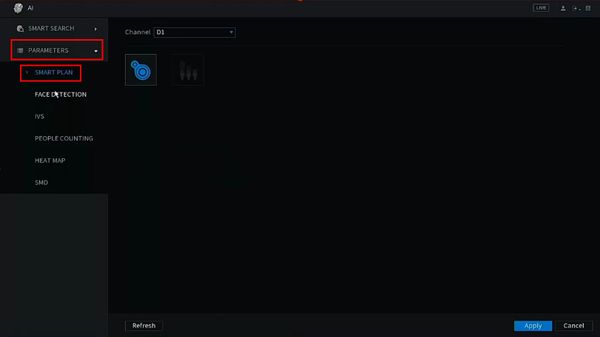
2. The Smart Plan for the channel must be configured
Click Parameters > Smart Plan
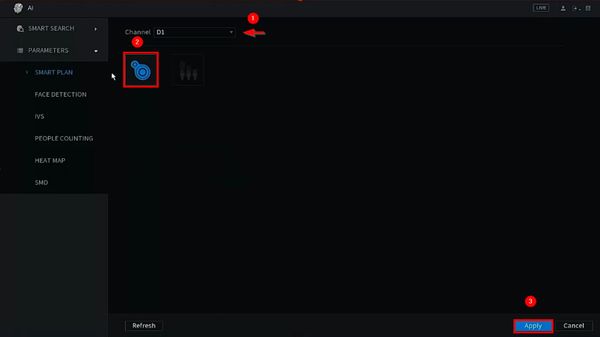
3. Use the dropdown box to select the channel
Click to enable the Heatmap IVS
Click Apply to save
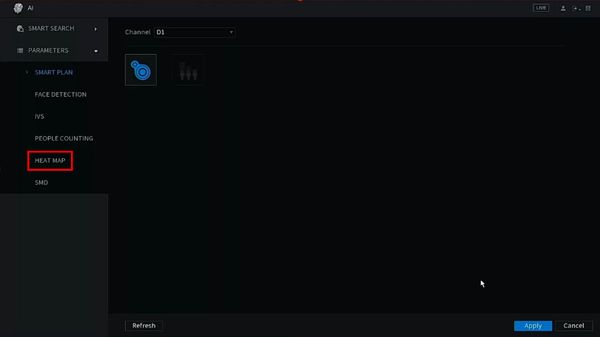
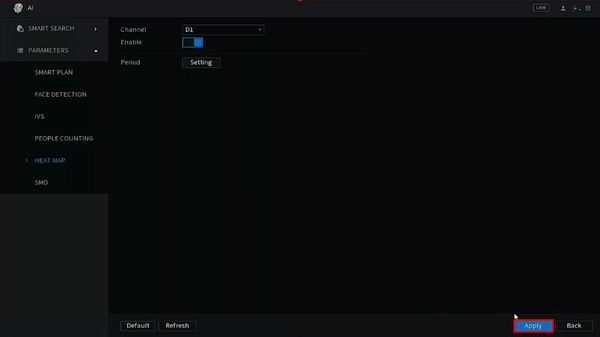
4. Click Parameters > Heat Map
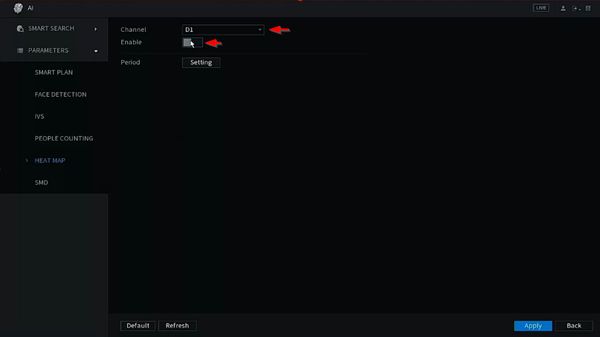
5. Use the dropdown box to select the Channel
Click to enable the Heat Map feature
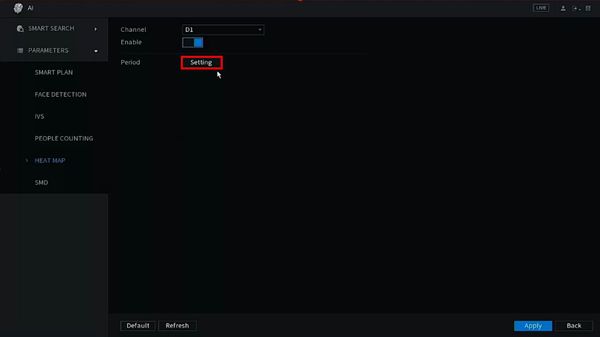
6. Click the Setting button next to Period to configure a schedule for the Heat Map (by default will be 24/7)
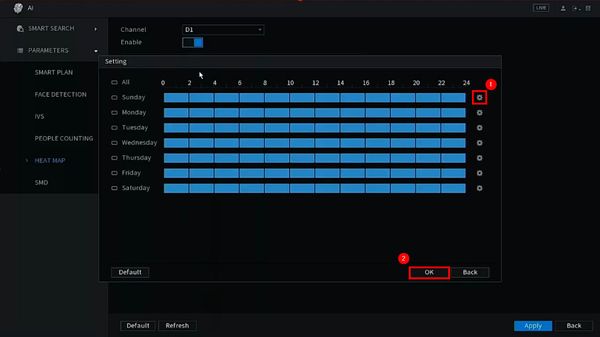
7. Click the gear to configure the schedule
Click OK to save
8. Click Apply to save all settings
Description
This article will show you how to use the Heat Map feature on a supported device using the WebUI / Web interface / Internet Explorer
Prerequisites
- Intelligent Network Camera or an HDCVI Camera that is connected to a HDCVI DVR that has intelligent features.
- Updated firmware that supports intelligent features.
- Internet Explorer.
Video Instructions
Step By Step Instructions
1.Log into device using the Web Service.
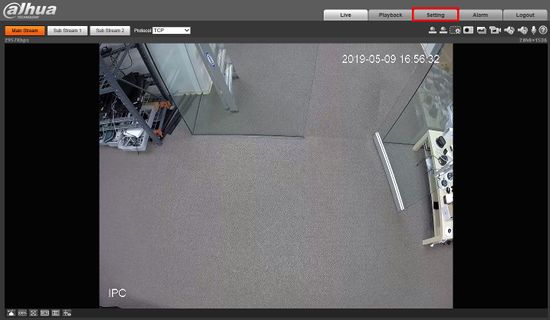
2. Click Setting
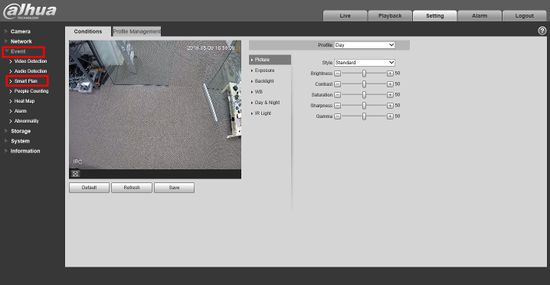
3. Click Event > Smart Plan
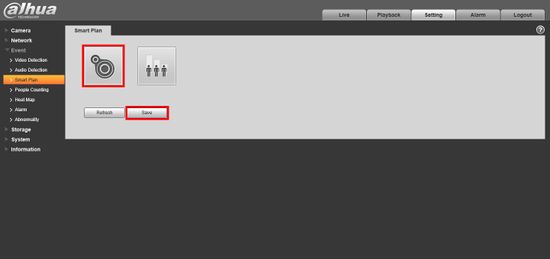
4. Click the Heat Map icon to enable the Smart Plan then click Save
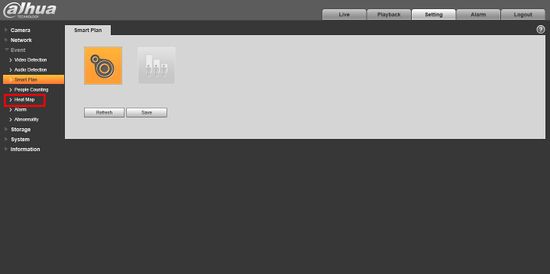
5. Click Heat Map
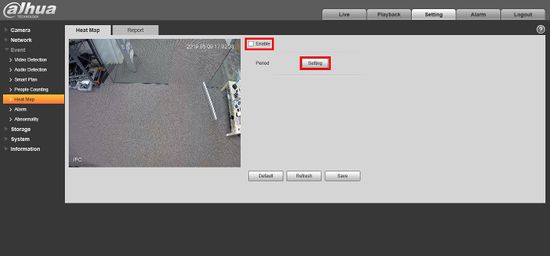
6. Check the box to Enable, then click Setting to set a custom schedule for the Heat Map.
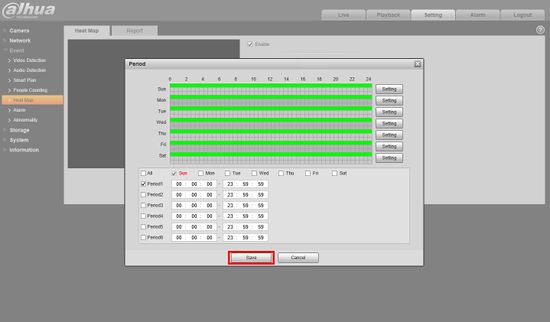
7. Use the menu to set a schedule for the Heat Map function. By default the schedule will be 24/7
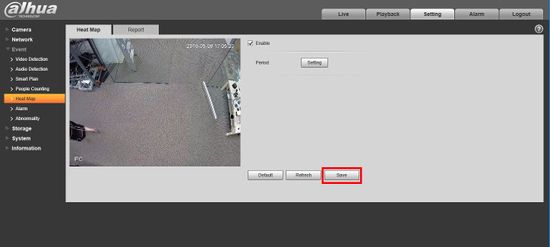
8. Click Save
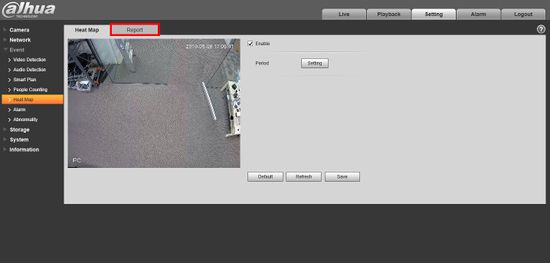
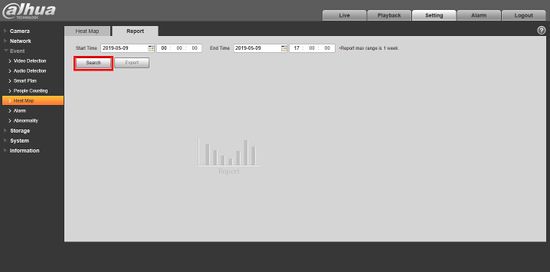
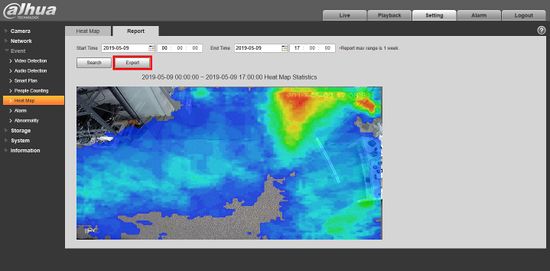
9. Click the Report tab to review the collected data
10. Enter a Time/Date range to search for then click Search
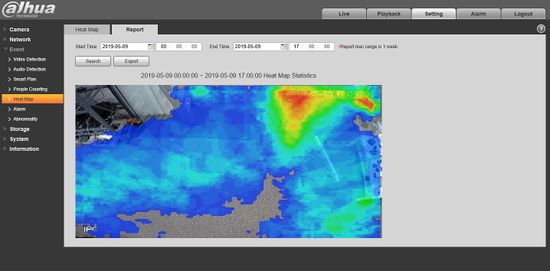
11. The heatmap data will be displayed.
12. Click Export to export the heat map data as a bmp Image
Description
This article will cover the setup of Heat Mapping on an N52B3P and will apply to any device using this UI that supports the Heat Mapping function.
Prerequisites
- An NVR that supports Heat Mapping
- A camera that supports Heat Mapping
- A Windows PC on the same local network as the NVR
Video Instructions
Step By Step Instructions
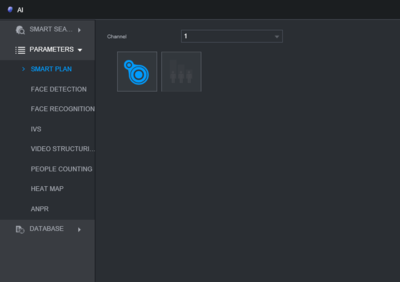
1. From the main page of the recorder web UI, select AI as shown in the image below, and choose Parameters in the left-hand menu.
2. From Parameters, Select Smart Plan and select the channel which Heat Mapping will be set for and make sure the Heat Mapping icon is Highlighted as in the image below.
3. Next choose the Heat Map option under the Parameters menu and again select the channel that Heat Mapping will be applied to. Check the box for Enable and if a schedule is need this can be set using the Period button
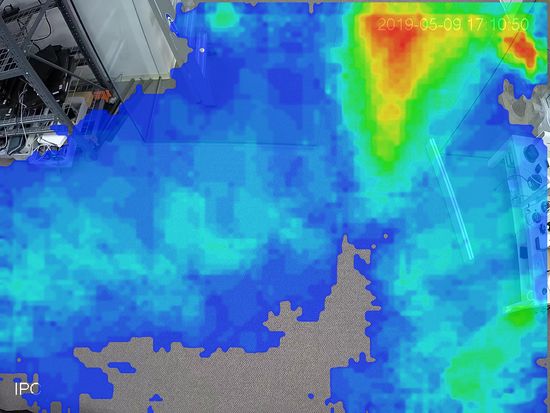
4. Once the Heat Map has been set up, the data can be queried under Smart Search and then Heat Map, the results will be show as they appear below.
